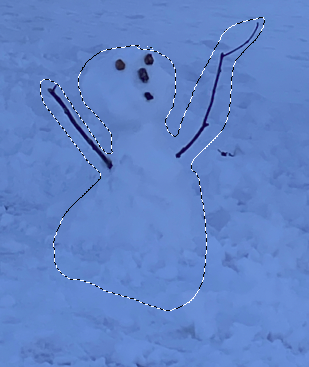
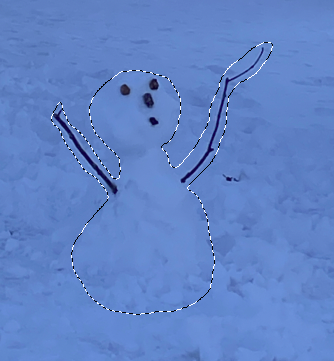
How to convert 2D image to 3D in Photoshop. A while ago, I made a 3D character from a 2D, photo of a snowman using Photoshop. Today I would like to show you this process for a moment. In fact, Photoshop's 3D features require detailed explanations for each element. It's been a long time since 3D features were added to Photoshop. Above all, for instance, the mesh preset function makes it possible for anyone to easily create various types of three-dimensional objects. Especially, Adobe Photoshop CC, which was newly updated in 2014, has been upgraded so that it can become a printer directly by connecting the created 3D model to a 3D printer. So, if you use the 3D function in Adobe Photoshop CC, products from more angles will pour out with various ideas. Today, I'm going to put off explaining this in detail and show you how I made the snowman I showed you above using photos. Additional function descriptions will be uploaded gradually. First, open your 2D image for convert 3D character from your browser in Photoshop.  Using the Lasso tool, draw along the snowman's line.
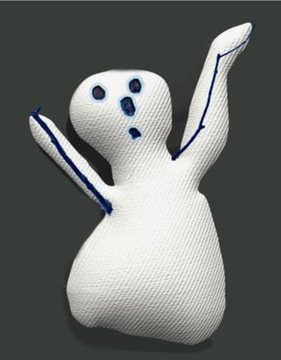
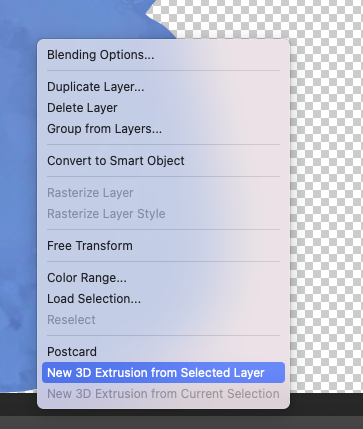
Make a new layer and paste the snowman like this. 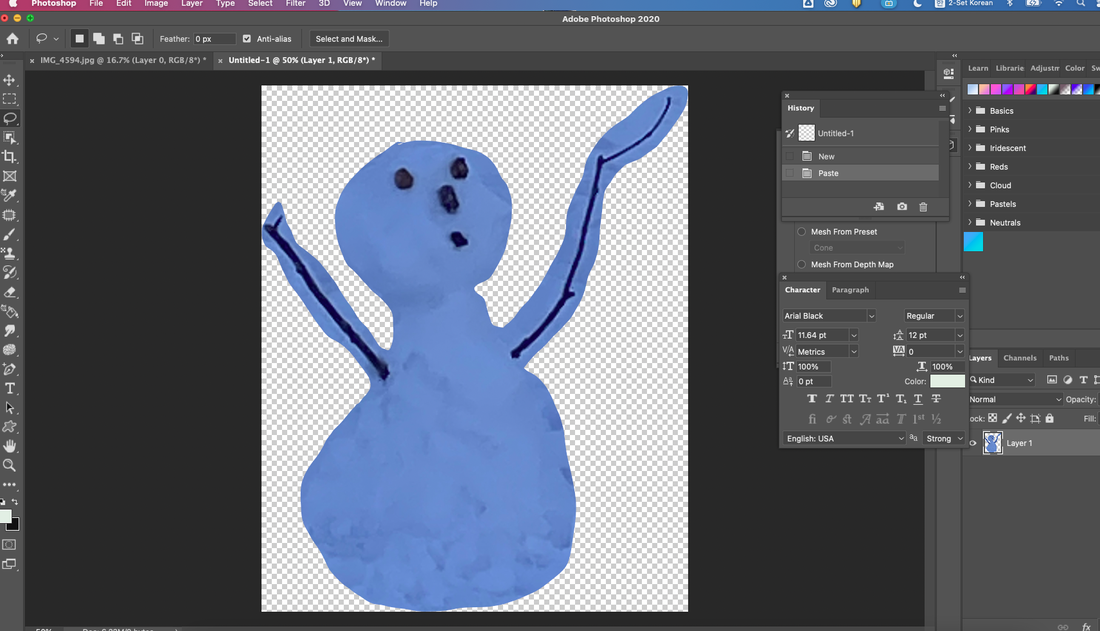 With Ctrl + J, you have to make a copied layer as follow as below. 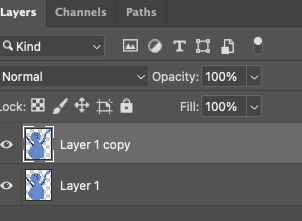 Turn off eye shaped icon on the layer1, to see only layer 1 copy for making eyes, nose and arms only. 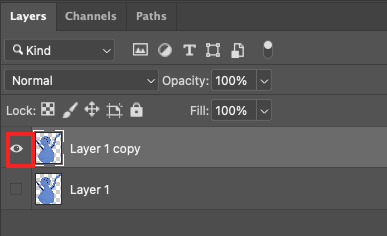 On layer 1 copy, you can erase background by using Magic Eraser Tool to show only eyes, nose, mouse and arms. 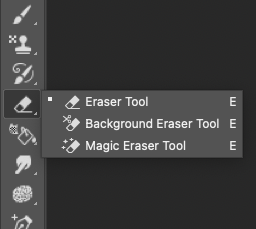 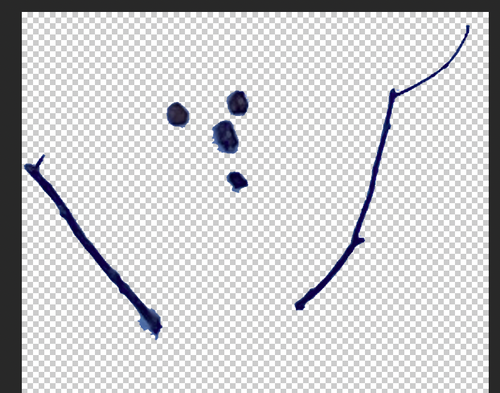 Named each layer like below. 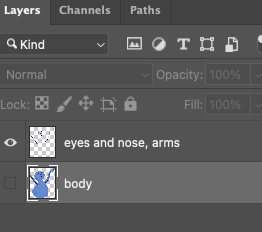 Return to the body layer and use the right-click mouse option to move to New 3d Extrusion from selected Layer.
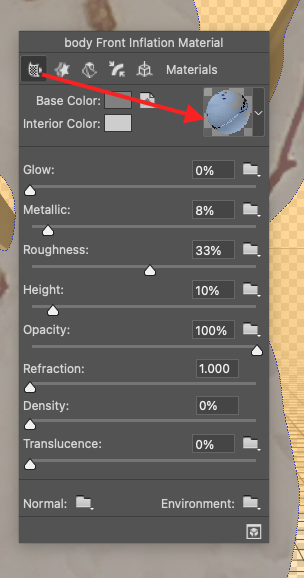
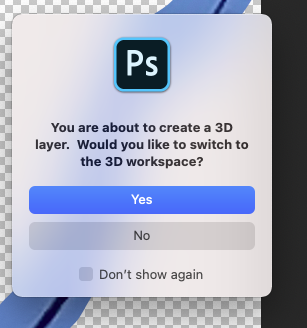 Click the yes!!! And then you can see the workspace for making 3D object. 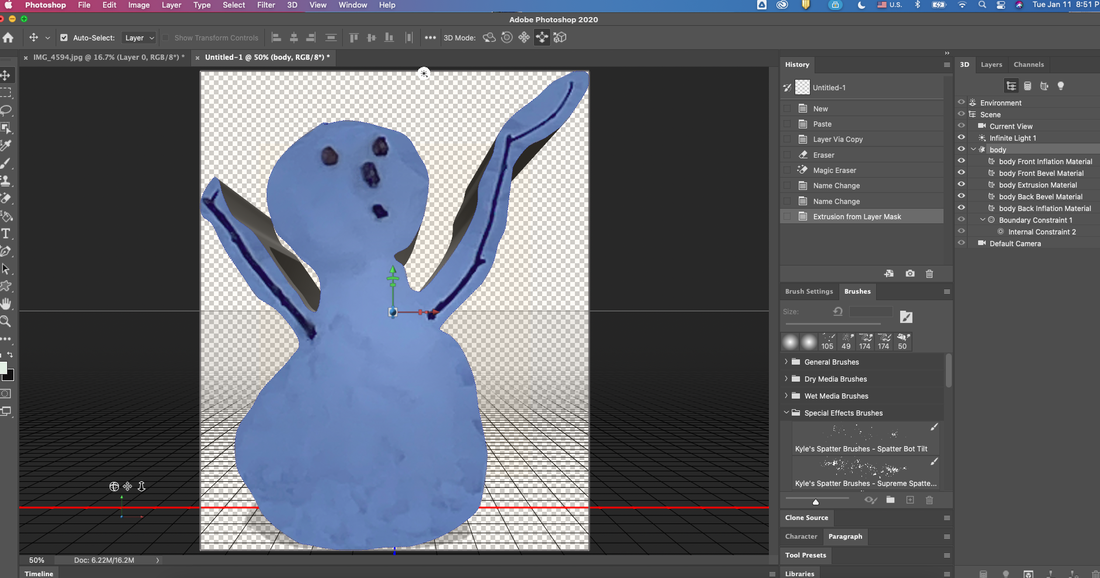 You have to click with Right-click on the snowman, and then find out below small window. 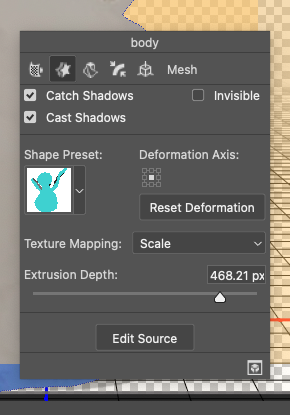 Click the first icon (In red rectangle area), it calls 'material". And then click the right blue icon.
After that, click the white ball from the drop down models.
 How to create moving banner for advertisement in Photoshop. I recently made an animated banner using Photoshop. This is a promotional banner for Girin Instruments, which is a link to my homepage. Go to Girin Instruments site! First, we get the image information as below in order to make a banner suitable for the site. To know the size information for the image to be replaced, follow the steps below. If you click with Right button on your mouse. (Depending on your environment, this option may not be available.) 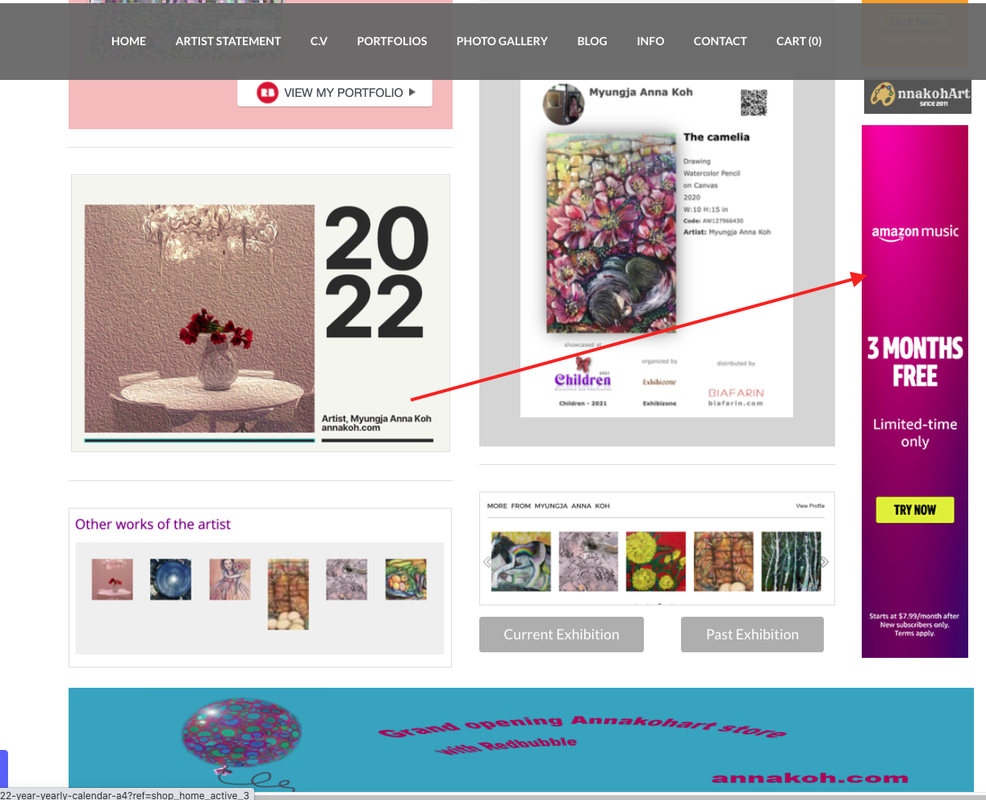 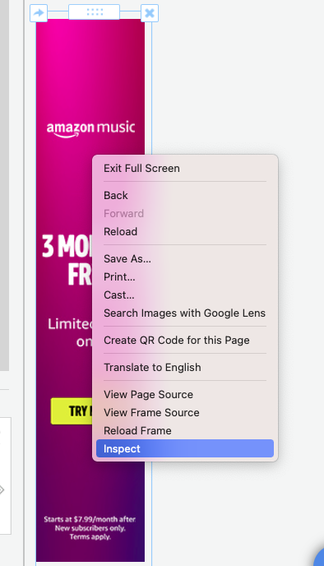 I get the image size info with 126.95 x 618.35. 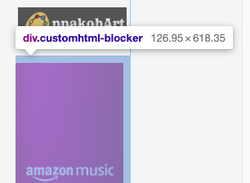 And then go to the Photoshop, make a new canvas to fit the size information. (Note that decimals are not used.) 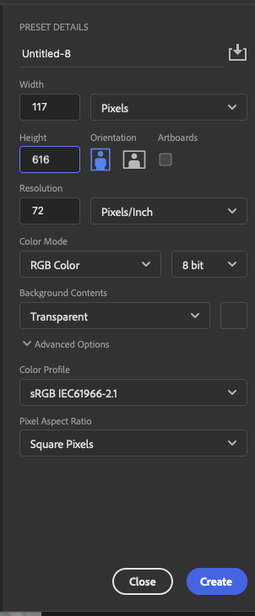  Change the color on the canvas for making banner. Create text and buttons on each layer as follows.
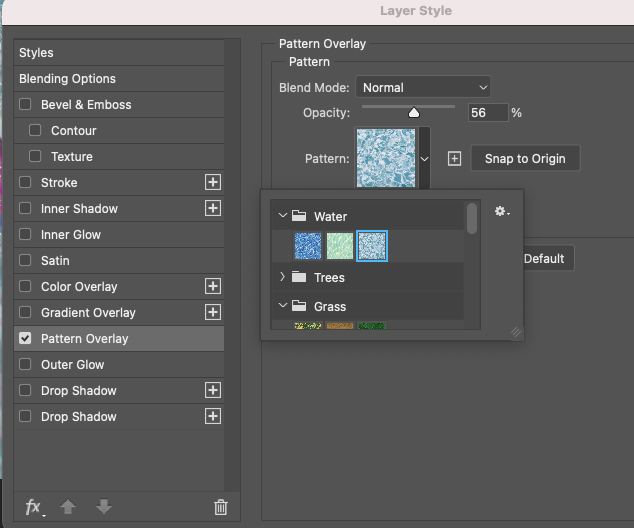
To express the button three-dimensionally, set the blending options as follows as below. 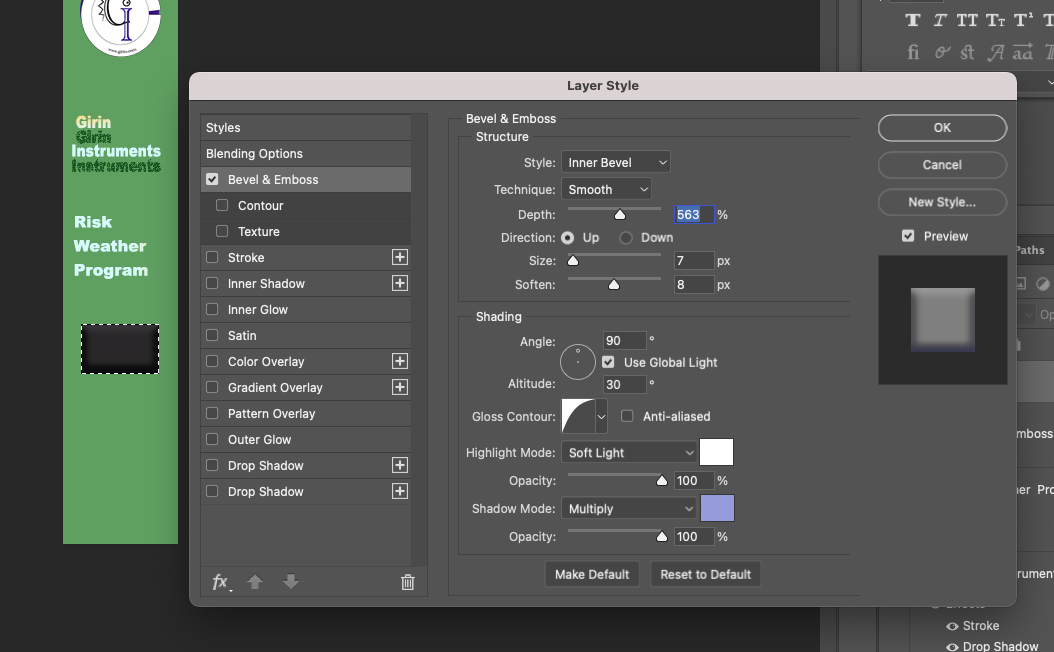 Put the risk weather icon at the bottom. Since you need to make it into a moving emoticon, you need to create each layer separately.
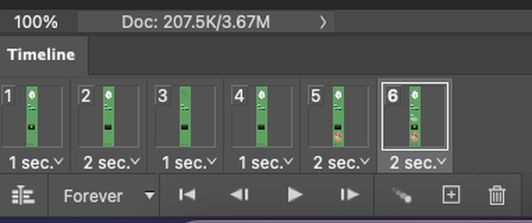
The created layer is named as shown below. 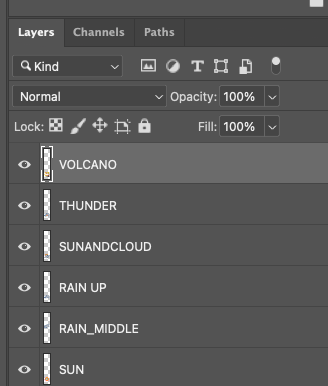 Next, go to the Window---> Timeline for making moving animation. 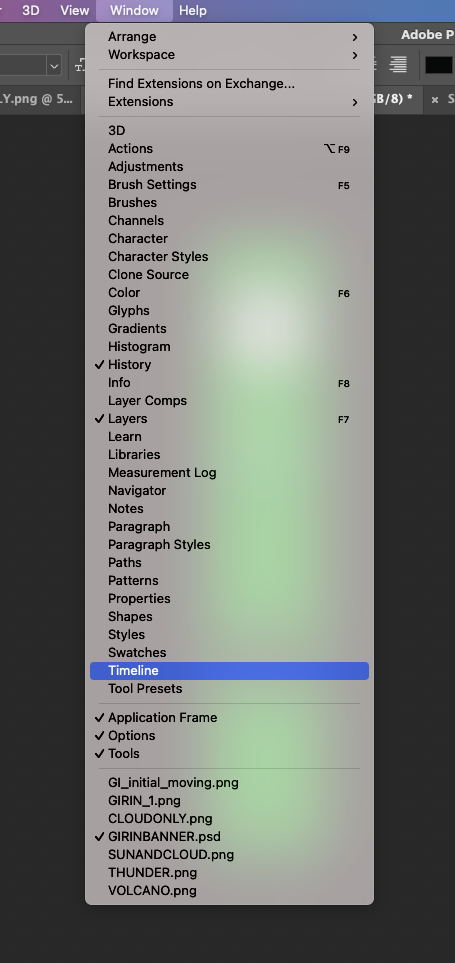 And then select the Create Frame Animation. Note!! You have to double click on the text to open it! Remember!  Here is the workspace for making keyframe. 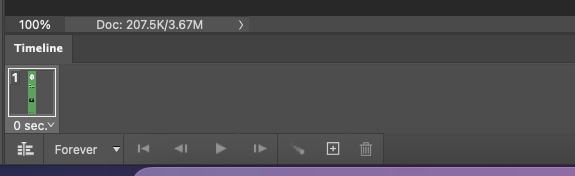 Click the icon below to add each frame. 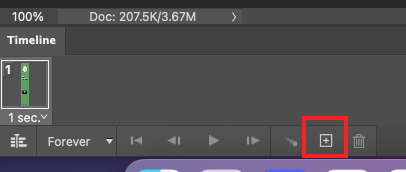 The principle is easy once you know it. Set one motion per frame and adjust the time. That is, each frame is created by calculating the part to be shown in advance. When creating, you can set the layer's eye icon by repeatedly turning it off and on.
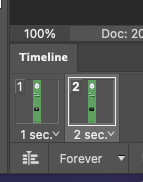
Adjust the second unit as shown below to designate the screen to be displayed for each second.
 Here is the last keyframe from making each actions.  Note! When you save the file, absolutely have to save as Gif file. For that, go to the File--> Save as---> change the file style to .gif.  Finally, you can check the result as below. 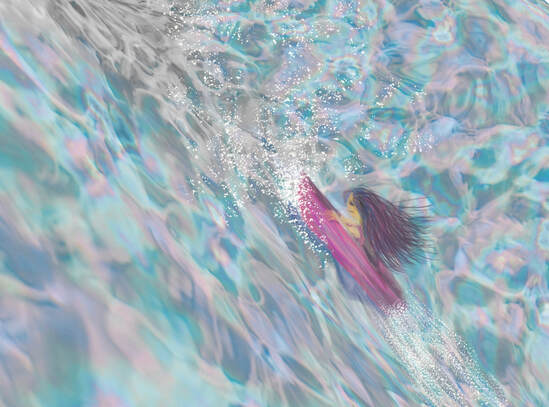 Cheer up ! , 2022, Myungja Anna Koh Draw a picture that will shake off your depression in 5 minutes with Photoshop It is a time when the mind and body are exhausted from the long-lasting fight against mutations. 2022 is bright, but we still need to wear a mask and get vaccinated regularly. we get tired easily in a situation that doesn't seem to have changed from last year. In this case, it is important to express your feelings. In particular, drawing, writing, and exercise are the best prevention and treatment measures. Today, in this sense, I would like to share a simple digital image of fighting a depression. First, I prepared a canvas with 2573 x 1907 px. 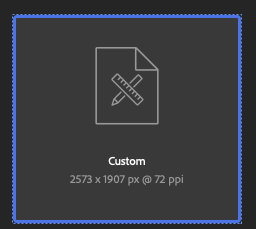 Next make a color with light blue and go to Filter---> Render---> Clouds. 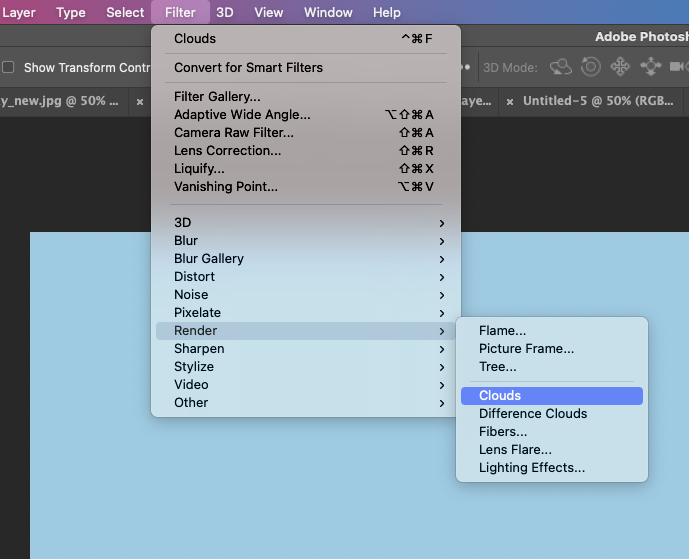 You can check the output after applying Clouds. 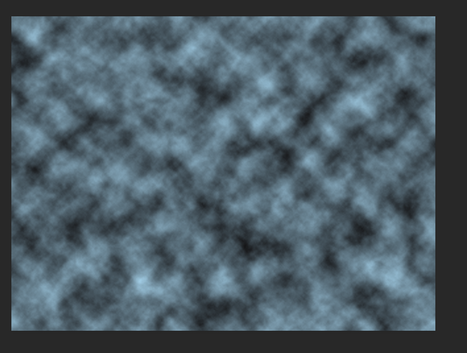 And then for effecting, you can go to Image---> Adustments ---> Curves.  And then, adjust the value as follow as below. 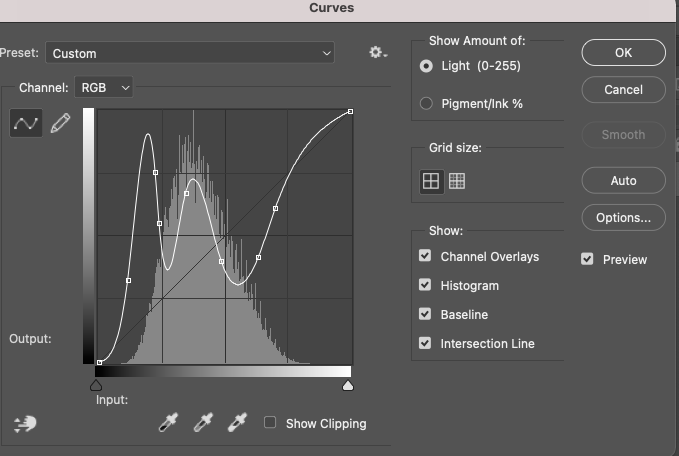 Here is the result. 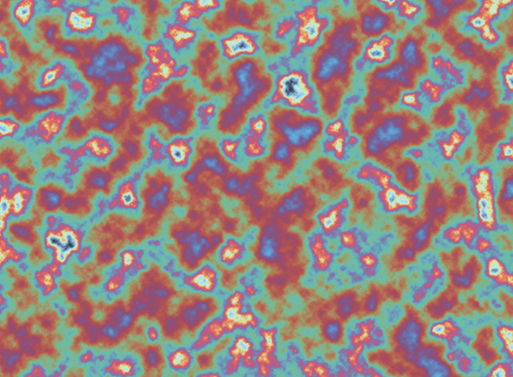 And then make a another layer, you can make it light blue. After then, you can use blending option with right-click, and adjust the value as below for expressing sea waves.
Next, lower the opacity (100%---> 60%)of the layer with the sea pattern applied. This will illuminate the layer with the previously created effect applied below. 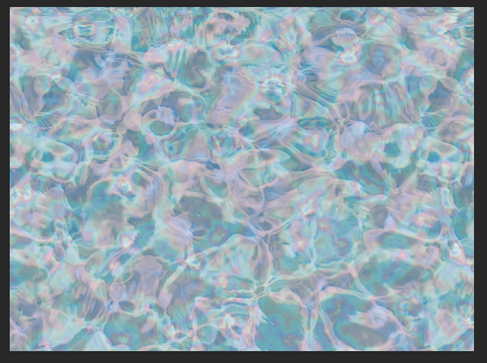 After selecting the sea wave pattern layer, right-click the mouse and go to Free Transform---> Warp to transform the pattern. Then I drew a girl going backwards in a boat and going up. 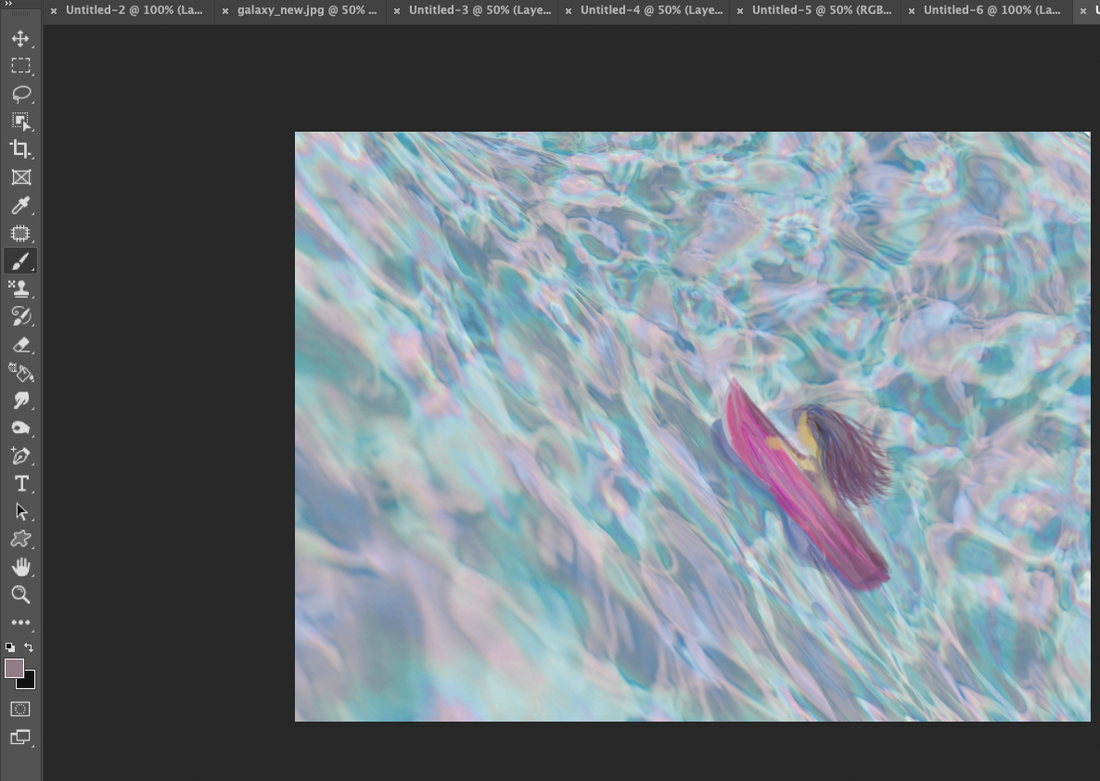 Since the boat is going retrograde, it represents a splash of water. From the blush set below, choose a dotted-line blush and paint around the boat in white. 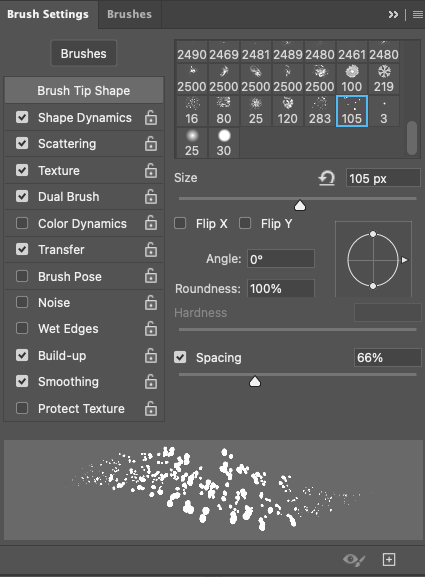 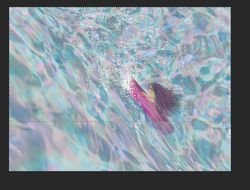 Finally, you can see the result in 5 min.  Like a boat sailing through the waves, I hope to overcome the gloomy heart and start the day with strength. How do I change the header image in Weebly? Today, I would like to briefly introduce how to change the header image in Weebly, which is very simple and easy, but easily confused. I recently changed the header image as above. The fish image filled with hopes and wishes at the beginning of the year was changed to induce a calmer image. Now, with new hope, I want to start each day as energetically as a fish that bounces back. To do this, first go to the Weebly editor.  Then click on the header image you want to change. You can see the button to edit the image only by clicking the header image. 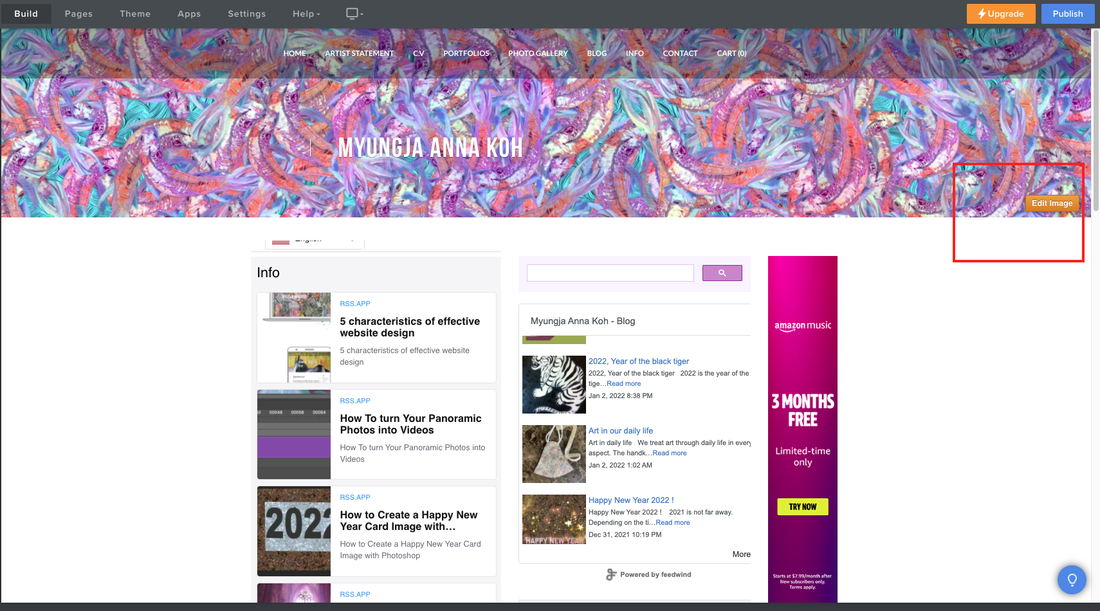 If you click the orange squared button on the right of bottoms in header image, see below with some changing. 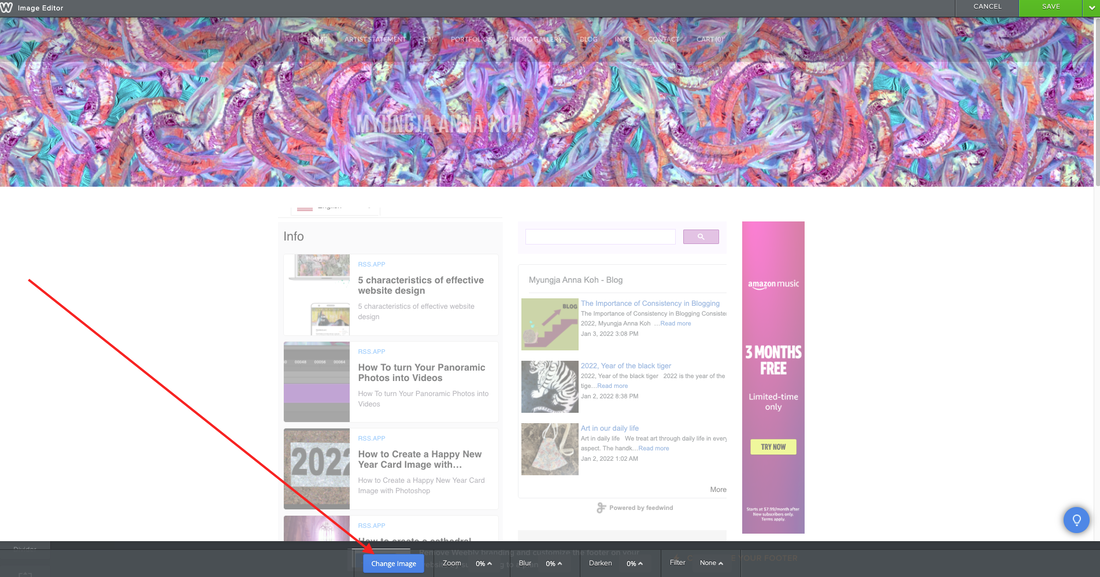 After changing the mode for edit, you have click the blue button, "change image". And then you can find out below small window to upload your image. 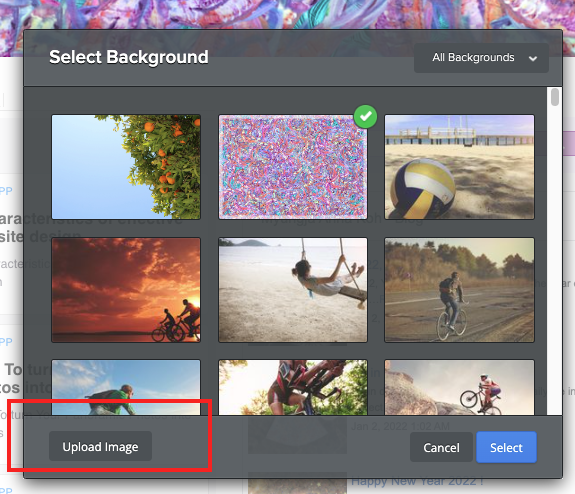 Sometimes you will be disappointed with the screen you see when you upload an image. The size of the image to be uploaded and the header image do not match, so it is only partially visible. In this case, use the following method. First, you click with right-click on your mouse. And then go to the Inspect mode. 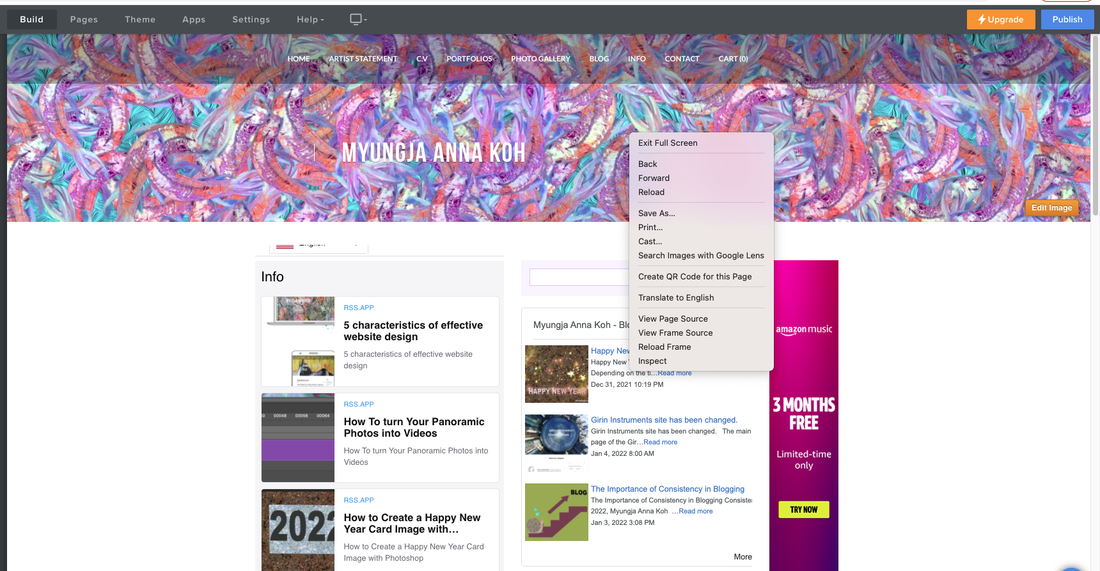 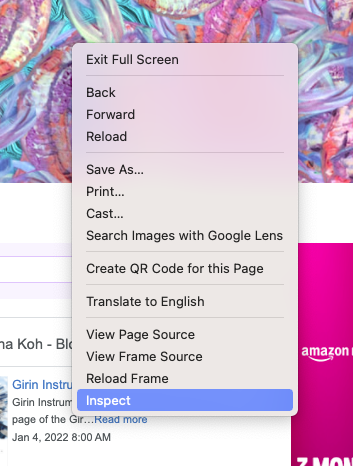 If you can go to the inspect mode, see the coding area on the right side. 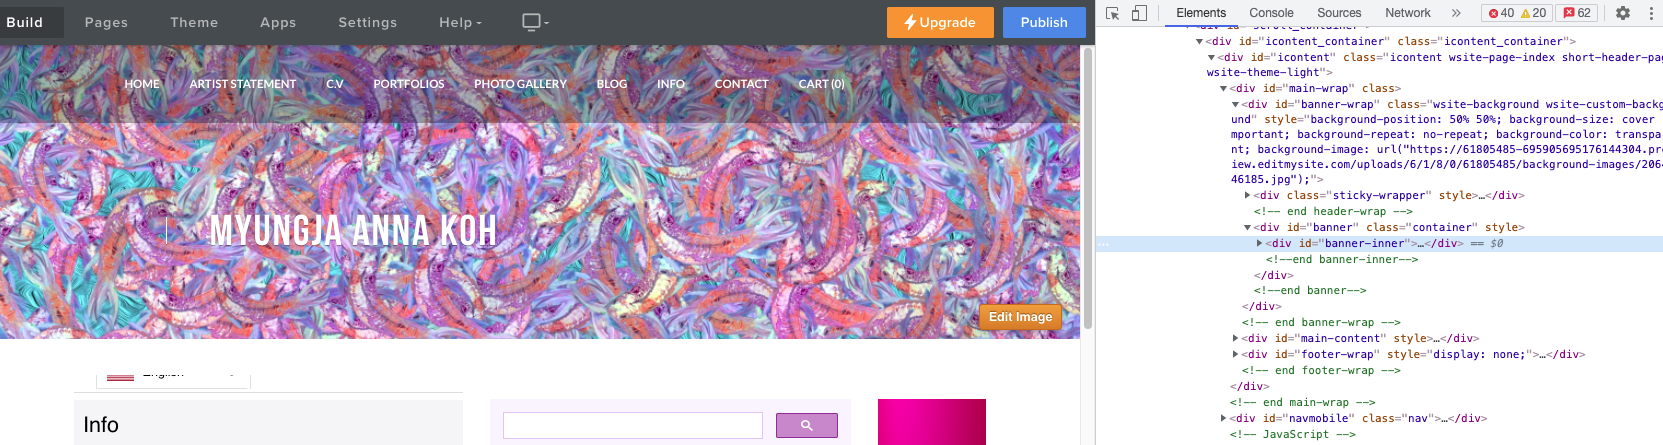 And the return to the header image, click it. You can get the size information from the image as follow as below. 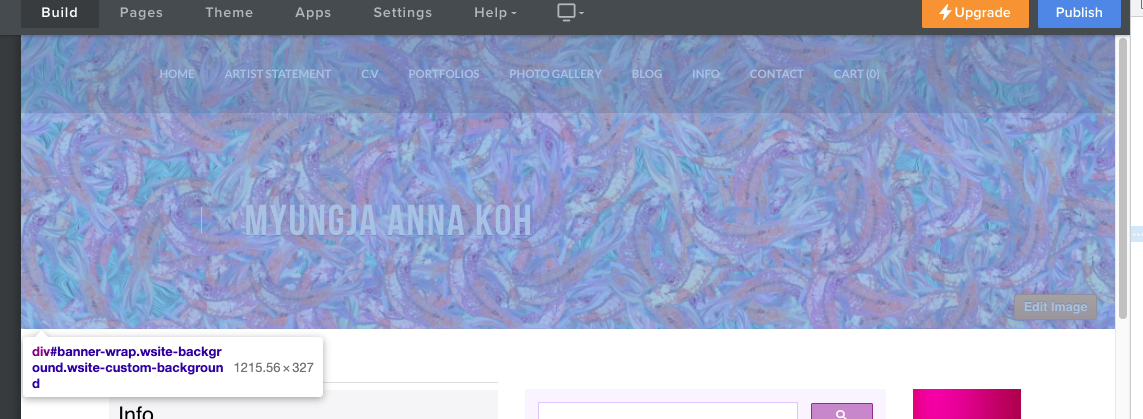 If you can get the image size successfully, go to the editor such as Photoshop. You can adjust the size to fit the actual header image size.  Adjust the style, proportions, and brightness to suit the case.  Below is the result to change the header image in Weebly. 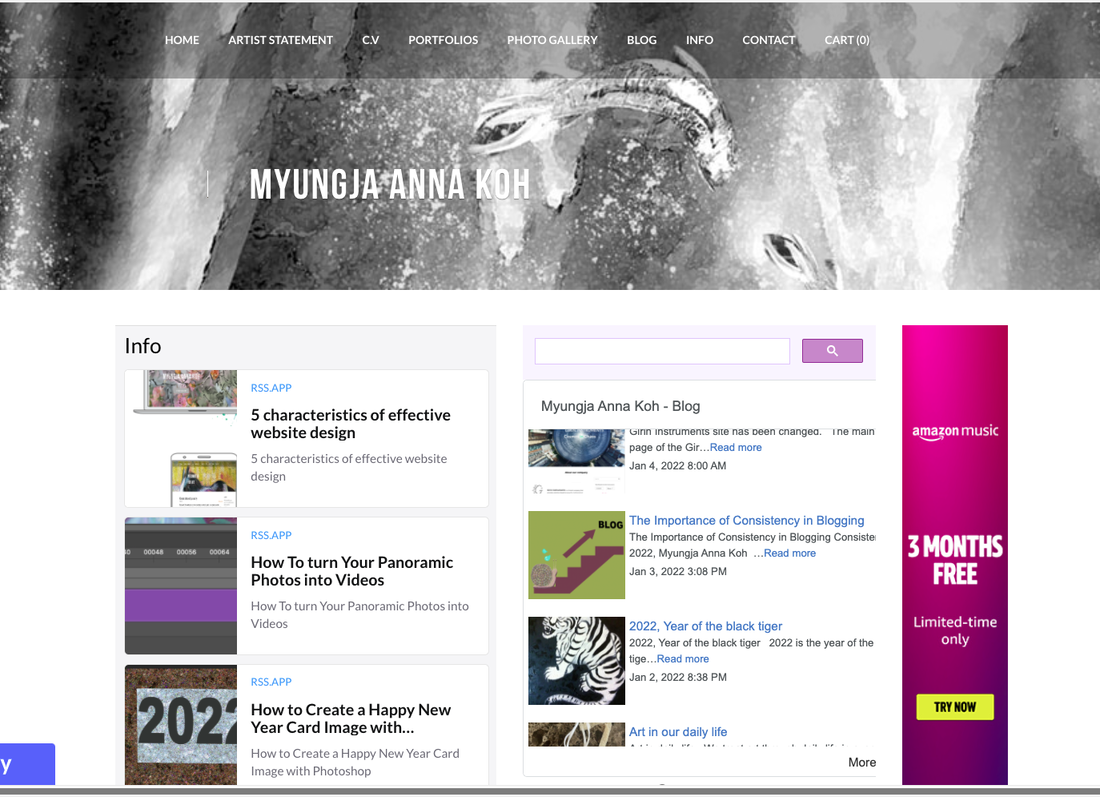 The way for changing one page design of theme in Weebly In the case of Weebly, the blog contents are not separately saved for backup purposes. Also, since there are no pagination functions and bulletin boards in the blog content, it isn't easy to count or display your own writing. I have been able to solve this inconvenience in my way. Therefore, it is still being used well, so it is up to you to get used to it. Instead, I'm posting this as a tip about what I've learned while adapting. Today is one of them. If you look at Weebly or any other website builder, you can choose the design and layout of your site through themes. However, there will be times when you need to modify the pages of one or more of those themes. For instance, I had to alter the main site while running the Girin Instruments site. The site consists of five menus: Main, Service, About, Demo, and Contact. (For reference, it is recommended to have around seven menus.) I want to modify only the central part of these menus. However, from the conclusion, it is impossible to completely change one page's design in one theme. If you want, you'd probably need to create a second site and link between that and the original location to have a single page use a different theme. But creating a second site is very cumbersome. I hope this area will be resolved soon with the bulletin board in Weebly. First of all, in my case, I would like to show you how I edited to change only one page of the thema. First, click the page at the top of the editor of the Pages you want to change, and then change the header time to No Header. 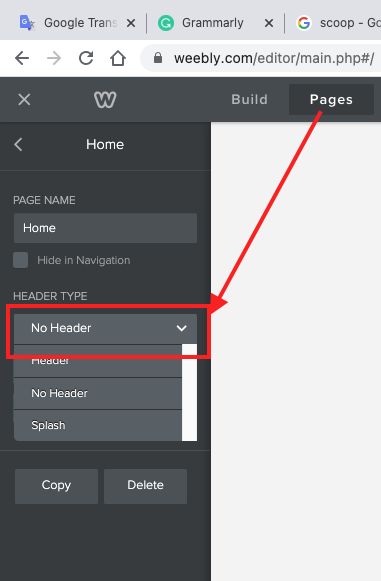 Put the main image you want to put in the space that is created when the header disappears. And go to the Inspect with a mouse right click.  If you go to the inspect mode, it will appear in the program coding window on the right side of the window. Click on the image to see the image size information as shown below. (Knowing the image size in this way is helpful when creating banners or intro images.) 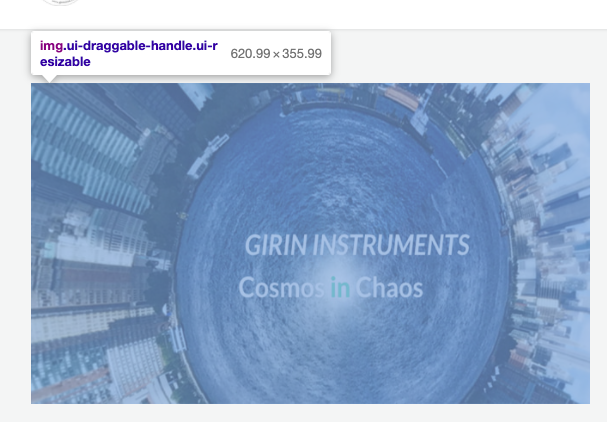 Adjust the image to size using Photoshop or other image editor. 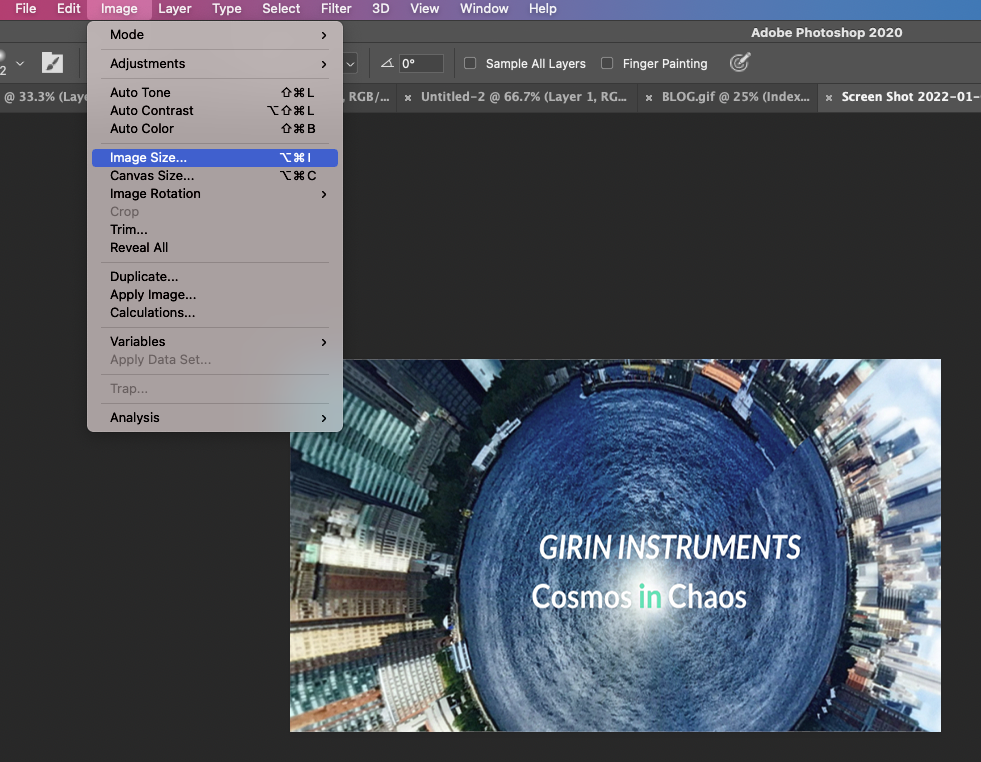 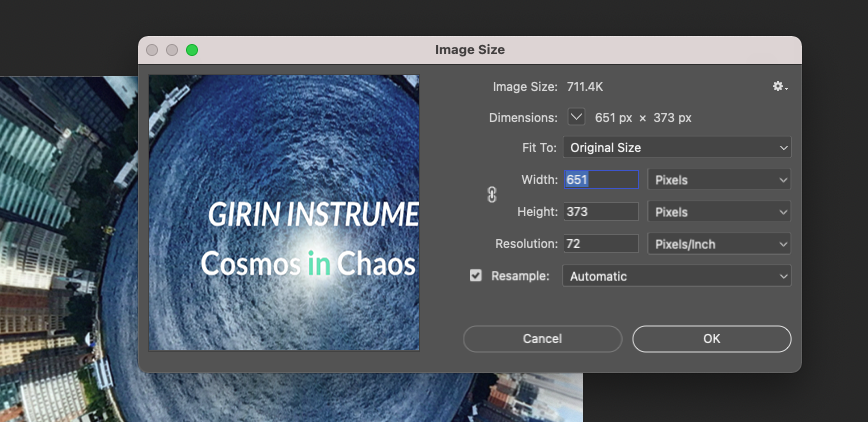 Below is the finished page. 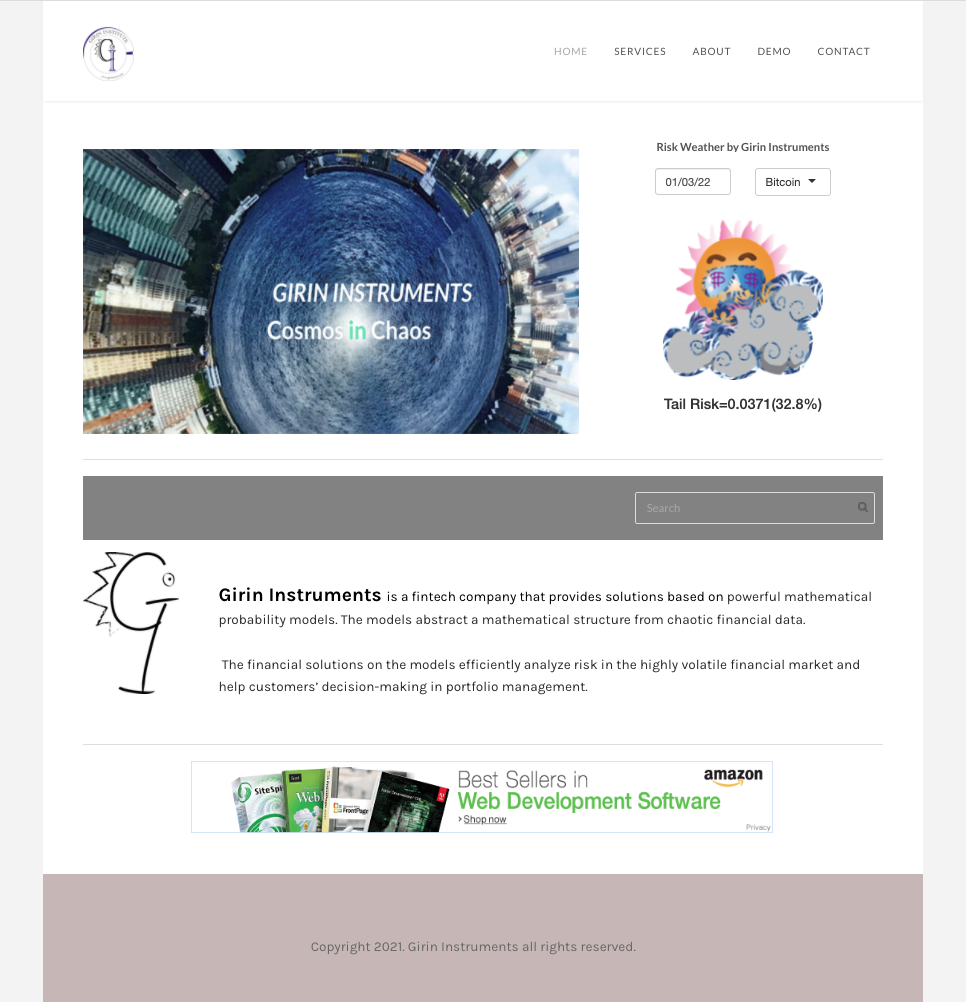 As you can see, the main intro screen has shrunk and the main program, Risk Weather, has risen to the top. This is to make the main program appear first when you click on the site. It's a good option to turn a page into a completely different page, but it's also a good idea to use a little variation like this. |
Myungja Anna KohArtist Categories
All
Archives
April 2024
|

|
Tutorial |


 RSS Feed