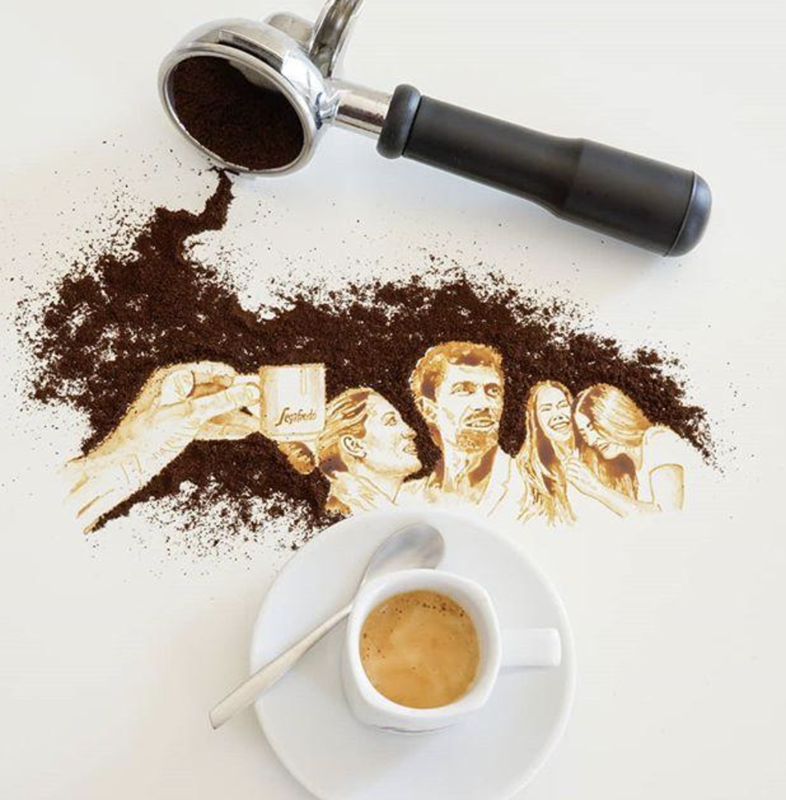
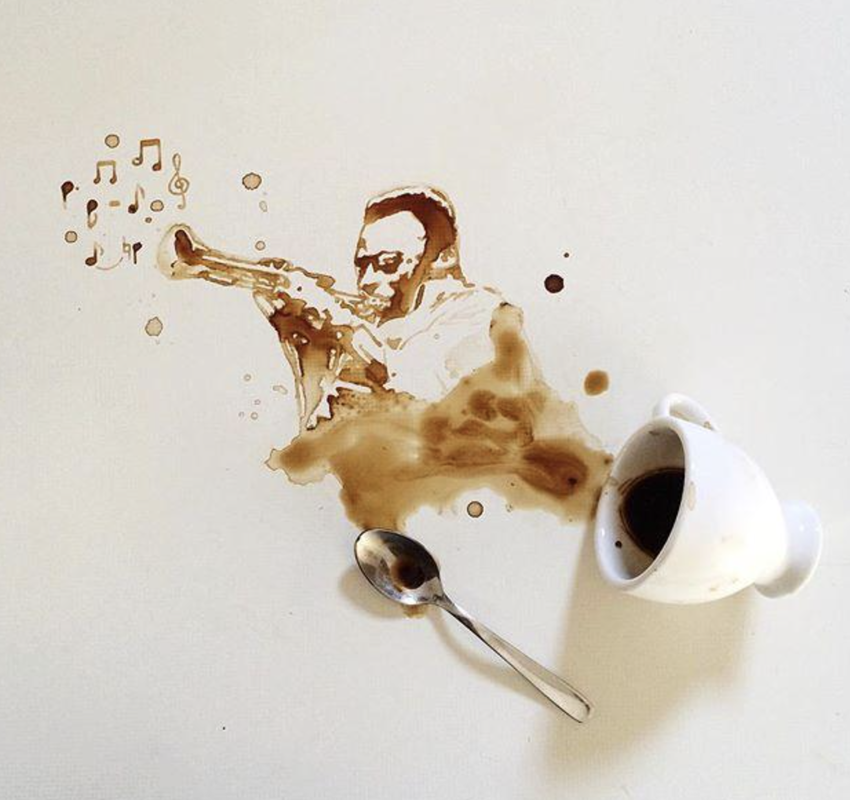
Coffee painting When coffee is spilled and left to dry, the coffee-ring effect is a phenomenon in which the edges of the coffee stains appear slightly darker. The coffee ringing effect can be seen not only in coffee, but also in drops of wine that have landed on a napkin. 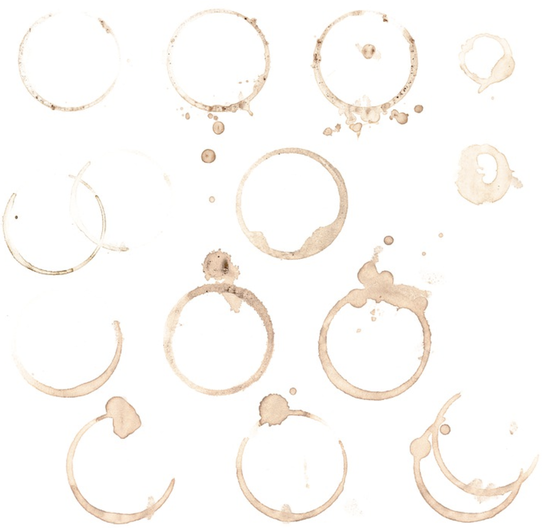 The reason for the currying effect is that coffee is not just a liquid. Coffee is a liquid mixture of ground coffee beans and water. When the coffee stain dries, the coffee powder particles are driven to the edge, so only the edge turns black. So, why do coffee grounds particles converge at the edges? It has to do with the nature of water. Water has the property of clinging to something. So the coffee drops that fall on the table have more force to stick to the table than to cohere inward. So, the coffee droplet maintains its size and evaporates. However, the middle of a coffee droplet with a lot of particles has a small contact surface with the gas, so the evaporation rate is slower than the edge. As a result, the water at the edge of the coffee pot evaporates faster than the water in the middle. As such, the difference in evaporation rate between the middle and the edge of a coffee drop causes a difference in surface tension on both sides. At this time, a flow is formed that moves the water from the middle to the edge, and the coffee grounds also move along this flow. Eventually, when all the water evaporates, the edges become darker than the middle because there are many coffee particles that are concentrated to the edges. Source: The Scientist Next Door (http://www.astronomer.rocks) You need to understand the effect of these coffee rings so that you can express them more naturally when drawing with coffee. And occasionally, there are good parts if you maximize and express these coffee ringing effects. The coffee used when drawing with coffee is good if it is in concentrated form. Because the coffee we drink is generally diluted with water, it is difficult to express the concentration of the dark part. In this case, if it is mostly coffee beans, it is recommended to drain the coffee, collect the remaining powder, and squeeze it with a net to use the extract. If this time is not enough, I made a concentrate by collecting several coffees in the form of tea bags. Coffee has a sticky effect and the edges come together well, so the effect is maximized if you draw in layers after the painting dries. The more layers you draw, the darker the picture and the easier it is to leave the texture of the paint. 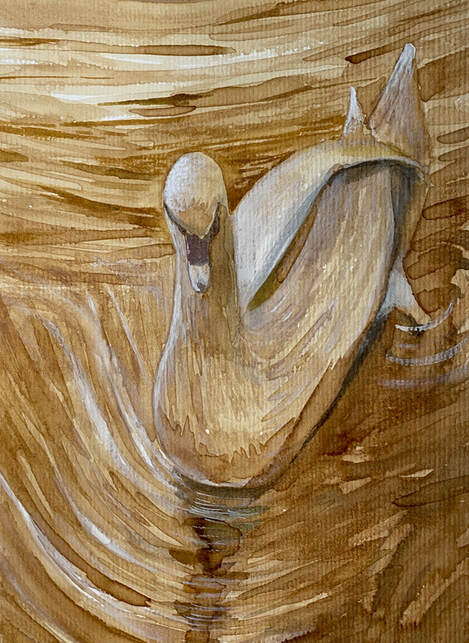 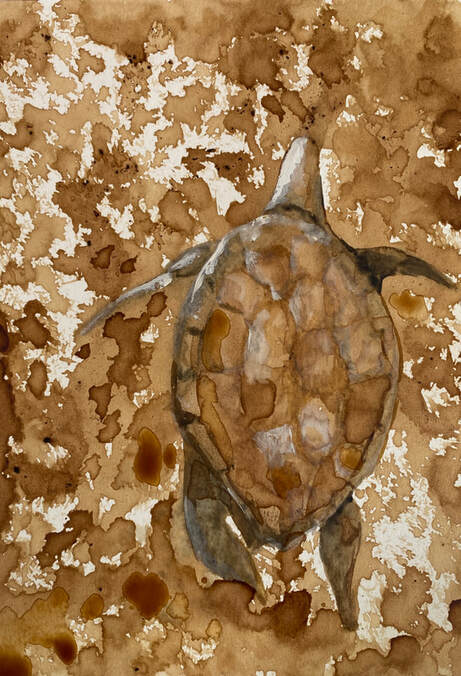 Because the natural color of coffee is brown, it is good for expressing brown puppies or trees. 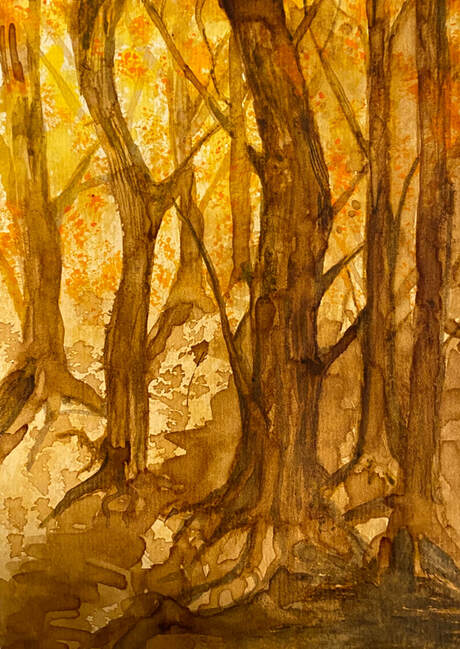 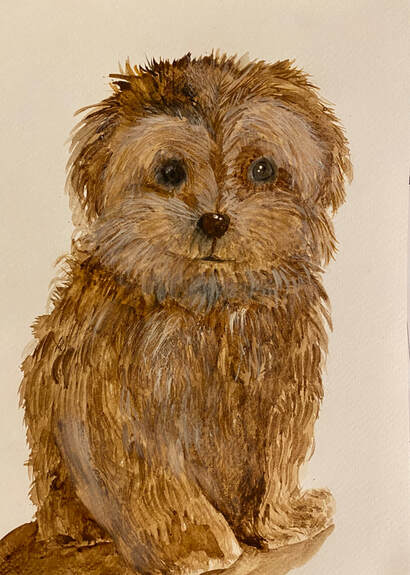 Italian designer Giulia Bernardelli, under the pseudonym Bernulia, is an artist who paints using the traces of spilled coffee.
0 Comments
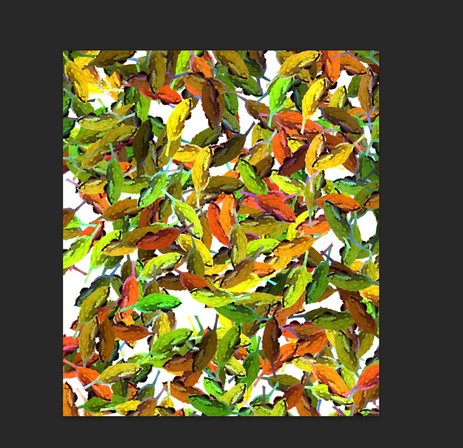
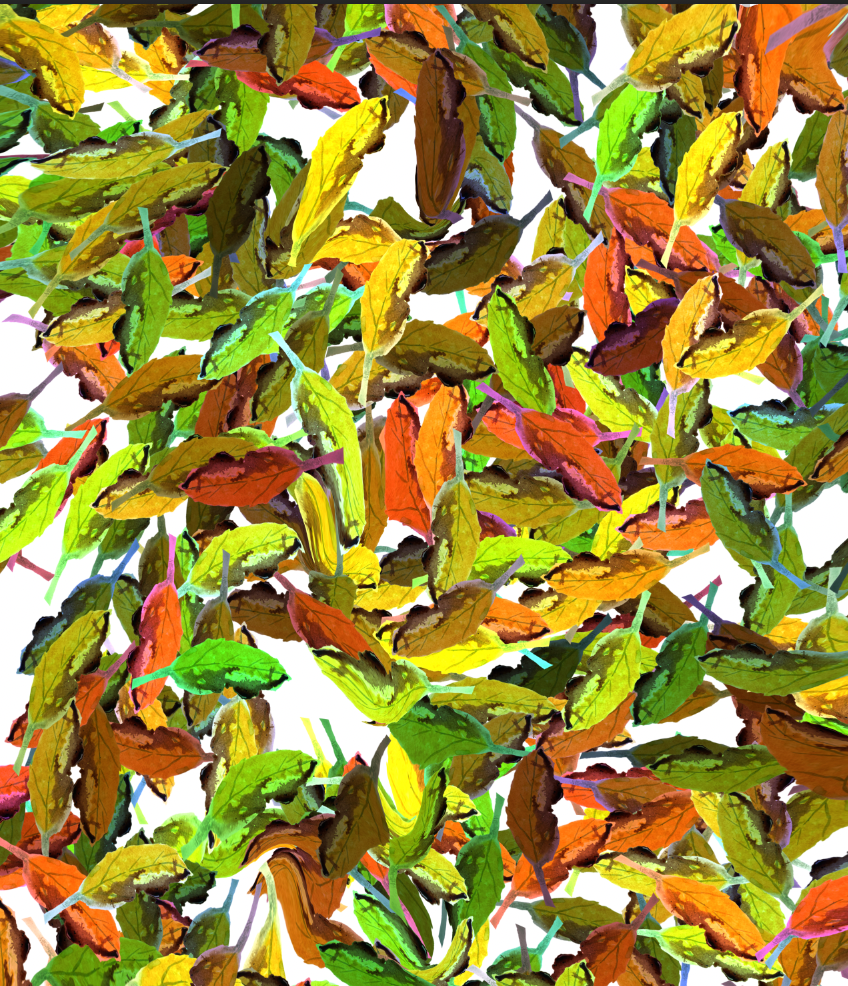
The process of drawing eyes with a pencil Today I am going to share how to draw eyes easily with 2 B and 4 B pencils. 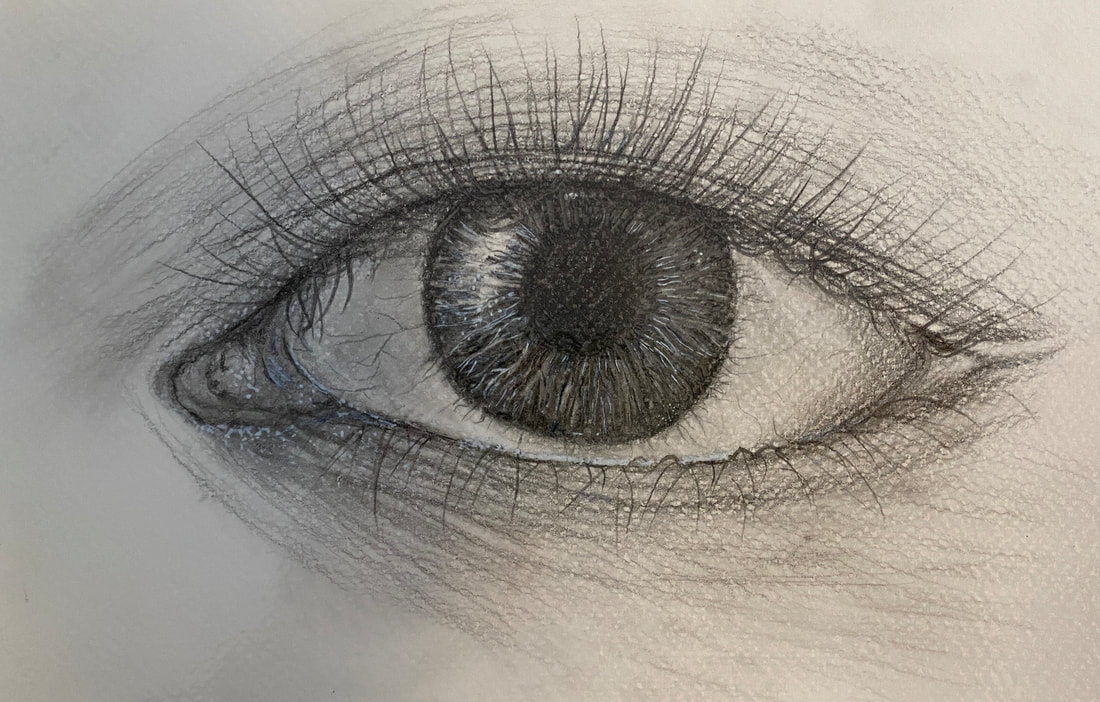 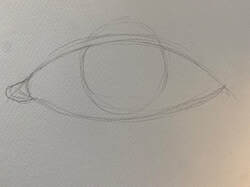 First, draw a basic line with 2B pencils. 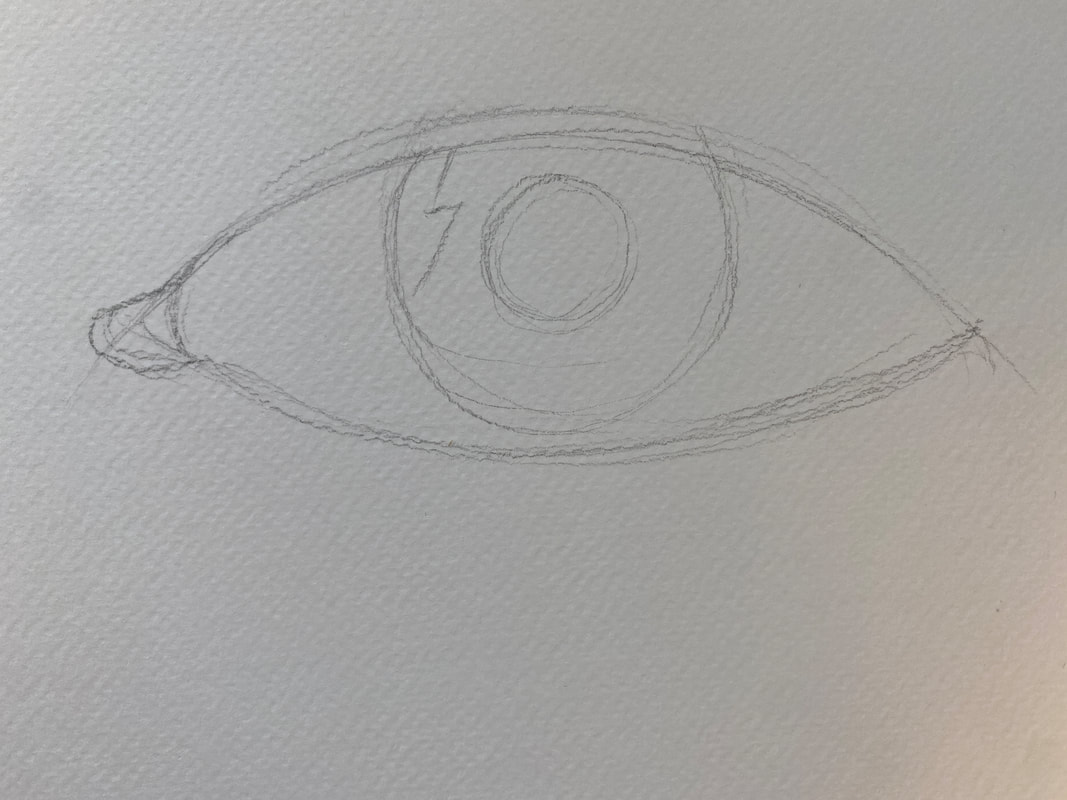 You can express the light's reflection on the left area of the iris and also describe the lacrimal gland ,like left end of the eye. 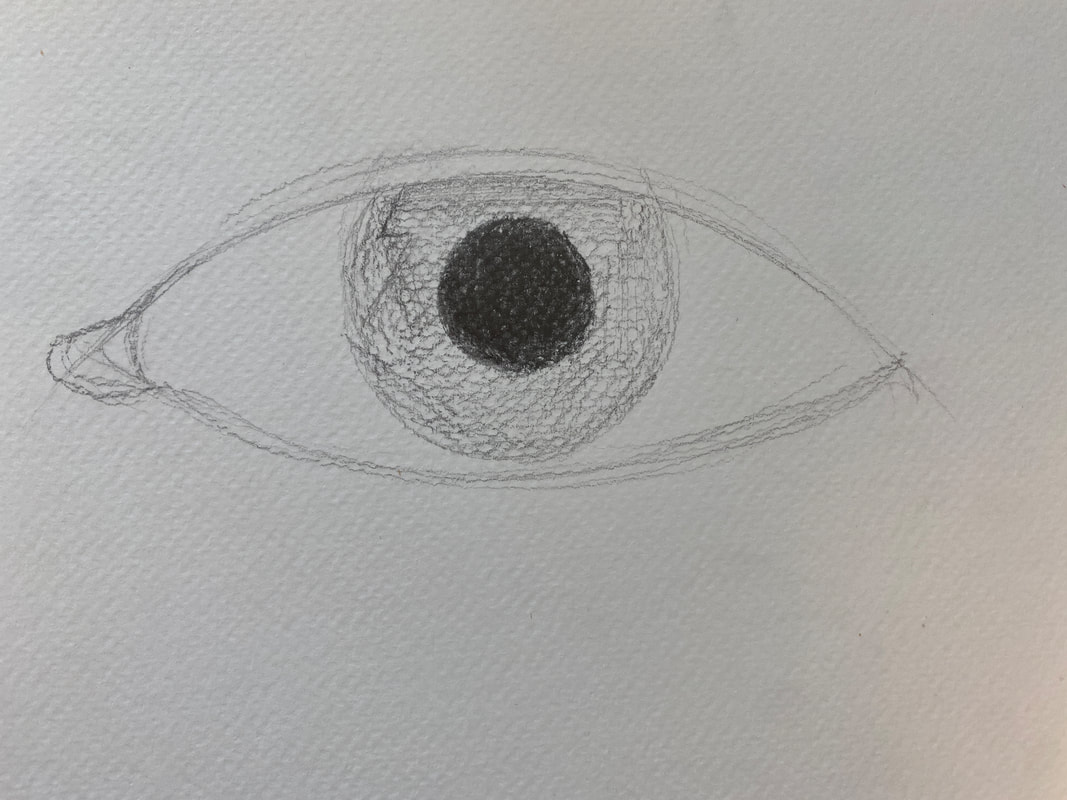 Next, you can draw the pupil with 4 B and the iris with 2 B roughly. 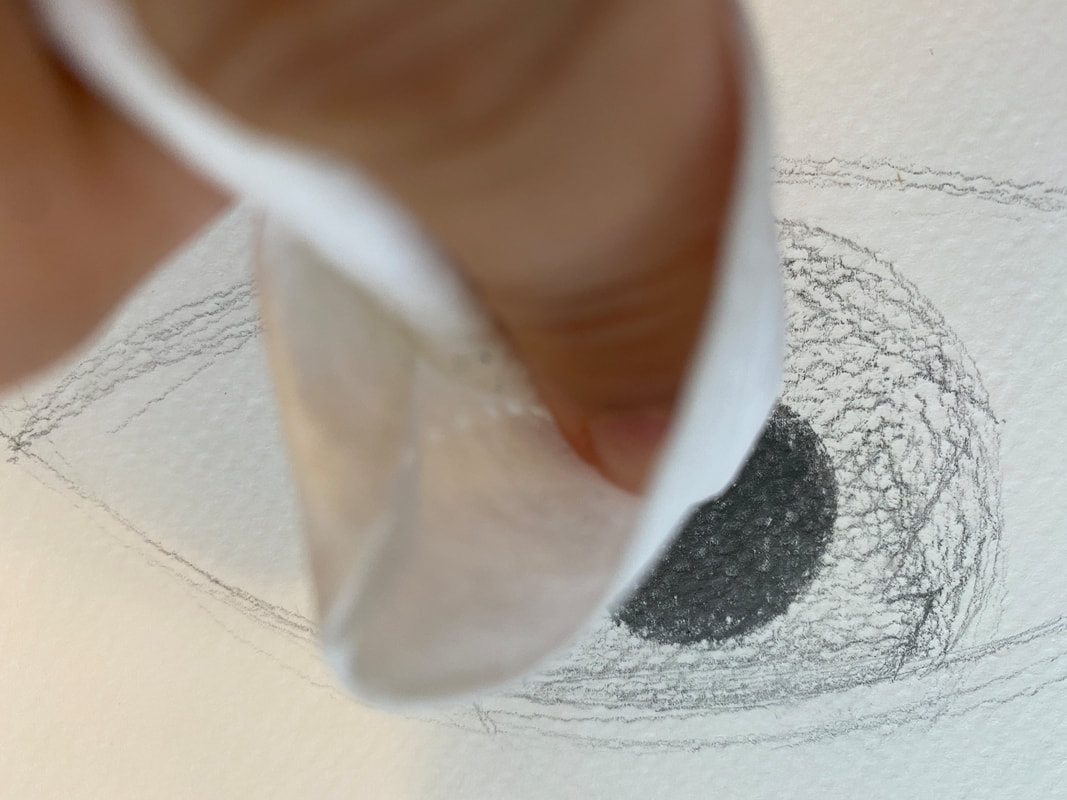 And then you have to make a tone by using a wet wipe like above. 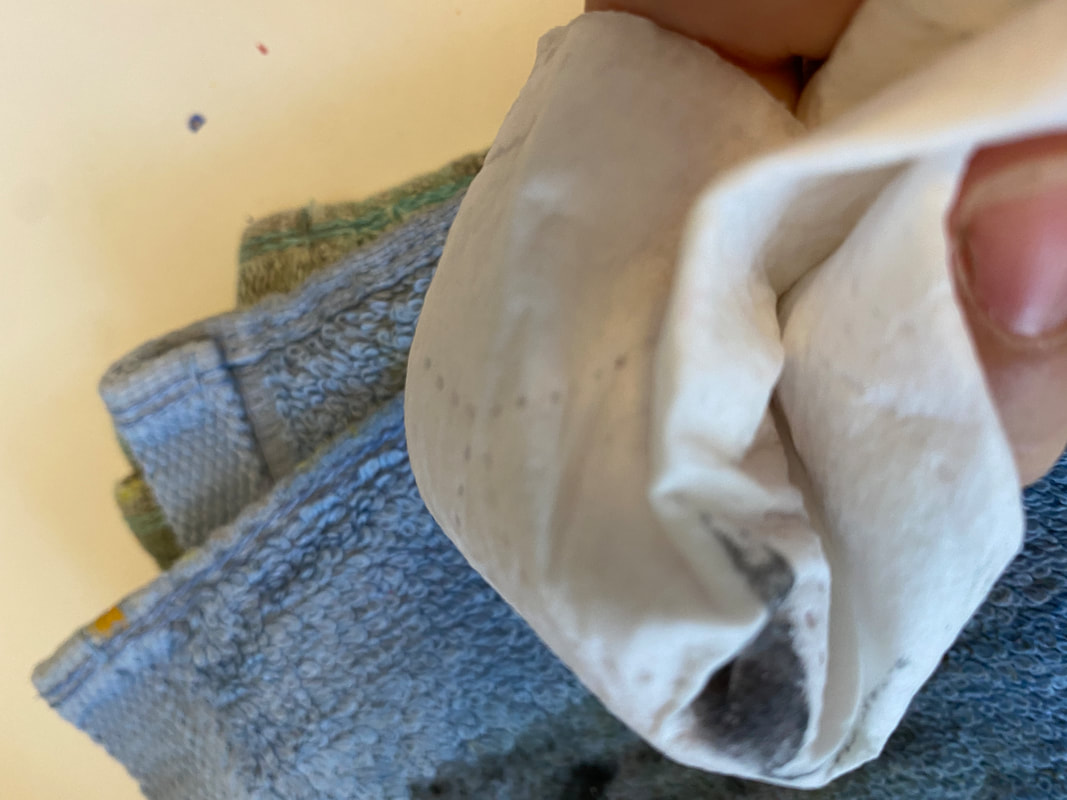 Continuously, you can make the medium tone around the iris by using remains of the graphite like above. 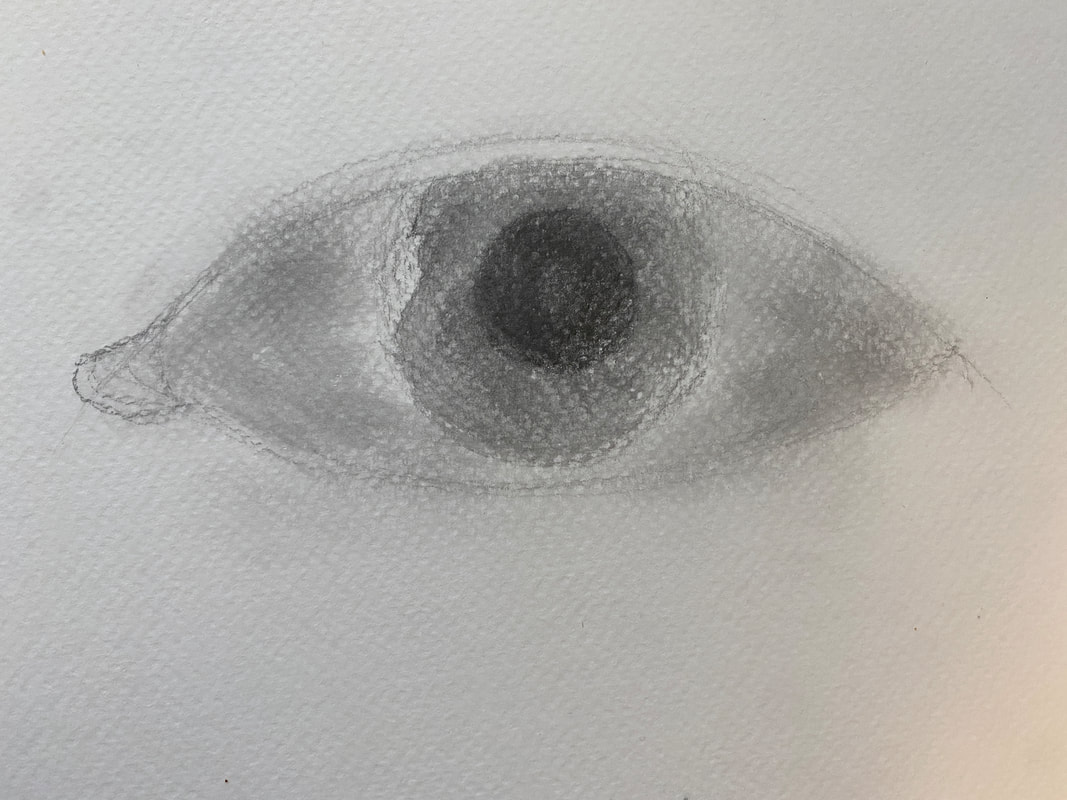 Like above, you can make tones roughly. 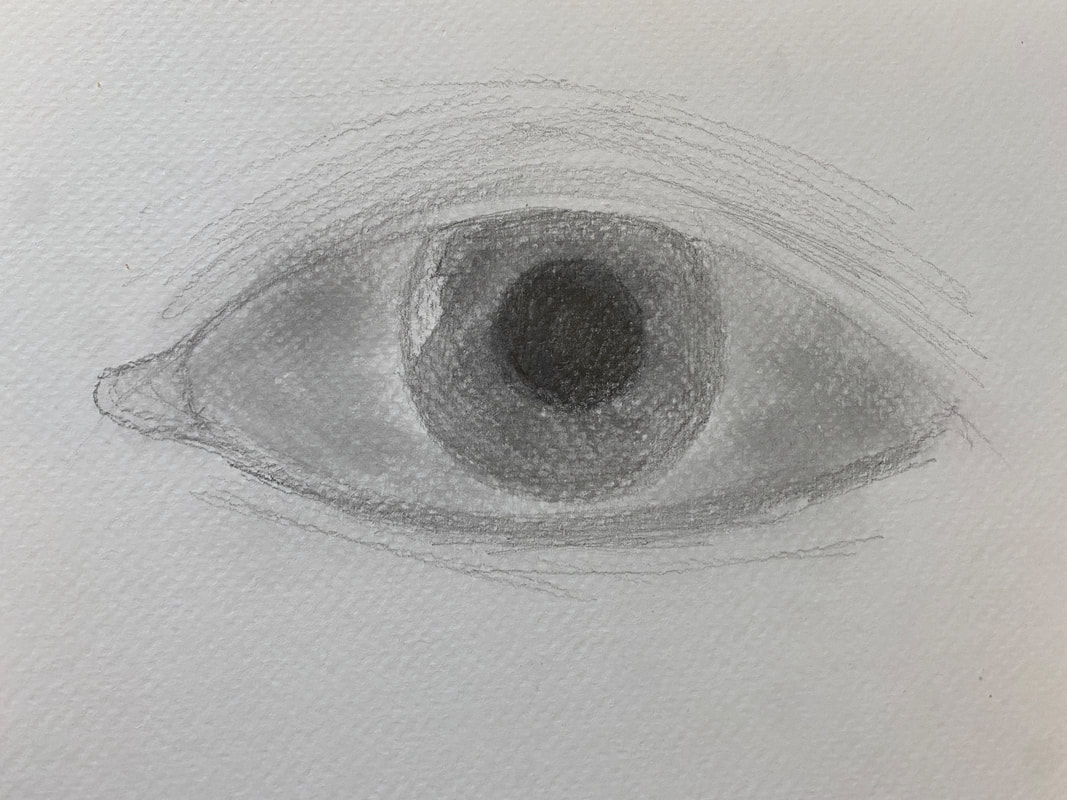 And add the lines as wrinkles around the eye and eyeliner. 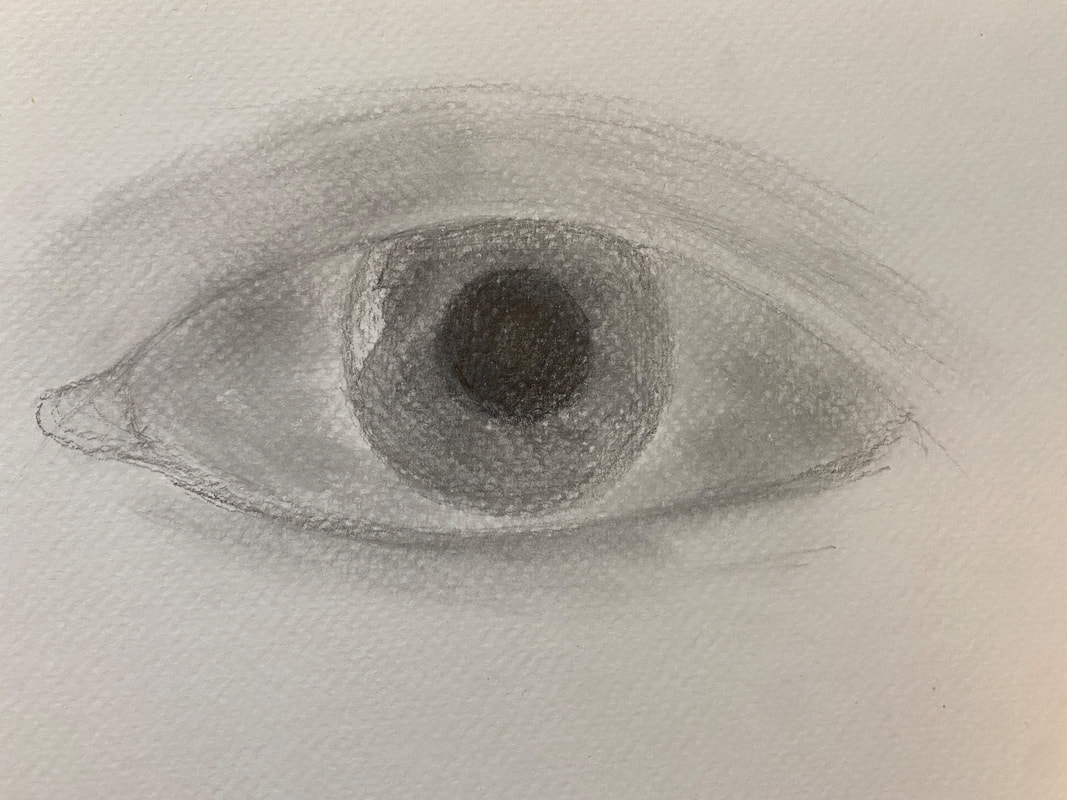 By using a wet wipe, you can make a tone again around the eye.  Draw the details of iris with 4B pencil. The fine lines of the iris may originate in the pupil or outside. All lines must be drawn with different thickness and length to be natural with 2B and 4 B pencils. 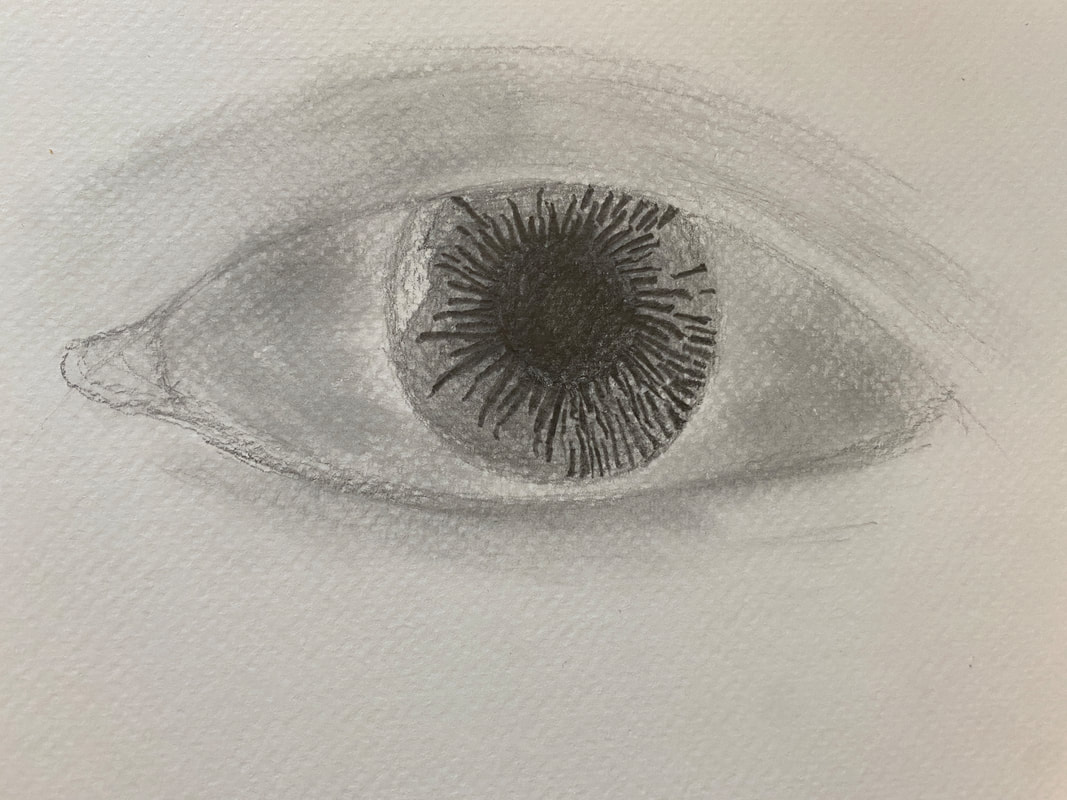 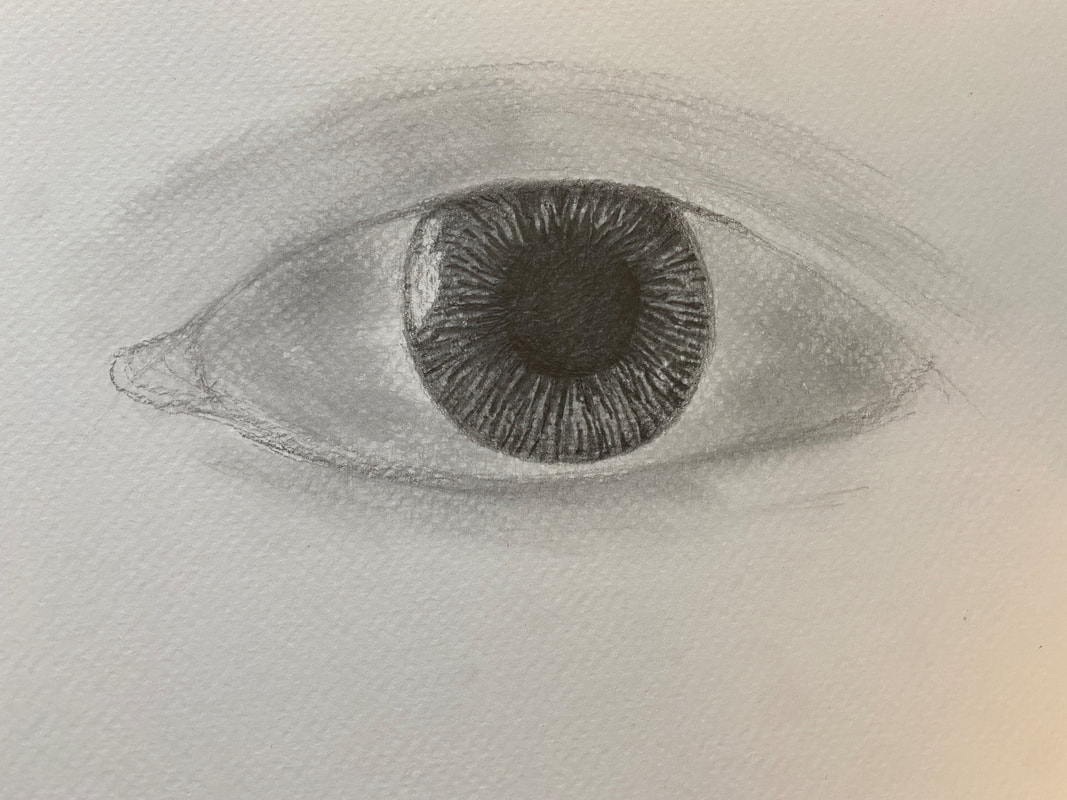 And then describe the eyelashes, you can remember the direction are also different. 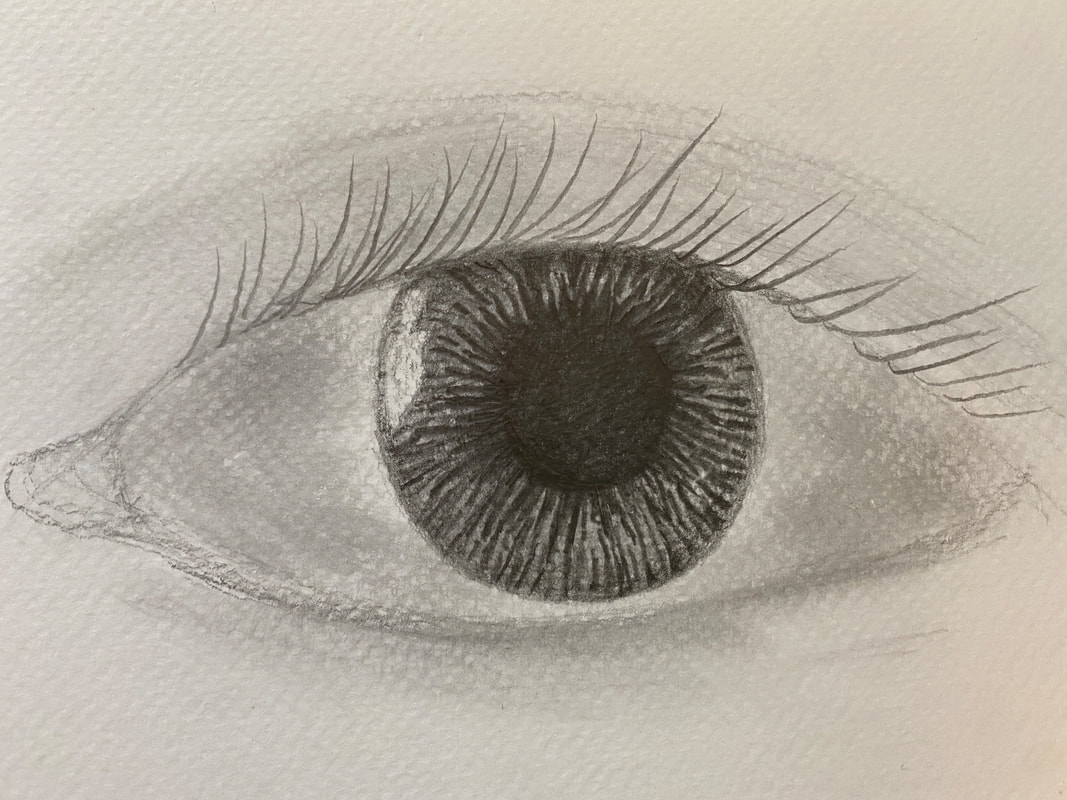 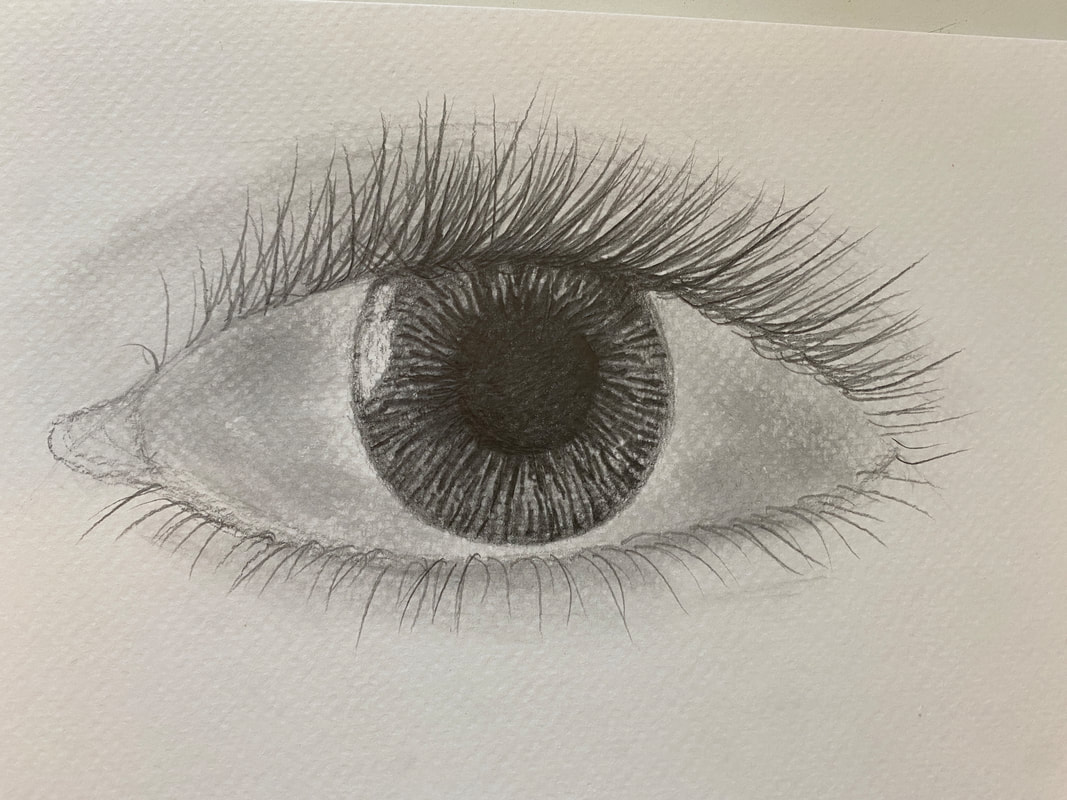 Add more details and you have to add the shade under the eyelashes because the eyelashes make some shadow under it. Also you can draw the eyeliner with 4 B strongly. 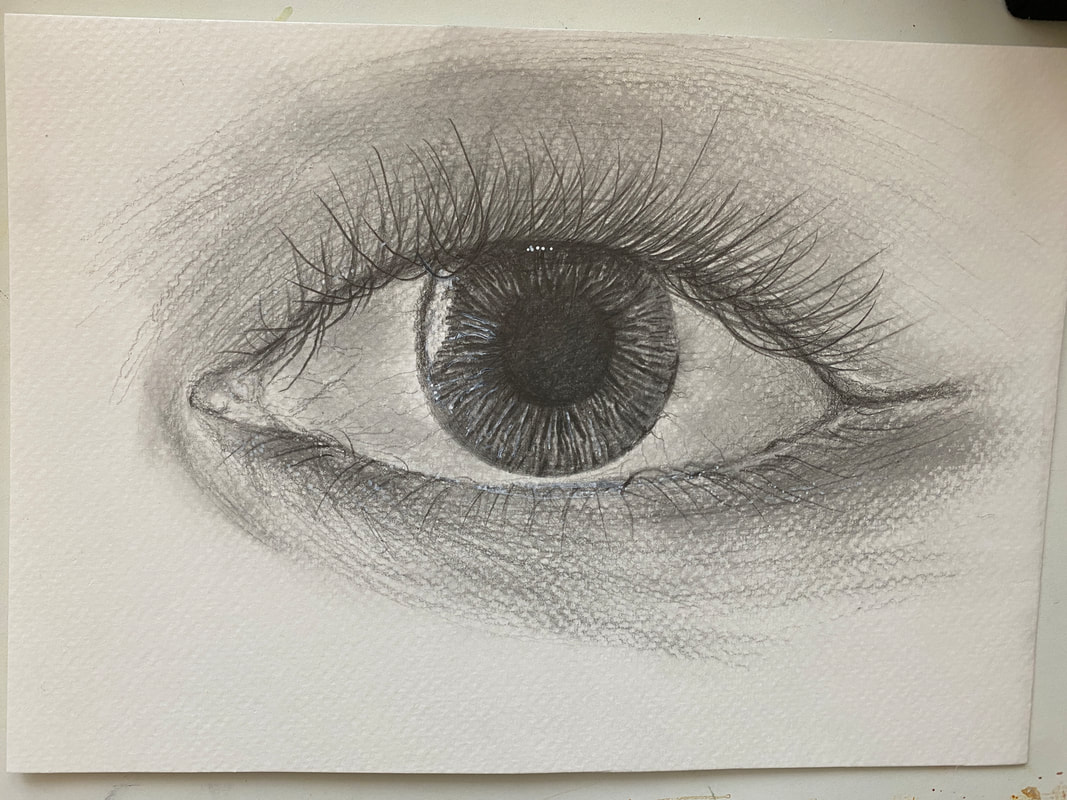 Last, you can make a white accent with white acrylic pen for expressing the strong light. Below is the another version of the eye with watercolor paint. 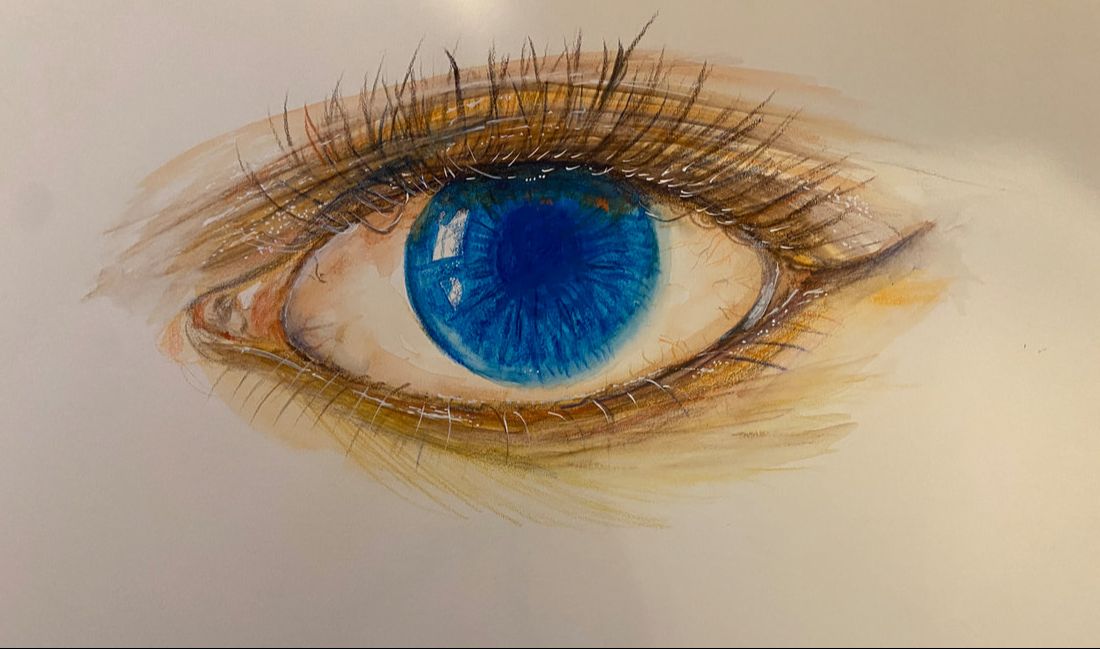 Create digital artwork with your own drawings The work below is by Charles. It was created by patterning one of the leaves painted in watercolor by Charles.  First, select the picture you want to make into a pattern using the object selection tool. 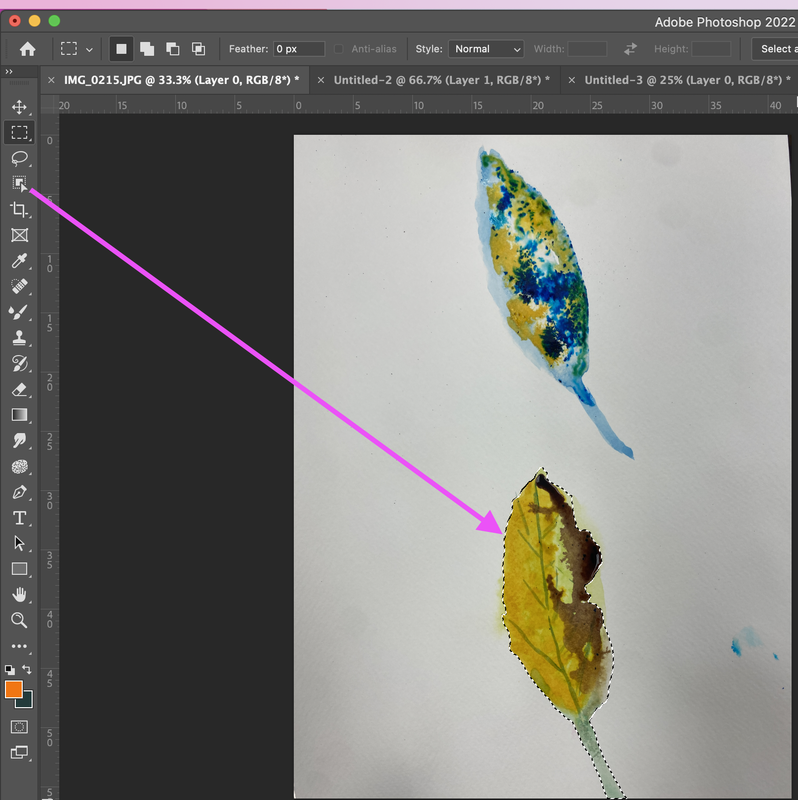 To make a pattern, you need to reduce the image size as follows. 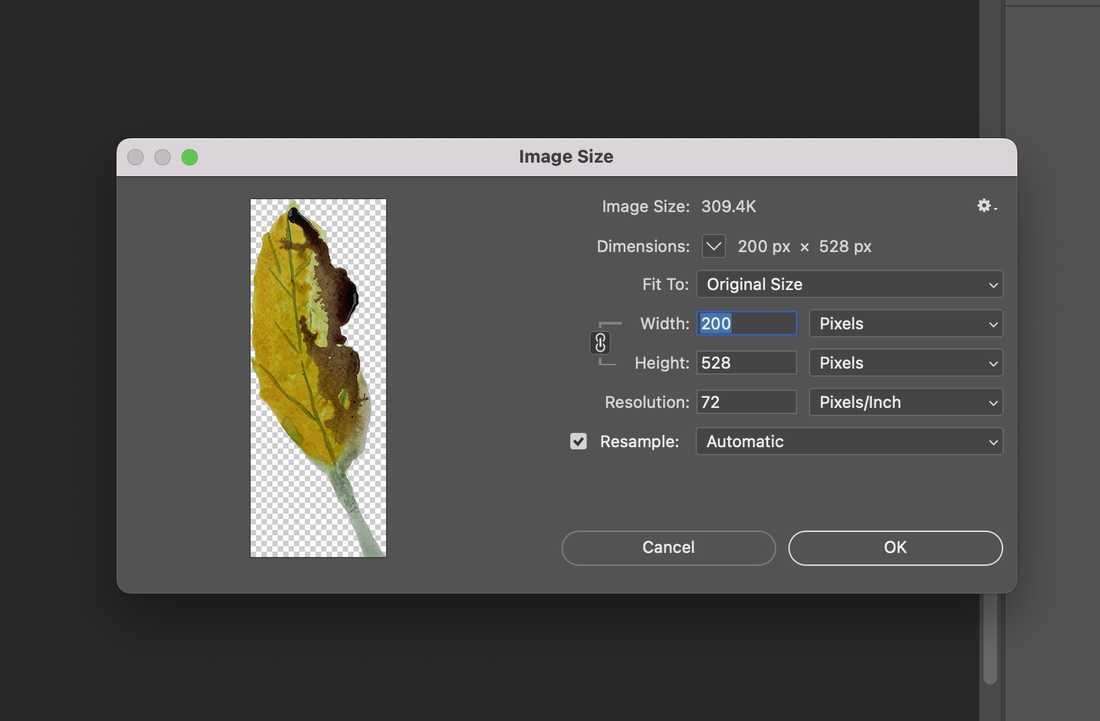 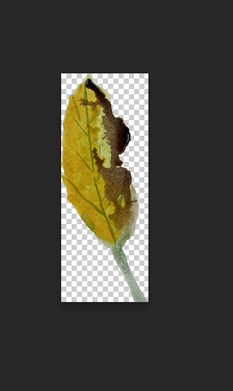 Next, go to the Edit---> Define Pattern. 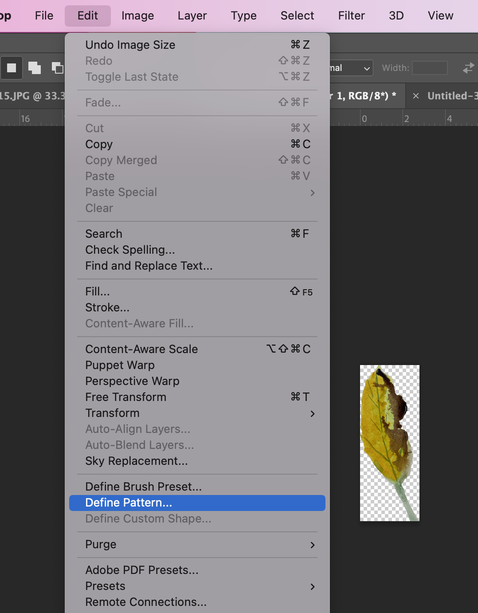 And then make a new canvas and go to Edit--> Fill. 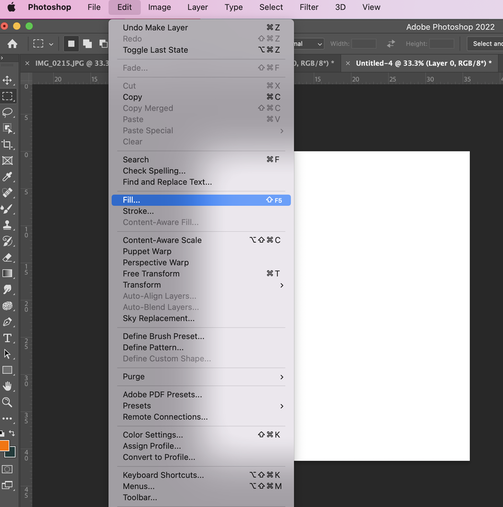 After that,he selects the leaf-shaped pattern he made earlier. At this time, make sure that the script option to fill the entire screen with the pattern is checked. In the case of Charles, I used a random fill. 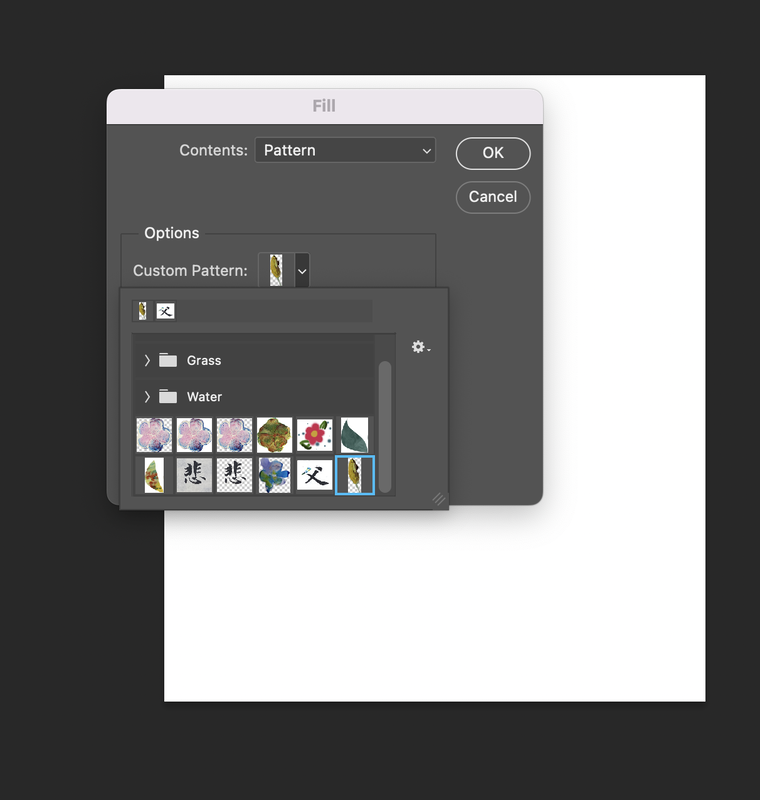 And then adjust the density, scale and other factors like below: 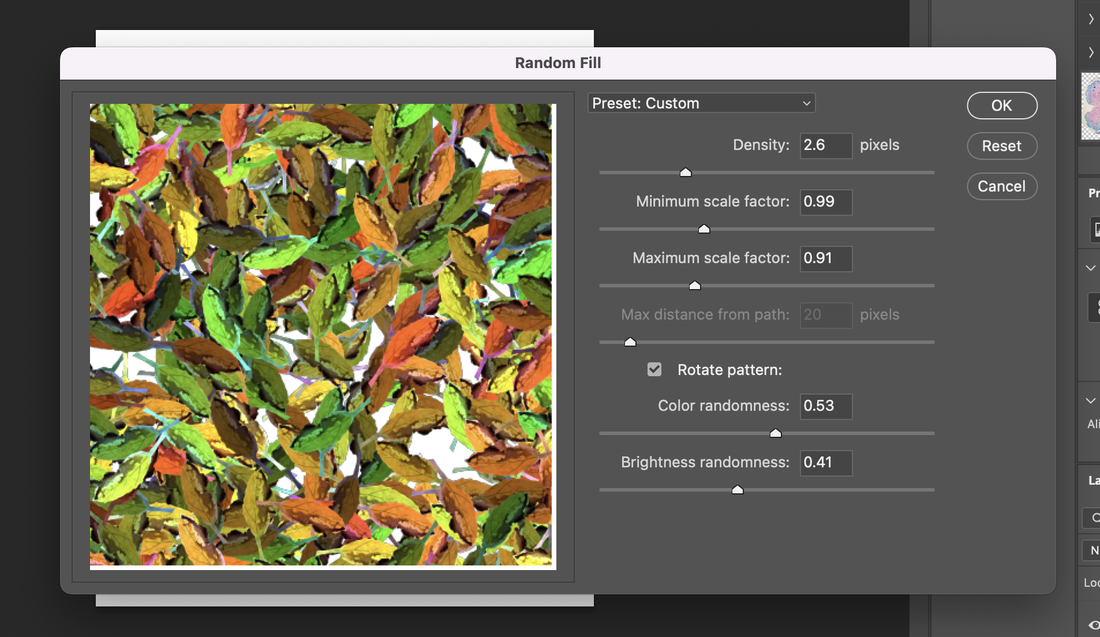  Move to Liquify of the filter to express it as if the leaves are swaying in the wind. 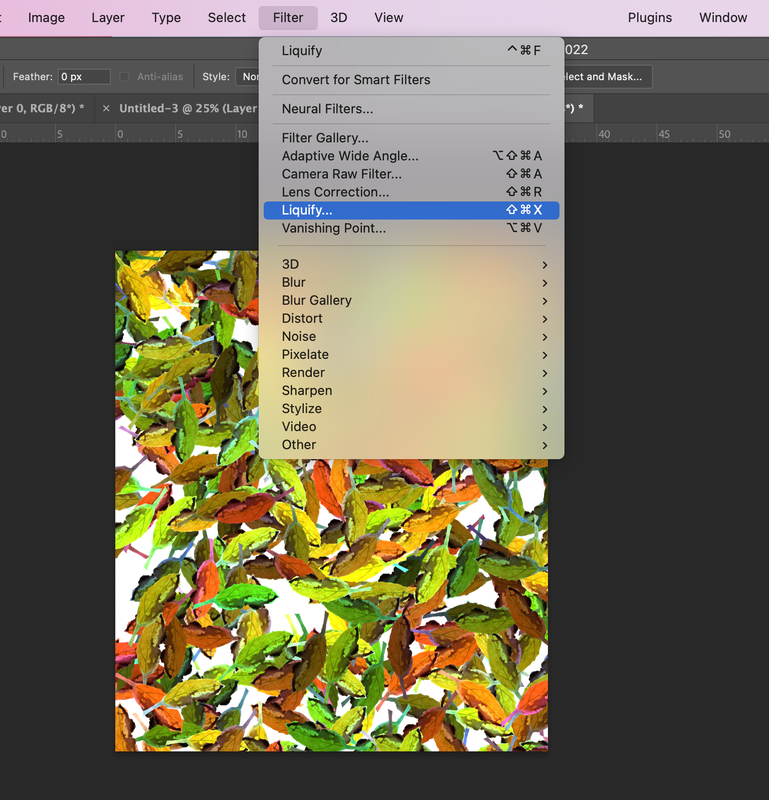 Here is the result after applying the liquify function.
Now move it as shown below to give the effect as if light is shining between these leaves. 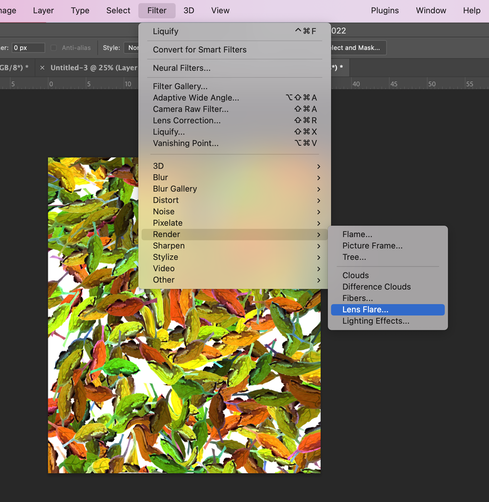 Adjusts the effect, position and size of the light effect. 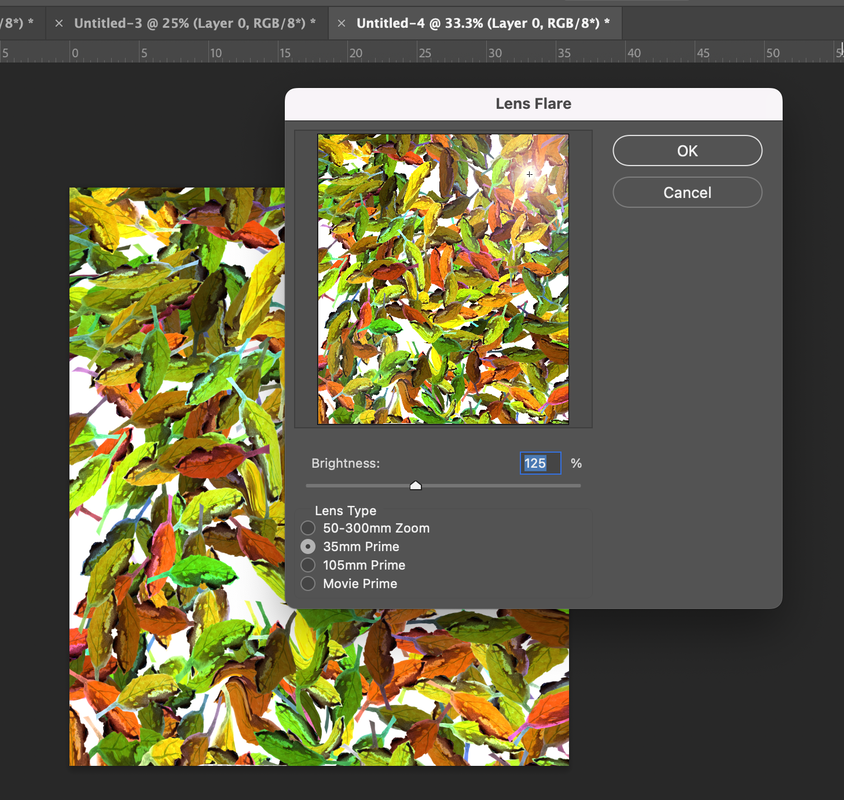 The below is the artwork from Charles. 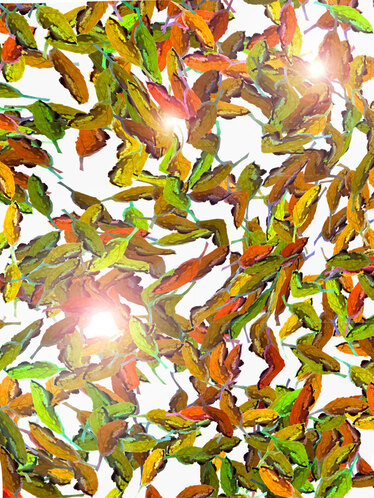 How to transfer a painting to digital artwork with examples. Today, I would like to show you how to select one letter from among beautiful Chinese characters, apply patterns to these characters, and transform them. First, select the text using the rectangle tool of the selection tool and copy it. (copy: command + C )  Image by Amy Pastes the selected text into a new file. Then use the Object selection tool to select the text. (If you select all strokes, hold down the shift key and then click each stroke to select them all.) 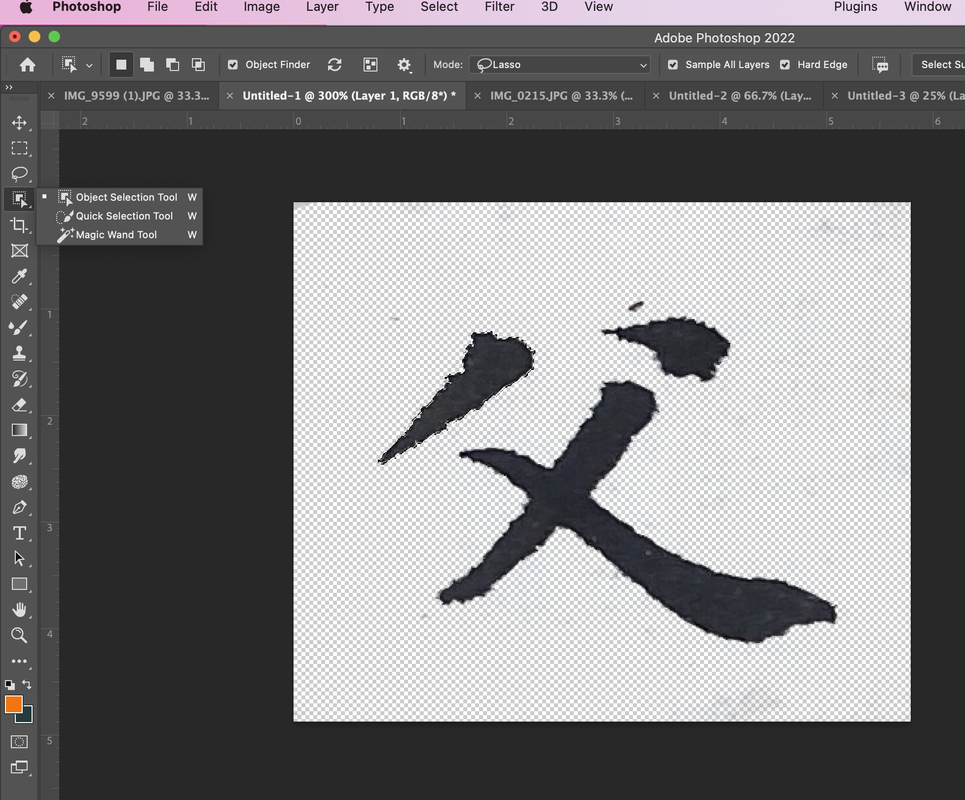 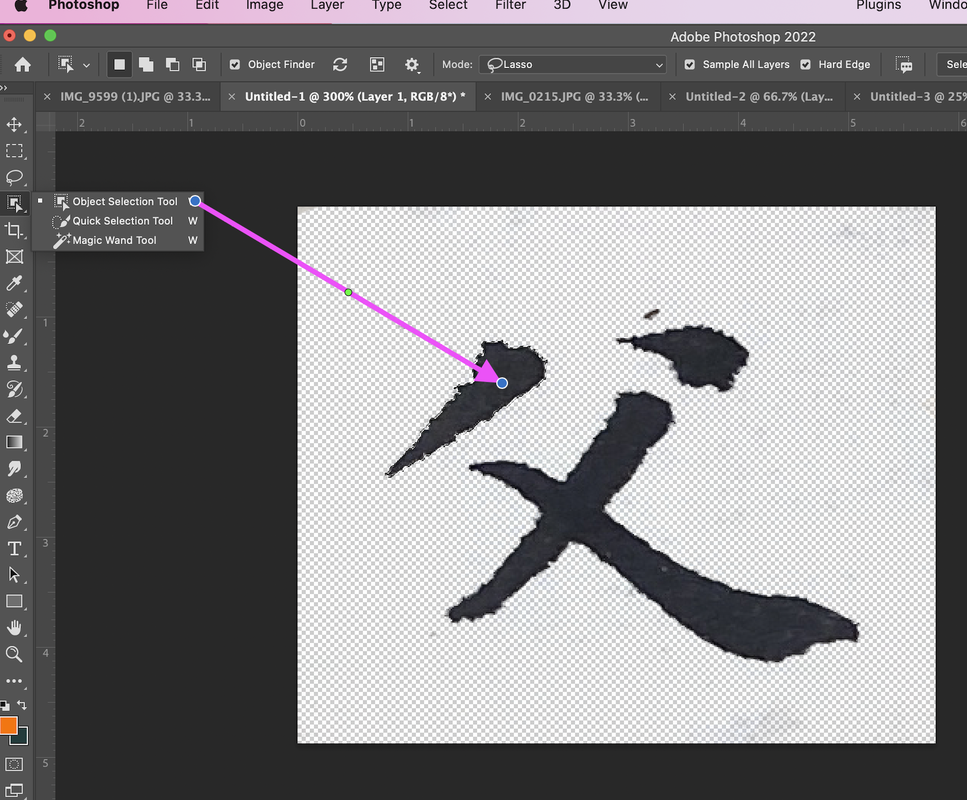 If the object selection tool is working well you should see a blue selection area like below. 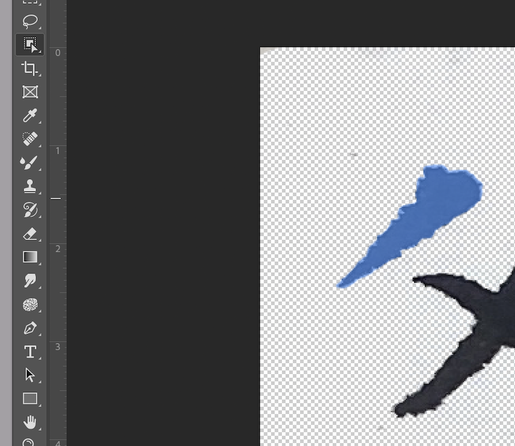 Right-click to go to the Fill menu. 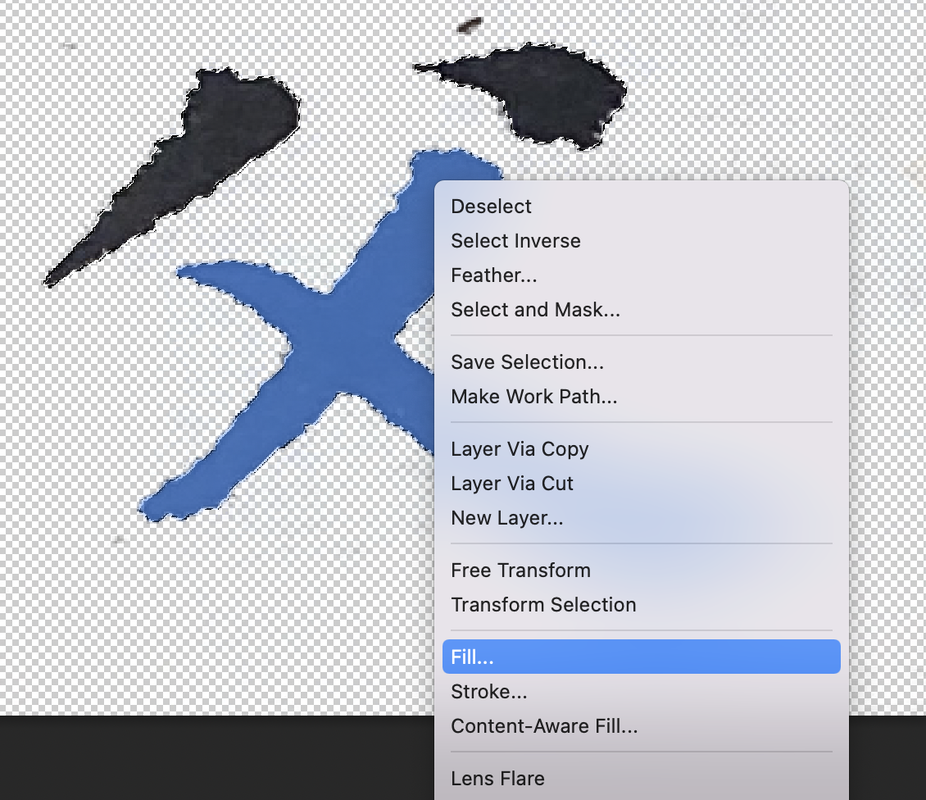 After that click on the pattern you want. 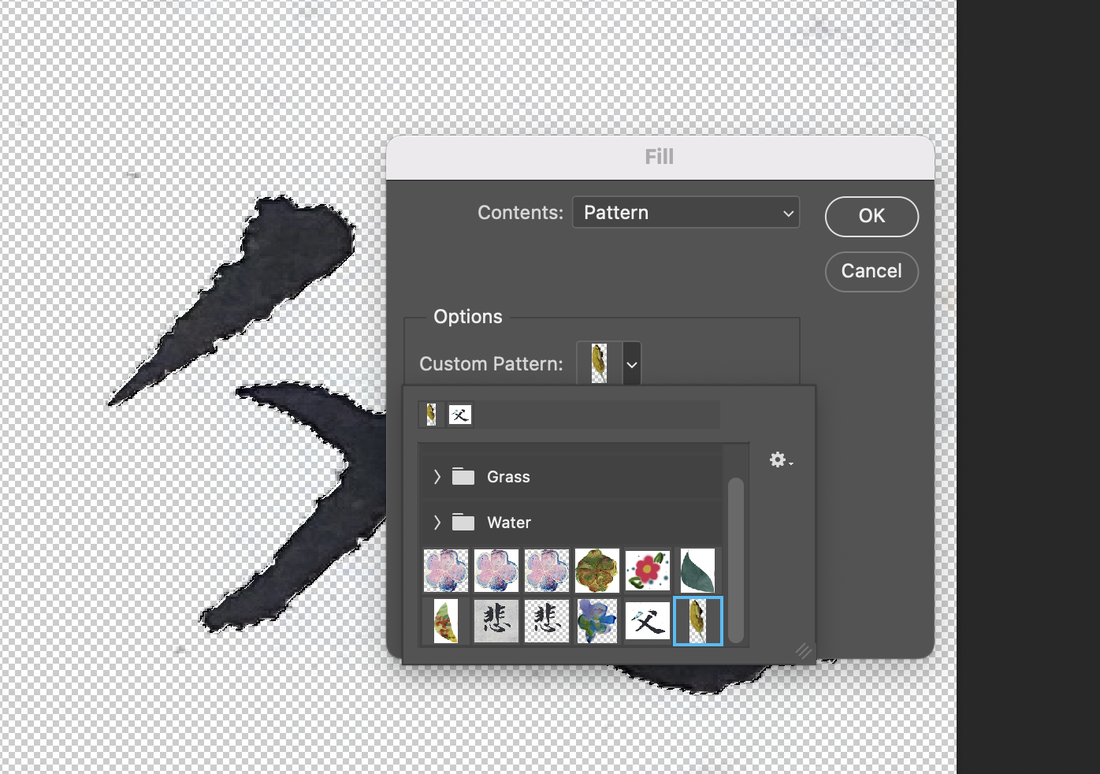 You can see that the pattern is applied to the selected area as shown below. 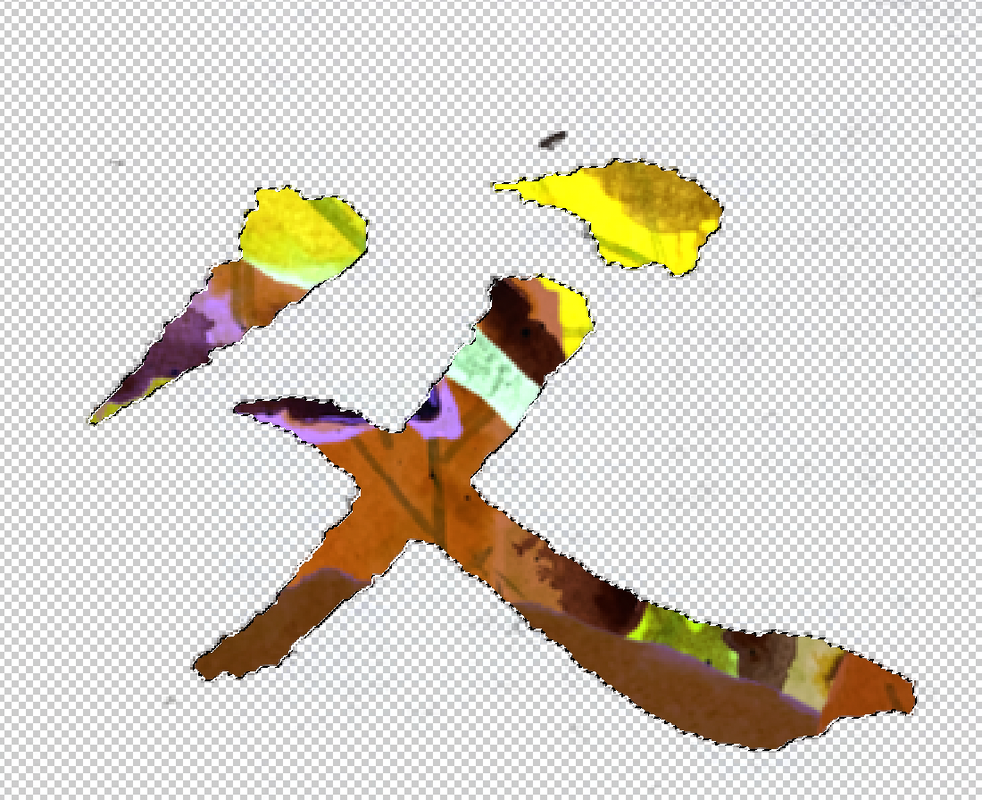 To deform the text, go to the Liquify menu of the filter. 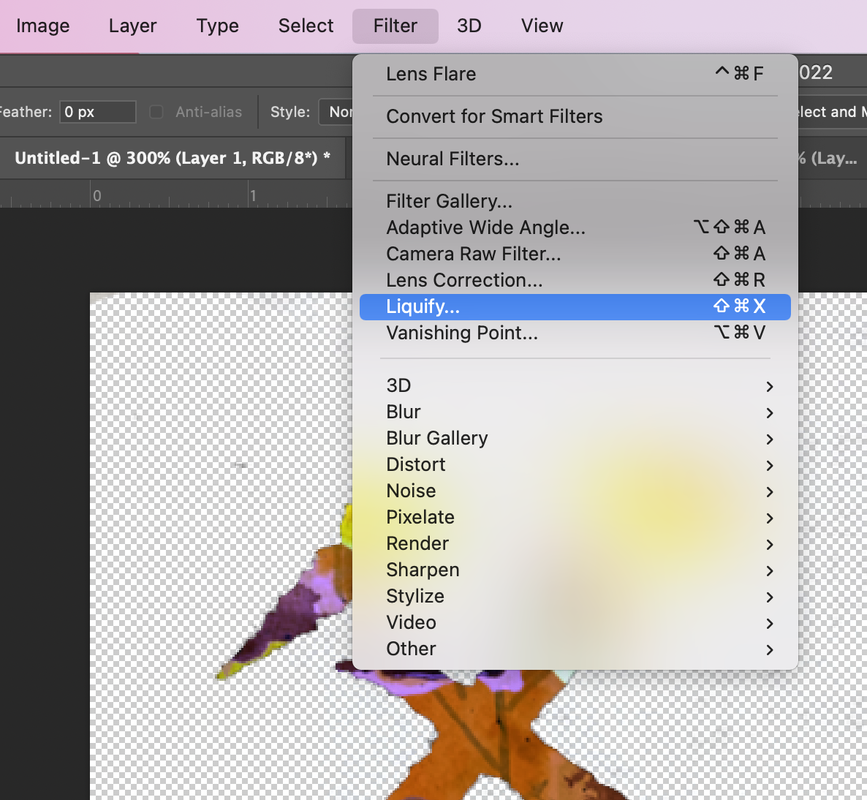 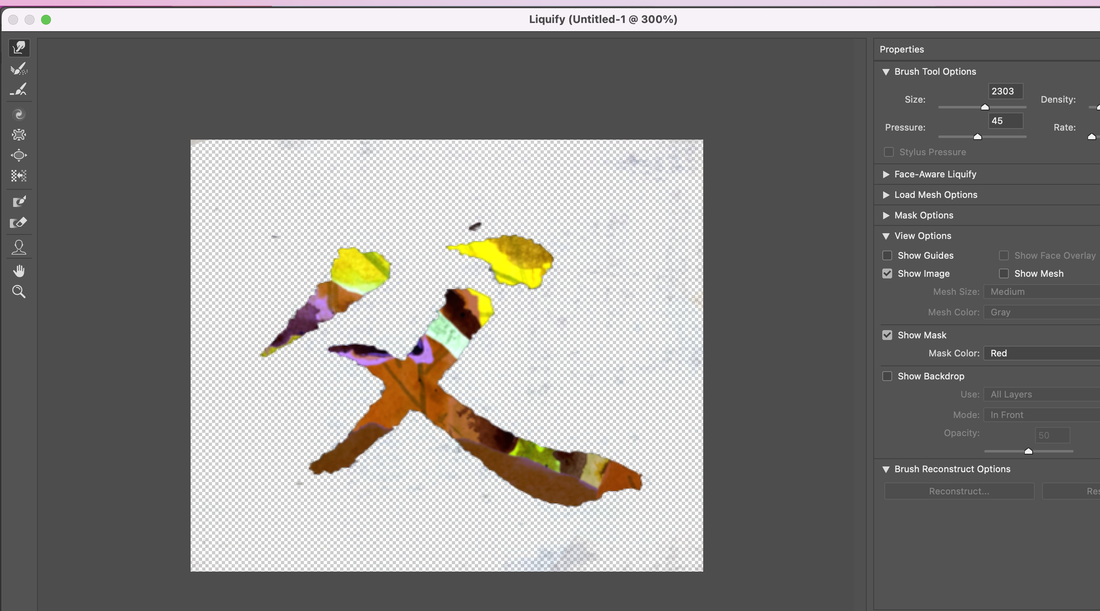 Select the first icon for making it go forward. The icon means Forward warp Tool. 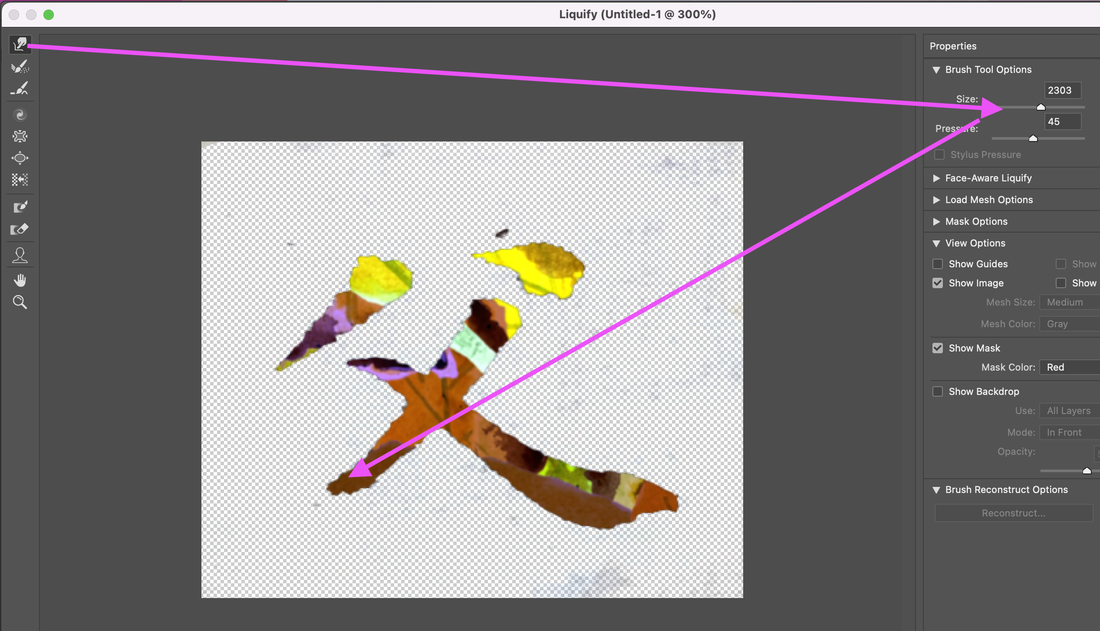 You can see how it was transformed.
|
Myungja Anna KohArtist Categories
All
Archives
July 2024
|

|
Tutorial |

 RSS Feed