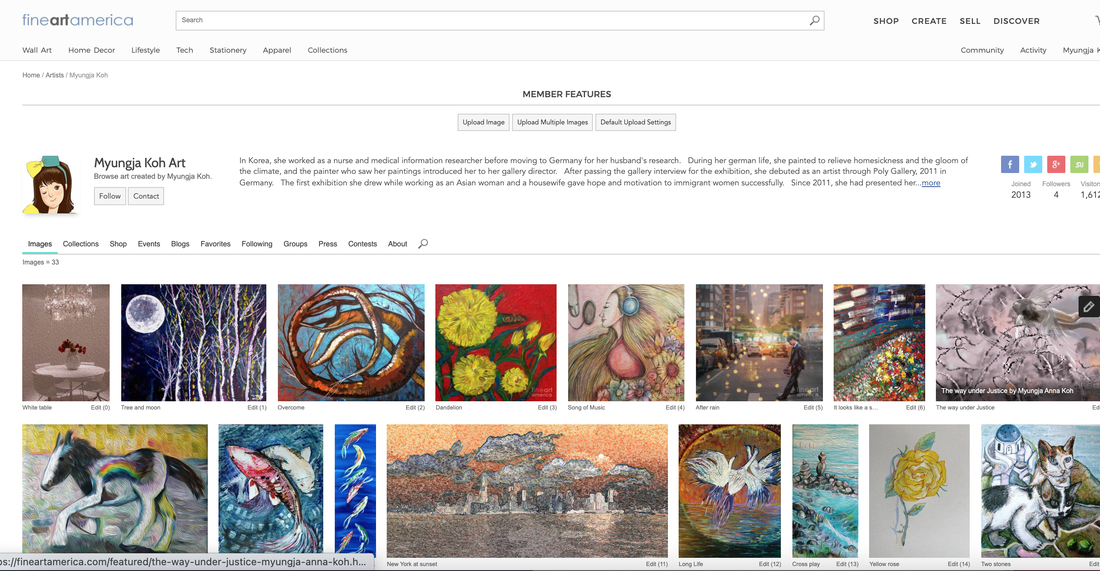
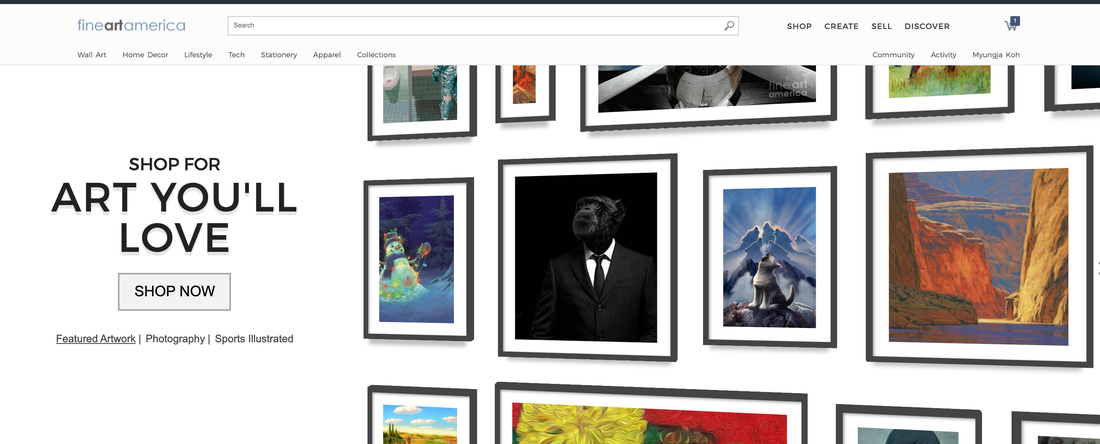
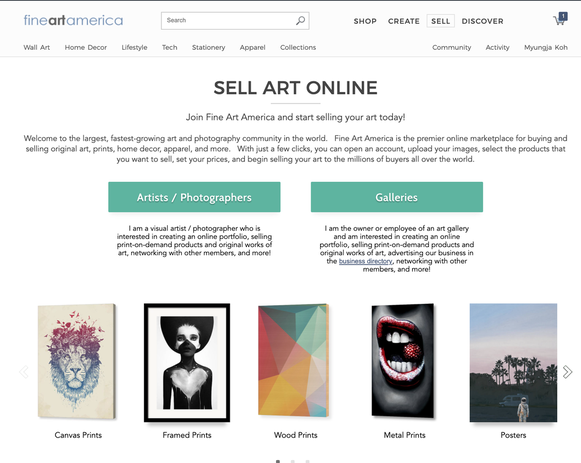
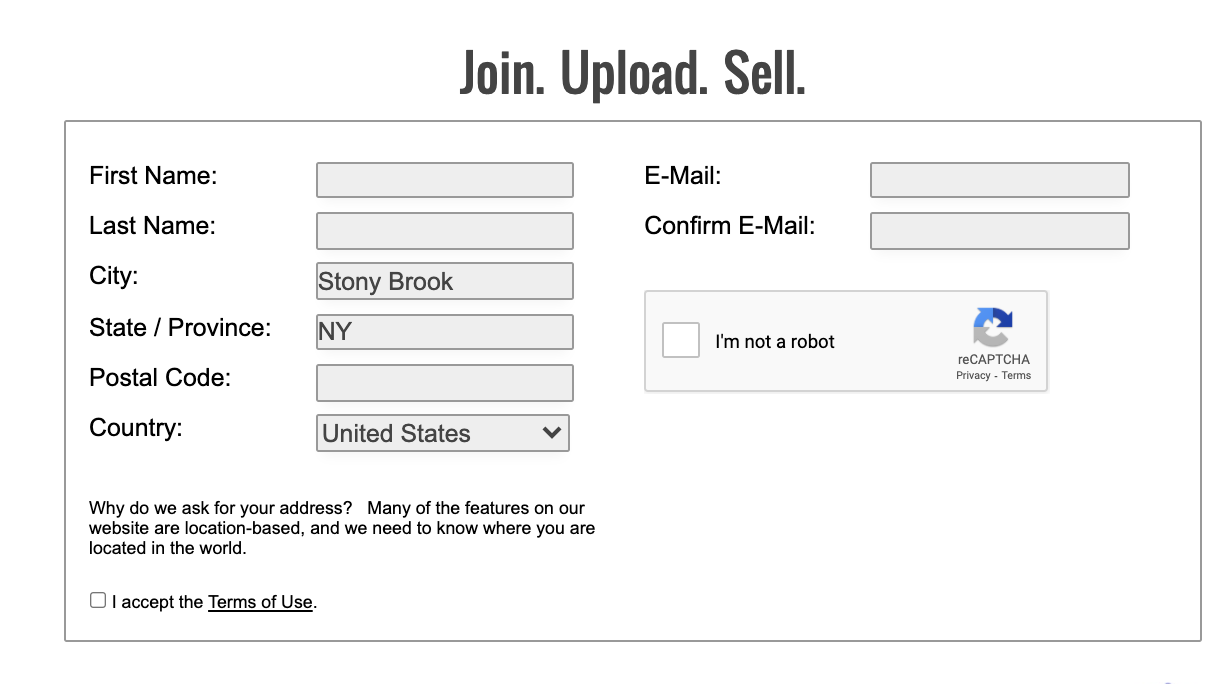
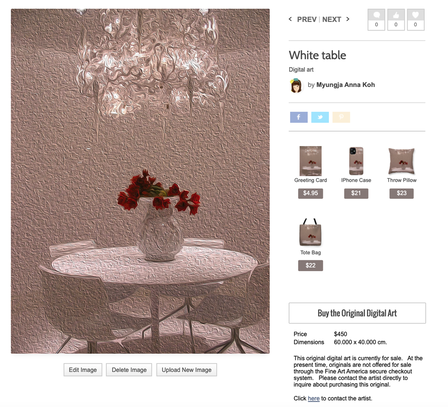
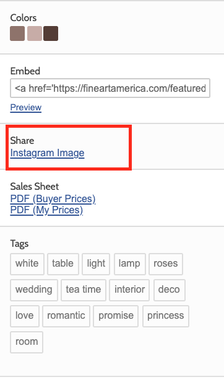
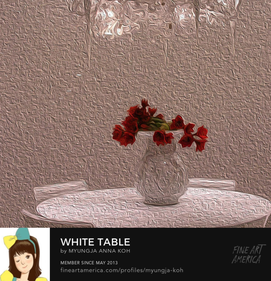
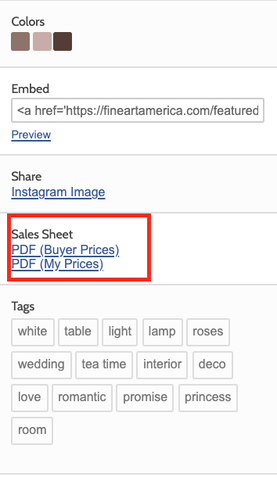
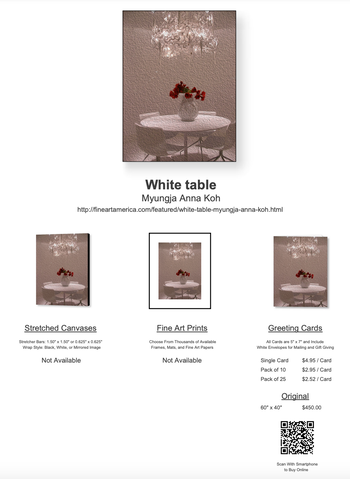
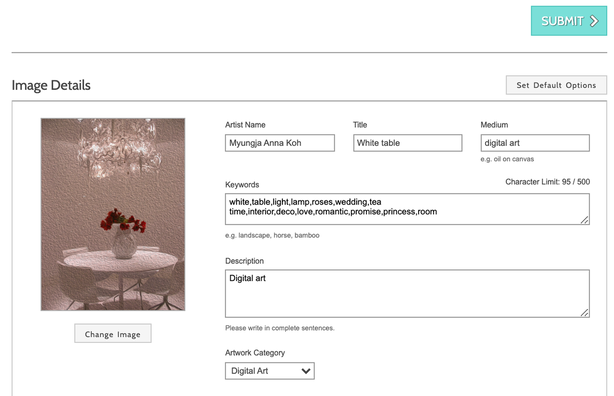
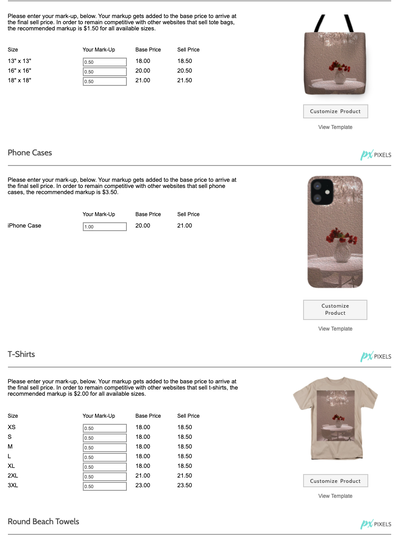
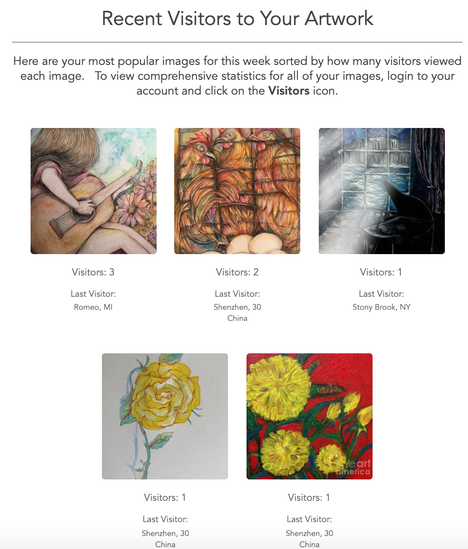
Fine Art America review With the development of the Internet, anyone can upload and sell their work online if they wish. But the competition is fierce because there are so many people who take on that challenge. Therefore, it would be lucky if your work sells like crazy on the Internet. At first, I thought that I would get attention and sell them as soon as I uploaded my paintings online. However, as time goes by, I realize that there are many hidden masters globally, and I am just grateful that there is a space on the Internet to show my drawings instead of selling purpose. And when I put it online like this, over time, my work may sell. I would like to introduce Fine Art America among various sites where you can show your work on the Internet, check the reaction, and see how it is sold as a product. I joined this site when I first came to the United States and have been using it up to now, updating my works. Up to 25 images are free, and you have to pay to upload more images. Currently, I am satisfied with only the free service and use it. Fine Art America is the world's largest art marketplace and print-on-demand technology company. 100,000+ Hundreds of thousands of independent artists from all over the world use Fine Art America to sell wall art, home decor, apparel, and more. If you click the cell menu among the upper menus, you will see a screen where you can select whether to sell as an artist / Photographer or in a gallery unit. Registration process is easy and simple, you can just put your infos in the blanks like below. Below is the screen displayed when the picture is registered. It can be applied not only to the frame style but also to products such as bags, cell phone cases, and blankets. Click the Share link in the menu on the right to get images for use on Instagram Click on the sales sheet to get a catalog of buyers to deliver to customers. The window to register an image is as follows. If sold as a different product, you can try applying price, style, etc. The reason I have maintained this site for a long time is because of the report function that keeps me informed of the response every week when I upload my work. At the time, 33 images were free, but now they are limited to 25. Below are images uploaded so far. I hope this brief review will be of some help to artists who are determined to start over.
0 Comments
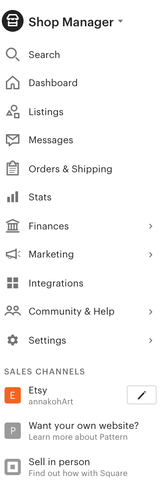
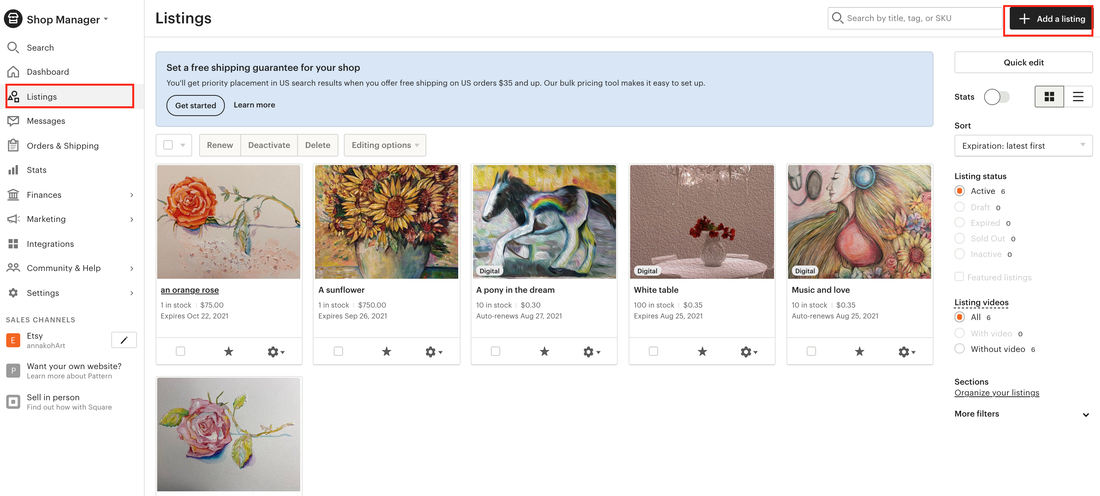
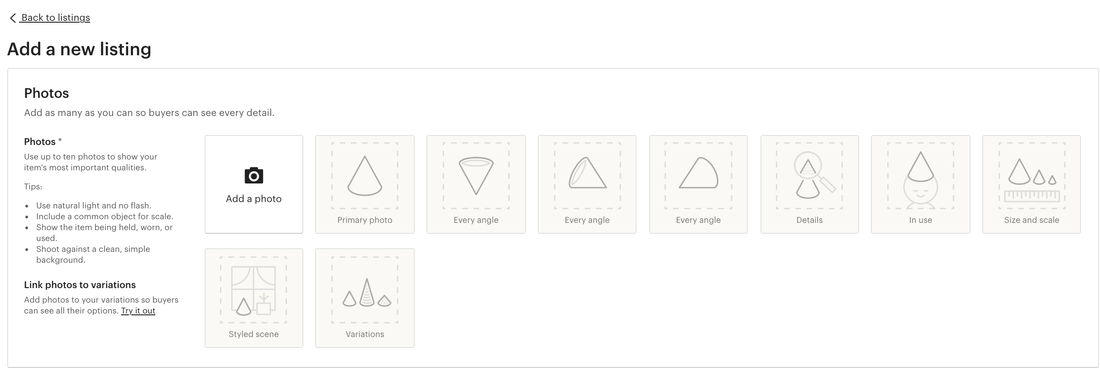
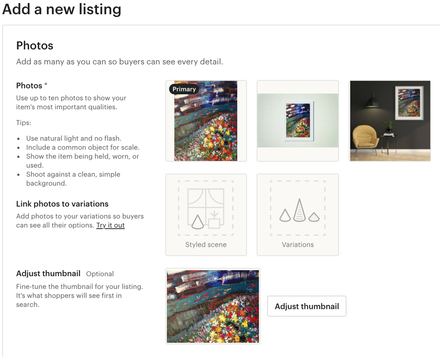
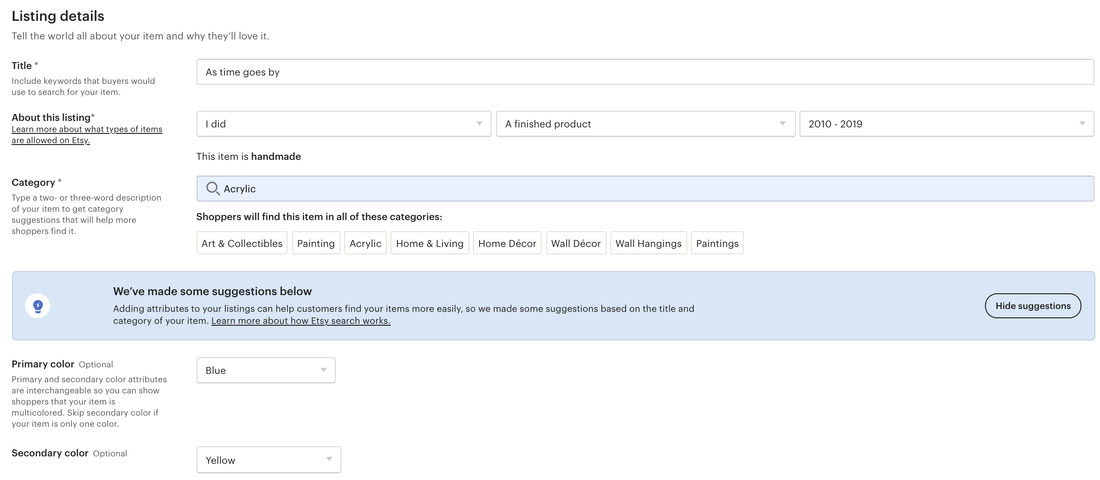
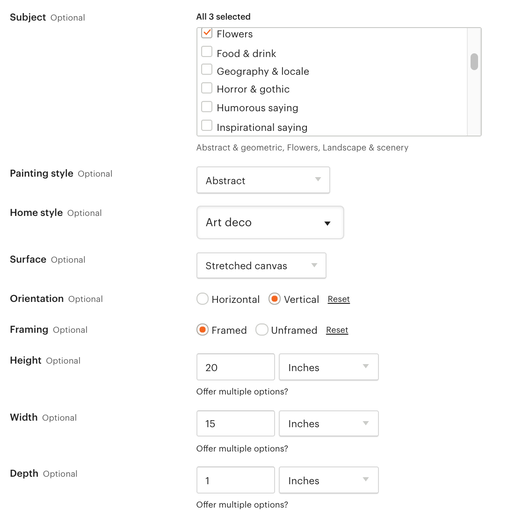
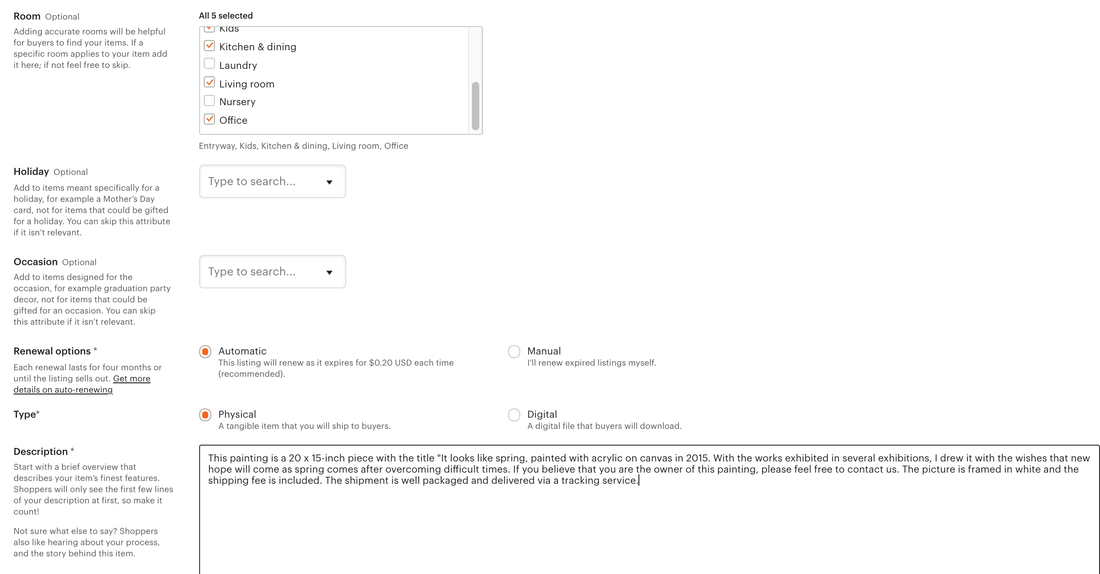
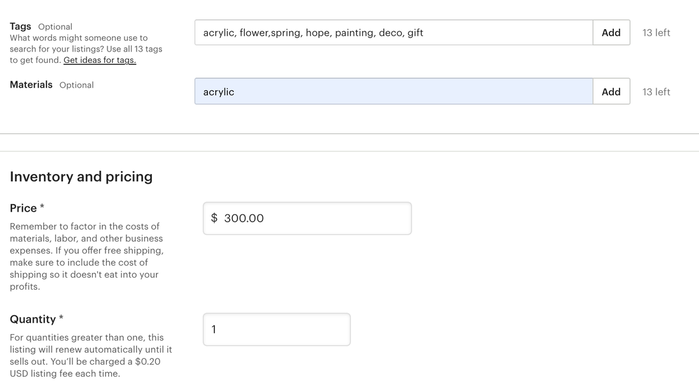
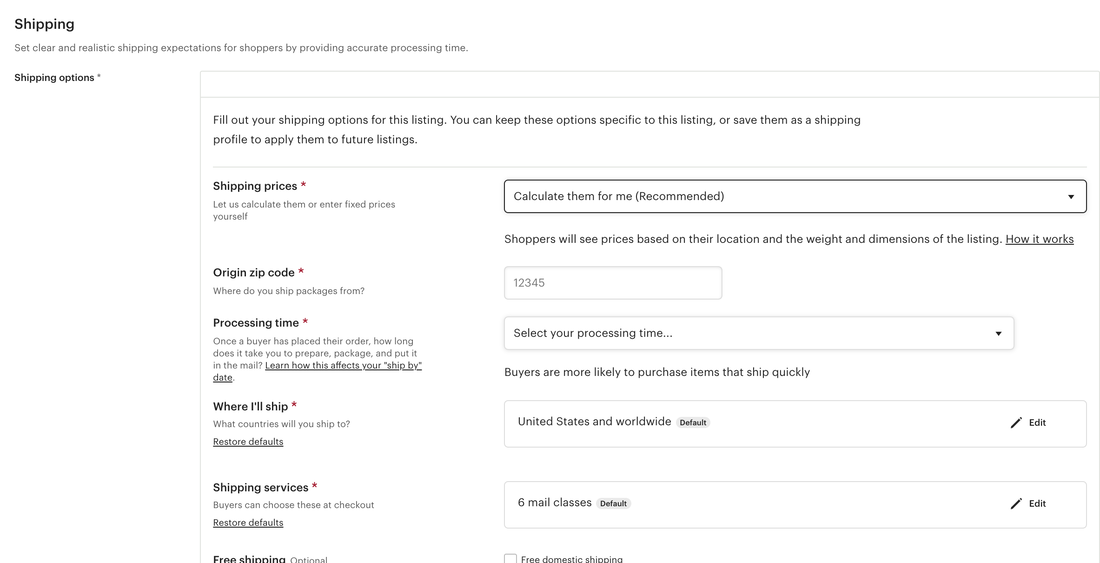
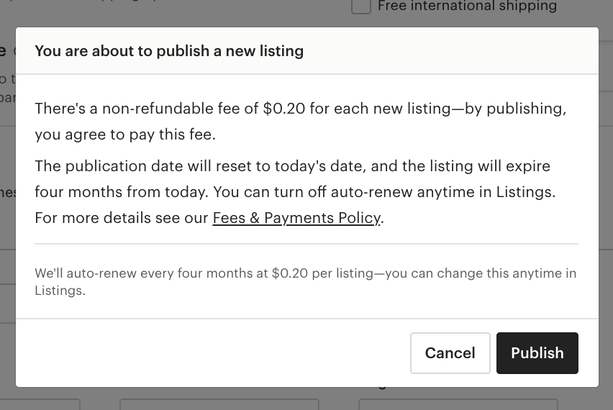
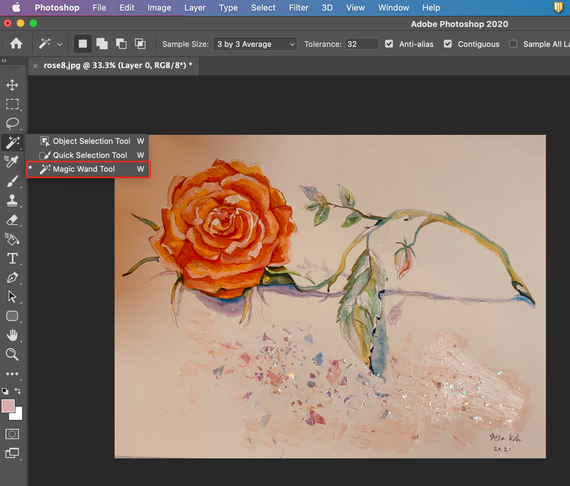
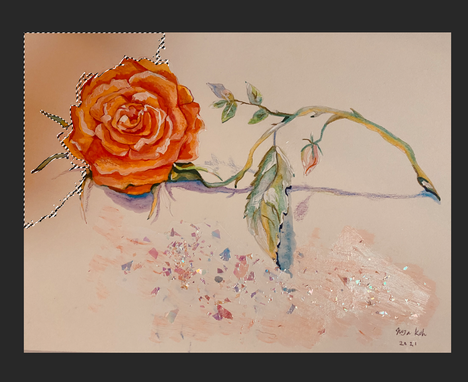
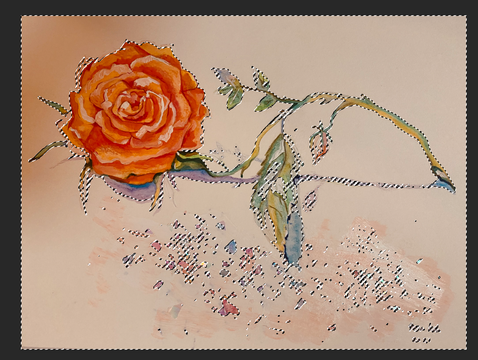
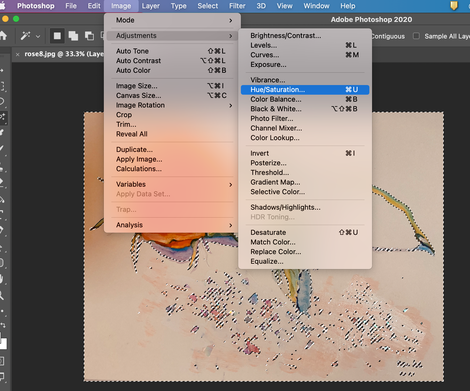
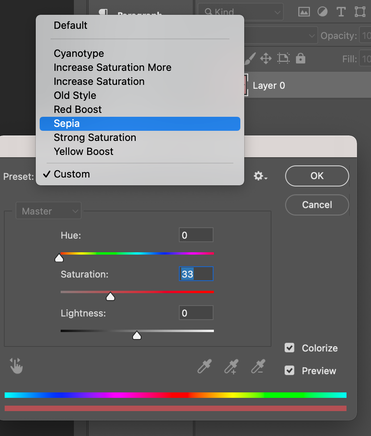
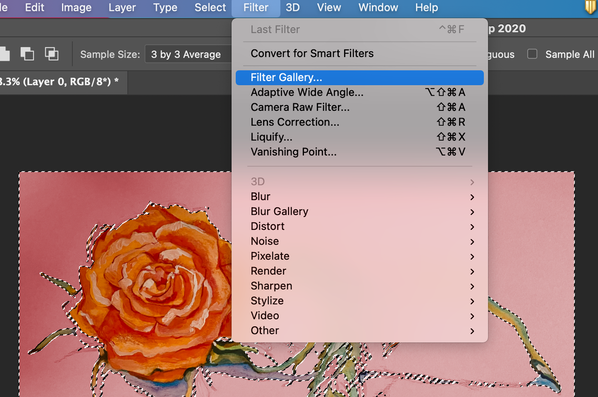
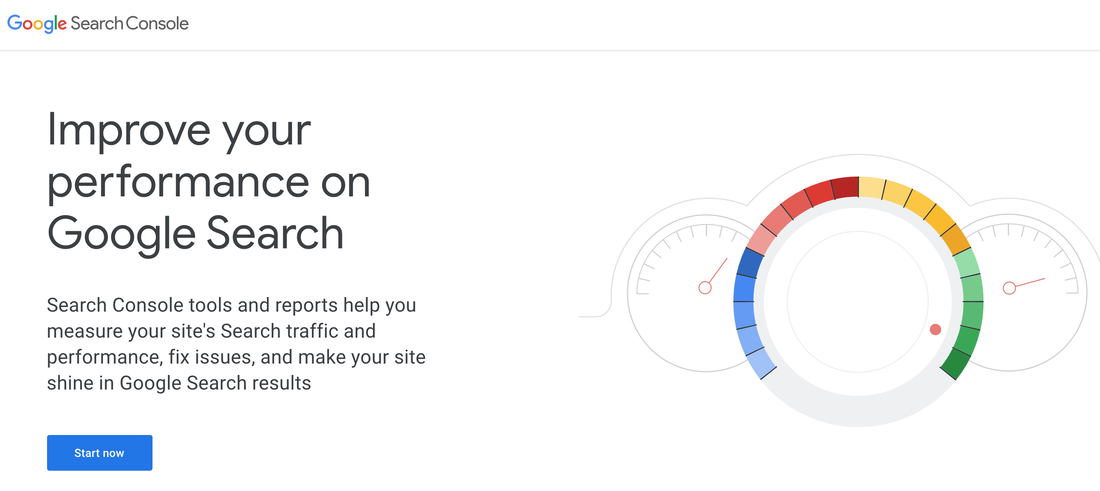
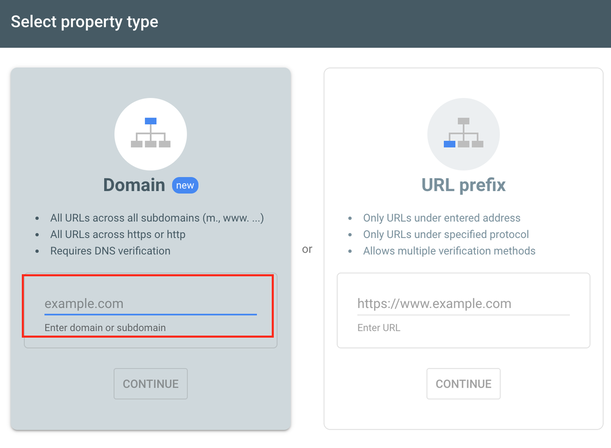
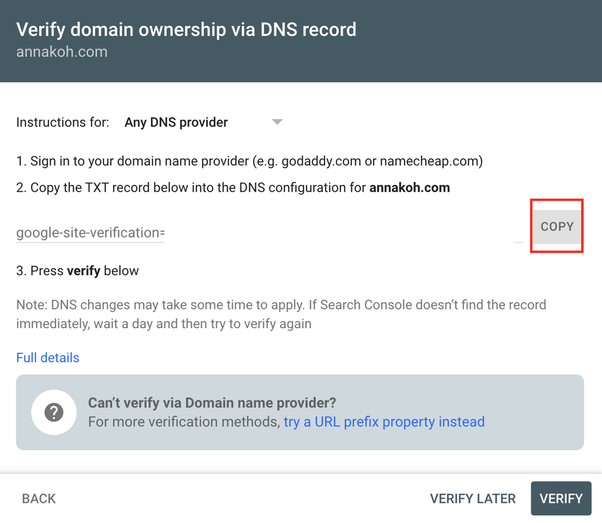
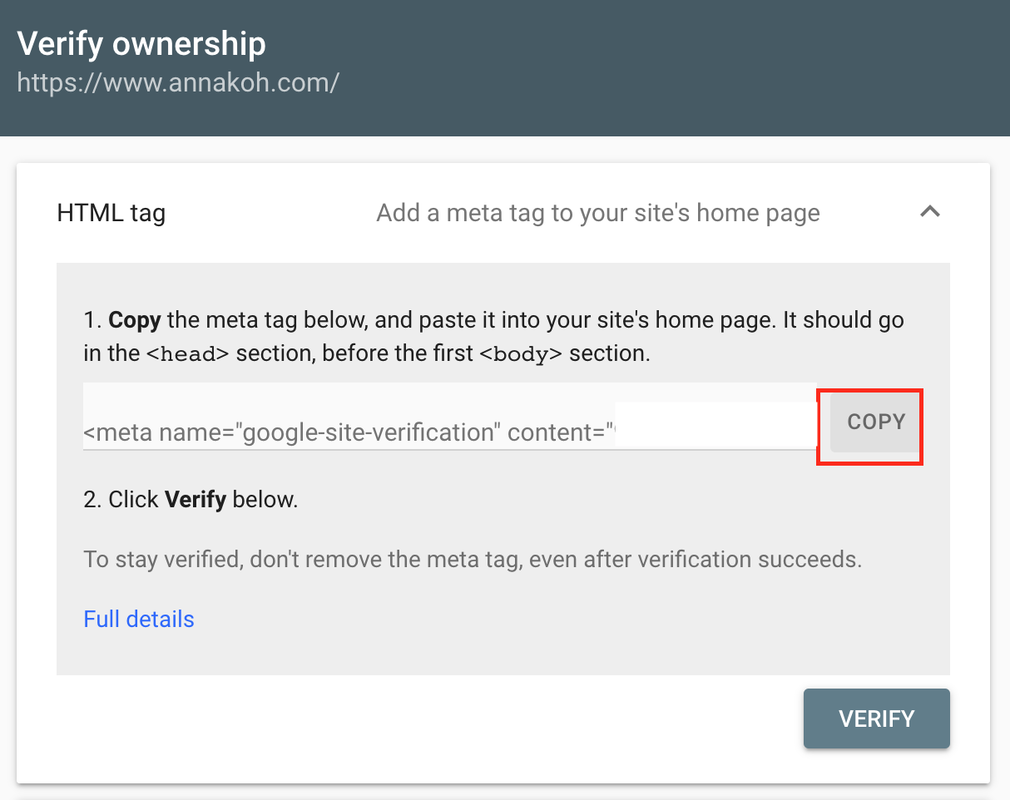
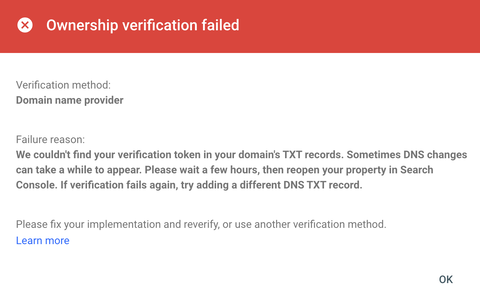
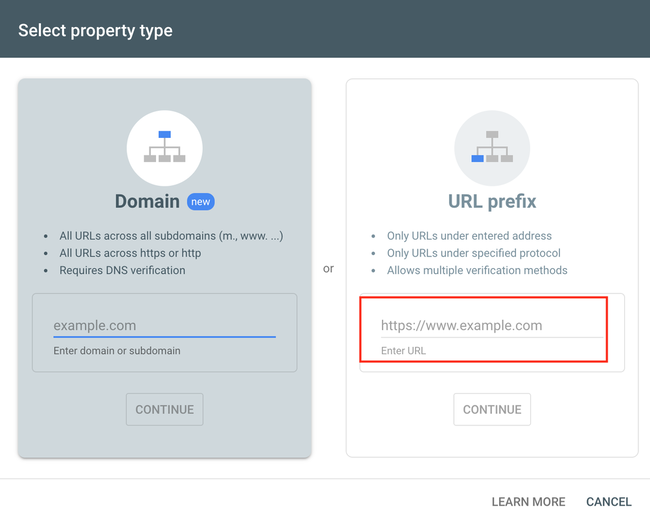
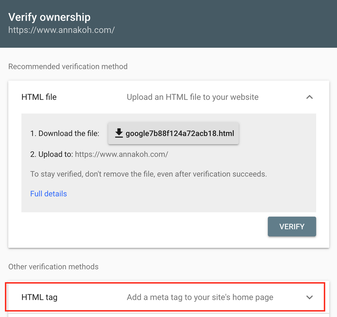
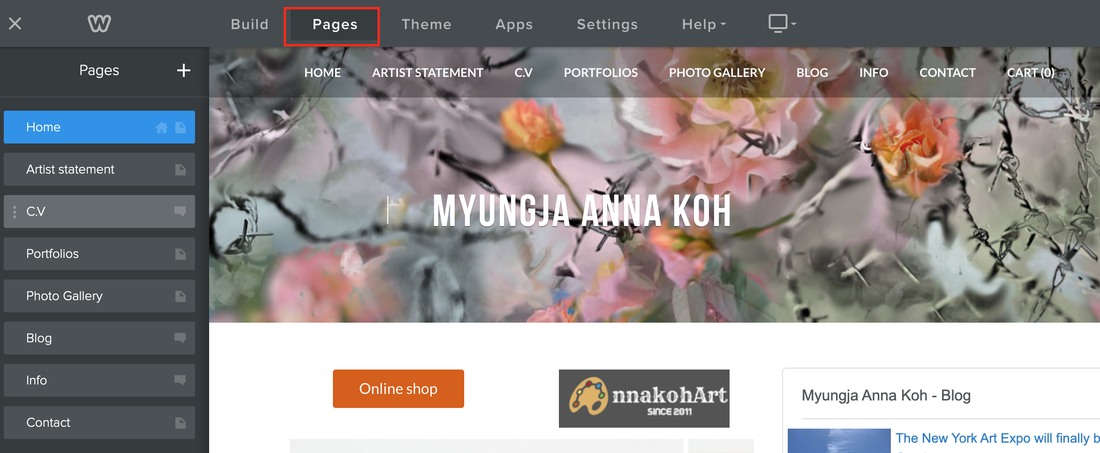
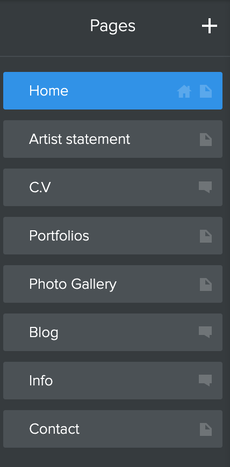
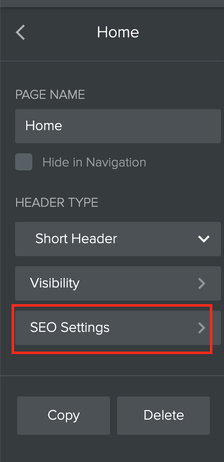
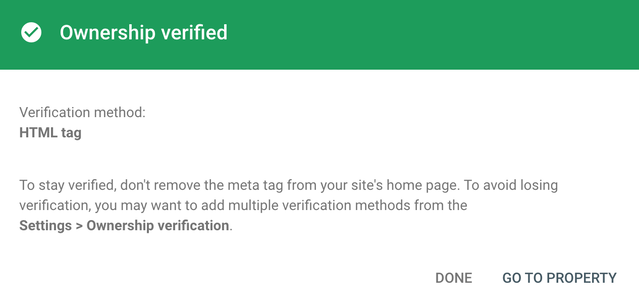
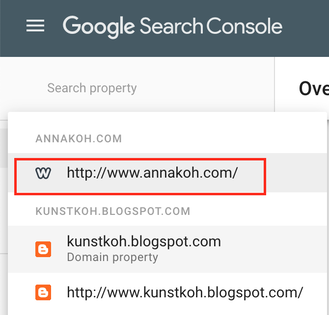
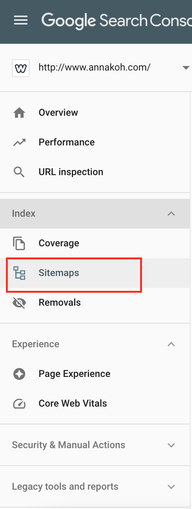
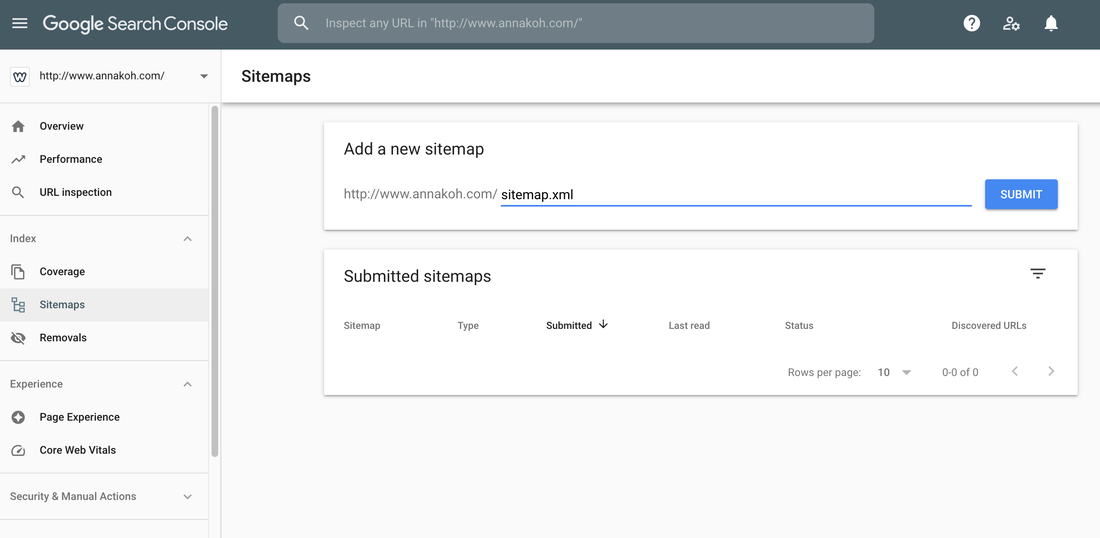
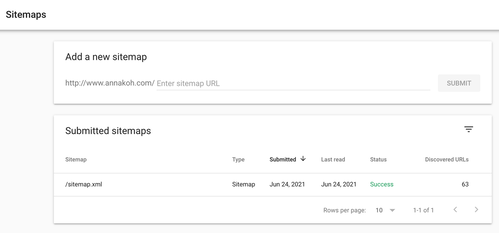
How to register your painting on Etsy. In the previous post, I briefly introduced how to sign up for Etsy while introducing the Etsy site. go to the post: Selling paintings by Etsy. Today I want to show you how to register a painting for sale, as I said in a previous post. First of all, when you sign up for Etsy, the following menu screen will appear. You can add a new picture by moving to Listing in the menu and clicking the Add a Listing button. The first step is to register the image of the painting you want to sell. Use up to ten photos to show your item's most important qualities. Lists look best on photos that are at least 2000 pixels wide and not less than 10 MB in size. This is the next step of uploading a 5-15 second video that can be viewed at a glance or the process of a product The next step is to enter details about the product, asking what is title, who made it, when it was made, in which category, what color it is, and so on. And then, you can select the subject types(up to 3), painting style, etc., and, most of all, you should put the product's size in the blank carefully. And you can then choose up to five choices to recommend to the next customer in which room this painting should be hung. And if you register a painting through the renewal option, you can choose whether to pay the registration fee of $0.20 manually or automatically after 4 months of Expire. And in order to reduce confusion for consumers, it is necessary to check whether the above product is a physically delivered work or whether it is simply an image to download. And the description explains the work. Here, we talk about whether there is a frame for the picture, whether the shipping cost is included, what type of delivery it will be, and so on. Then, when you search for a work, you enter a tag that becomes a keyword for the search, and set the price and quantity. If there is a situation that you want to add personally and convey, turn on this button and write the contents of each. Then, as the last step, enter the shipping information and click the preview button below to check if it was entered correctly. After confirming, click the Publish button, and the following window will appear. Confirm that the picture has been added. I wish you all a wonderful and successful registration of your drawings on Etsy How to change only background color in Photoshop. After drawing an orange rose recently, I am working on digitizing this painting. Physically drawing pictures gives me great pleasure, but digitizing them later is also a meaningful experience. Because I can reinterpret the concept from various angles, I can see that the picture changes without physical modification. Of course, since I work on my drawings, I have the advantage of being able to change them digitally without any copyright issues freely. Today I want to show you how to adjust the background color and mood of the background, leaving only the most fundamental objects. It's very simple. Those who are new to Photoshop or who want to change their drawings to a different atmosphere would be good to see. First of all, you need to load the picture file you want to change in Photoshop, and I opened the orange rose that I recently worked on. Then, take out the magic wand tool from the left toolbar and select the background. When using this magic wand for the first time, it is difficult to capture the desired object well at once. It is normal for partial partial selection as shown below. In this case, if you click the background again while holding down the shift key, only the entire background is selected as shown below. In that state, go to Image ---> Adjustments--> Hue/Saturation. I made changes by setting the mode values as follows. And check the results. You can also apply various textures by selecting the filter gallery from the menu bar above. How to register google search consoleYou can use Google Search Console to measure and troubleshoot your site's search traffic and performance, and to make your site stand out in Google search results. A Google account is required to proceed with this article. If you do not have a Google Account yet, please create a new one using the link below and clicking Create Account. Step 1: Register Google Webmaster Tools Go to Google Webmaster Tools (Search Console). Click the Get Started button. (Login with Google account is required.) There are two ways to start Google Search Console. One way is by using the URL prefix and the other is by using the domain. To use the URL prefix, http and https must be registered separately, so if you want to register at the same time, it is recommended to register as a domain. Enter your domain and click the Continue button. (Note: If you have registered the website at least once through your account, this process can be skipped. To add a new site, click Attribute Search in the upper left corner and click Add Attribute.) You then need to copy the HTML code that Google gives you. When the meta tag appears, click the Copy button to copy it. Make sure to leave this page open.. Now from within the Weebly Editor go to Settings > SEO and paste the line of code you copied from Google into the Header box. Be sure to Save and Publish your Weebly website. 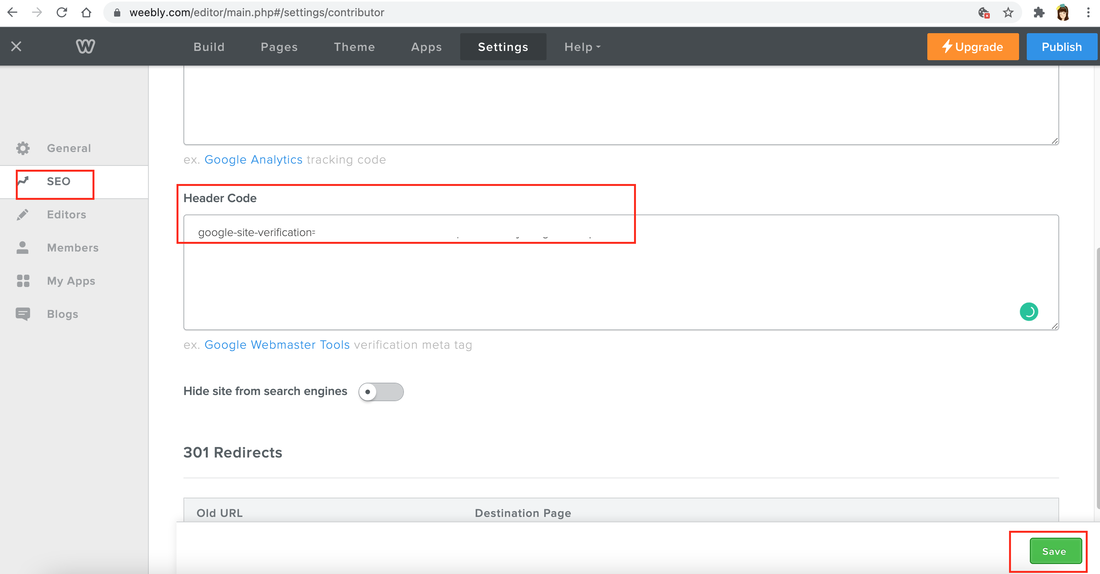 When you’ve done this, hit the Verify button on Google Webmaster Tools interface. Give it a few minutes then your website will be verified with Google. In my case, when I click the "verify" button, I found the following message: In the message window, someone told me to wait for a while, but something didn't feel right. Like everyone else, I wanted to quickly see the green window that ownership was recognized. So I decided to try another way. This time, I went into the URL below. Then, in the Verify Ownership window below, you will see a phrase to copy the HTML code, click the Copy button. In that state, go to the Weebly editing site and click the page on the upper bar. First, if you press the home button on the left, you will see a menu like the screen on the right below. Now, simply paste the copied code into the header code section below. Don't forget to hit the publish button! Then, when you return to the Ownership Verify window in Google search Console(Google webmaster tool) and press the Verify button, the following message window will finally appear. And you can see that the site has been added to the Google Search Console site as shown in red below. If you've come this far, but it's been difficult, the next thing to do is to add a sitemap of the Google Search Console site. A sitemap is a file that contains a list of all your website’s pages URL’s. It provides the different search engines such as Google with relevant information about your website’s URL’s and structure. o submit your Weebly sitemap:
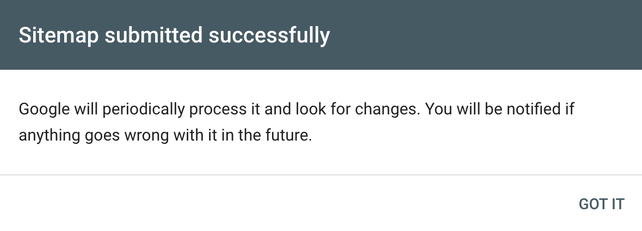
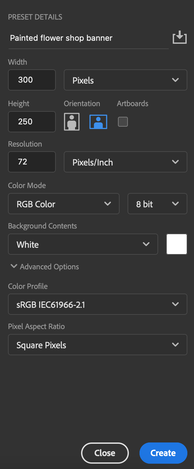
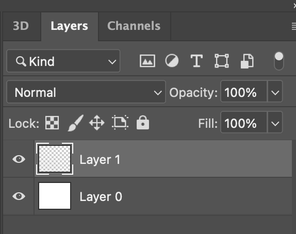
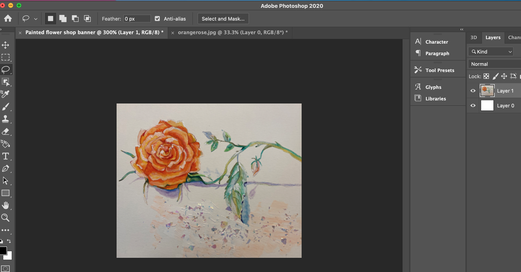
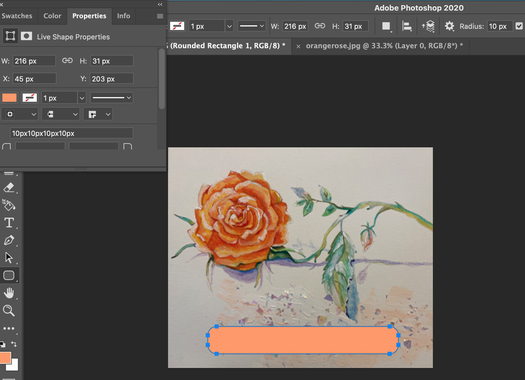
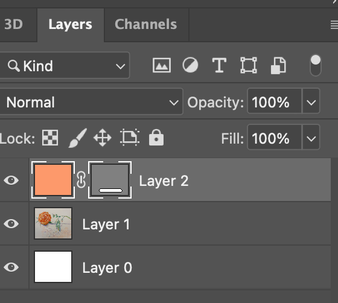
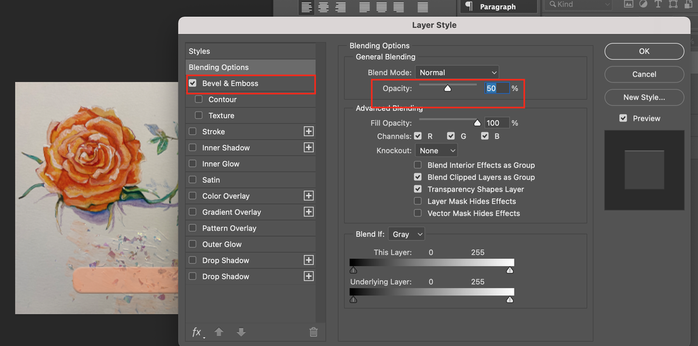
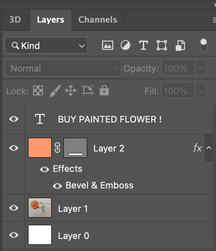
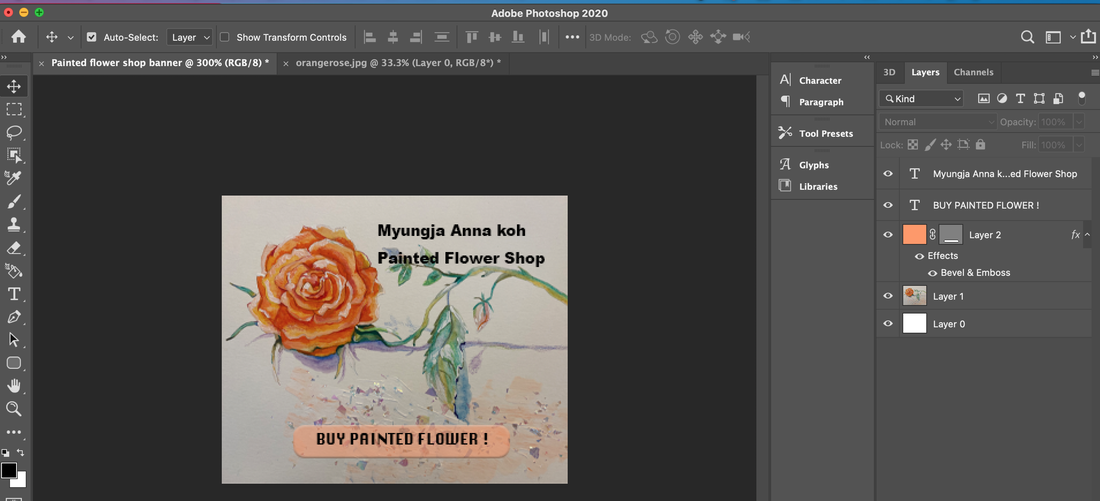
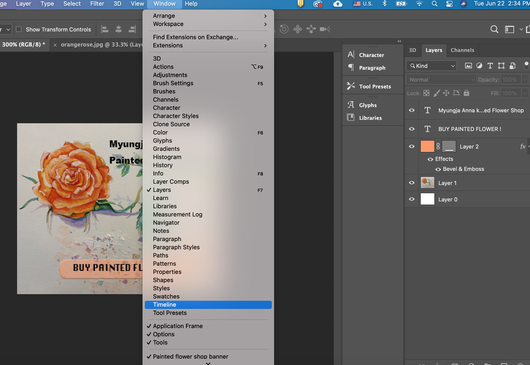
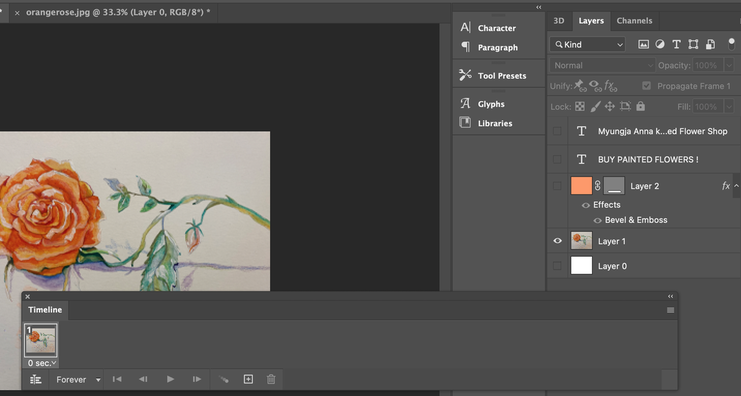
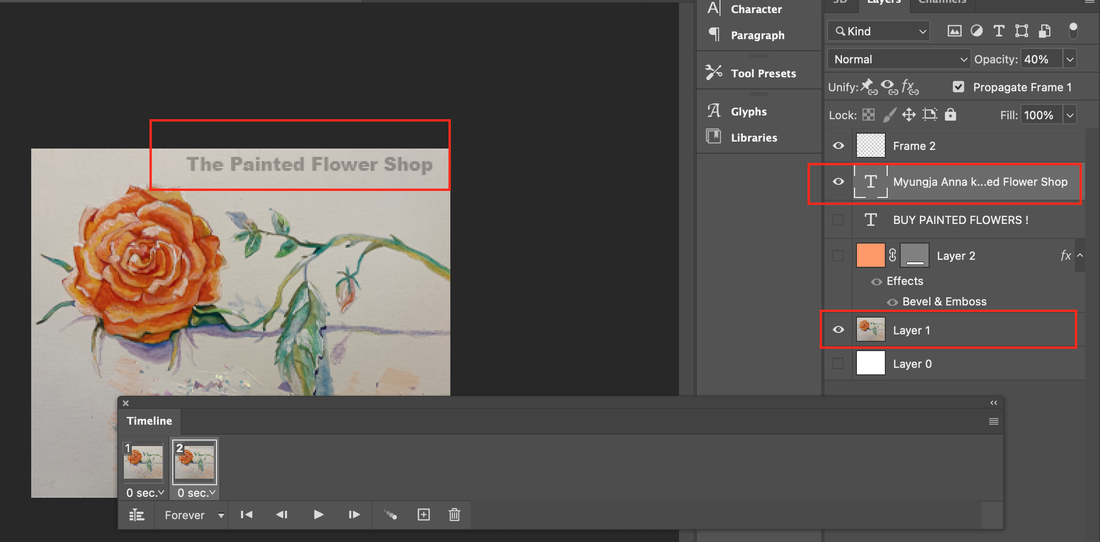
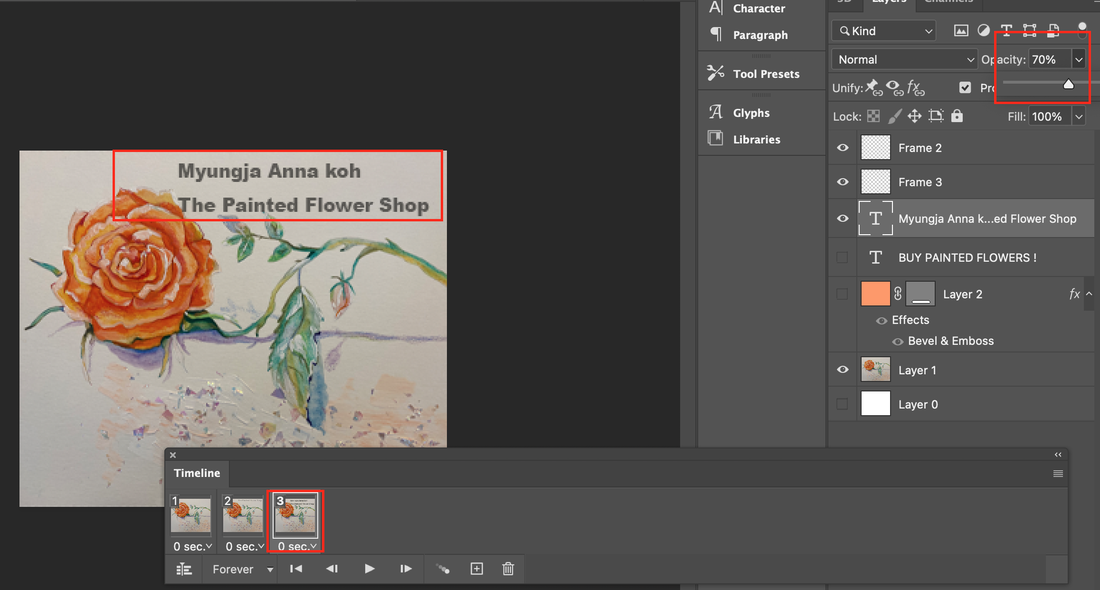
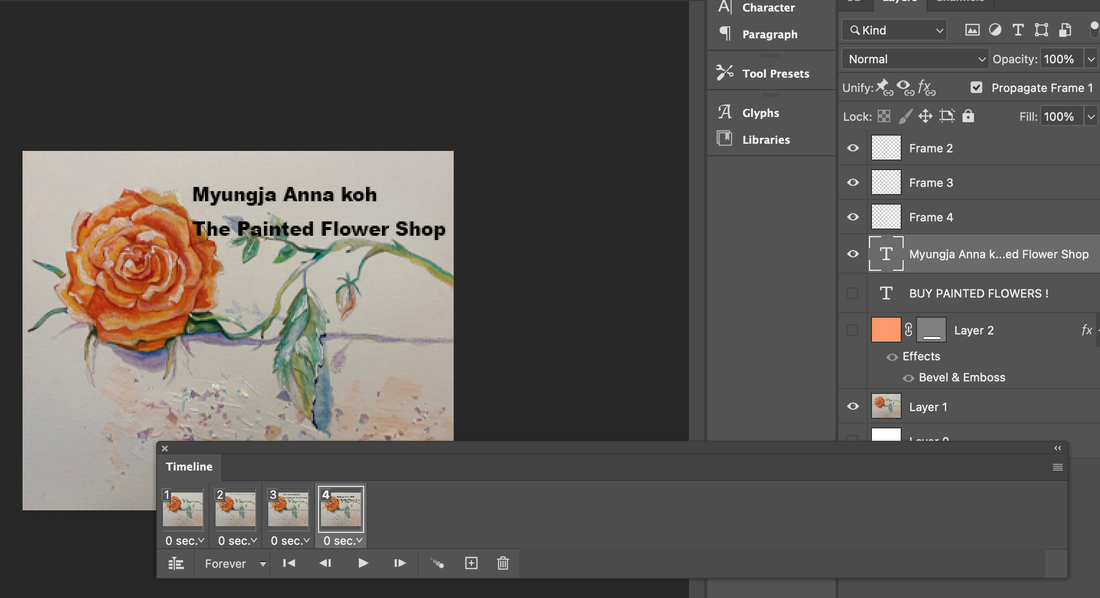
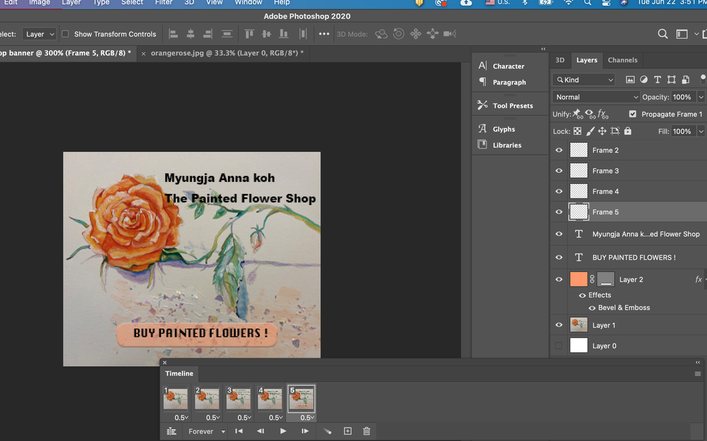
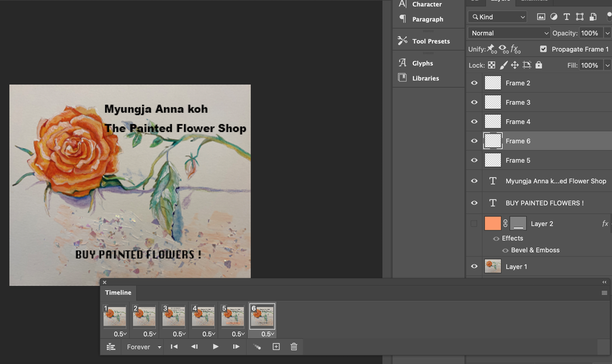
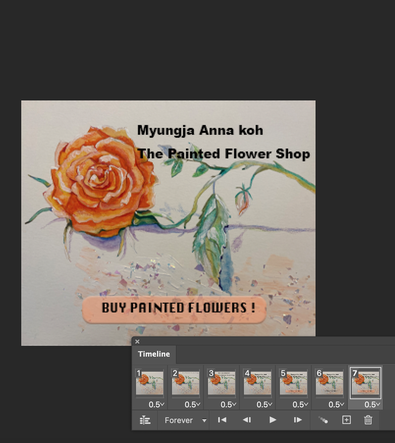
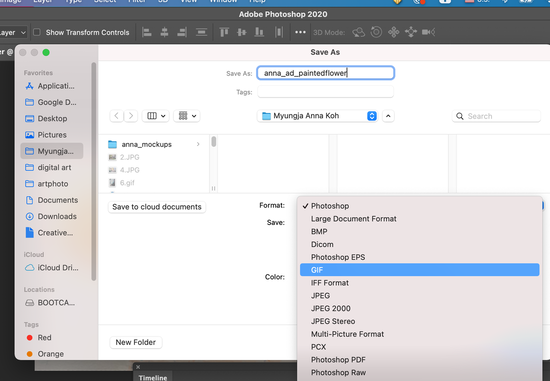
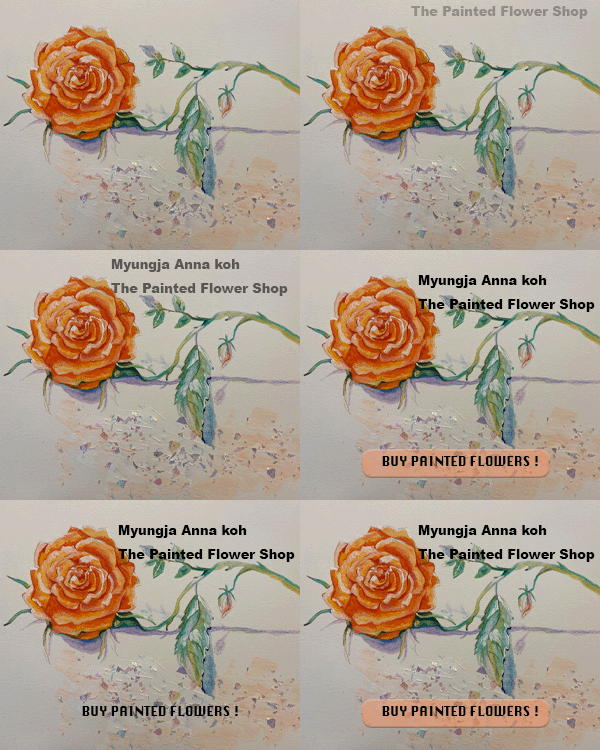
If you see the window above and below, you have succeeded. Congratulations!!! And 4 days after registering like this, I received the following email from the Google team. I wish you all the best of luck, registering in the Google search engine and managing well. Some works become series when working on paintings. For example, a rose that I've been drawing recently for a painted flower store project is growing, and one day it will become a large painted flower shop. When I think of warehousing these tasks while doing all the step-by-step tasks, the fatigue piled up will disappear, and I will be happy all day long. So, today, I want to show the step-by-step growth by dividing these works into one category, so I will make a banner to introduce the results on a project basis. First, open a new Photoshop document 300 pixels wide and 250 pixels high. The size of a standard banner ad. Since the banner is only used online, you can keep the resolution at 72. Add one more layer. Load the image you want to use and paste it on a new layer. Use the Rounded Rectangle Tool (U) to create a button near the bottom of the ad. Add a mask as shown below to highlight the new shape layer in the Layers panel. Select the drop-down menu and choose Bevel and Emboss. Set the style to 50% for Inner Bevel and Depth. Add a new layer to the file and use the Type Tool (T) to create a button "Buy painted flowers!. Then create another layer and use the Type tool again to create the basic message for the banner. Go to the window timeline to create the animation. Now let's create a simple animation to make the banner a reality. With the first animation frame selected, toggle the button layer and both text layers invisible. Create a new frame in the Animation panel. Redisplay the default message layer in banner ads. Move the text up so that only the last line is visible. In the Layers panel, set the opacity of this layer to 40%. Create a third frame and move the text further down so that most or all of the text is visible and increase the layer opacity to 70%. Create a new frame and move the messaging text to its final batch. Increase the opacity to 100%. Create a fifth frame and display the button and button text layers. Each frame will have “0 seconds” displayed below the thumbnail. Use the drop-down menu to set Frames 0.5 sec. Click the “play” icon in the animation panel and you will see the banner ad in action and you can adjust the timing if necessary. Create another layer to give the button a twinkle effect. And make the background button of the text invisible, leaving only the text Create the 7th action flame layer, select the layer with the button and text together. To complete your banner ad, go to File > Save for Web & Devices. Select GIF as the file type from the second drop-down menu at the top and click Save. Below is the completed GIF file. I hope you all start a successful business by creating your own awesome advertising banners. |
Myungja Anna KohArtist Categories
All
Archives
July 2024
|
Proudly powered by Weebly










 RSS Feed