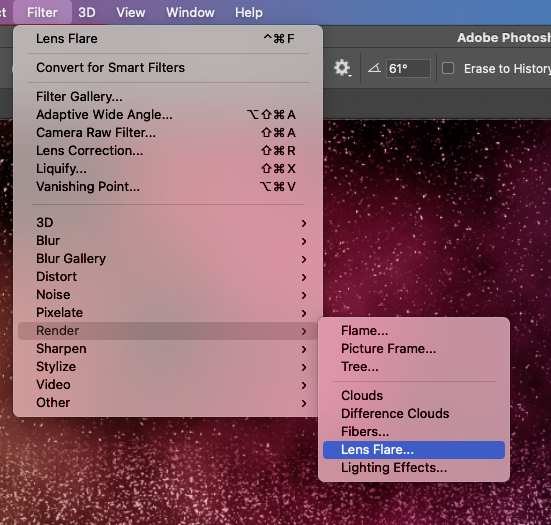
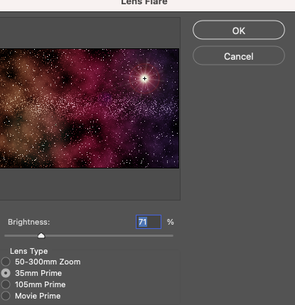
Spherical Panorama function in Photoshop If you're someone who likes taking photographs, I'm sure you're thinking the same thing as me. It is the feeling of applying to use your own photos when making and planning an image with Photoshop. Many triggers in own photos will evoke images in your mind, such as emotions, sensations, weather, air temperature, etc., that you felt when you took the picture. Sometimes you will feel that way. Oh, I was excited when I took those pictures. Then, some time goes by, even looking at the photo, strangely enough, the same emotions that I felt at that time are recalled. Photography stimulates memories in this way, and those memories evoke emotions in the heart. So, if what you forget the moment , you can also save and record your feelings through the image. I also vividly remember passing in front of the Statue of Liberty when I first went to New York. The weather was surprisingly nice that day. It was Wonderful Weather. The clouds flew over the buildings, waving like Van Gogh's paintings, and the wind smelled like mint. The bright rays of the sun, sprinkling in moderation, made the Hudson River twinkle. The clear weather made the color of the river shimmer with a bluer and darker cobalt color. I took a picture of the scene, being careful not to miss out on its beauty. 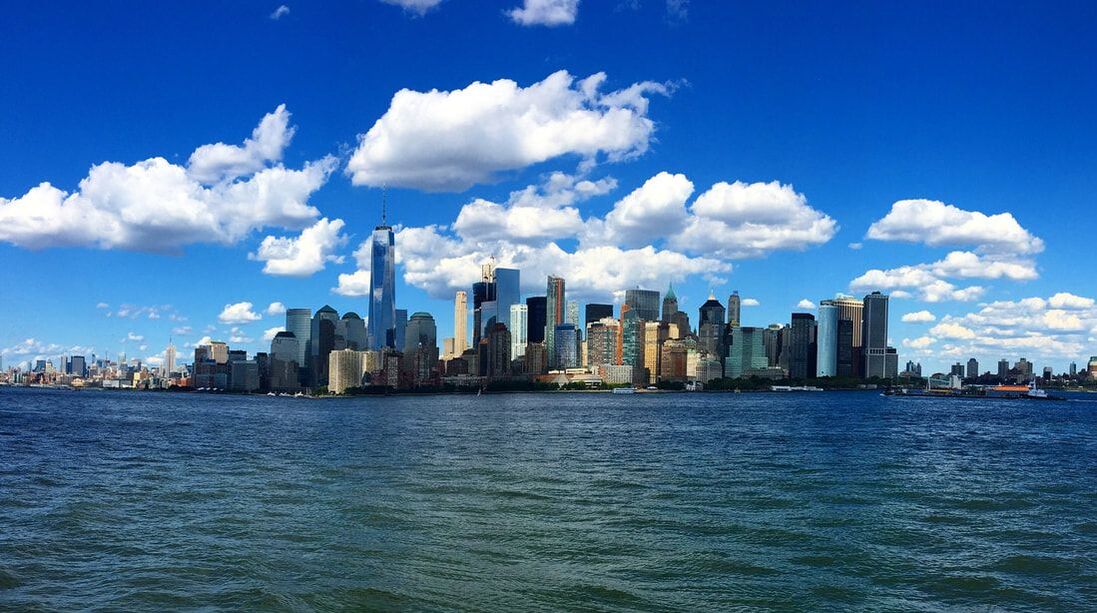 New York, 2018, Myungja Anna Koh New York, 2018, Myungja Anna Koh I used this photo to complete a digital artwork called City Eye. If the photo does not convey this overwhelming beauty, the result may somewhat reduce the quality of the image displayed from Photoshop. I imported this photo into Photoshop. 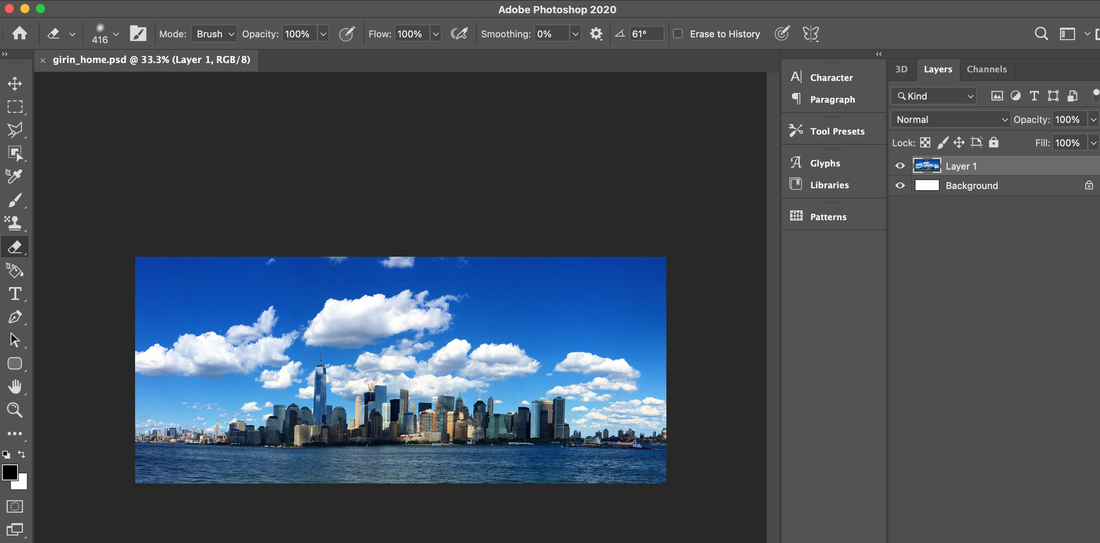 The concept of Citi Eye's work was introduced in the previous post below. Here is a brief excerpt: (Go to related article!) Have you ever looked up at a magnificent building from top to bottom when visiting a metropolitan area like New York or Seoul? Our point of view always weakens the existence of nature, like a painting drawn by our nephew. Because, as we know, we are part of that nature. Sometimes it seems that we are controlled by an artificial environment. When I walk the streets of New York, I often feel overwhelmed by its grandeur and splendor. Then whenever I see the beautiful red geraniums planted around the restaurant, I feel a little relieved. There is a force that such a colossal building gives. So I changed the viewpoint this time. That is a top-down view. Perhaps a flying bird, insect, or even extraterrestrial life from a distant universe might see our city this way. In the middle, you can see a blue river like a human eye. The center of the river opens like an iris, and light leaks out. The light swirls the river and converges the building in the middle. I got the idea that the energy that makes these cities, that is, people, who are the subjects of power, are also part of nature. Finally, I paid attention to the power of the invisible spirit that creates a large visible city. How we use and control this energy depends on what direction and angle the human eye sees, so the city's future seems to be determined. It would be nice if nature and the city coexist. I hope that an environment where we can embrace each other and coexist is universal. It is very simple to use Photoshop's features to change an image and transform it into a beautiful picture. Just click to change. However, in order for this to come out as an artwork, why was such a function used, and the use of a very small function must be sufficiently digested according to the philosophy. As explained above, I wanted an image of a city as far away from the Hudson River as the river swirls and converges the city. Just like the human eye. 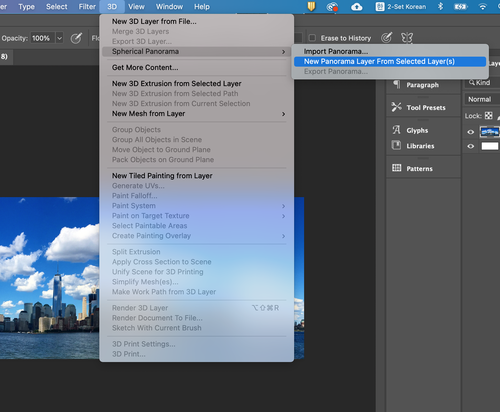 For this function, I moved the 3D menu like above, and click the Spherical panorama---> New panorama Layer From Selected Layer. After a few seconds, there will be an adjustment icon that adjusts the angle to 3 D as shown in the screen below. Rotate the angle of this icon to get the desired three-dimensional image. 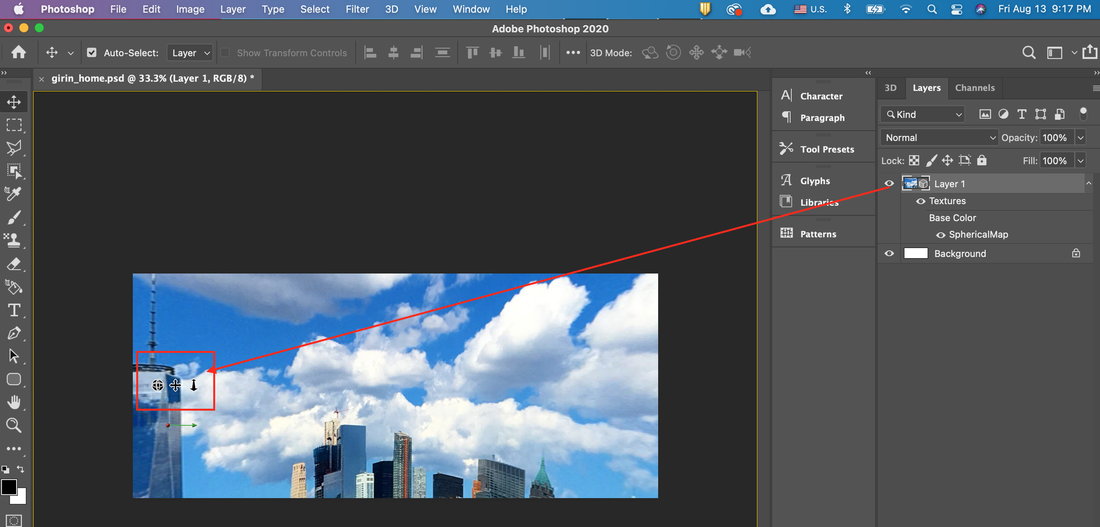 It can be a bit dizzy as it has to be rotated round and round. But after a while, you can get a nice screen like this. 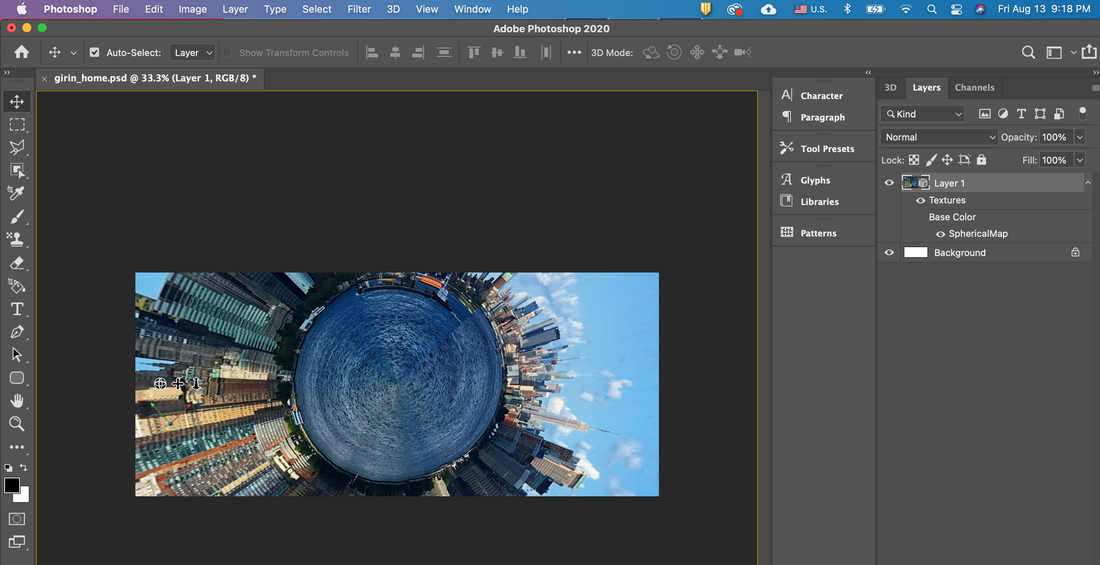 The important point is that if you use this photo as is, something artistic is missing. If you artificially deform a photo, you will see an unnatural image because of that part. Personally, as a child, I really liked the animations directed by Hayao Miyazaki. In particular, one of my favorite scenes is the sky with puffy clouds, where the master's artistic sense flows as it is. Hayao Miyazaki, who loved airplanes and sky under the influence of his father who worked in the aviation industry from an early age, in many of his works, through the sky with beautiful clouds like an artwork, the individual victimized by the groupism of the majority spreads the wings of freedom. I drew a space where I could spread out and fly. Perhaps that's why I feel this infinite freedom when I watch his animations. Additionally , the scene where an individual, exhausted from the development between industrialization and civilization, becomes a part of nature and soars through the sky has so many implications that I feel infinitely moved when I watch it. Anyway, I remembered his paintings and used the features below to create an image as close as possible. 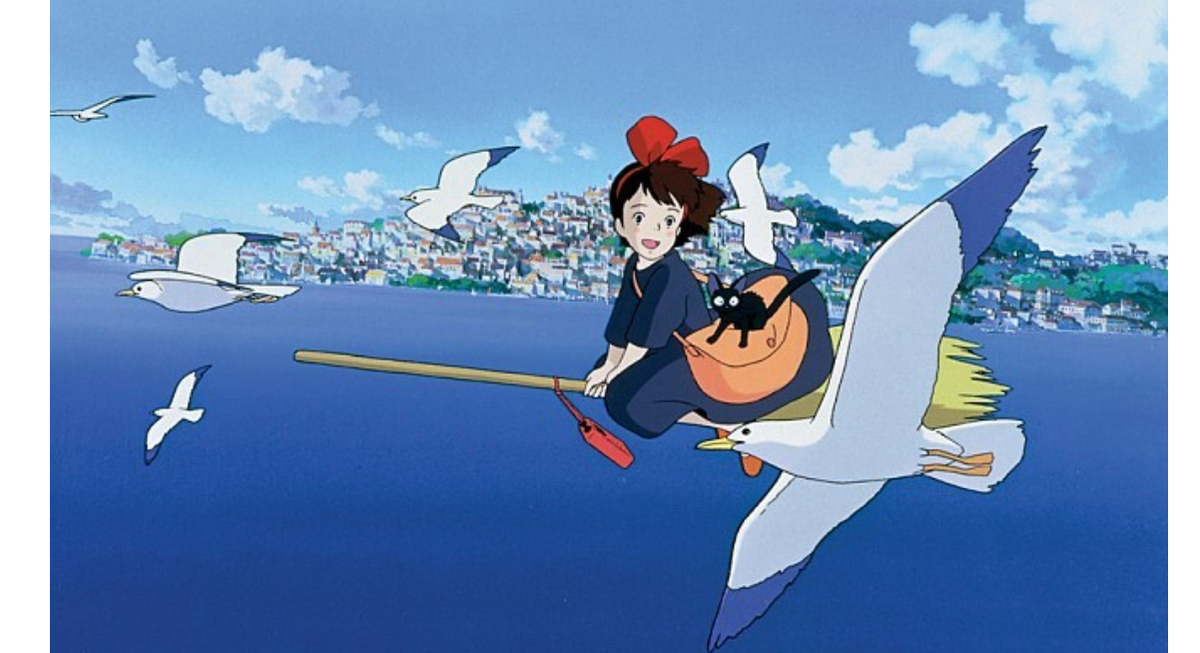 Witch's Delivery Service Kiki, source: naver Imagine his sky and go to the filter gallery. 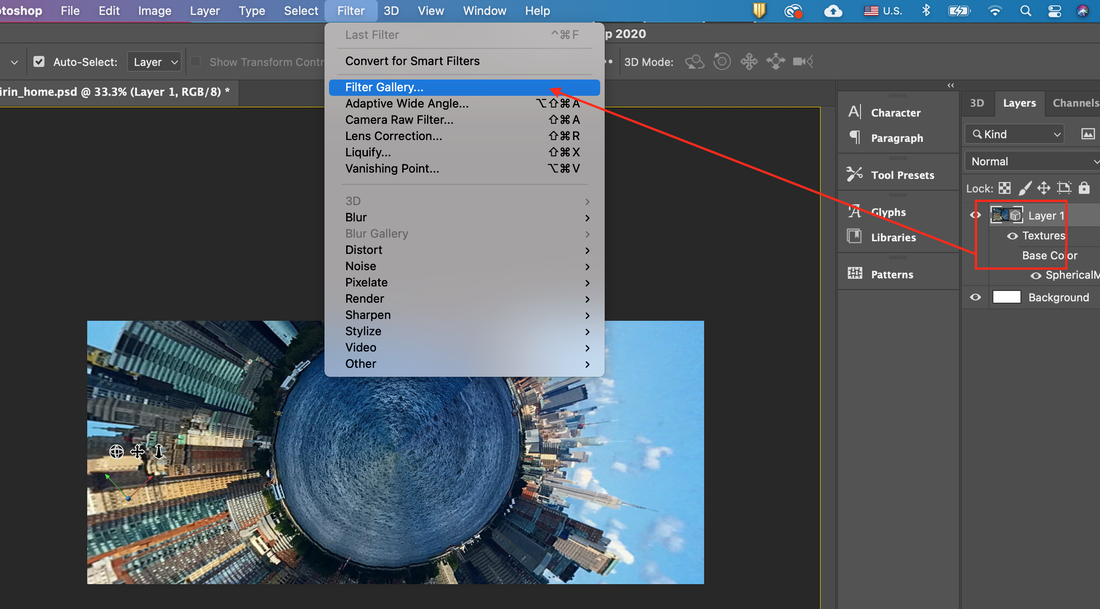 Click the Distort folder and select the Diffuse Glow and you can adjust the value.  The artificial sky like below changes like a fairy tale. 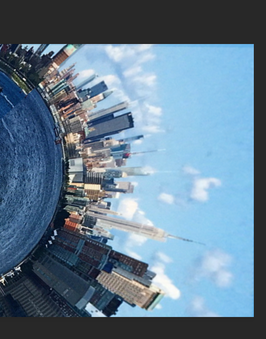 The next task is to create a scene where the light comes from the Hudson River. For this expression, go to Filter menu and click the Render--> Lens Flare. And then adjust the value. 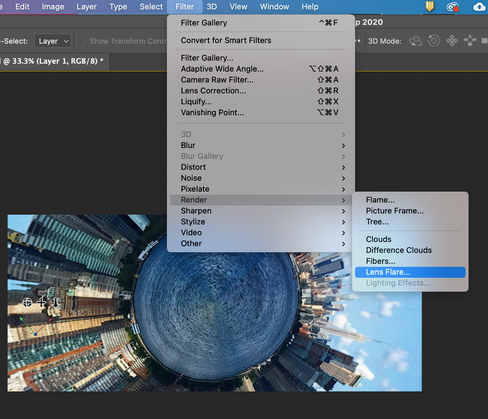 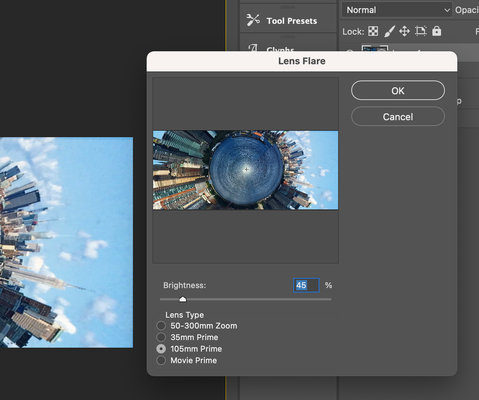 Below is the completed Citi Eye image. I've been working with Photoshop in a relatively simple way. I hope that you will also create a lot of cool images that fit your own concept. 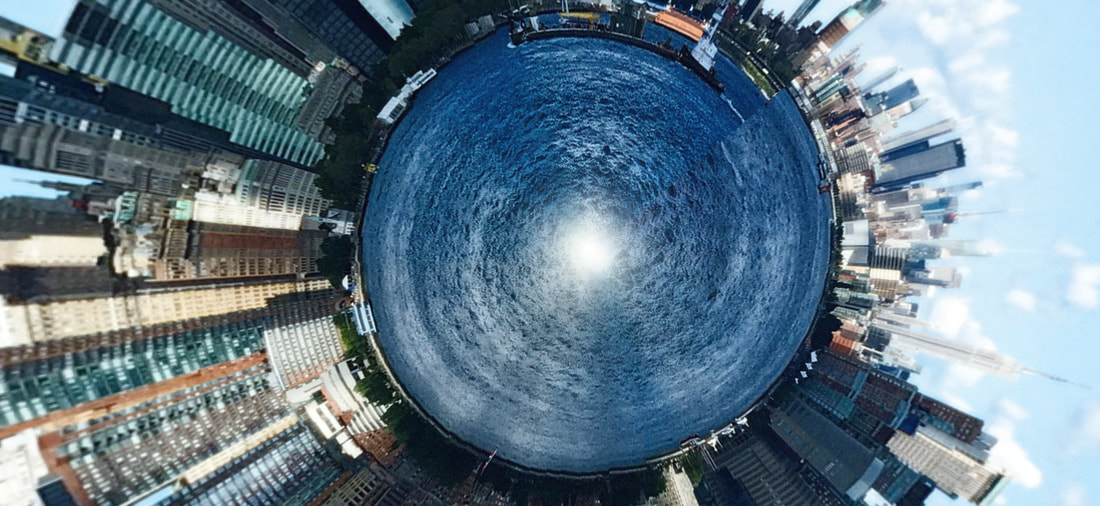
0 Comments
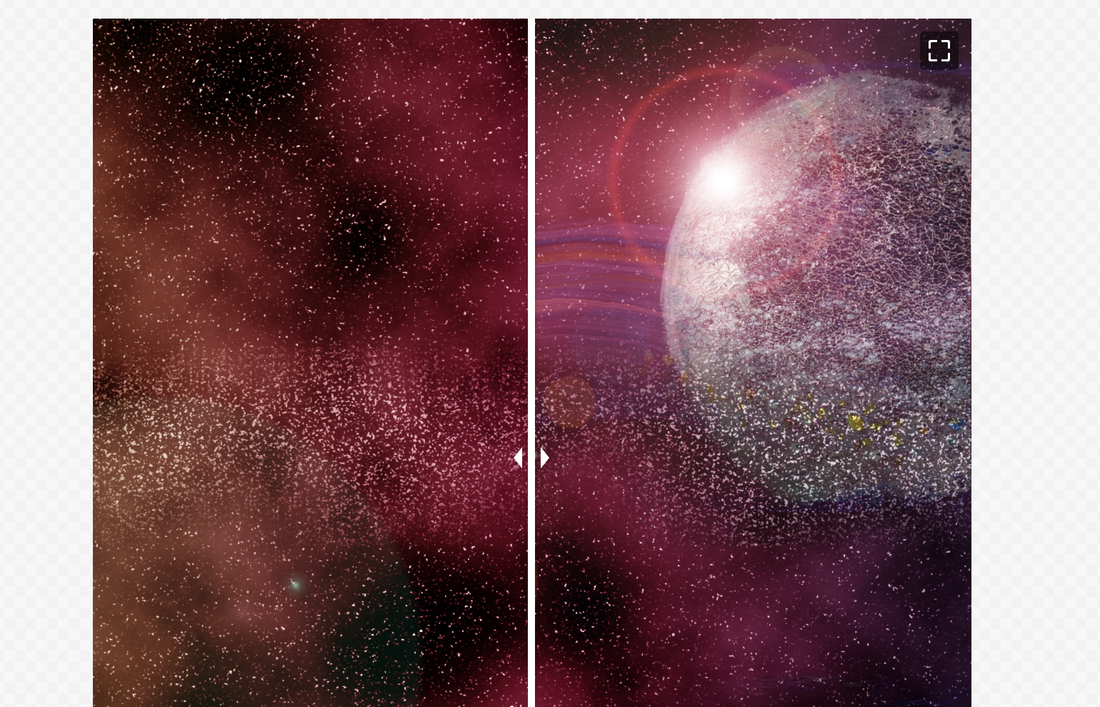
Before and after slider widget for weebly
In the last post, I introduced the before and after scene as follows.
When you need to express this before and after, using an image slide that can naturally show these images is more effective. If you visit the fortress website, you will see it often.
Below is a website that provides before and after image slides. You can use the service for free if you use simple functions. (If you want to move the site, please click the below screen) 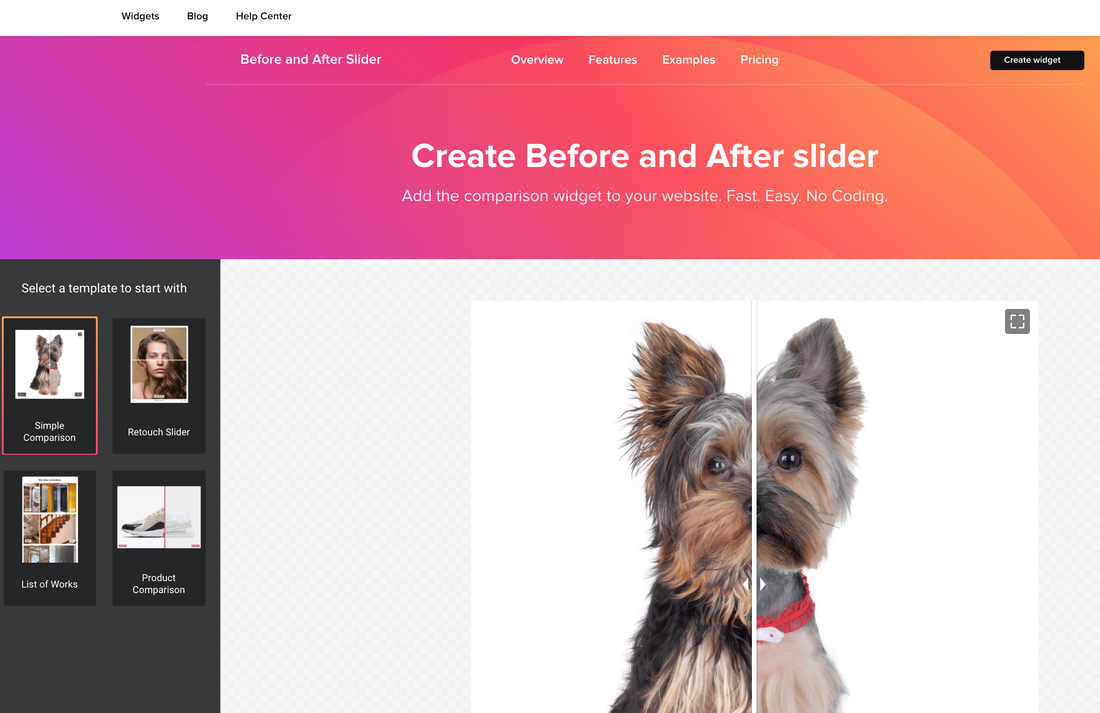
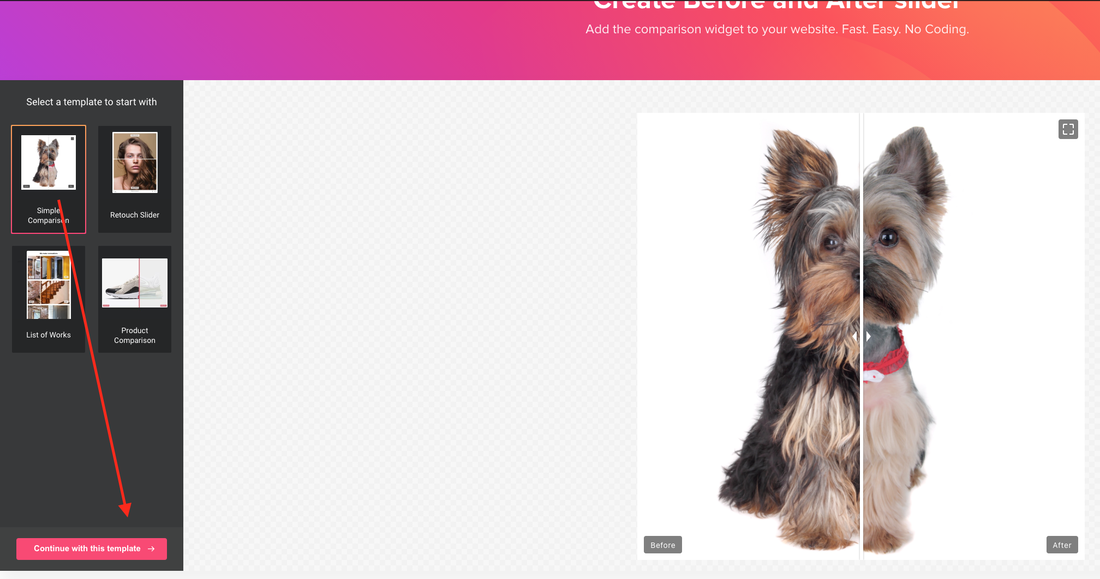
How to use is as follows: After selecting your favorite slider style and then Click the button at the hot pink bottom(Continue with this templates) left of the screen.
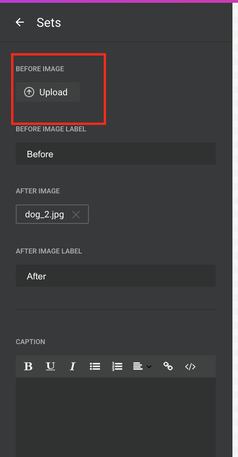
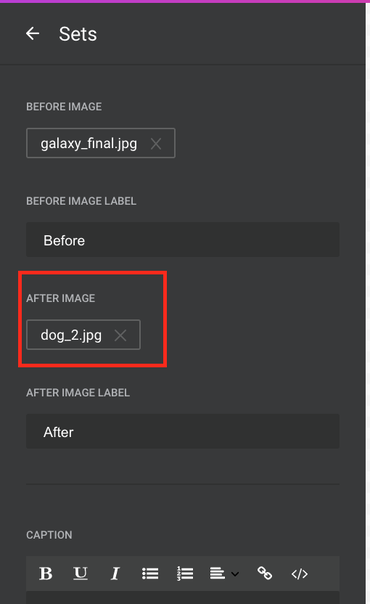
Click on it and you will see the below screen, and then click the dog_2.jpg.
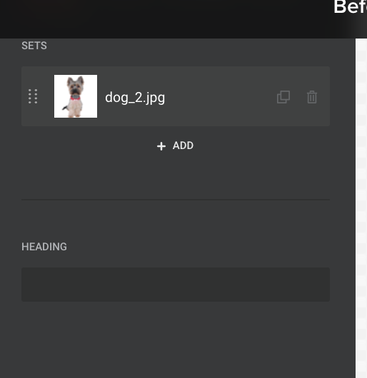
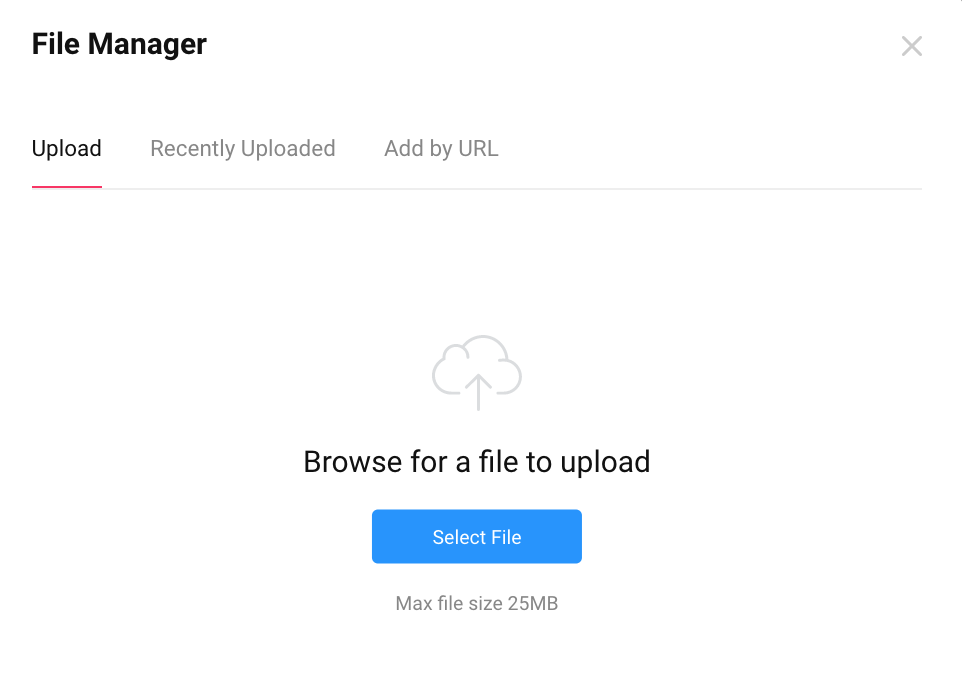
And then please upload your before image from your computer.
You have to upload the after image by using the same process like above.
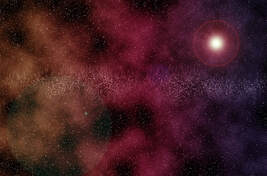
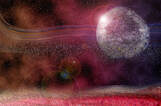
Let's decorate the beautiful outer space with PhotoshopIn a previous post, I made a simple gallery image with Photoshop. Here, I will create another universe by combining the picture of the moon and the gallery picture I made last time among the pictures I drew today. (Go to previous post!)
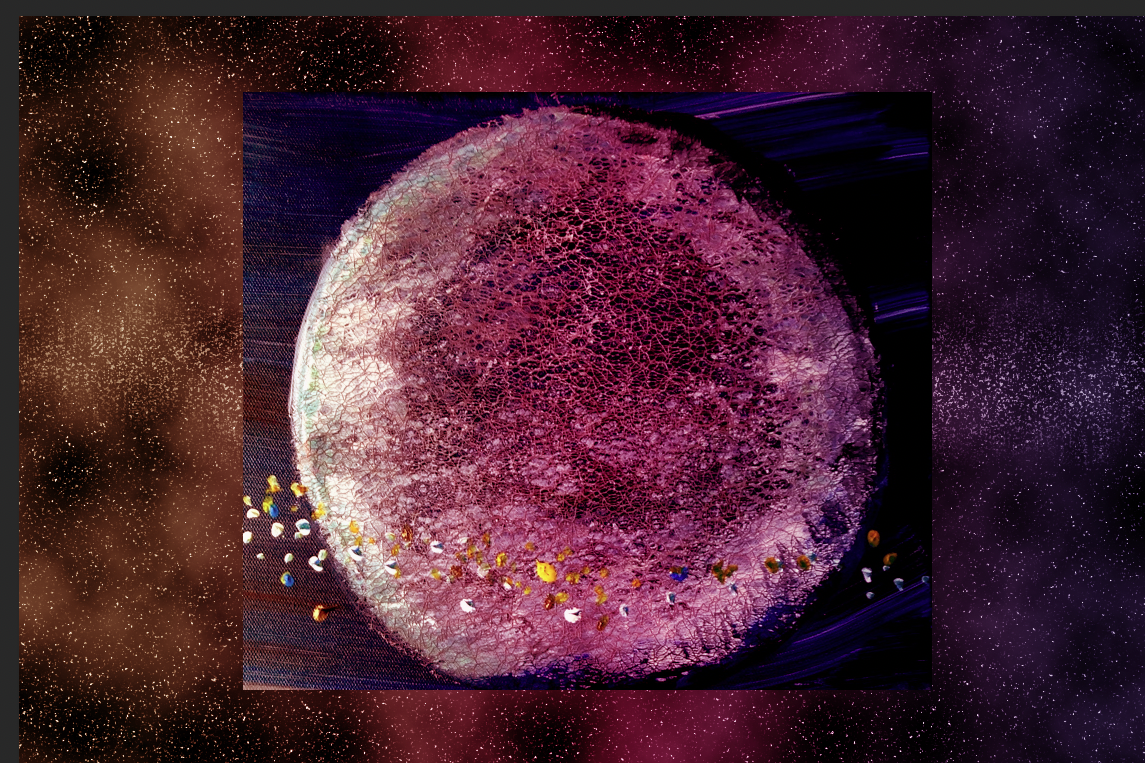
The first, materials are PSD file with Galaxy work in advance and a file image to be loaded with the moon draw. 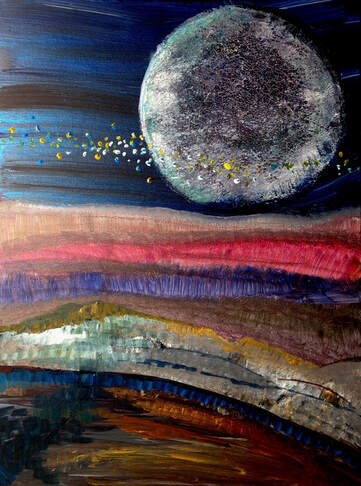 A moon goes here, 2015, Acrylic, Myungja Anna Koh The above picture is one of the pictures submitted during the first exhibition in New York in 2015. I painted it with acrylic and remembered the moon and the angle I saw the moon in my dream. I try to create another universe by inserting this picture into the Galaxy image I worked on within Photoshop. First, open Photoshop where you created the gallery image and load the image of the moon above. Select only the moon area of the imported the image with the selection tool and copy it.  Then resize it and orient it where you want it to be placed as shown below.
Then, click the drop-down menu to change the layer properties in the layer window on the right from normal to screen. (normal ---> screen)
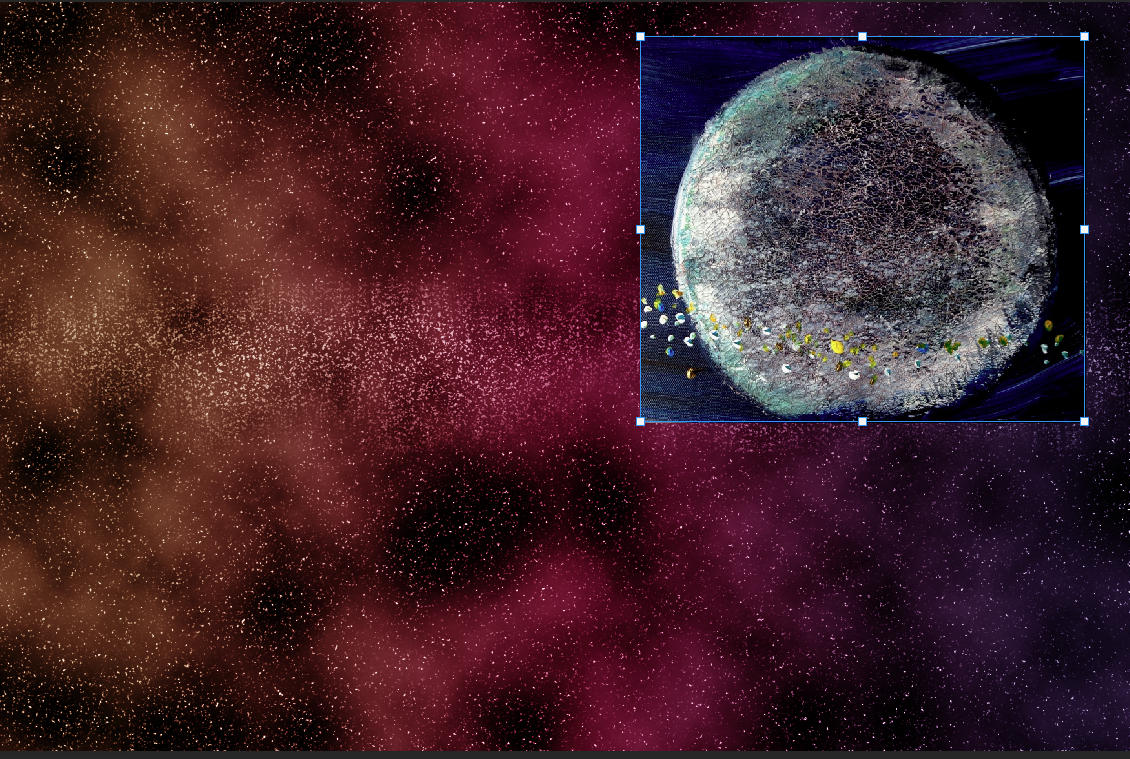
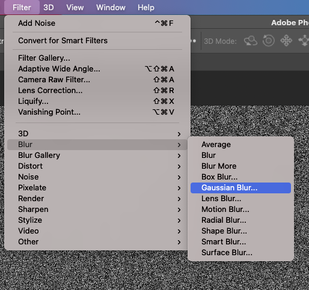
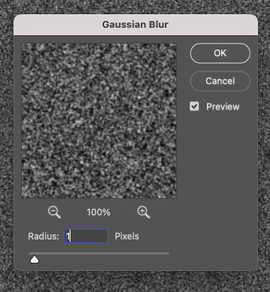
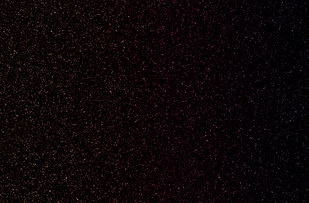
If you use this function, the two images will be blended naturally. How to create a galaxy image in photoshop In the last post, I made the homepage intro image using the gallery image I made in advance. Go to related post ! Images of our galaxy are actually available from free image download sites like Pixabay. However, I recommend making your own if possible. Because if you want to express your digital art creation through Photoshop more artistically, it is best to avoid using images created by others as much as possible. Because if you borrow someone else's image too much, it's like the crow with the feathers of several birds in Aesop's fables, and it loses its true color. As this becomes a habit, Photoshop is only a tool for compositing, and it becomes increasingly difficult to use it as a tool to create artworks. 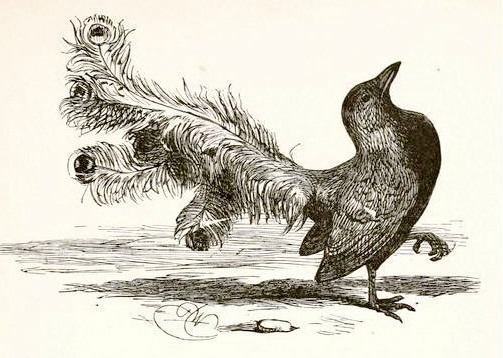 Source: Aesop's fable: borrowed plumes In this sense, today, I would like to introduce you to making a gallery image yourself with Photoshop. First, open a new document in Photoshop and change the background color to black.  Add noise to the background black layer. Go to Filter menu---> Noise--> Add Noise 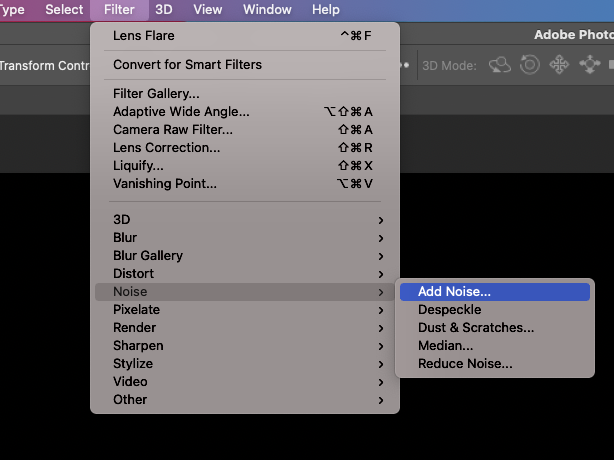 And then you can adjust the value like below. 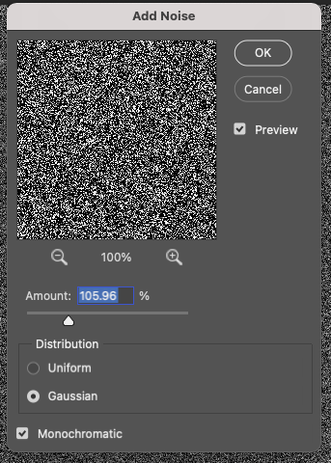 Here is the result screen. 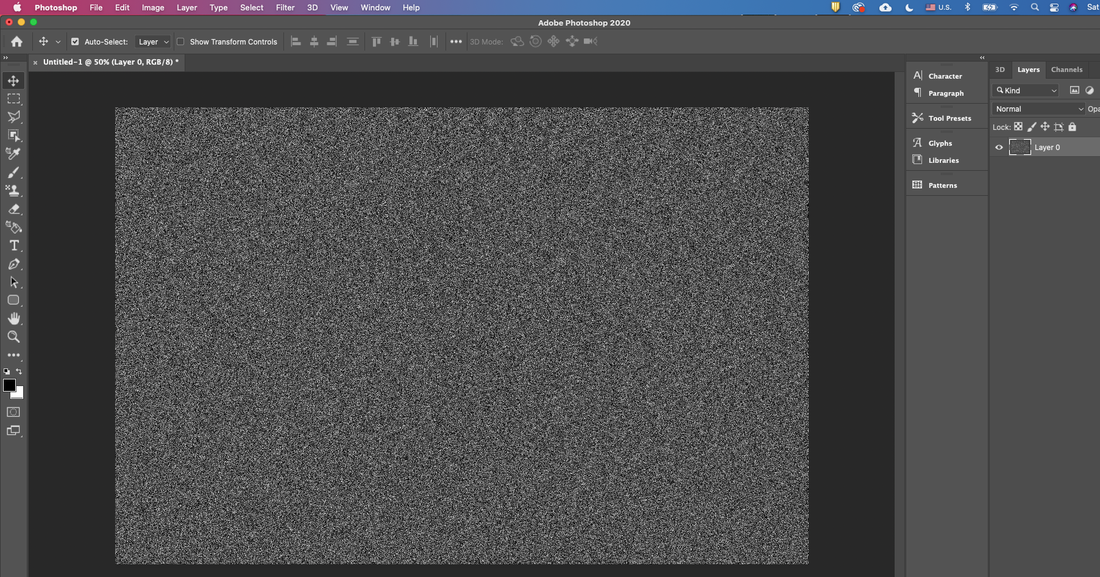 Next, you can click the menu, Filter--> Blur--> Gaussian blur and adjust the value 1 px like below.
And then click the menu, Image ---> Levels. 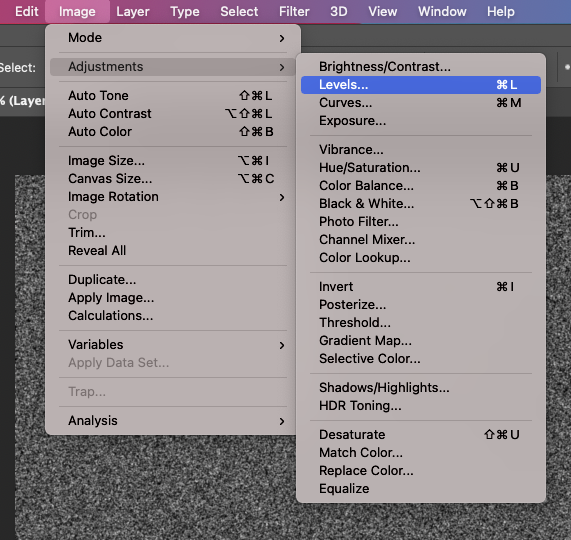 Next, for seeing blinking stars, you can adjust the value like below. 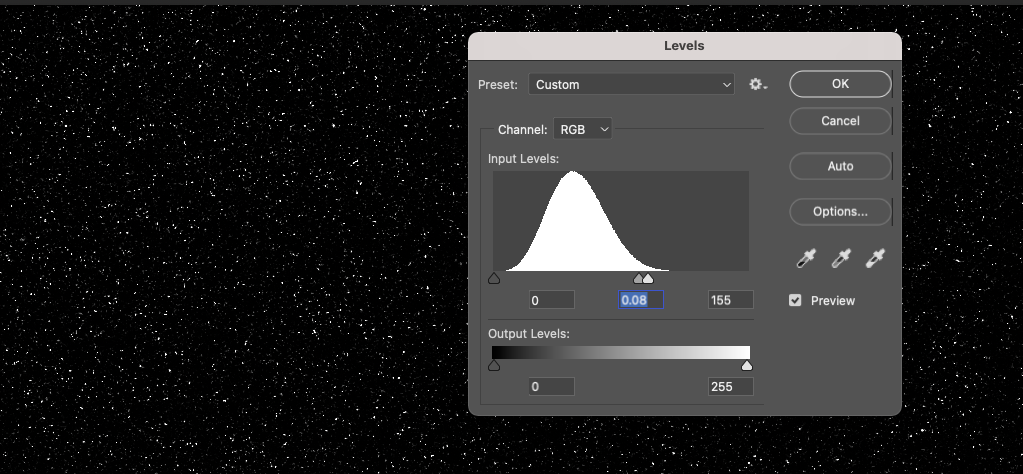 And add the new layer for gradiation. 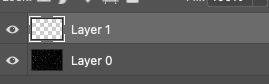 And click the Gradient tool. 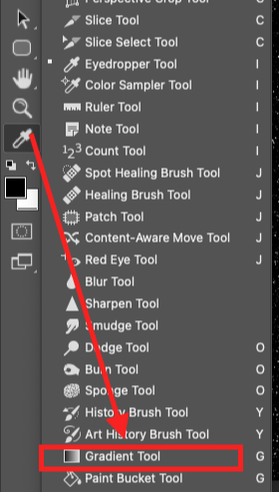 Select the gradient color like below, and then you can choose also the color as you wish. 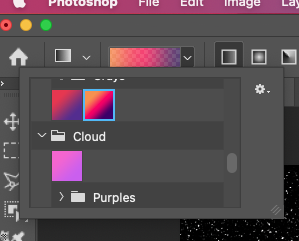 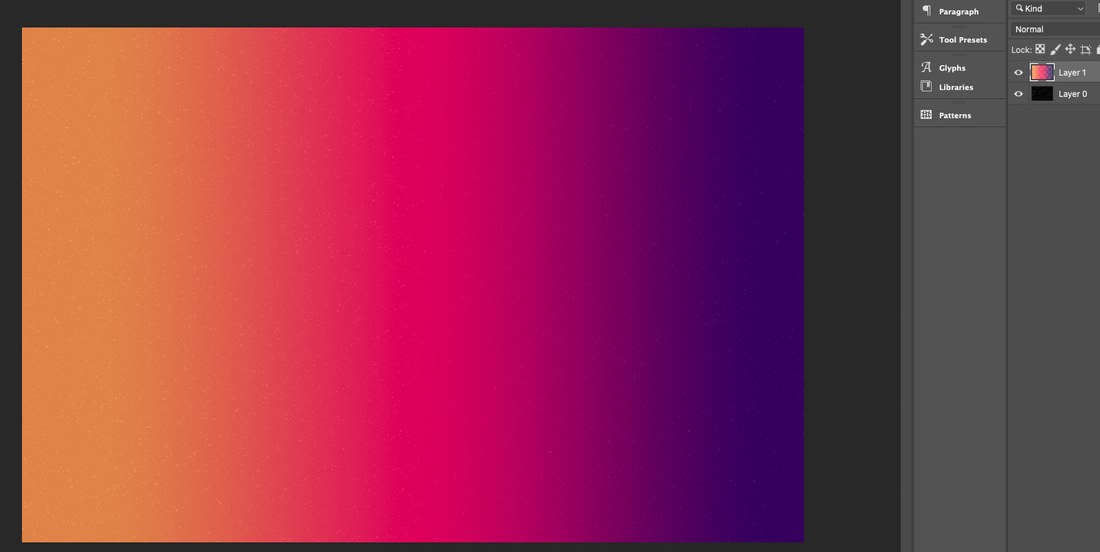 And then you can click the right side layer window like below. (drop down the menubar and click the Soft Light for colorful stars)
Then perform the following steps to represent the outer space more realistically. First copy the layer from Layer 0 (Cmd + J) and click on the black layer(Layer 0 copy) and go to the Render ---> Clouds of the filter.  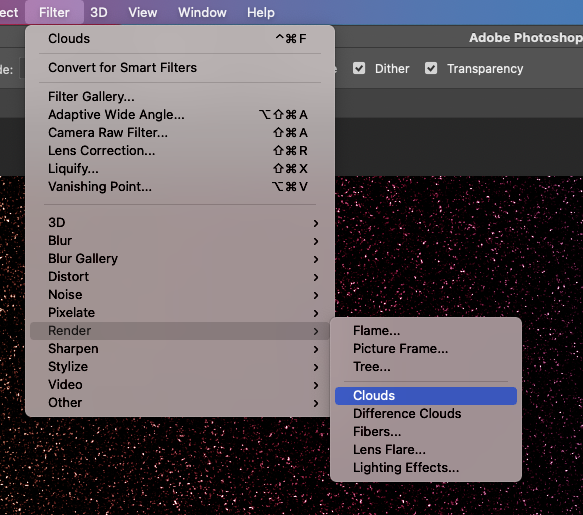 Here is the result screen. 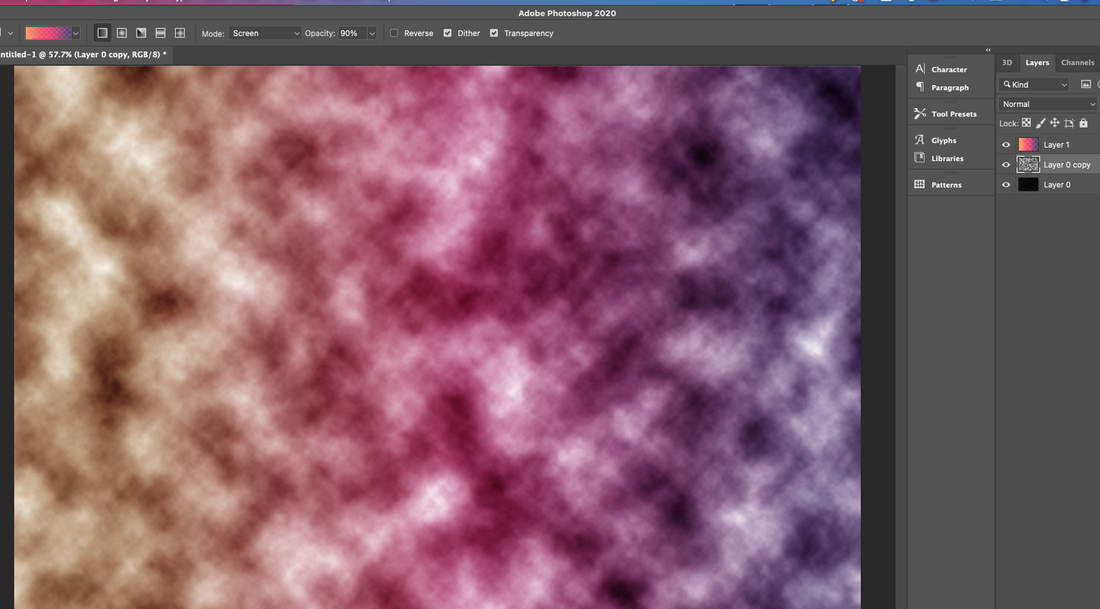 And then adjust the value on the right layer window like below. 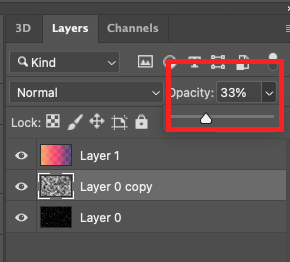 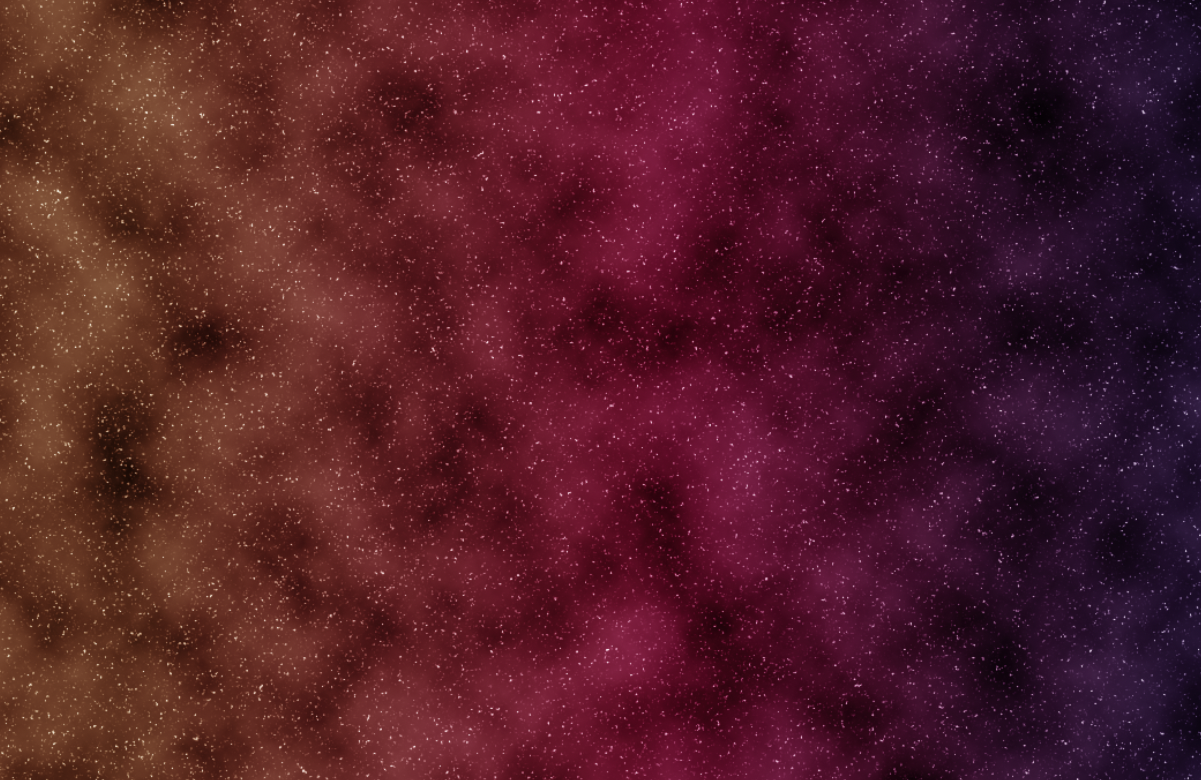 Next, you can use Eraser tool for arrange the shape of clouds like below. 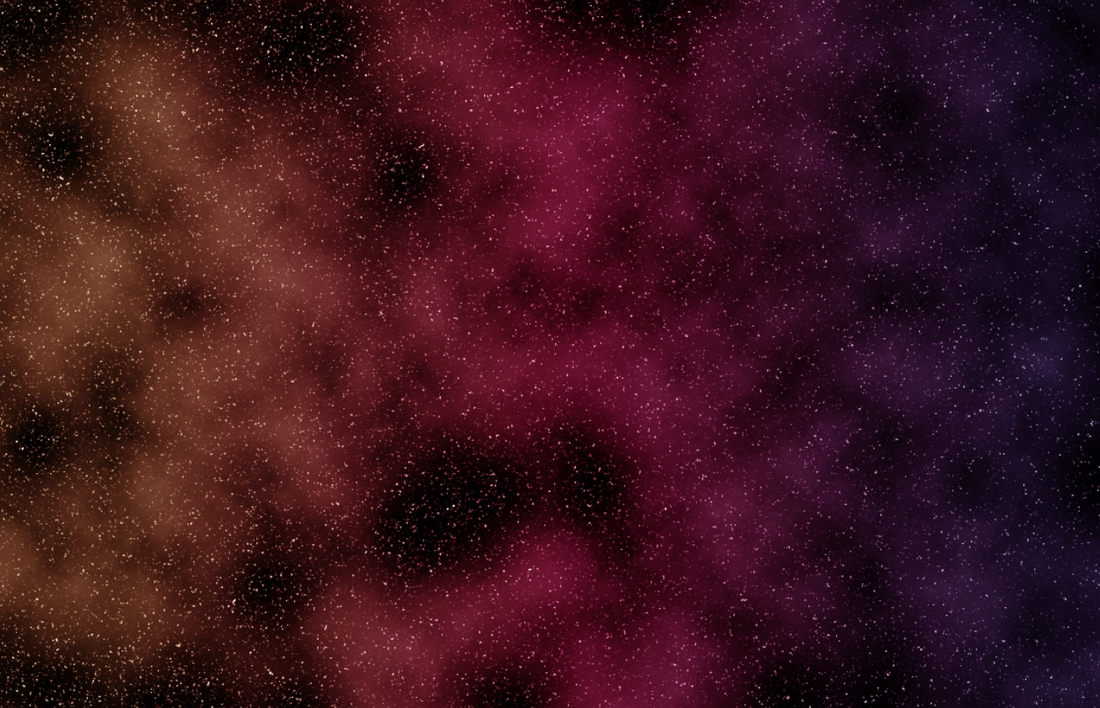 And in general, there are galleries in the space. Copy the space of the first layer using the square selection tool to express the galley like a bright band in the middle.  Then, only the selected band part adjusts the brightness to the brightest. 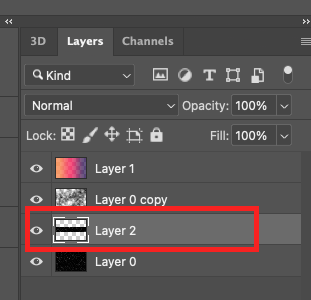 Below are the steps for adding the Milky Way. 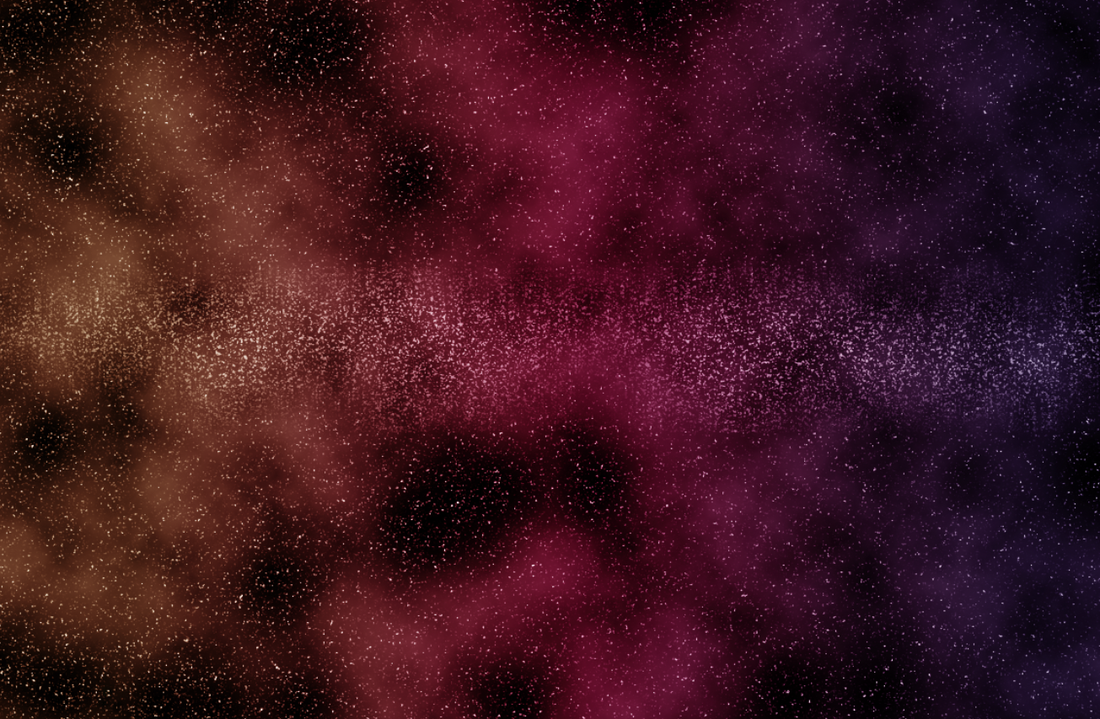 Now, finally, we take advantage of the filter's lens flare feature to create a mysterious atmosphere.
Finally, the finished screen. I hope you all make the universe even better than me. 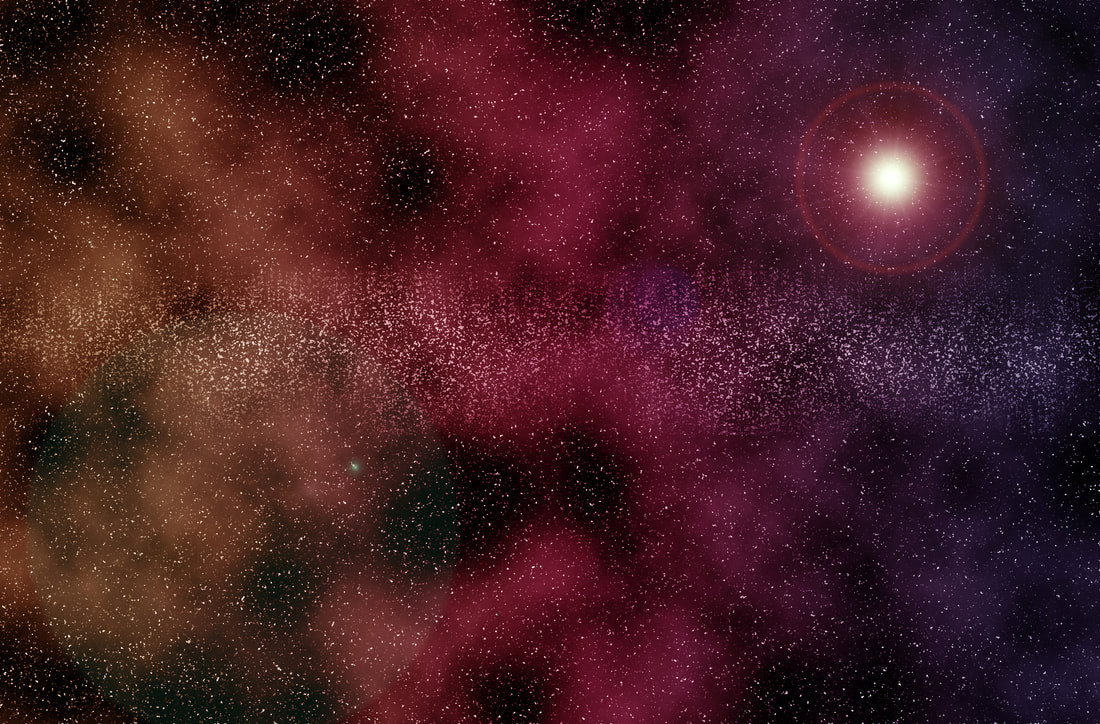 For instance, here is the galaxy image with adding other image and effects. 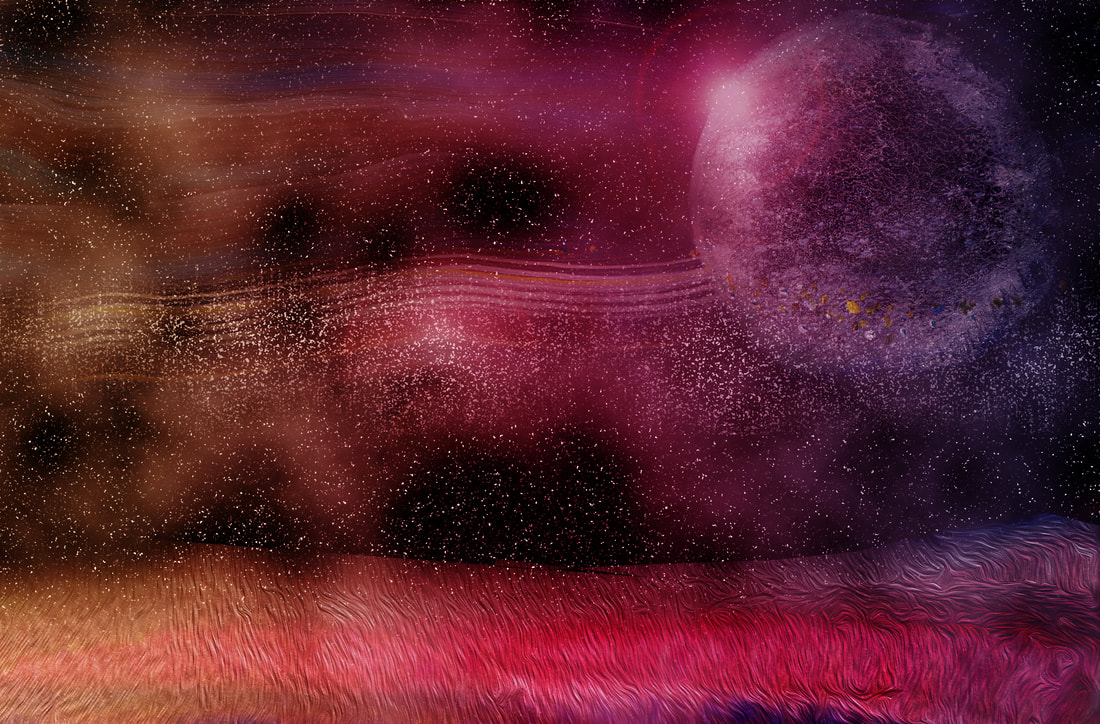 How to create an artistic header image in Photoshop When you create a website, you need an image. In particular, from the homepage main intro image to the header image for each page, the header is decorated with an image that symbolizes each menu. You can use these header images by downloading them from sites that provide free images, such as Pixar Bay. However, if you use the images you created yourself in Photoshop, you will feel a great sense of accomplishment. And give symbolism, philosophy, and meaning to the page menu, and consider the artistic aspect. You can enjoy the experience of turning even the image into a work of art. The header image to be introduced today is the service menu intro image. The service is related to finance, and its motto is Find Cosmos in Chaos. It is one of the tasks to find order in the chaos. The purpose is to relieve the risk and anxiety experienced by investors by using a mathematical model that can predict scientifically in the unpredictable stock market. We need an image of a galaxy to symbolize the first chaos, unpredictability, and massive data. In the next post, I will cover how to make a gallery image in Photoshop, which is essential for image creation introduced today. First, I loaded the gallery image I made in advance.  It will display a mathematical model with the universe in the background. Load the image. 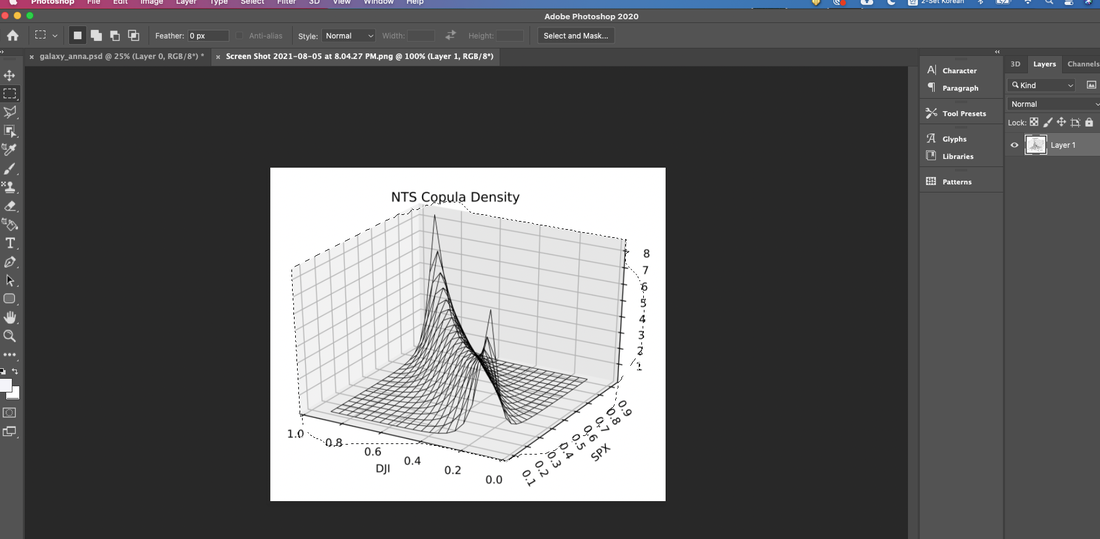 Now we will naturally merge these two images.  Use the divide in the layer properties to make the mathematical model naturally distant in outer space. 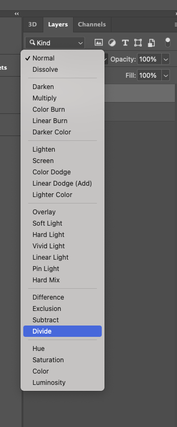 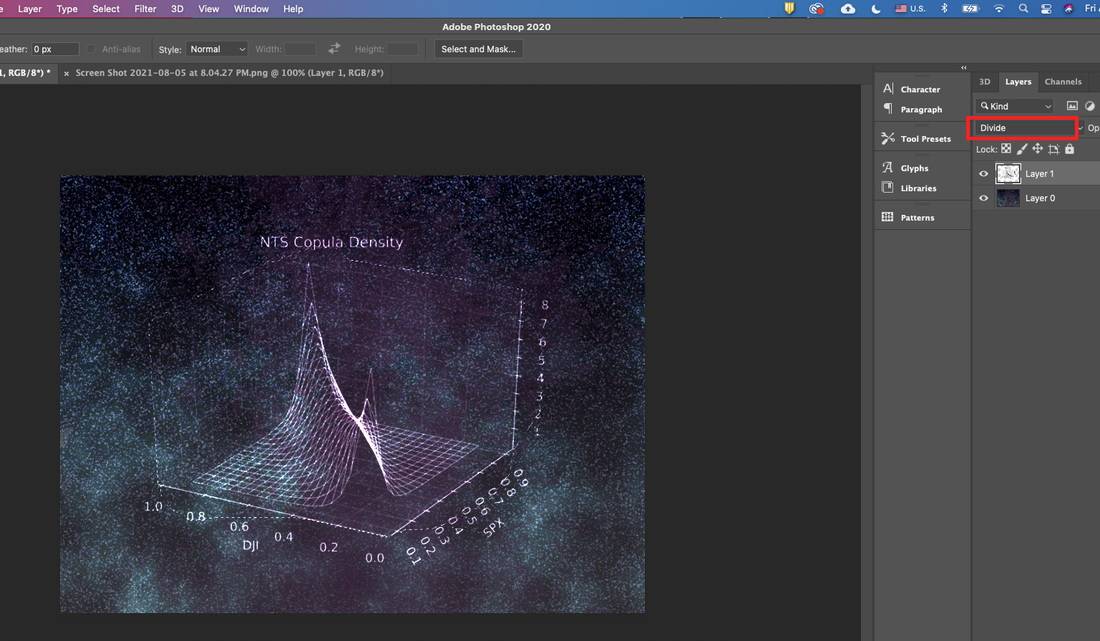 Next, I load an image called Cityeye that I made in advance. I will use this image. I will upload the image production process later. 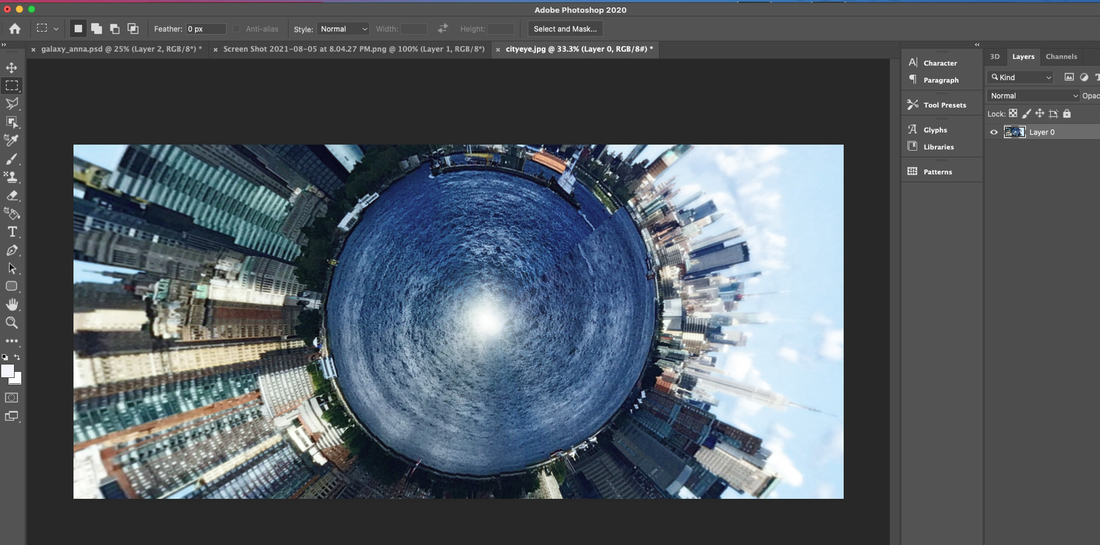 It will transform this picture. Go to 3D menu --> New Mesh from Layer--> Postcard. 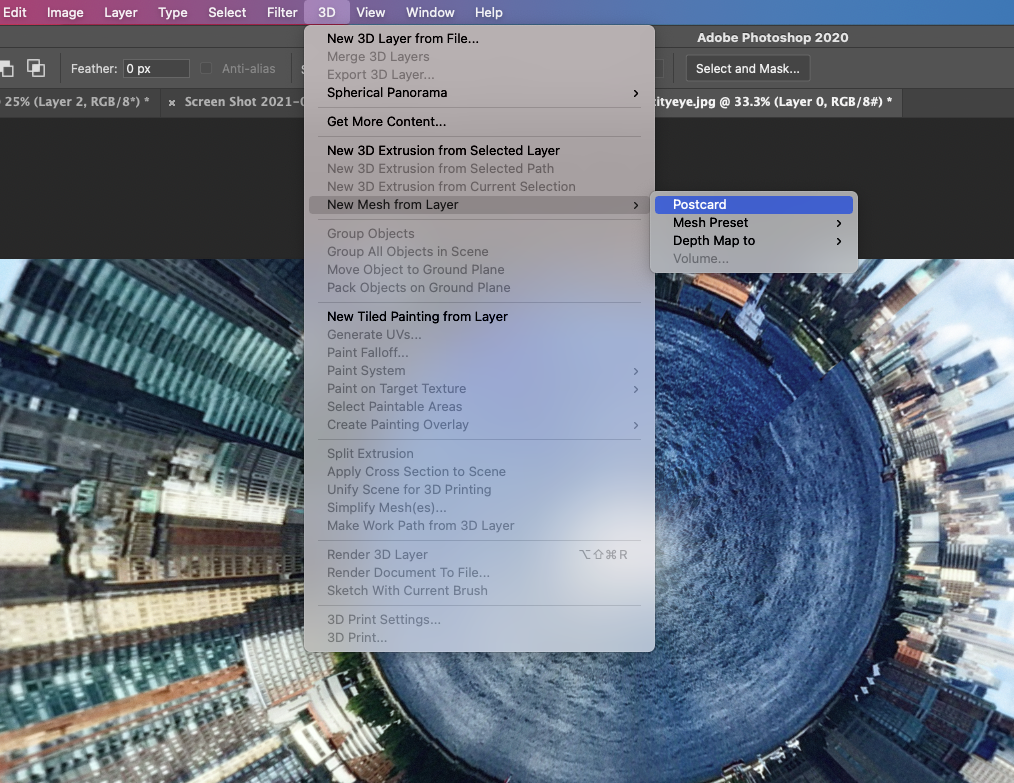 If you use the Postcard option, you can adjust the angle to create a screen like the one below. 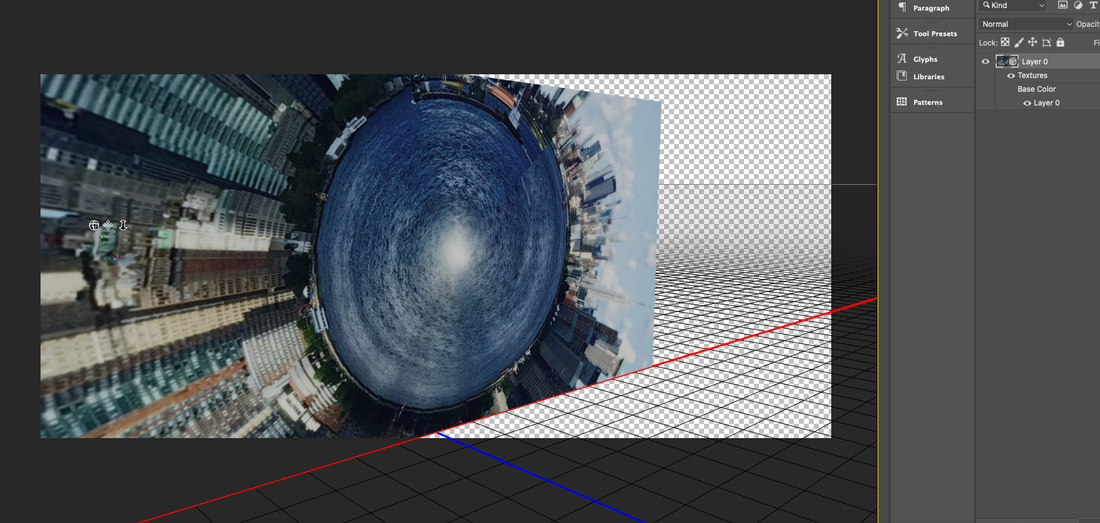 Add one more layer and paste the created image.
|
Myungja Anna KohArtist Categories
All
Archives
July 2024
|

|
Tutorial |


 RSS Feed