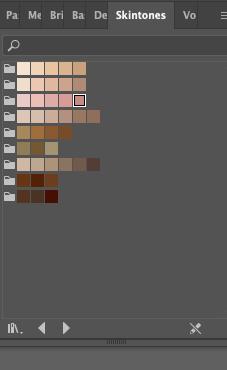
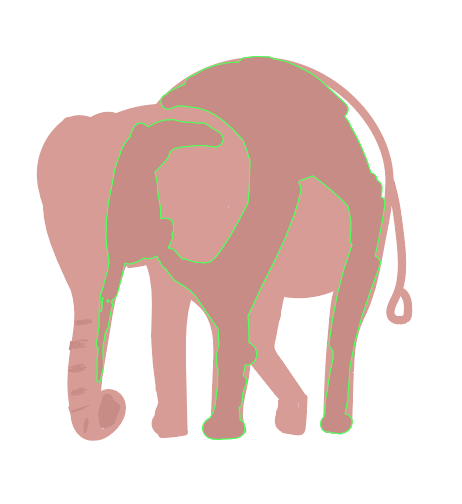
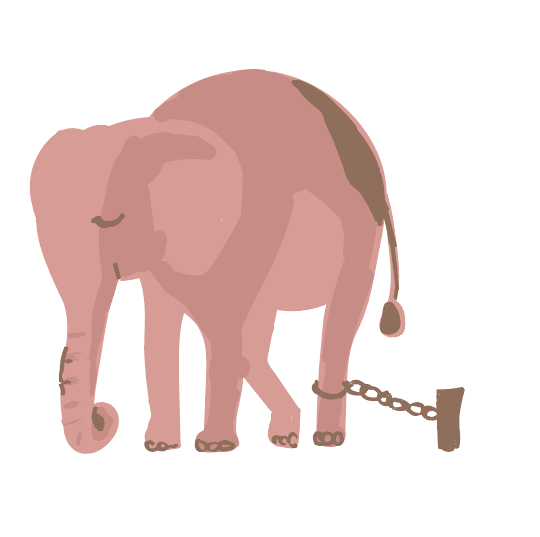
Easy drawing with illustratorToday, I am going to show you an elementary illustrator drawing. I drew a ballerina a while ago, but it's an illustration related to psychology this time. 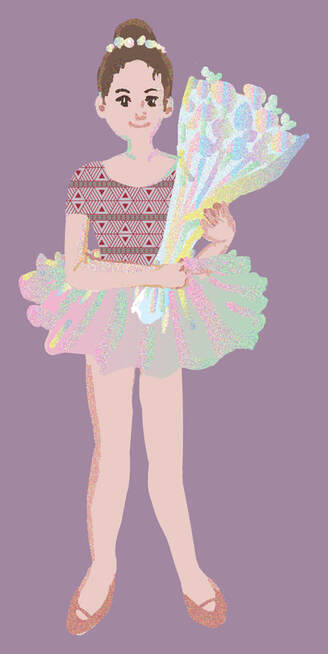 Ballerina, 2021, Myungja Anna Koh I wanted to paint a picture of learned helplessness, that is, to get used to the limits that I have made myself before without even questioning them and get used to them within those limits. Learned helplessness is a reaction to giving up, a response to stopping, and the belief that whatever you do is not very important. If you tie a baby elephant to a small stake, it will try to escape several times. However, it will not be possible. The baby elephant accepts that he will never escape and stops trying at a specific moment. Even though the elephant can easily escape when it becomes an adult, the thought will not cross his mind, pulling out the shrunken stakes. So he remains tied up. It is how most of us behave. We have been conditioned to be unable or unable to do certain things. We have been bound by expectations from our families, friends, and society. And we often don't stop checking to see if these things are true. We don't dare to do anything against them, mainly based on fear. Most of the time, we do not realize that we view certain ideas as cosmic truths, but they are only cultural conditioning or breaking conclusions. 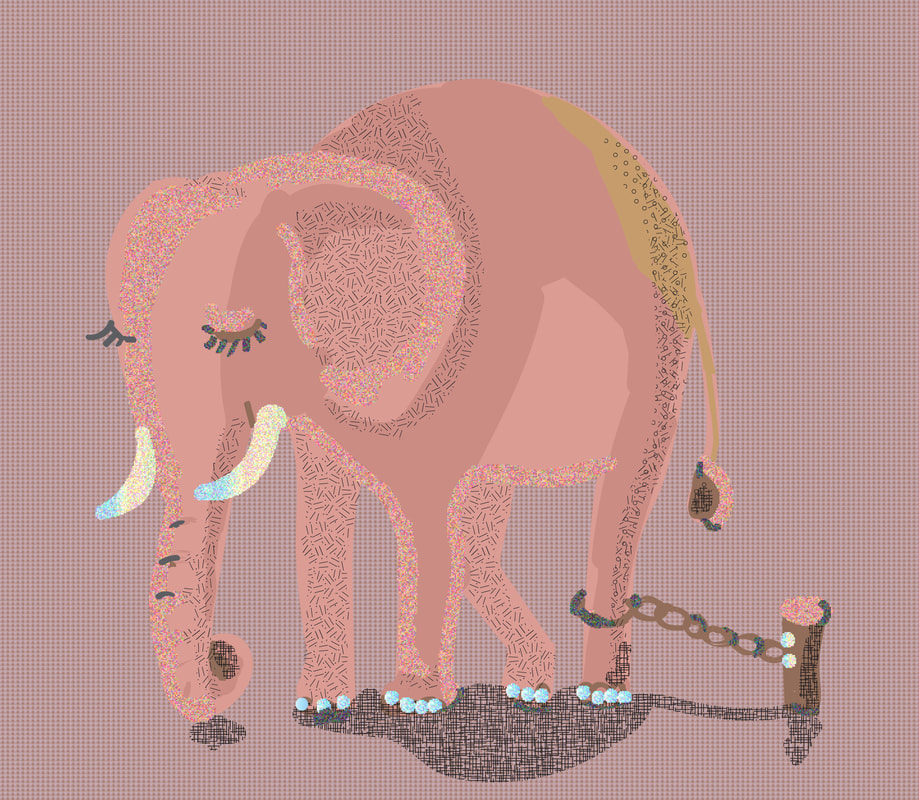 Learned helplessness, 2021, Myungja Anna Koh I often use the Blob Brush Tool to draw a non-lined surface of an object.  And then prepare your palette .  Then add a color palette of skin tones from the library as shown below and put them in the panel you use often. I used a skin tone with a hint of pink.  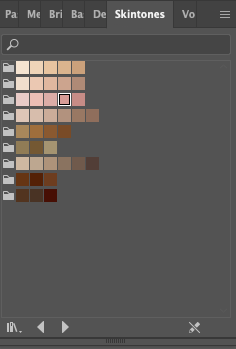 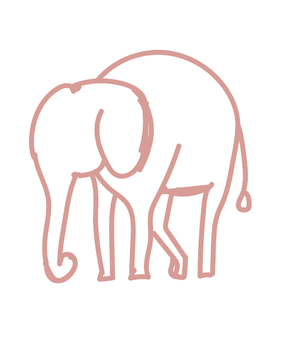 First, draw a rough line like this. Then, take out a thick brush and paint the surface as shown below. First, I paint the bright areas. 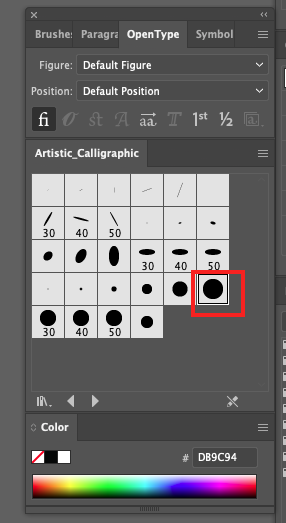 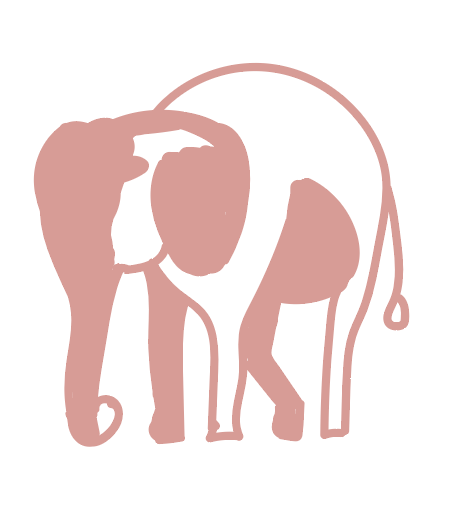 Then, use a mid-tone skin color to add a medium contrast.
Then draw with a darker tone. At this time, I also drew the stakes. Because it is in the darkest place, I drew it all at once.
Next, you can use Basic Graphics_Textures tool for expressing a shadow. It's my favorite thing to show somehow depth of a painting. You can add it from the library.  If I create a shadow, I have to add another layer for editing in the future.  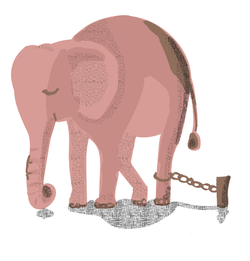 Here is the result after applying a shadow. Use the effect below to complete the ivory and claw parts. Go to Effect---> Texture--->Stained Glass 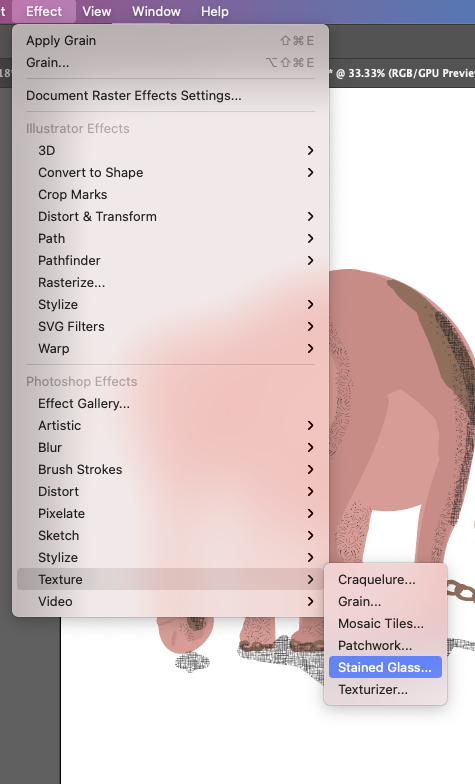 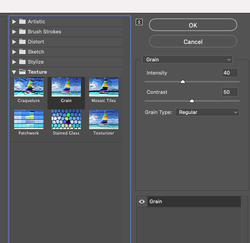 If you can see the pop up window with options, you can choose the Grain for expressing shiny bright paint. 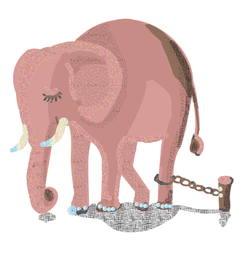 With above the effect, you can draw tooth and nails. Below is the display, I made for products in Redbubble. 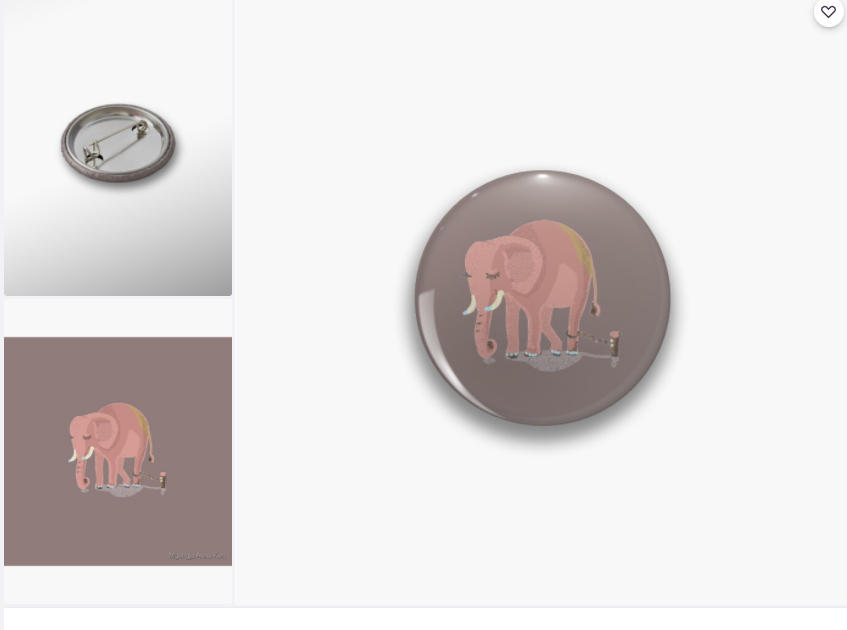  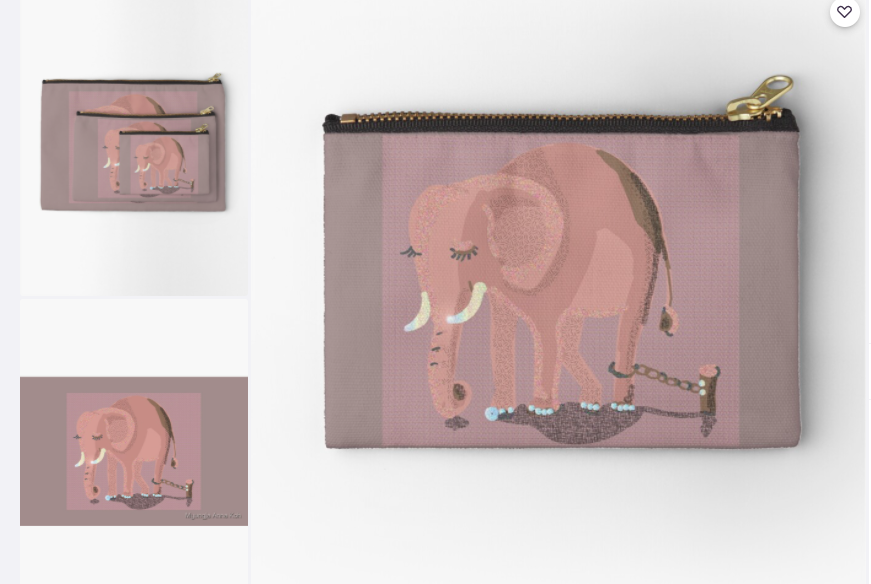 How to pick only star image from a photo, and create a wonderful digital art in Photoshop12/17/2021
How to pick only star image from a photo, and create a wonderful digital art in Photoshop Today, I would like to show you the process of making a digital art, " Stars with a transformation" that I recently created. 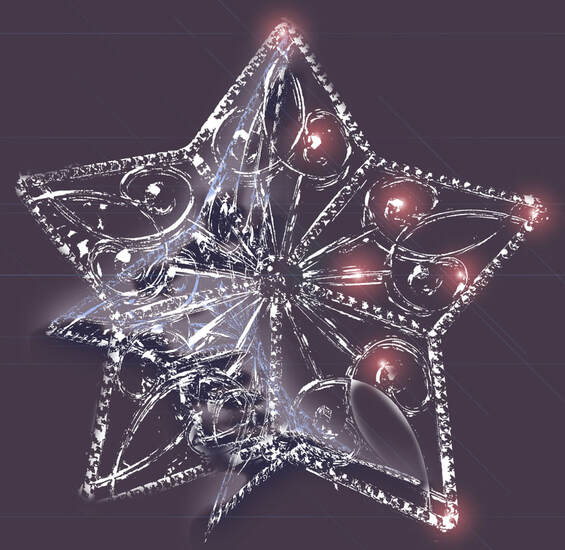 Star with a transformation, 2021, Myungja Anna Koh The antique and luxurious vibe of the above star is actually taken from a $1.25 large star decoration purchased from Dollar Tree. Today, I am going to show you how to take an image from a photograph and turn it into digital art. First, extract the star image from the photo using the Lasso tool as shown below.  Next, you have to go Image--> Adjustments---> Levels, and then adjust the values like below. 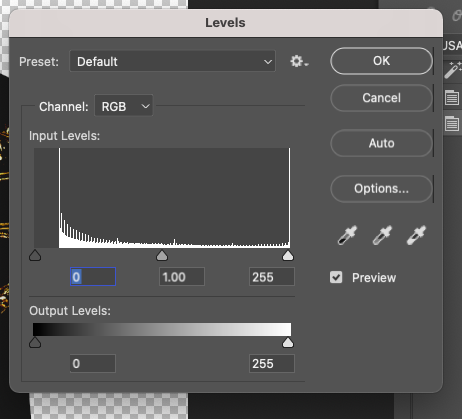 Adjust the level's Infinity Level value to fix the value at the point where the image becomes clearly sharp. 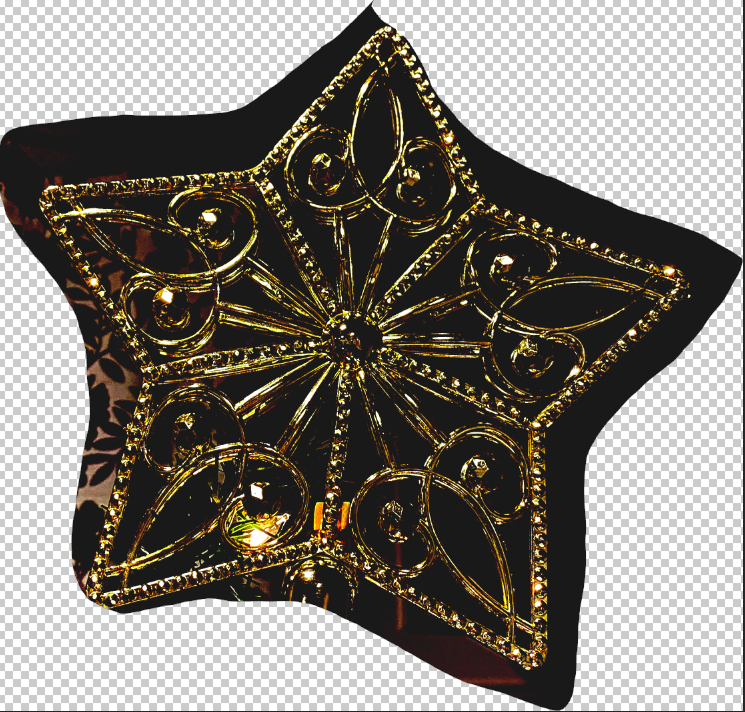 If you are ready, you can use the magic wand tool on the left menu bar. You select the whole line of a star. 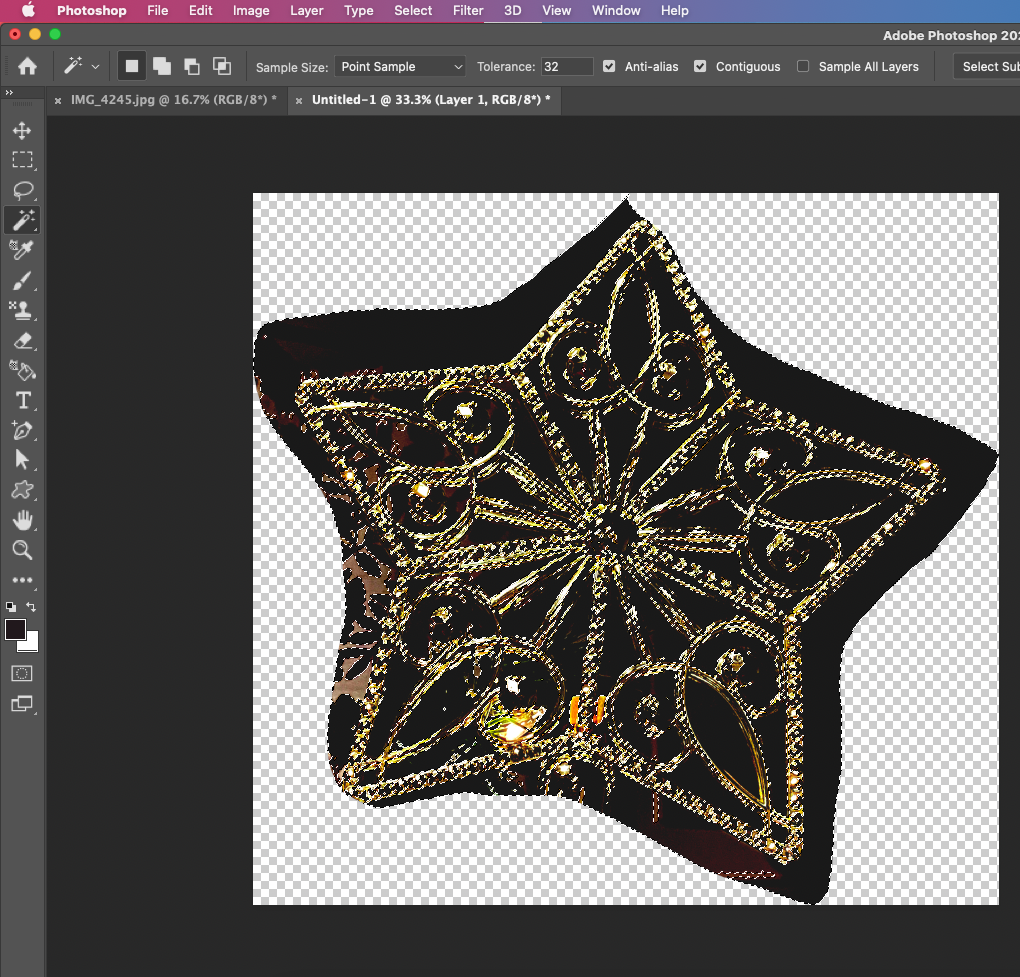 And then make a mask clip like below. 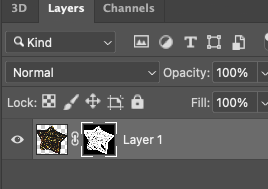 Next, you create a black layer, and then locate back to the first original layer. 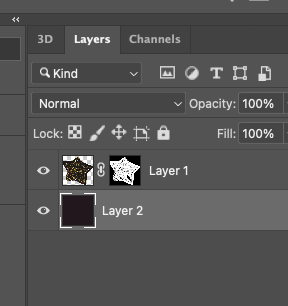 After checking the selection area of the first layer 1 like below, select layer 2 to invert the image (Shift + Ctrl + I ) and press the delete key ! 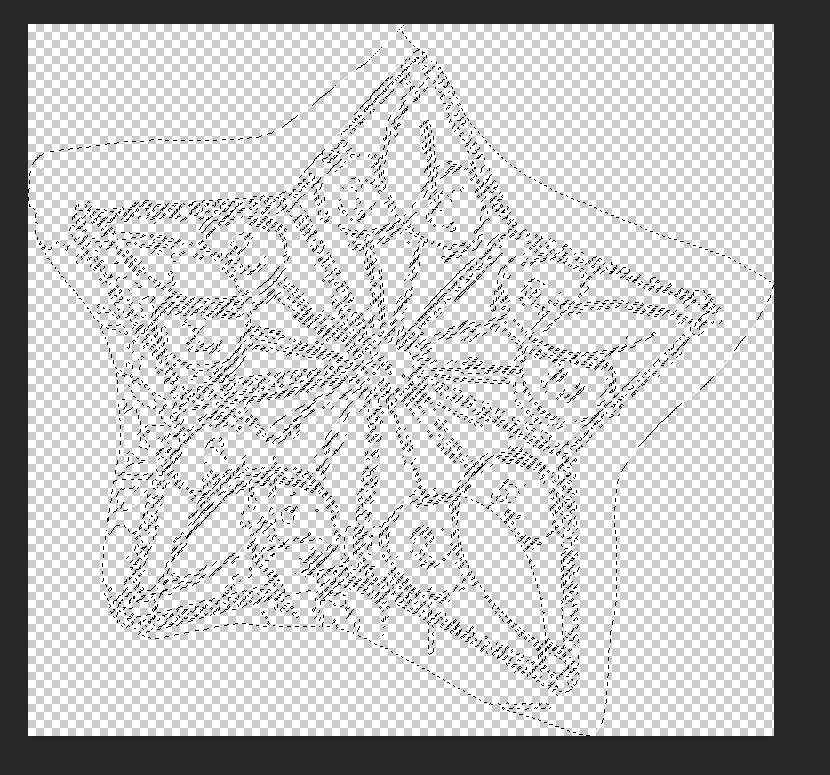 Then, you can find the result as follow as below. 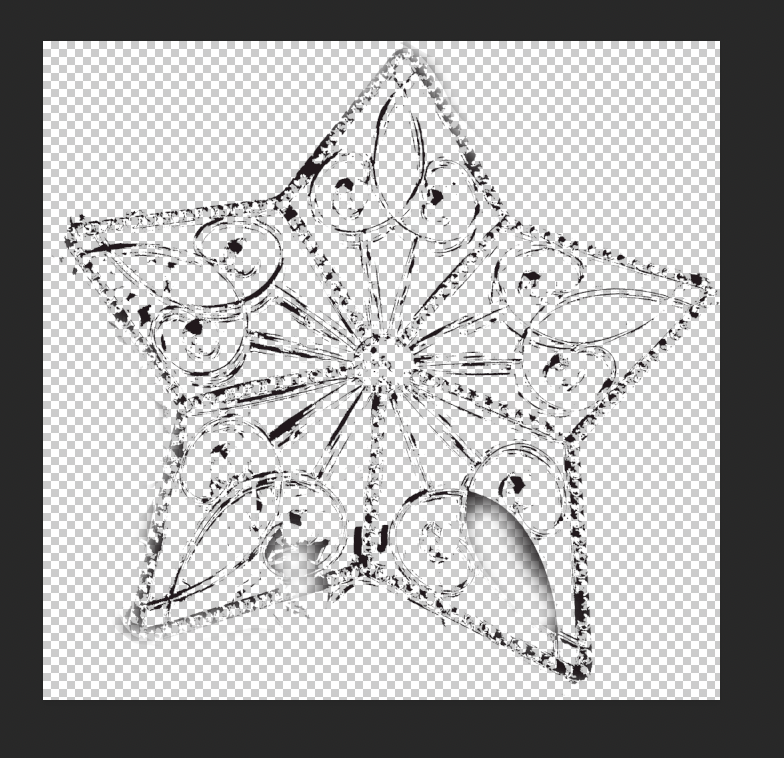 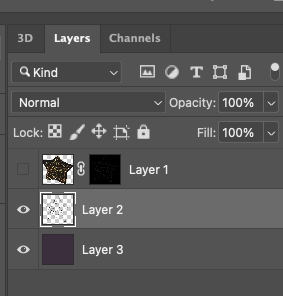 Now, you make another layer, layer3, and then change the color. In my case, I changed it to purple. With selecting the Layer 2, you go to Image---> Adjustments---> Levels, and then adjust the output levels 0 ---> 255 (max). 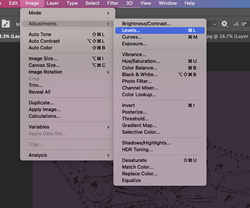 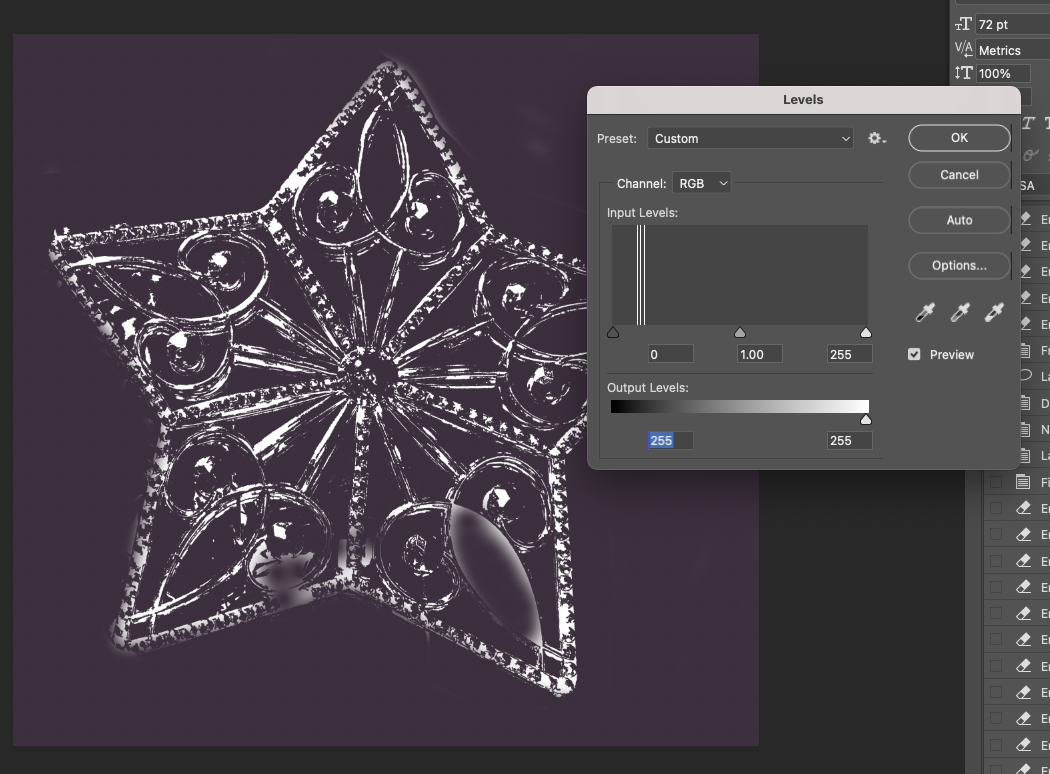 Copy the layer 2 by using Ctrl + J (Layer copy key).  Like a below screen, you can move it to the right slightly and then deduct the size by using the key, Ctrl + T. 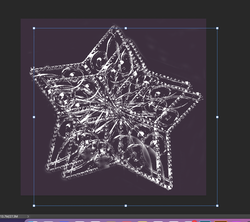 To make it look like a star is falling from the star, and you can use the Warp mode in Photoshop. (Go to Edit---> Transform--> Warp) 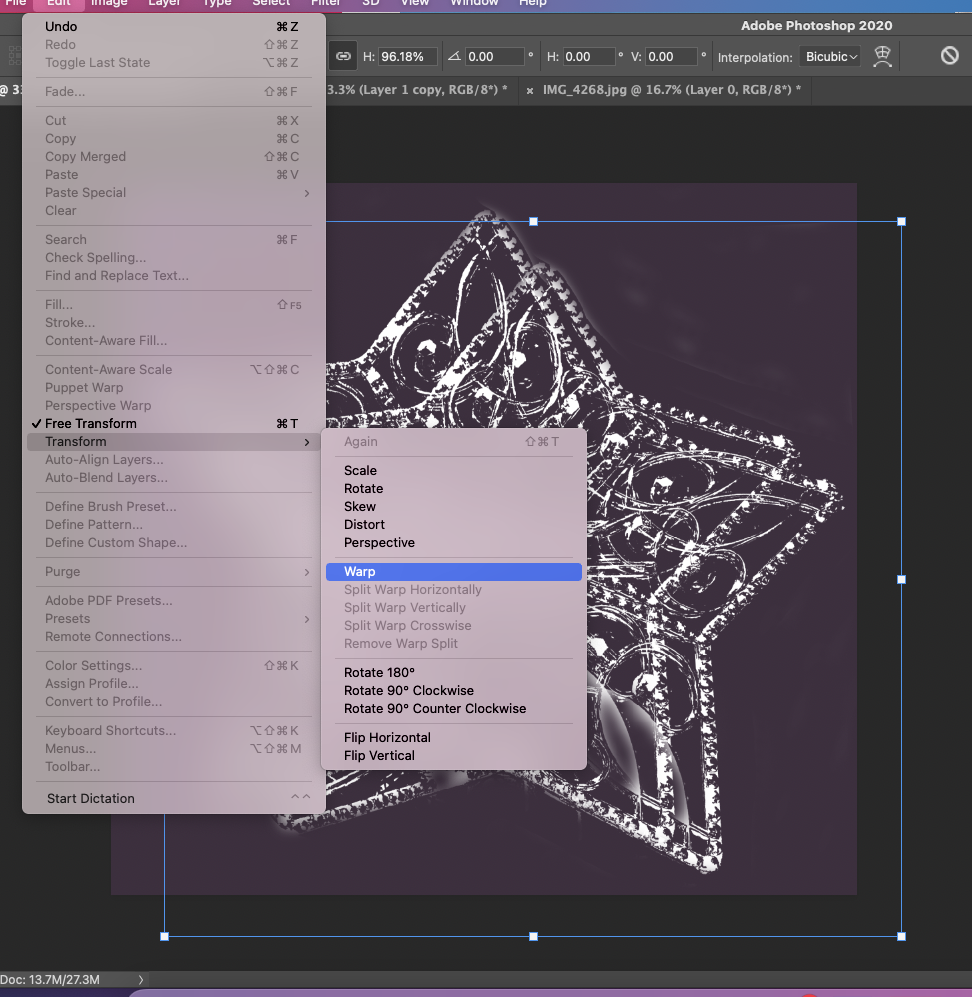 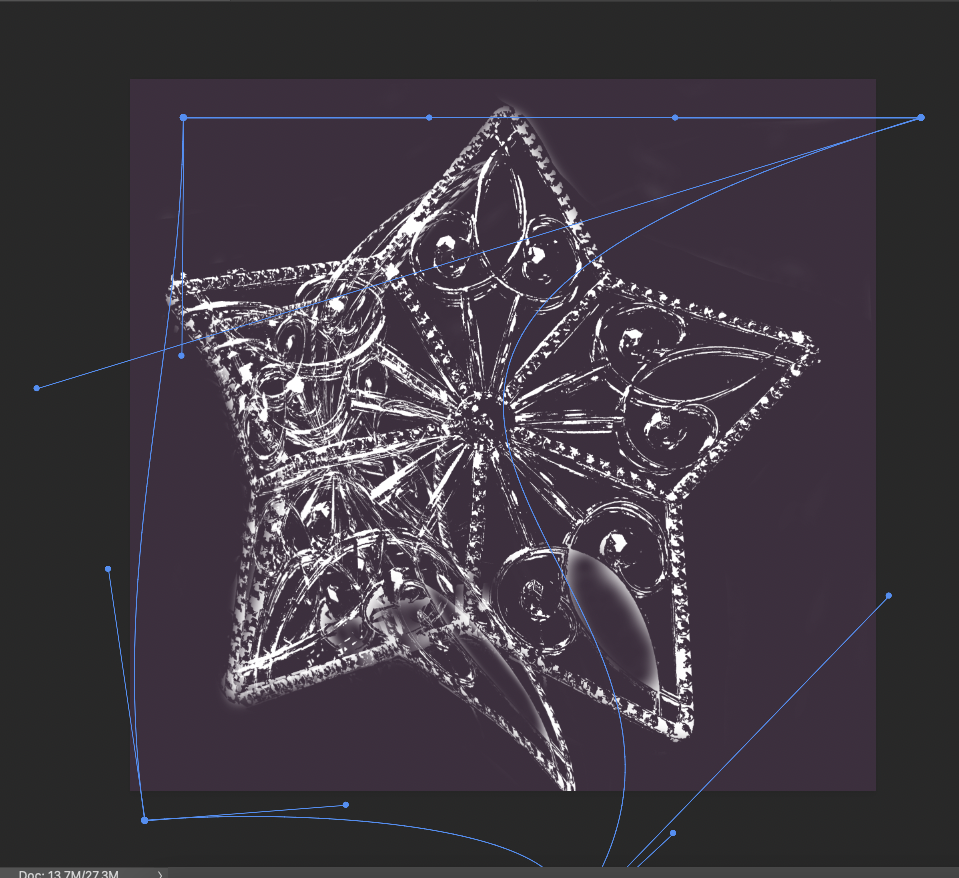 For reference, you can use the Warp function to make the stars move freely. Just like a puppet. 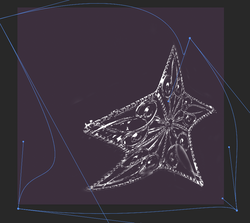 For example, if you use this function, you can create a star running with a balloon as shown below. I uploaded it for fun. 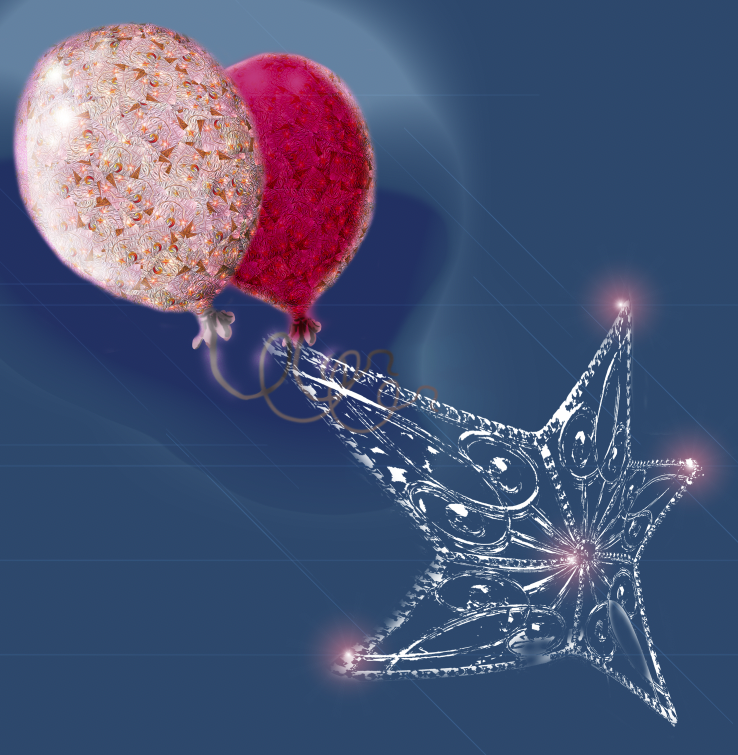 Happy Star, 2021, Myungja Anna Koh Finally, you can finish your artwork with the effect of lens flare for example. 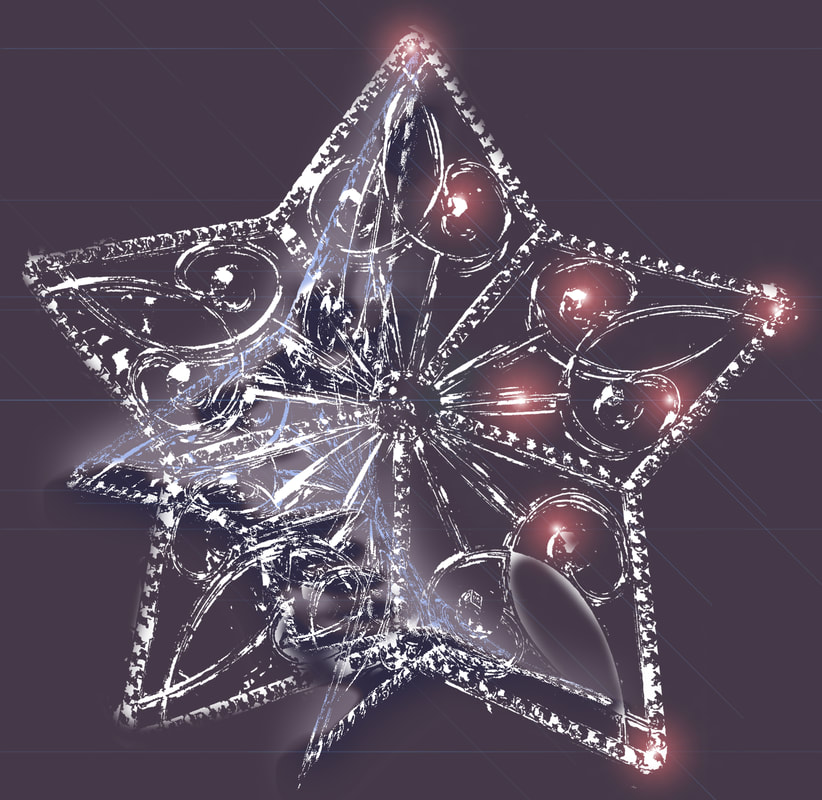 Create a Happy Balloon with Photoshop Today I am going to show you how to make a balloon in Photoshop. I made an image called Happy Balloons a while ago. I liked this image and uploaded it to the main banner of the Red Bubble site below. I made it with a few products and it's pretty good. What I like the most is the watch. 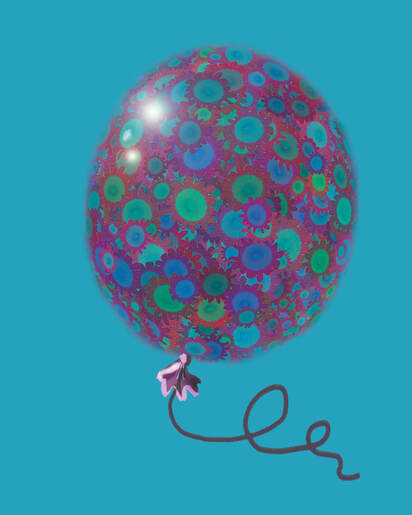 Happy Balloon, 2021, Myungja Anna Koh  Banner with happy balloon 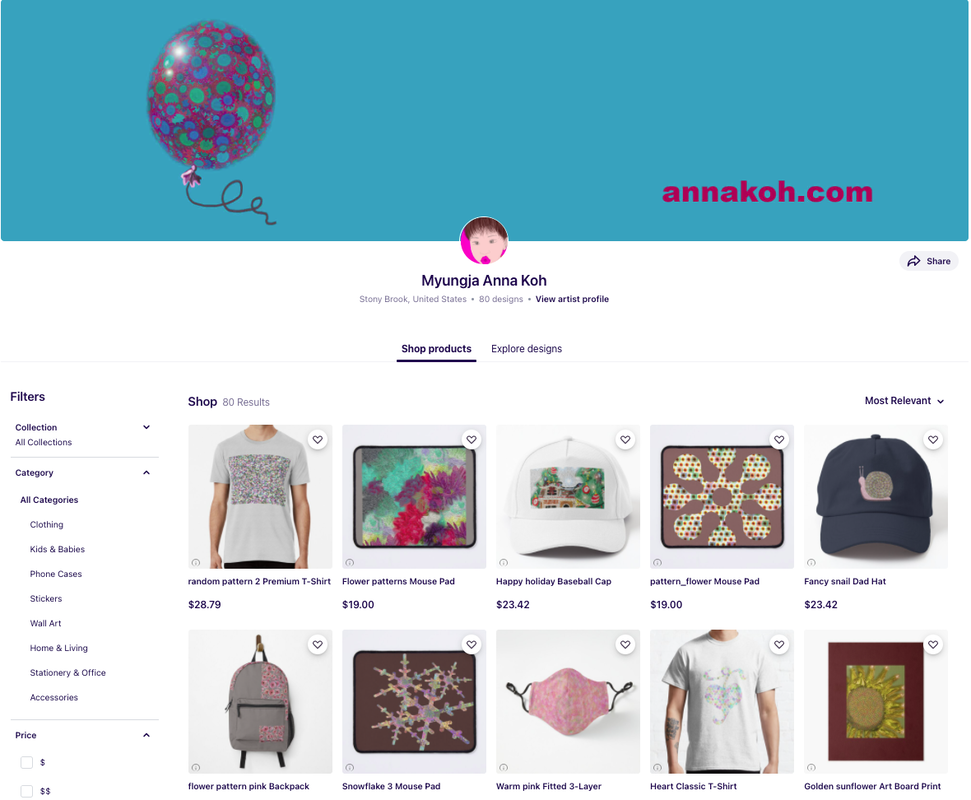 AnnakohArt, Redbubble site Here is the related products: 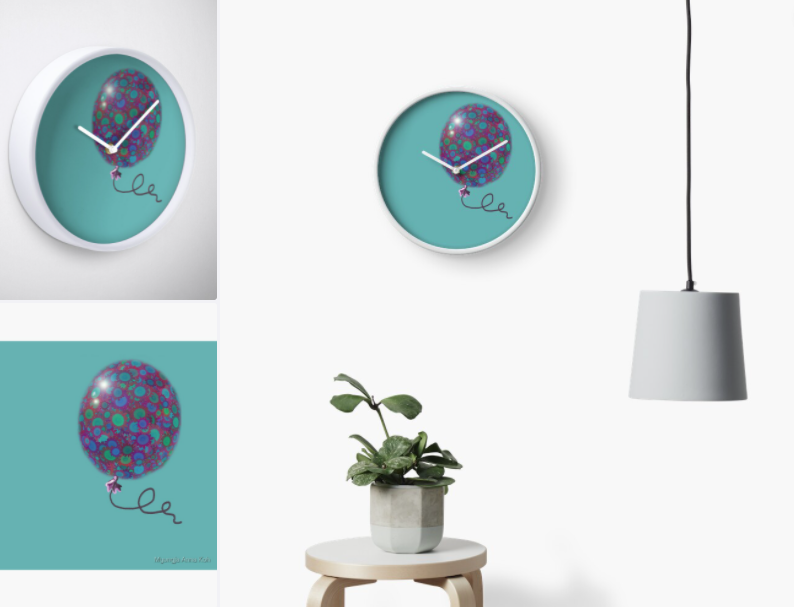 Today, I am going to try to make another Happy Balloon with a different image. First, I loaded the image below. 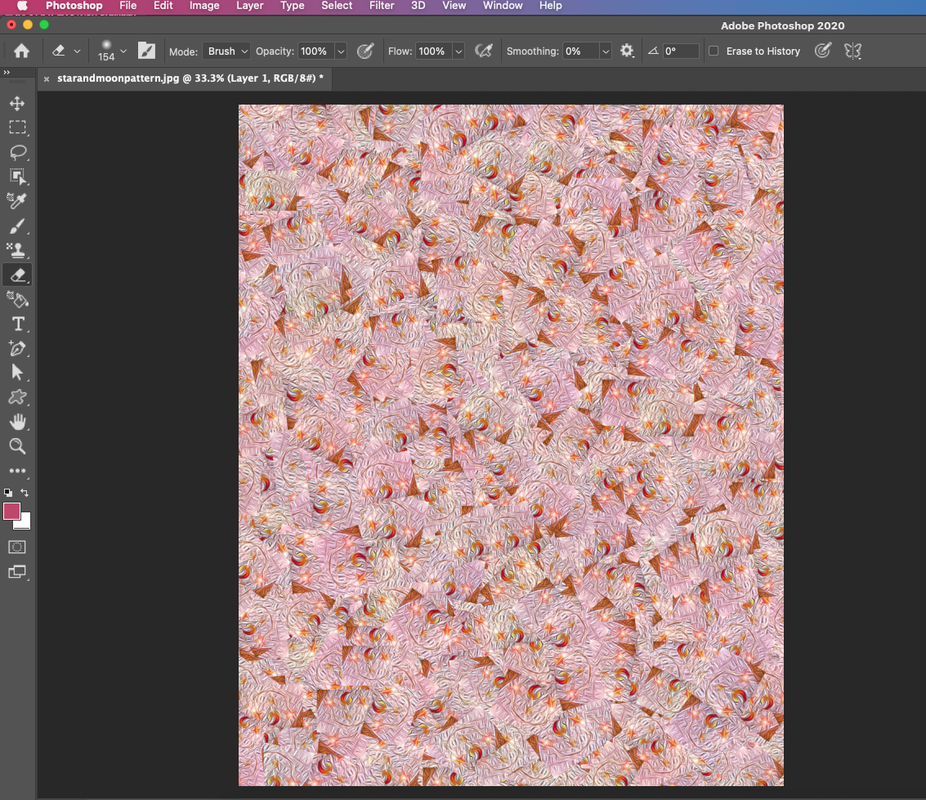 And then you go to Filter--> Distort---> Spherize for forming a three-dimensional shape.  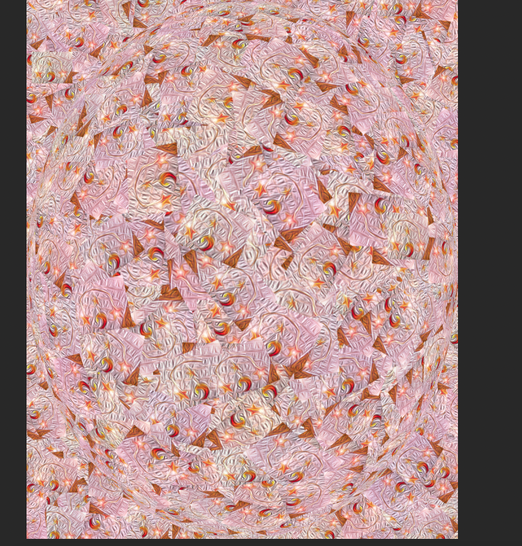 You can see the result after applying the spherize function of distort like above, and then use the eraser tool for pick up the balloon line. Below is about the mode of Eraser. tool for removing the outline naturally.   And then apply the blending options for the balloon image after click the layer.   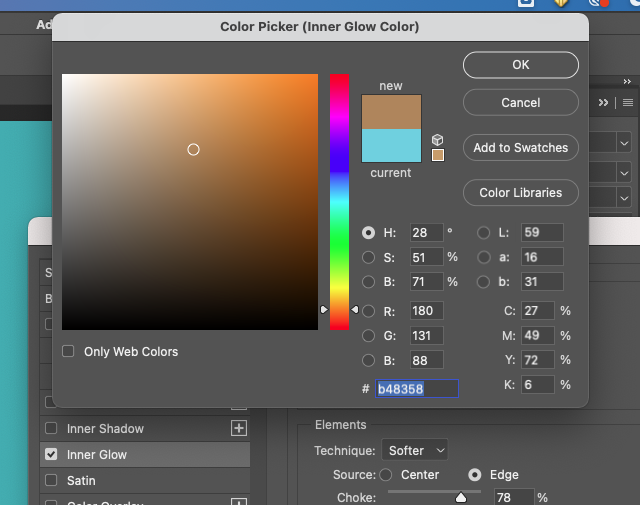 After applying the above blending options, and go to the Filter---> Render---> Lens Flare. 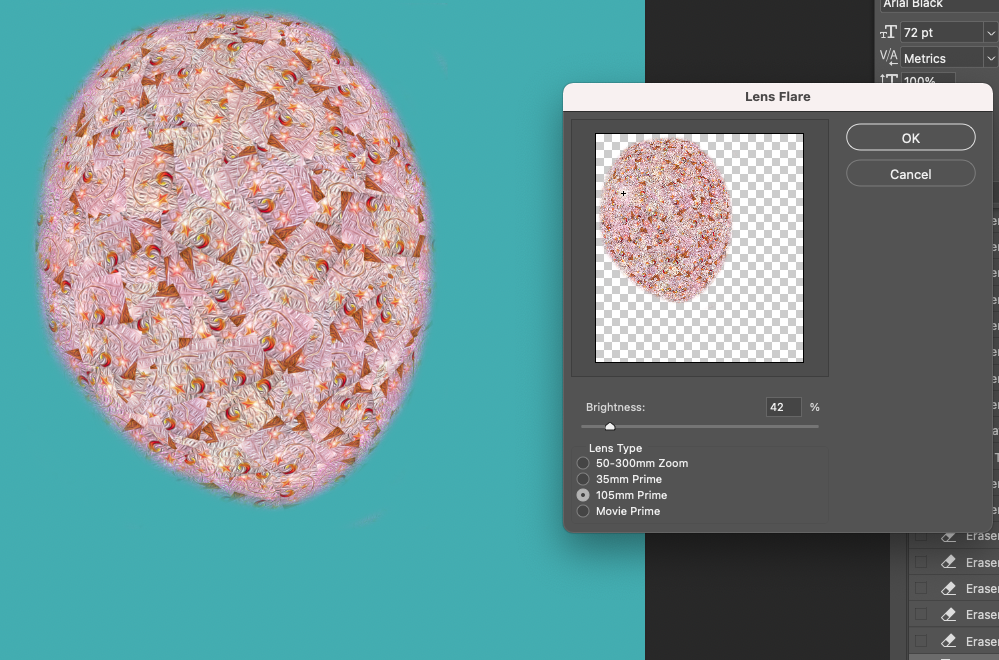 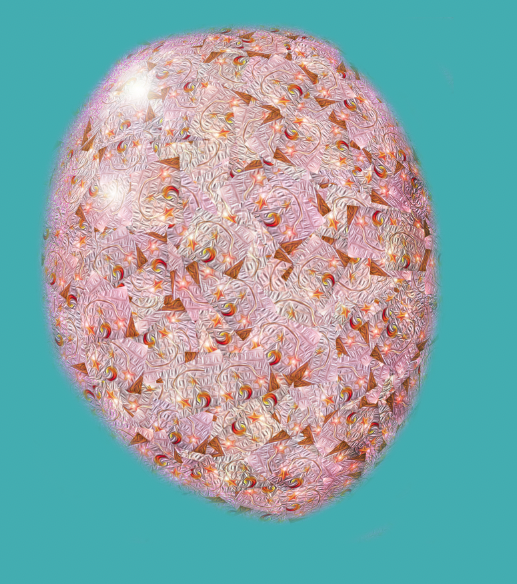 Let's make promotional postcard for artworks!
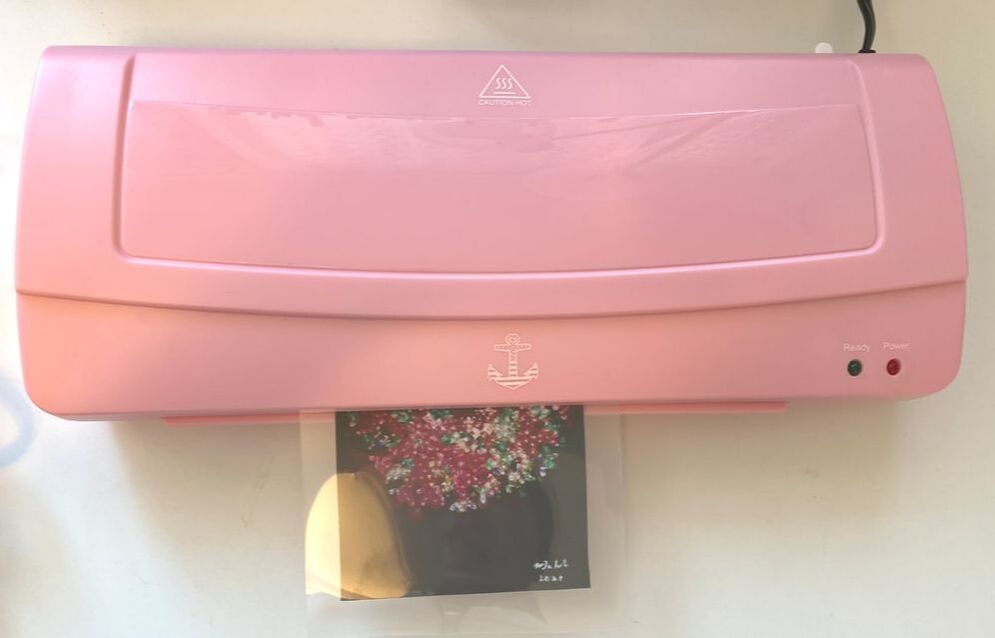
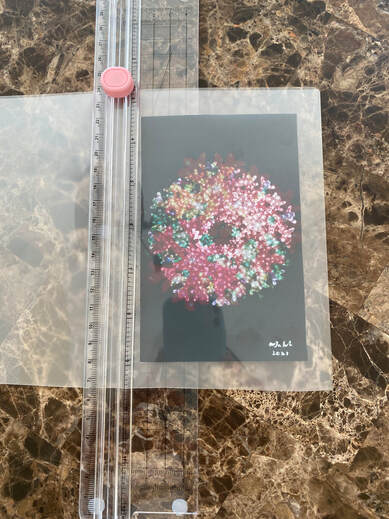
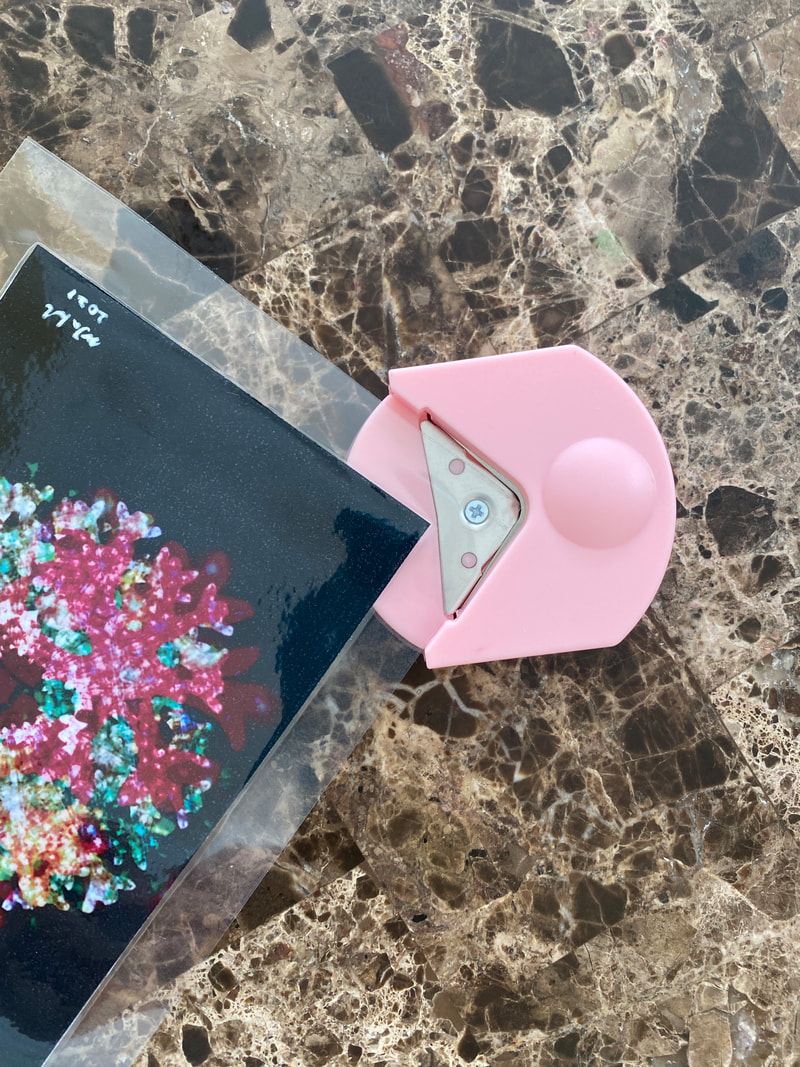
Today, I am going to share with you how to make a promotional laminating post card using the laminating machine below.

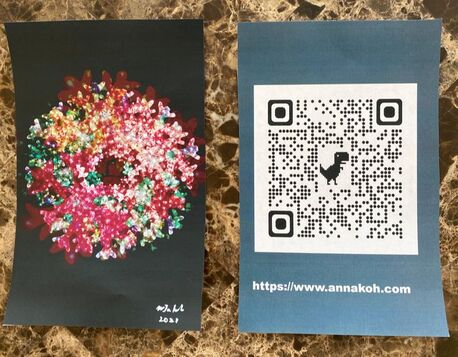
When I was a child, I used a iron to make a laminating paper to be needed a coating to protect paintings from water and other contaminants. In the past, when the laminating machines were not available in every house, it had no alternative choice to coat.
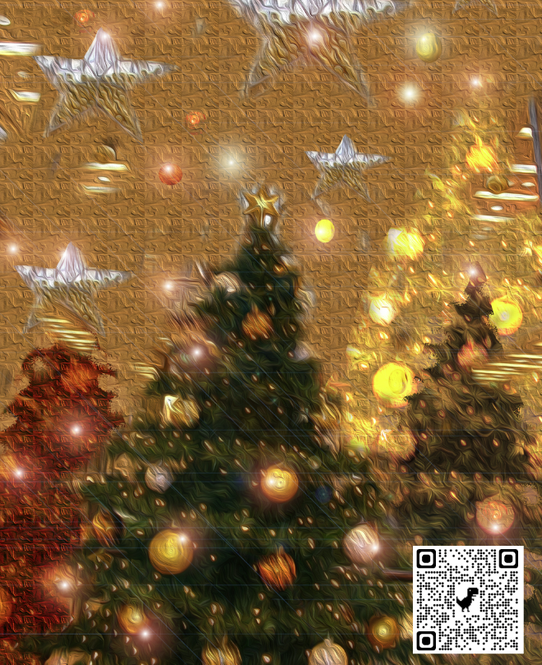
Children had to buy thick vinyl and press it with an moderate heated iron to press it for a while. The coating targets were primarily pretty fallen leaves, well-dried petals, or a four-leaf clover found by chance. It was always crowded with children who wanted to get a wonderful picture around the talented child. They were asked to draw a picture and then pressed with an iron to make coated paper, then used as a bookshelf. Now you can buy different types of laminating machines through the stores. This time I decided to put the QR code inside the picture instead of the signature. First, I had to get the QR code from the recently opened Redbubble site. Go to the site you want to promote as shown below. Then, place the mouse cursor on the website and right-click to get the QR code as shown below. 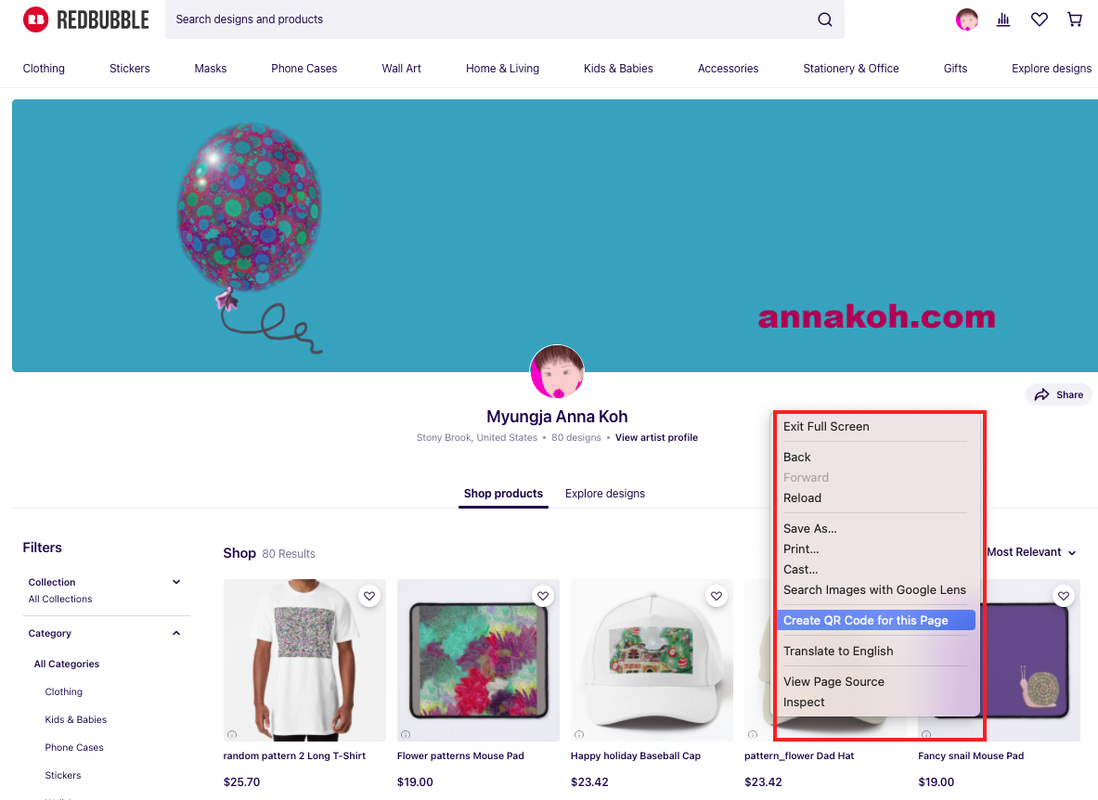
When you click, the following window will appear. Click Download.

Then, put the QR code obtained in this way into the image you want to promote.
This way, when people who are interested in your drawings take a QR code with their cell phone, they will be directed to the site.
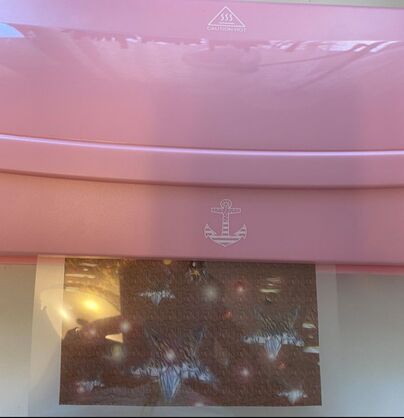
Then put the picture in the coated paper as shown below and put the coated paper in the laminating machine. 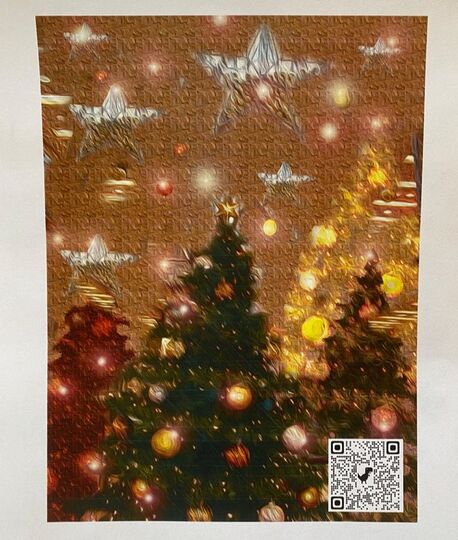
I made another picture like the one below. Below is an example made with both front and back sides.

How to display your art products of Redbubble in your site. I decided to update the following part of the main screen of the homepage this time. It is good to display items that need frequent update mainly in the main part of the site, because there must be a part that is periodically changed on the homepage to confirm that it is being managed diligently. 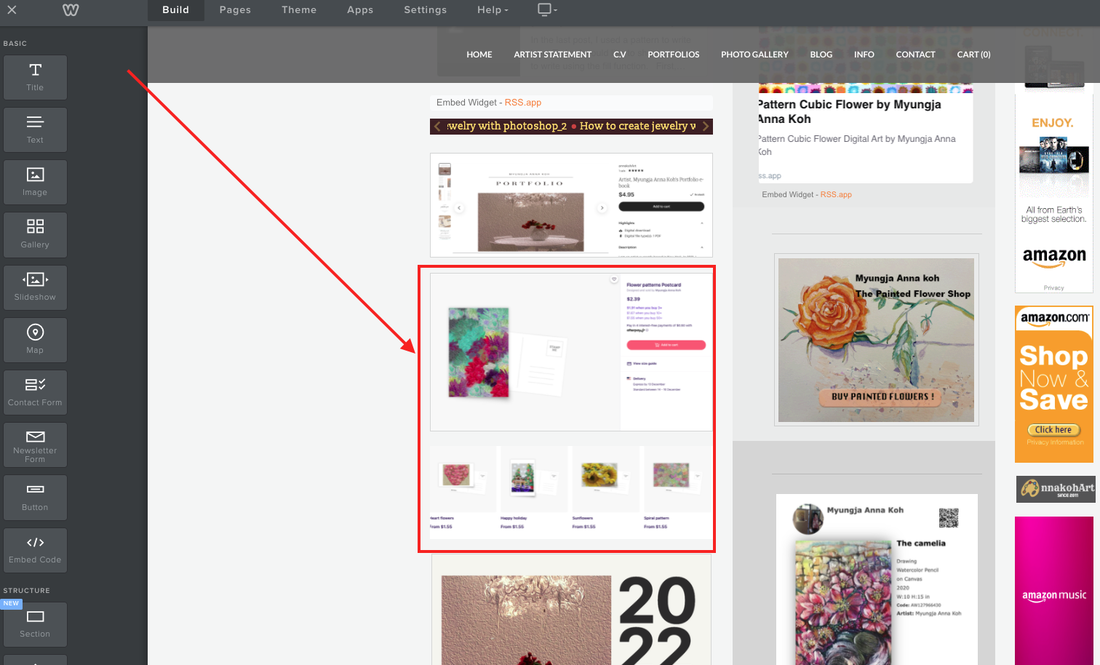 The above is now changed to this. 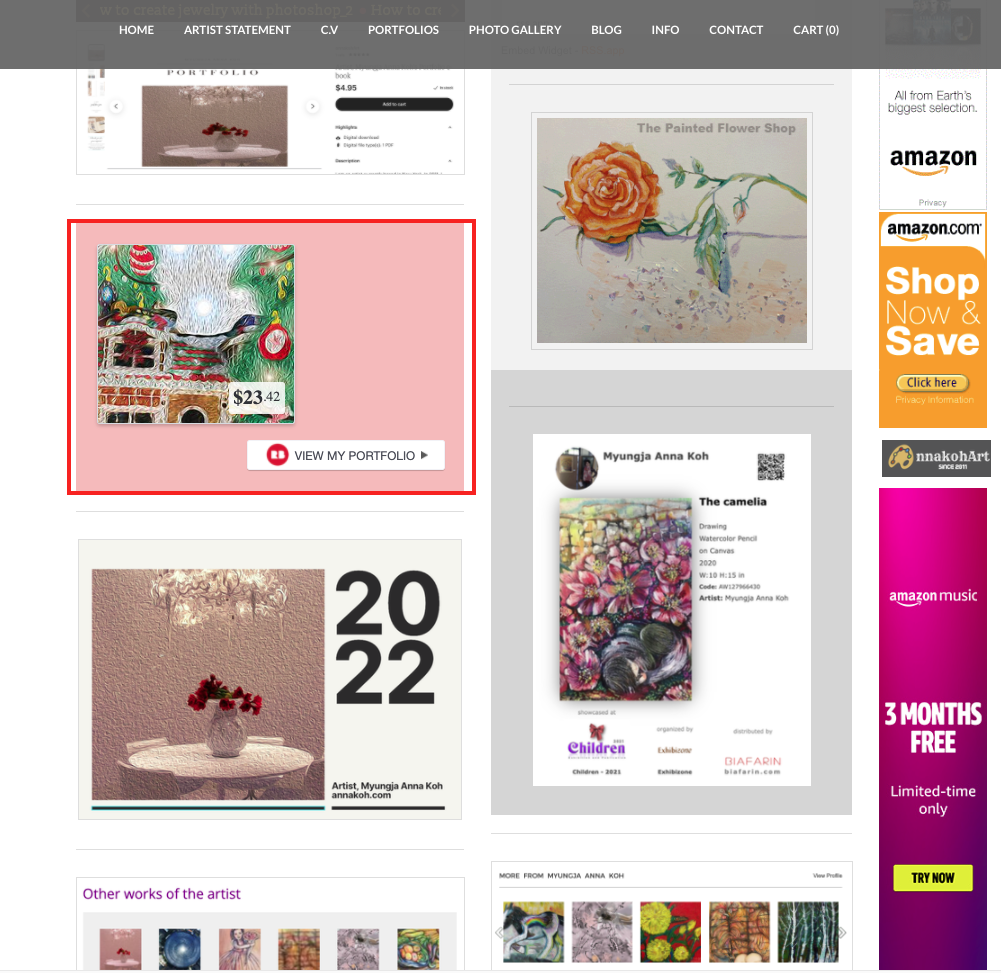 The picture in the pink part above is the marketing embed code provided by the Red Bubble site. Today, I would like to share with you how to insert the Embed code provided by Red Bubble into your homepage. First, you have to move Artist Tools in Redbubble, and then click the Link to other sites. 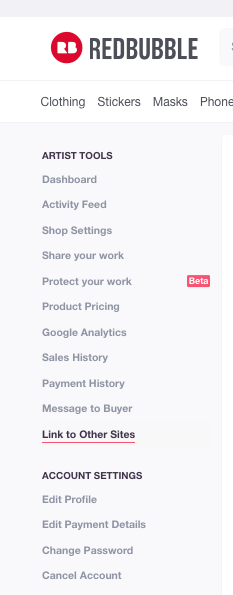 Next, you can find below options to show off your products on your website. 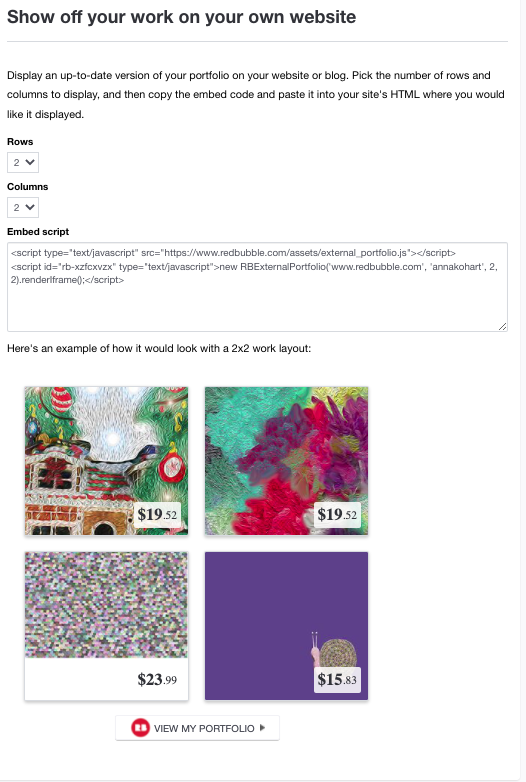 Last, you just do right-click and copy the entire code like below.  Then go to where you want to be located. In my case, I am speaking based on the Weebly editor. Just select and paste the embed code on the left side of Weebly's edit window. However, in my case, I wanted to show only one picture, so I modified the code a bit as shown below. 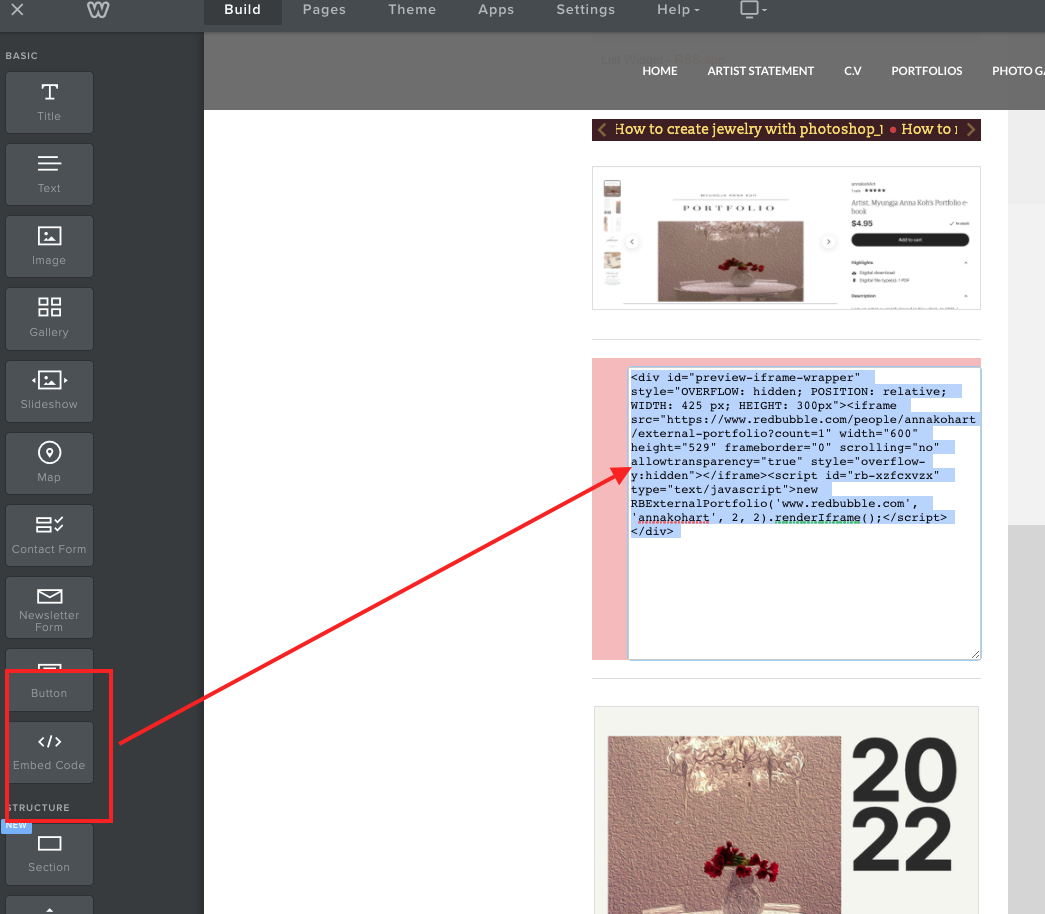 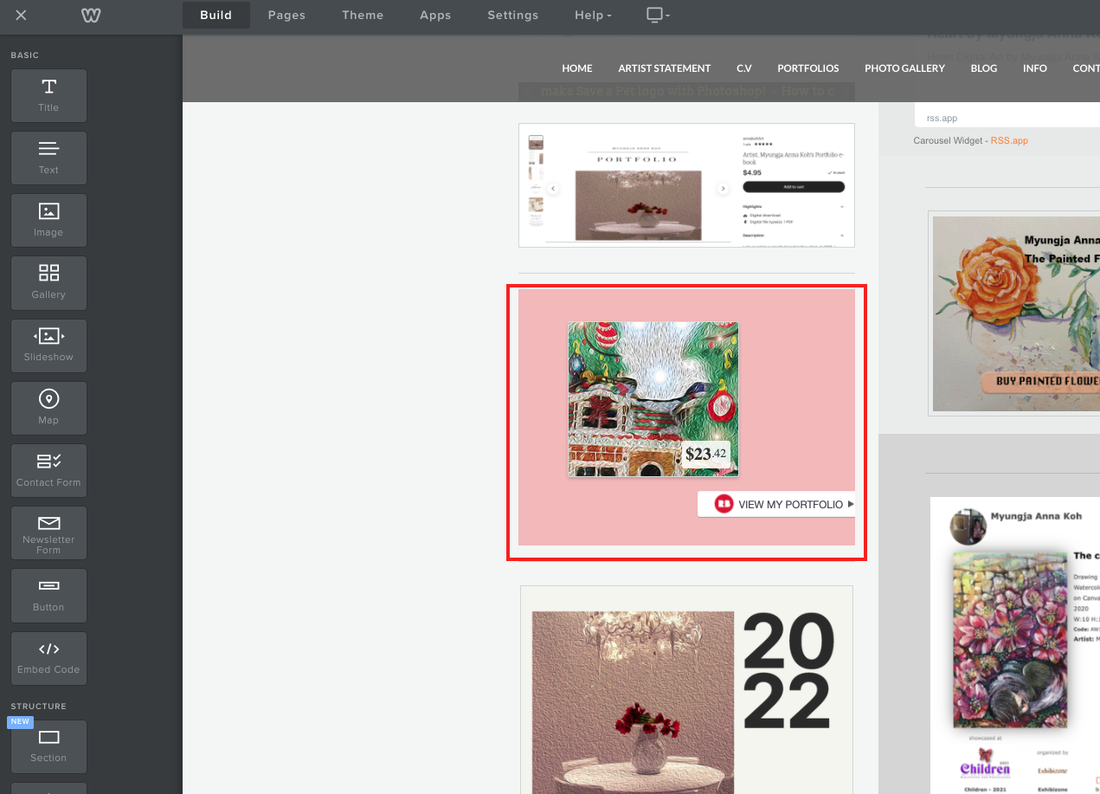 Here is the modified code : <div id="preview-iframe-wrapper" style="OVERFLOW: hidden; POSITION: relative; WIDTH: 425 px; HEIGHT: 300px"> <iframe src="https://www.redbubble.com/people/annakohart/external-portfolio?count=1" width="600" height="529" frameborder="0" scrolling="no" allowtransparency="true" style="overflow-y:hidden"></iframe><script id="rb-xzfcxvzx" type="text/javascript">new RBExternalPortfolio('www.redbubble.com', 'annakohart', 2, 2).renderIframe();</script></div> |
Myungja Anna KohArtist Categories
All
Archives
April 2024
|

|
Tutorial |

 RSS Feed