How to convert jpg to vector image by using Image Trace tool. Today, I am going to show you the process of converting image files with extensions .jpg, .gif etc to .ai files for vector image in Illustrator. Recently, I converted the image file on the left into the file for Illustrator on the right. At the same time as the conversion, the picture was also modified.
As in the examples above, you can simply convert an image file to an illustrator file and edit or change it and save it. First, after uploading your image file like below, and click the layer (not the original one, only click the sub image like below. ) 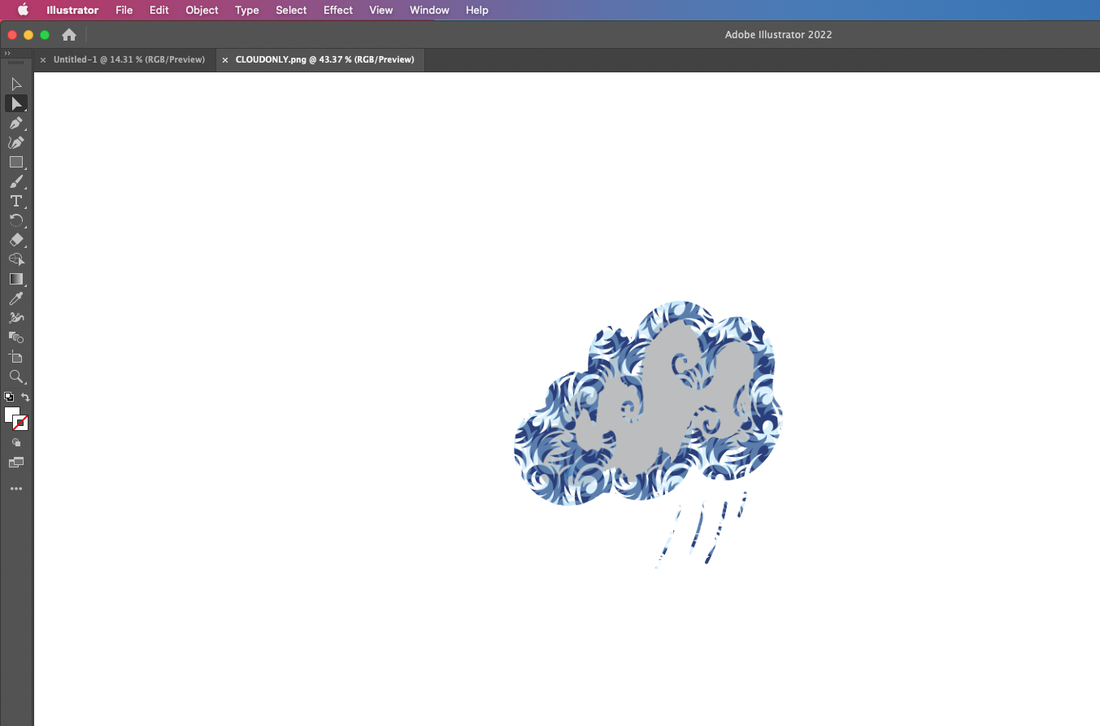  And then you can find the image Trace menu on the top side bar like red rectangle. 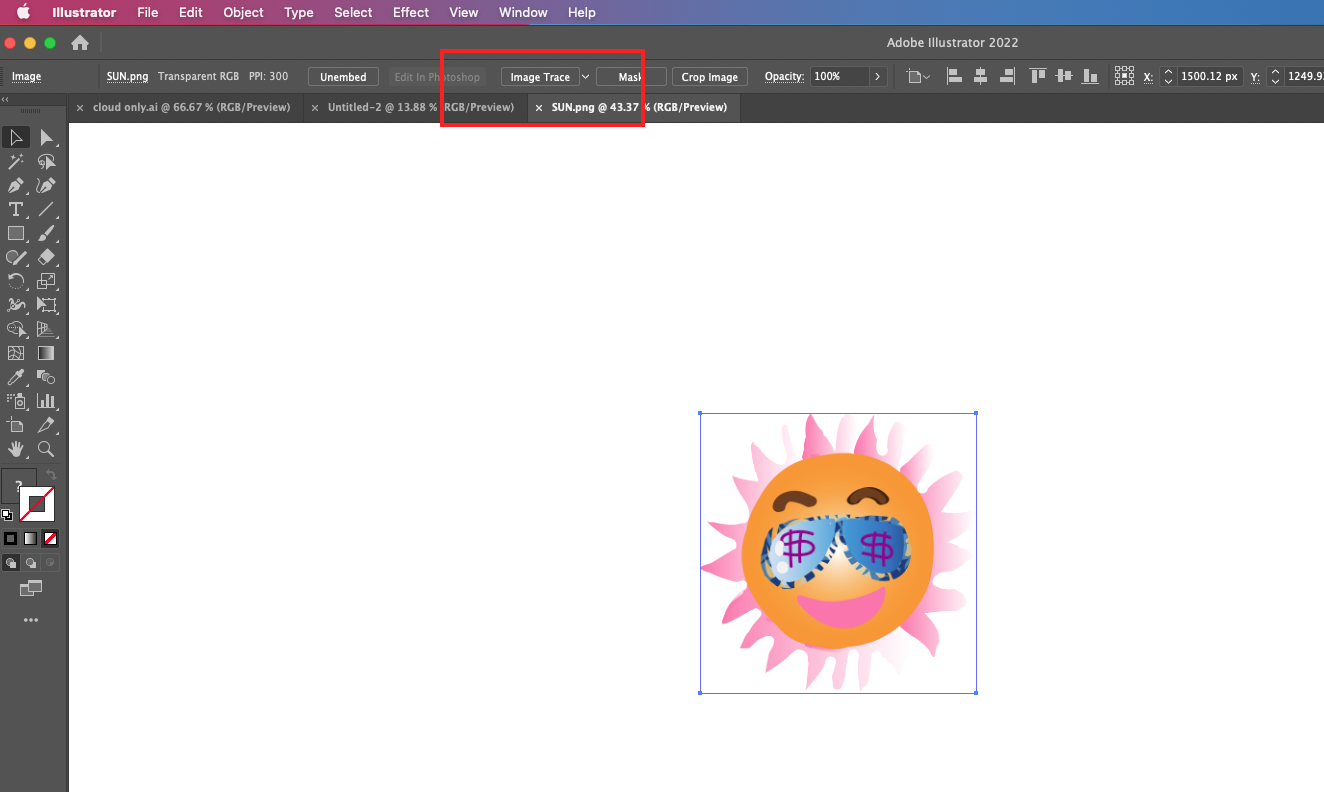 Next you can drop down the menu and select the High Fidelity Photo. 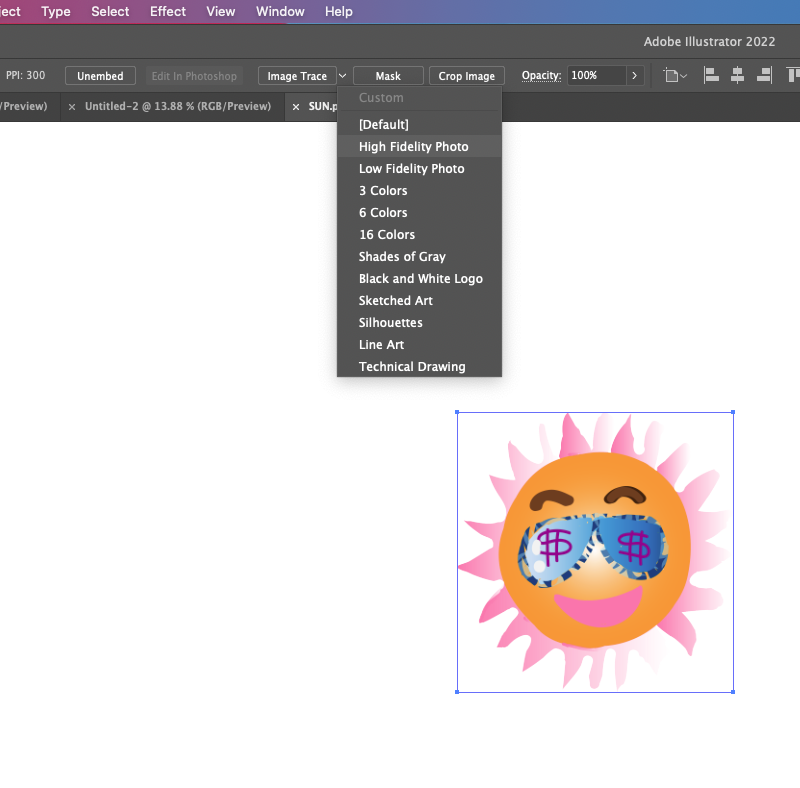 After selecting that , you can make sure the processing status like below. 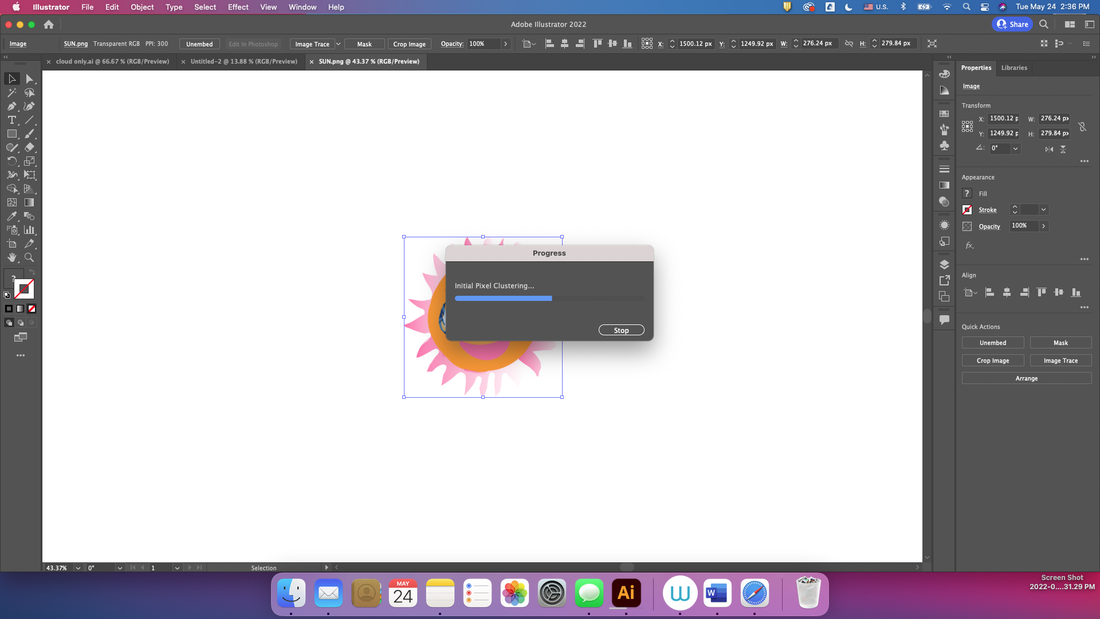 If everything goes well, you can find the expand menu. You have to click expand menu. 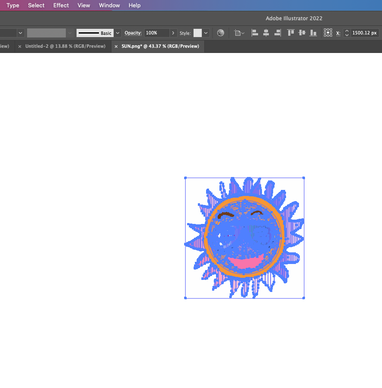 For modifications, you can make the selecting line as ungroup status. 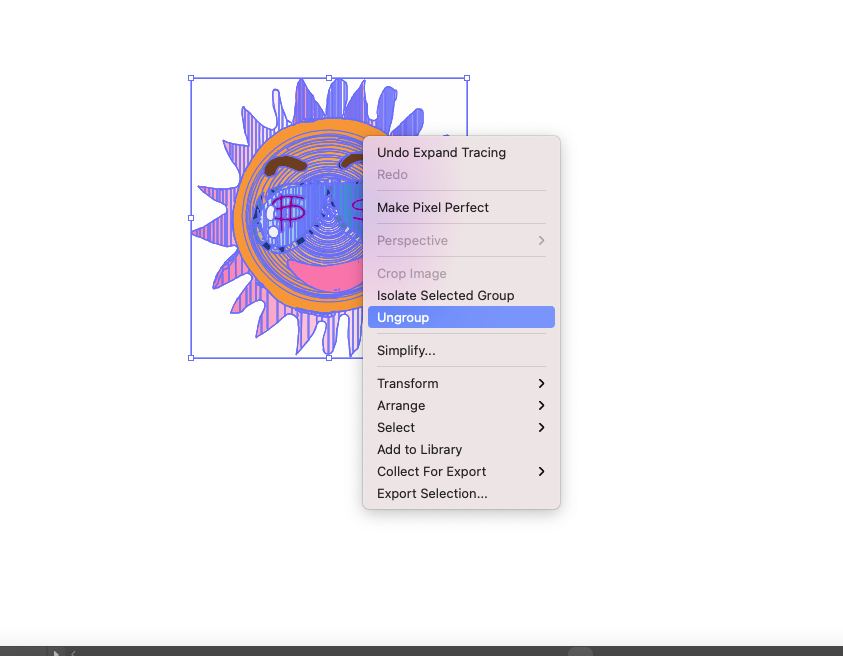 To explain again with an example, select the image you want to convert and click High Fidelity Photo in the image trace menu. 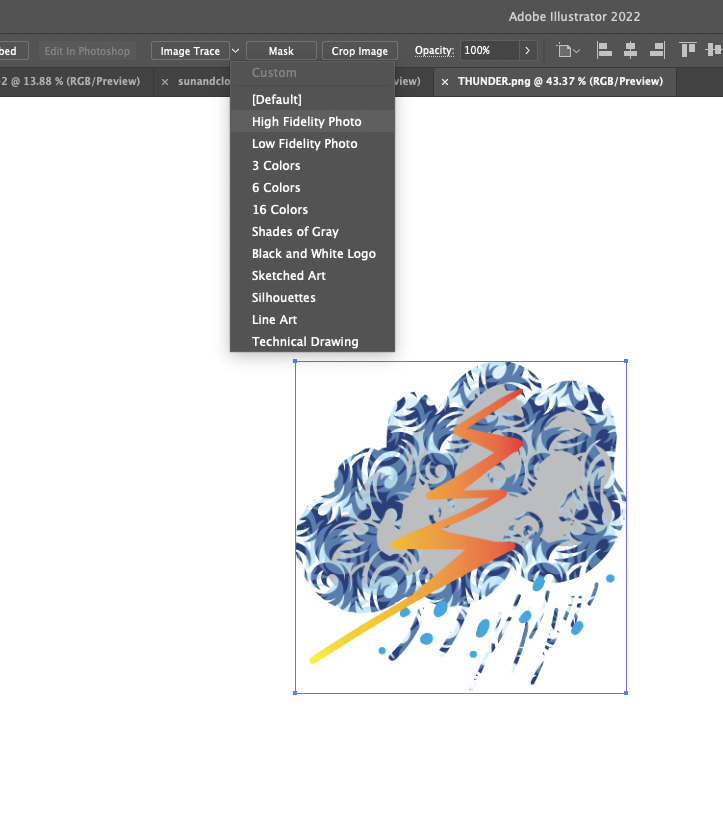 And then if you find the Expand text, you have to click it. 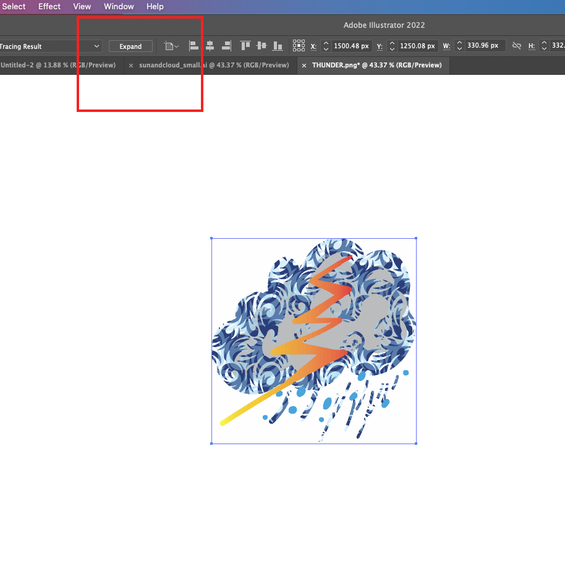 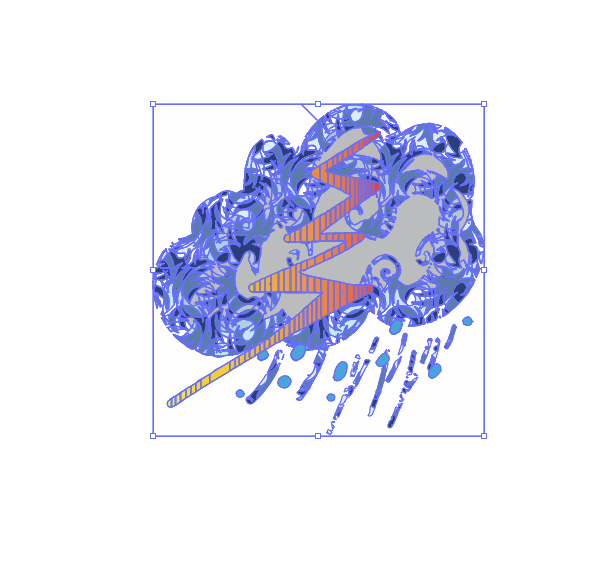 For adding or removing the image, you have to ungroup the each image lines. 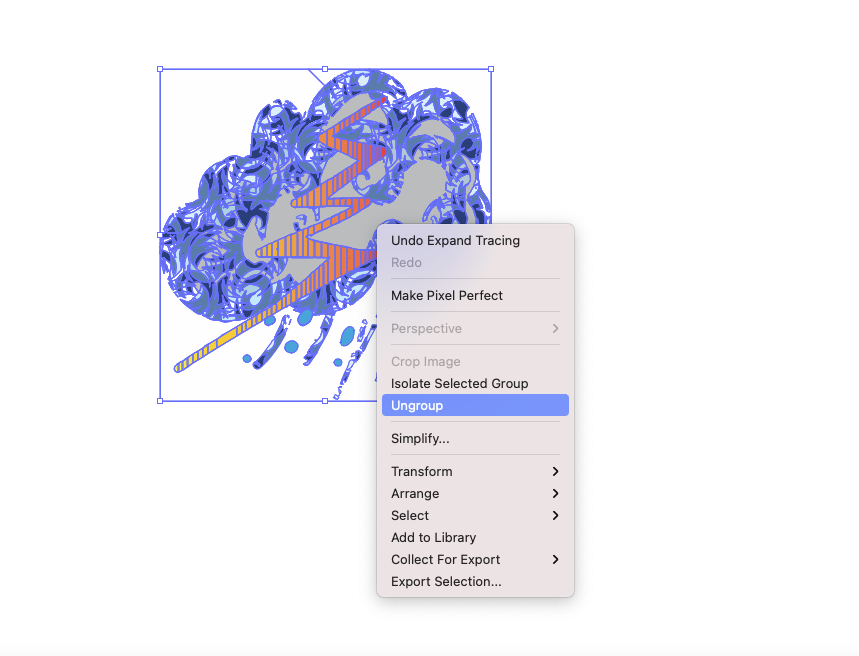 In my case, I added a yellow wind mark to the thunderstorm picture as shown below and saved it as an illustrator file. 
0 Comments
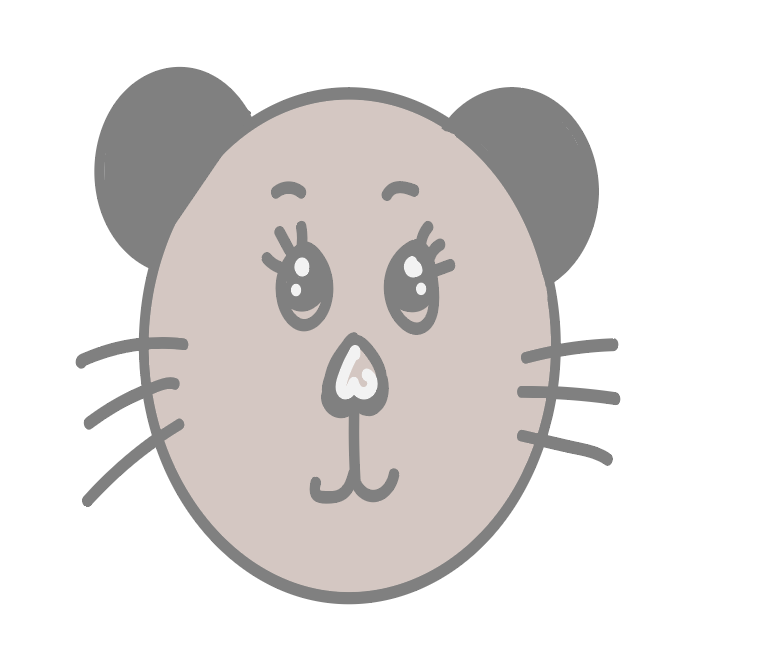
How to draw and paint an animal with Illustrator!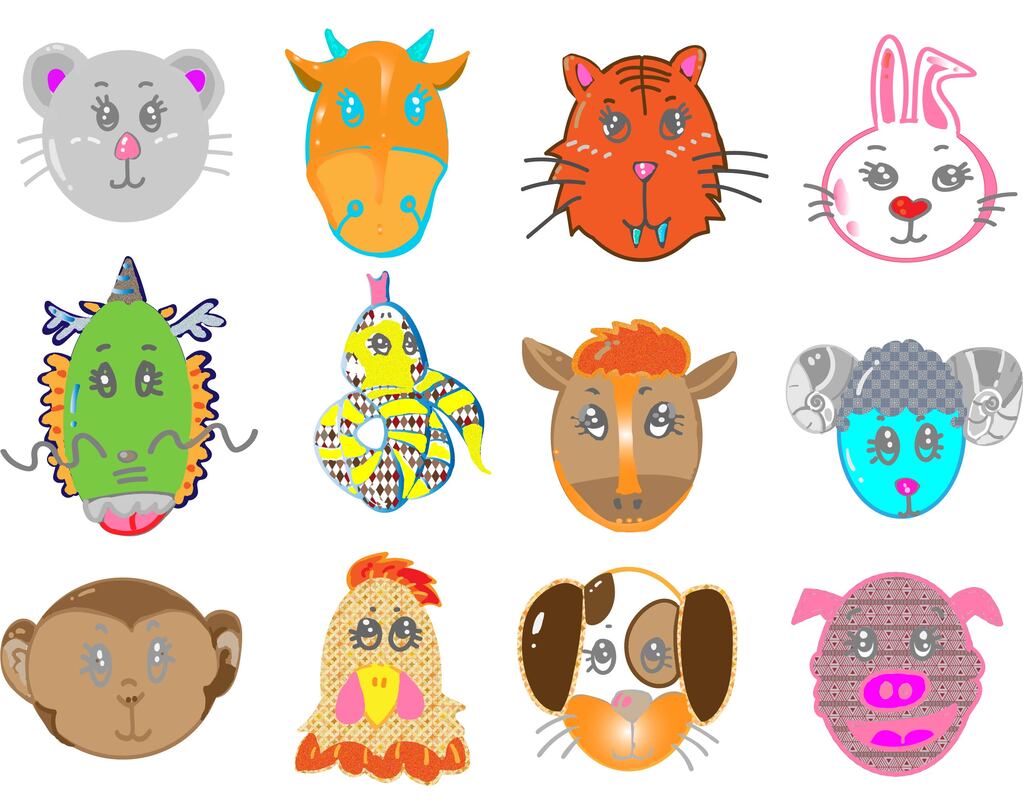 Today, I will try to draw a simple animal animations with Illustrator. The animals to be drawn are 12 symbolic creatures from the Zodiac. Related information has been posted on the blog. (Go to related blog) Most of all, I will explain the mouse face, which is the easiest to draw. First, draw a circle as shown below. After that, make the ears with small circles.
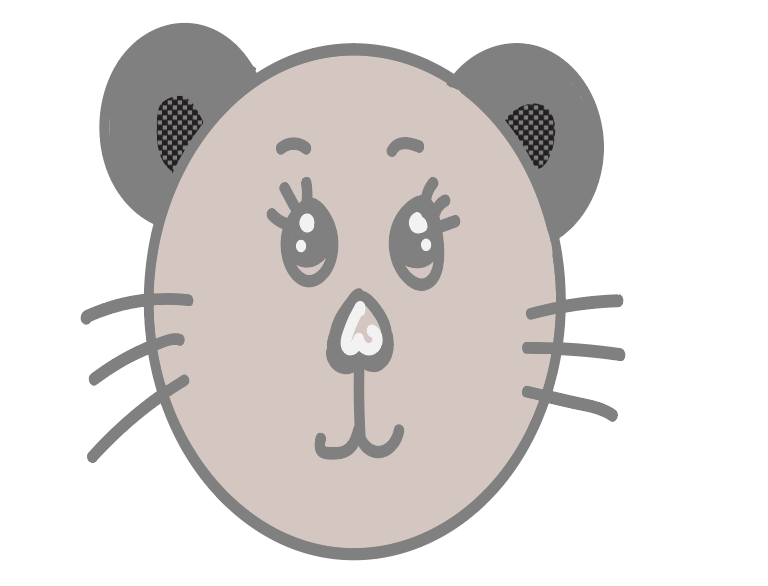
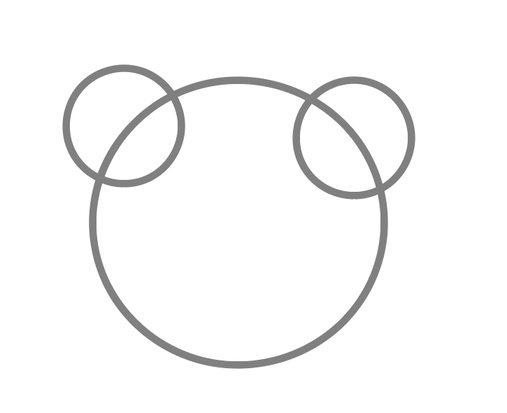 You need to erase the ear line on the inside of the face. In general, if you just erase using the eraser tool, it will not work. The Illustrator erases by plane unit. So, when erasing a line like this, you must first designate this line as a path and erase it. In a nutshell, you have to go Object ---> Path---> Outline Stroke, and then erase it. 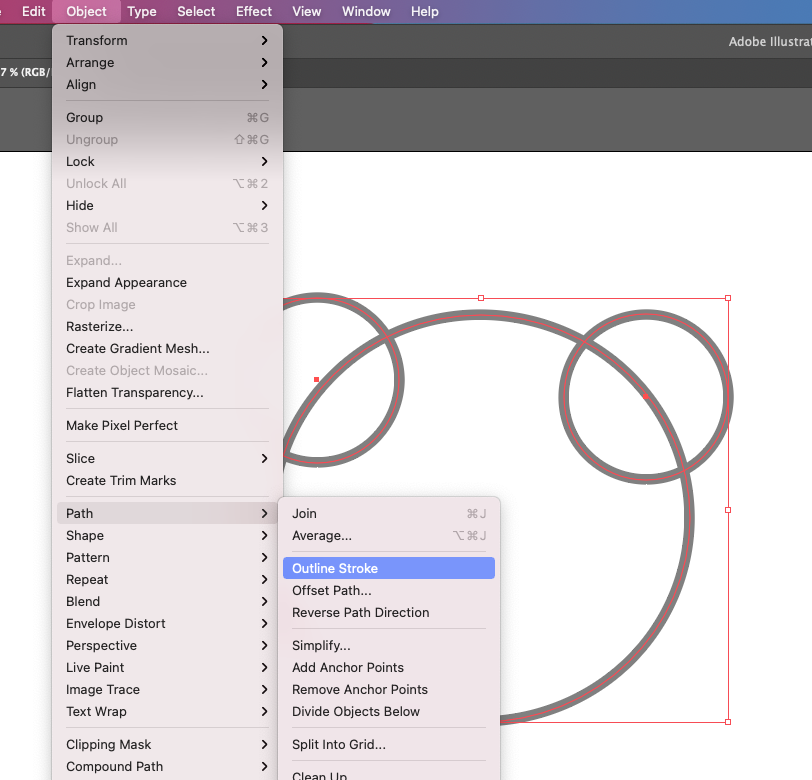 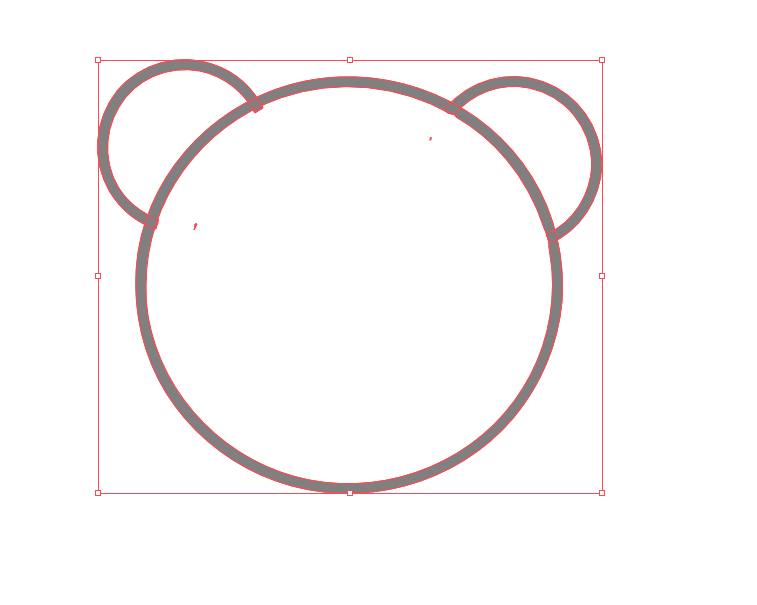 Next, complete the eyes, nose and mouth with the Blob Brush tool. 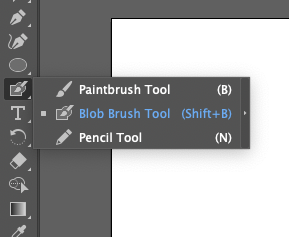 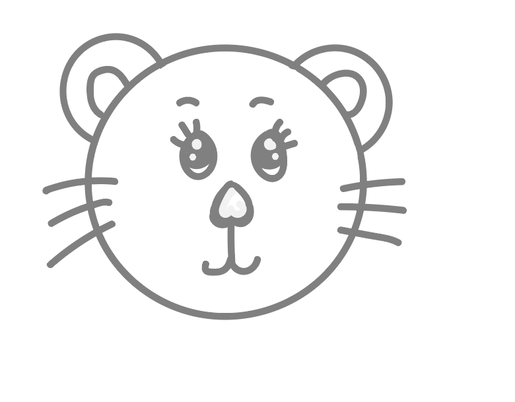 For painting the shape, you have to go Live paint pallet by click on the left sidebar.  If you feel some difficulty to find it, you can go Object---> Live Paint---> Make. 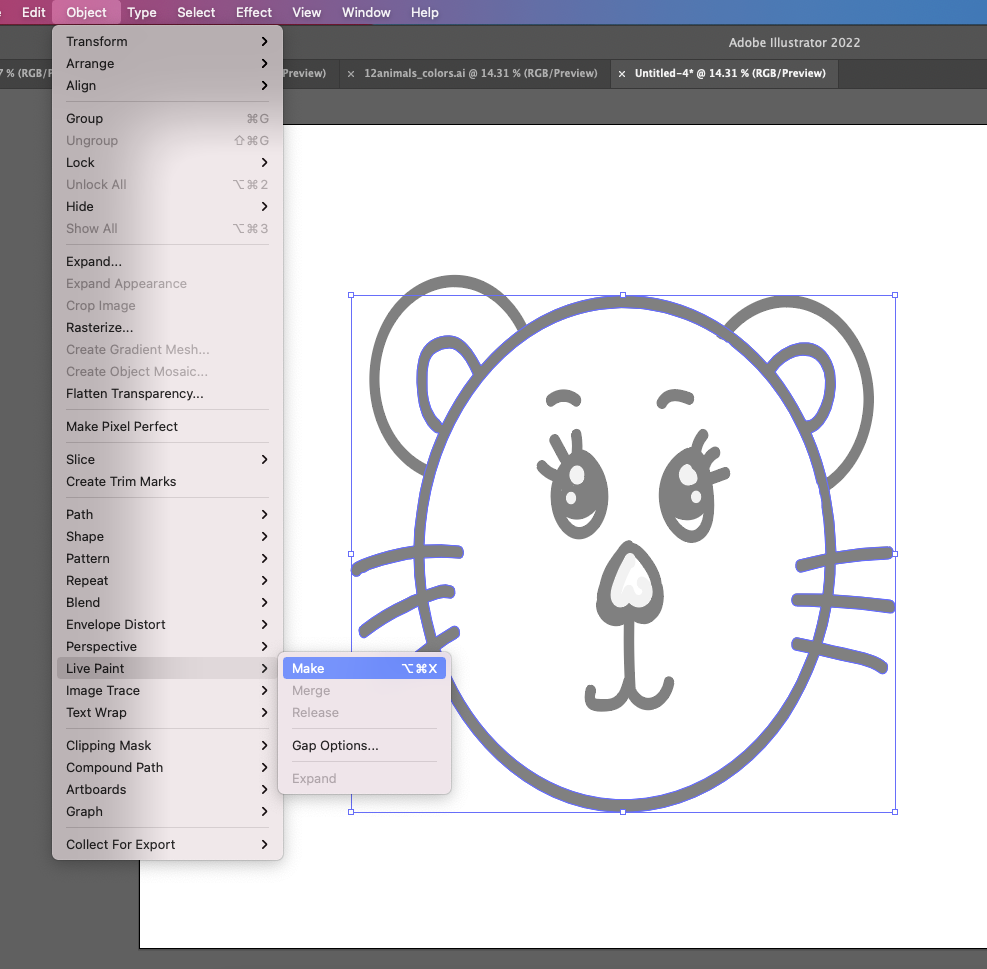 Specify a color to fill, and when the cursor changes to a paint bucket, click the corresponding face. If you want to use a pattern fill, you can also choose it like below! 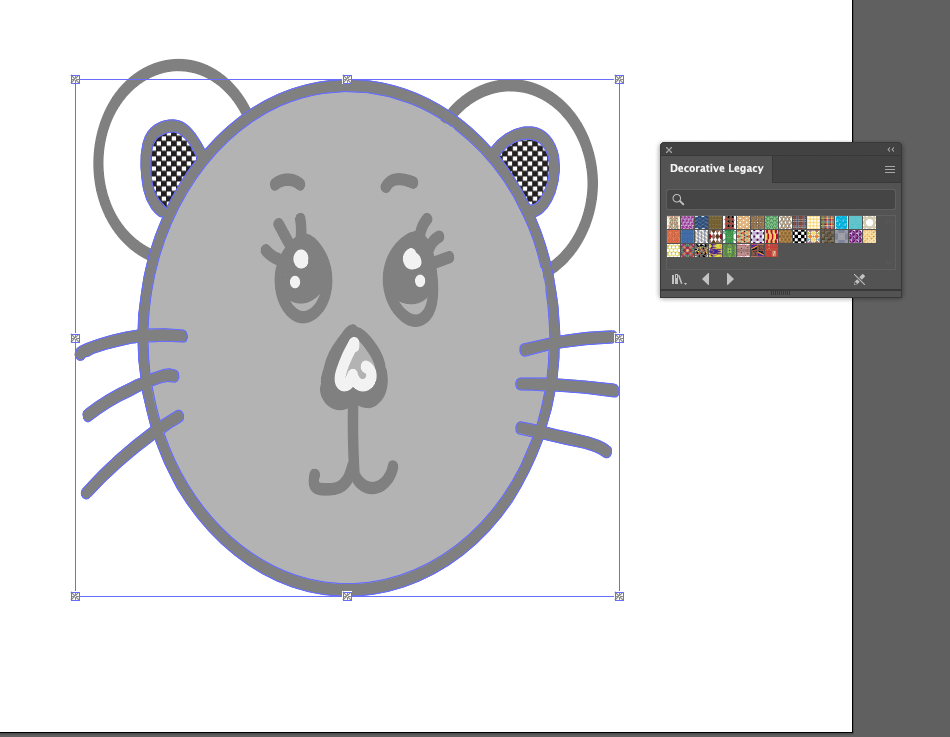 Sometimes, if the live paint function doesn't work like the ear wheel, create an area with the pen tool as shown below. At this time, create a new layer and draw on it. 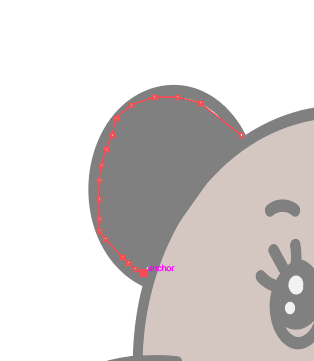 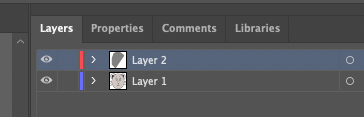  After drawing everything as shown below, change the order of the layers
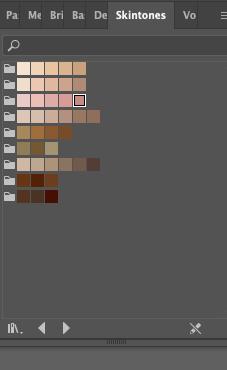
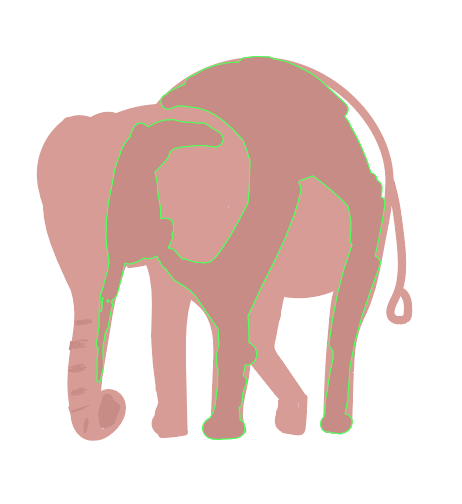
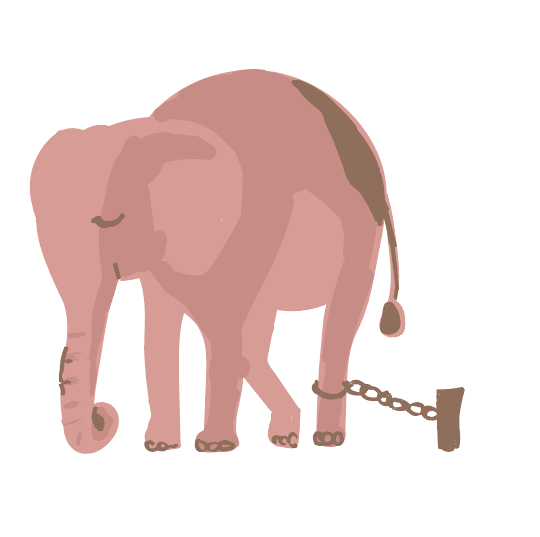
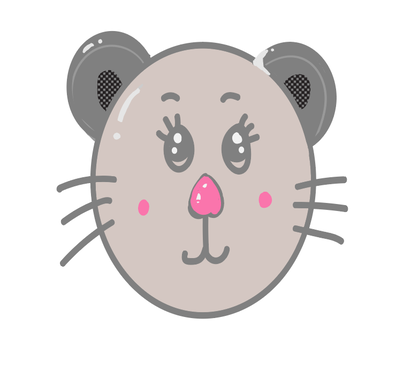 Complete the details as shown the final image. Easy drawing with illustratorToday, I am going to show you an elementary illustrator drawing. I drew a ballerina a while ago, but it's an illustration related to psychology this time.  Ballerina, 2021, Myungja Anna Koh I wanted to paint a picture of learned helplessness, that is, to get used to the limits that I have made myself before without even questioning them and get used to them within those limits. Learned helplessness is a reaction to giving up, a response to stopping, and the belief that whatever you do is not very important. If you tie a baby elephant to a small stake, it will try to escape several times. However, it will not be possible. The baby elephant accepts that he will never escape and stops trying at a specific moment. Even though the elephant can easily escape when it becomes an adult, the thought will not cross his mind, pulling out the shrunken stakes. So he remains tied up. It is how most of us behave. We have been conditioned to be unable or unable to do certain things. We have been bound by expectations from our families, friends, and society. And we often don't stop checking to see if these things are true. We don't dare to do anything against them, mainly based on fear. Most of the time, we do not realize that we view certain ideas as cosmic truths, but they are only cultural conditioning or breaking conclusions. 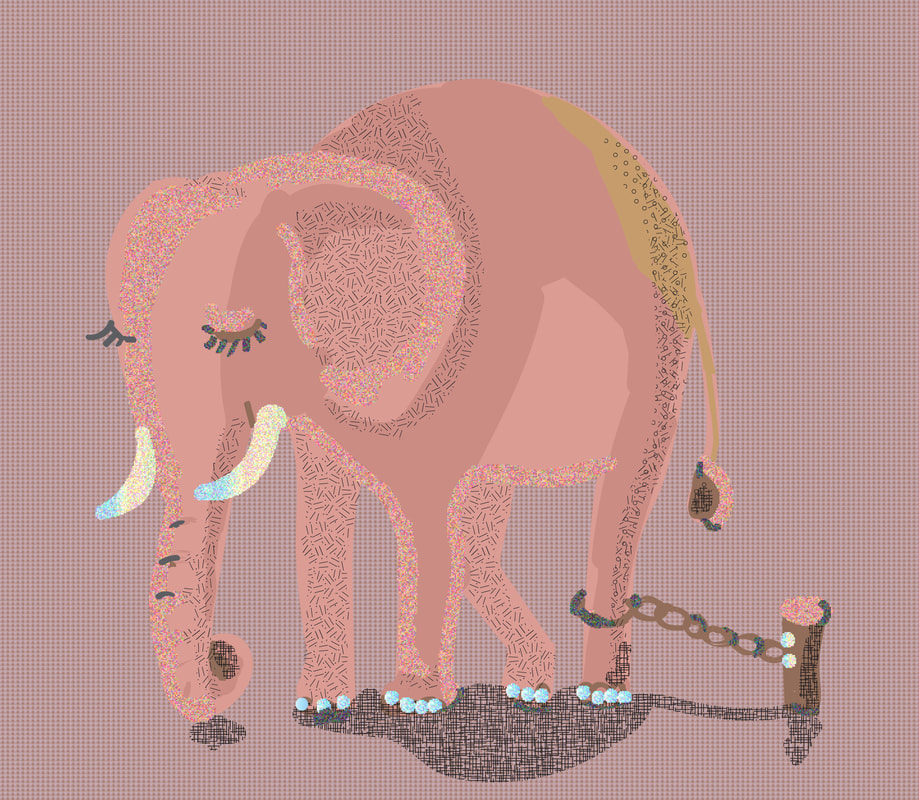 Learned helplessness, 2021, Myungja Anna Koh I often use the Blob Brush Tool to draw a non-lined surface of an object.  And then prepare your palette .  Then add a color palette of skin tones from the library as shown below and put them in the panel you use often. I used a skin tone with a hint of pink. 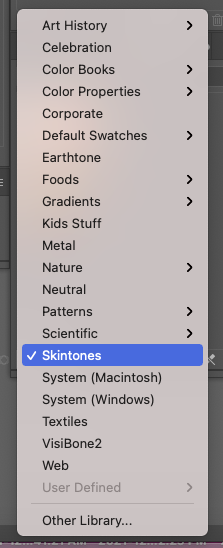 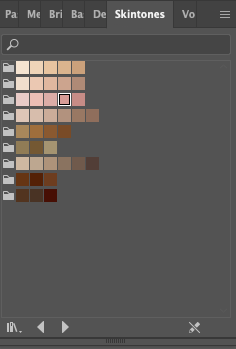  First, draw a rough line like this. Then, take out a thick brush and paint the surface as shown below. First, I paint the bright areas. 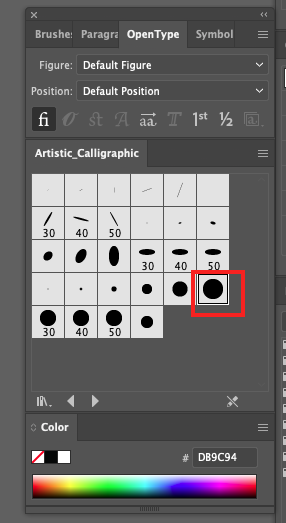  Then, use a mid-tone skin color to add a medium contrast.
Then draw with a darker tone. At this time, I also drew the stakes. Because it is in the darkest place, I drew it all at once.
Next, you can use Basic Graphics_Textures tool for expressing a shadow. It's my favorite thing to show somehow depth of a painting. You can add it from the library. 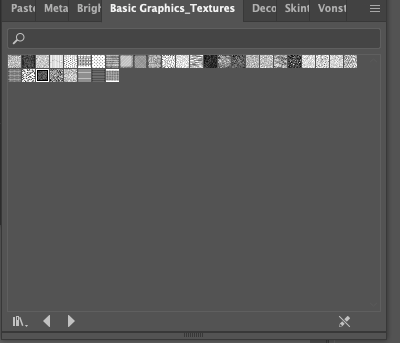 If I create a shadow, I have to add another layer for editing in the future.  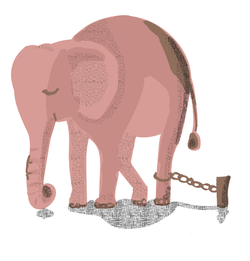 Here is the result after applying a shadow. Use the effect below to complete the ivory and claw parts. Go to Effect---> Texture--->Stained Glass 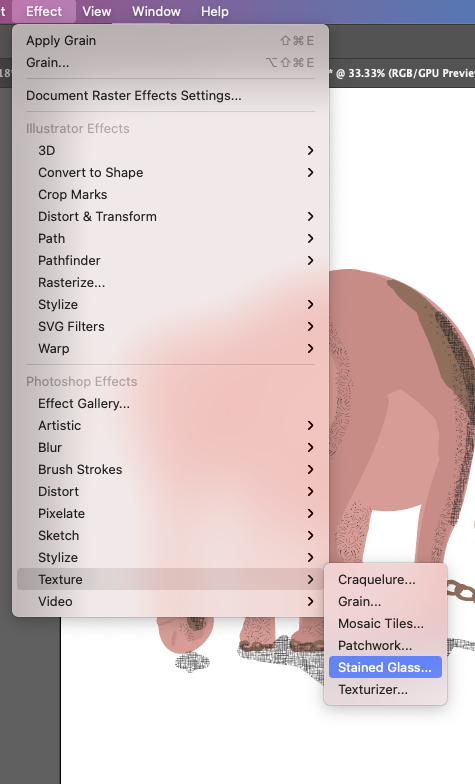 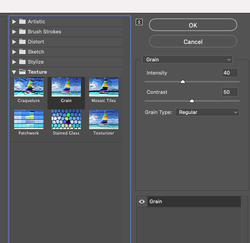 If you can see the pop up window with options, you can choose the Grain for expressing shiny bright paint. 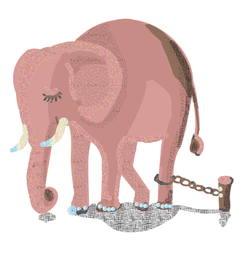 With above the effect, you can draw tooth and nails. Below is the display, I made for products in Redbubble. 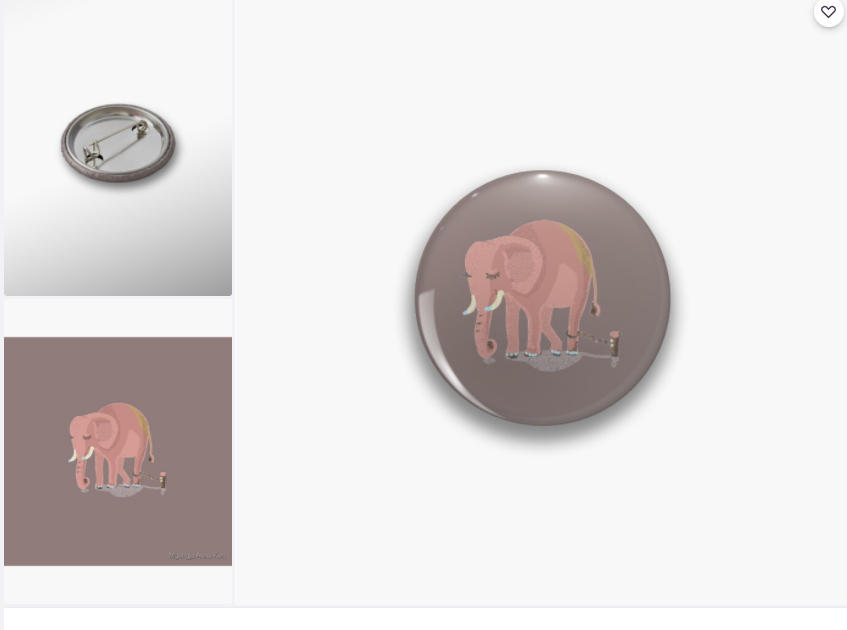  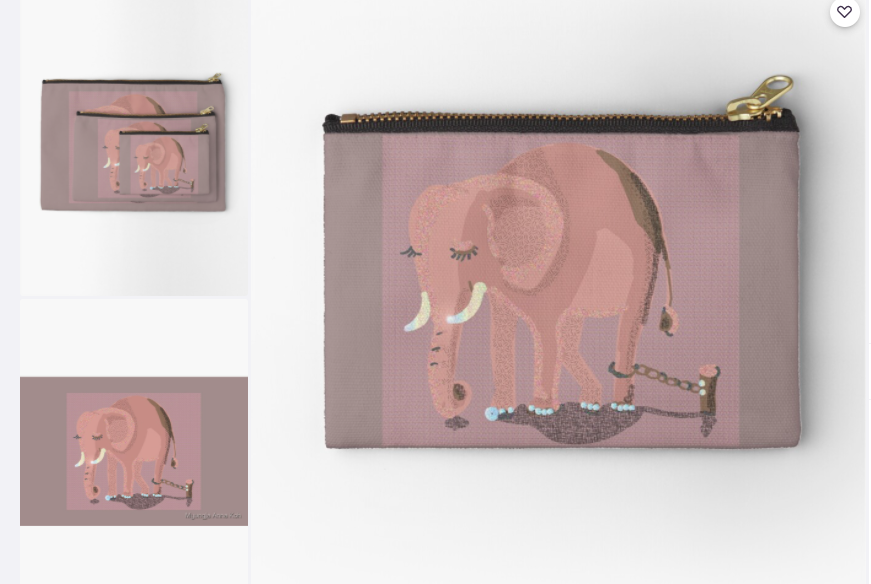 Let's transform the image file to vector image.
I received the following paper from the school where my second child attends the Native American Parade. Today I'm going to show you how to turn this physical paper into a digital file image. The program used is Illustrator.
First, take a picture of the paper as shown below. (Just take a picture like the one below.) 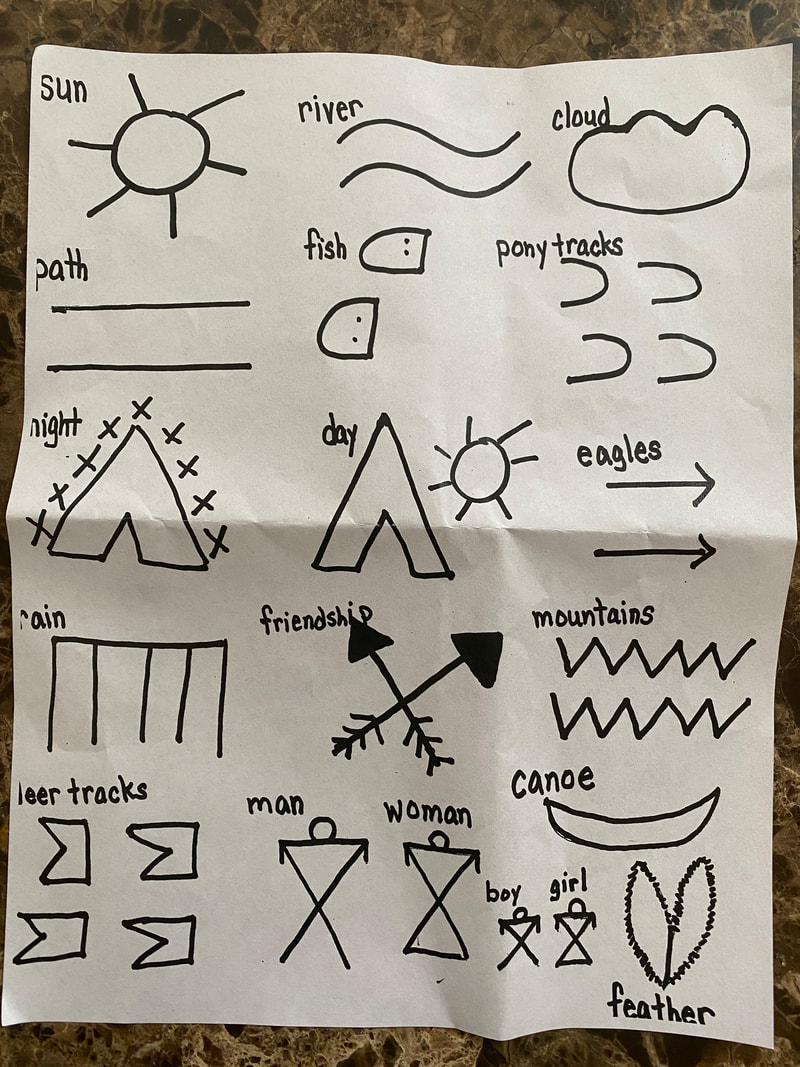
The picture above shows the symbols called pictograph used by Native Americans and their meanings.
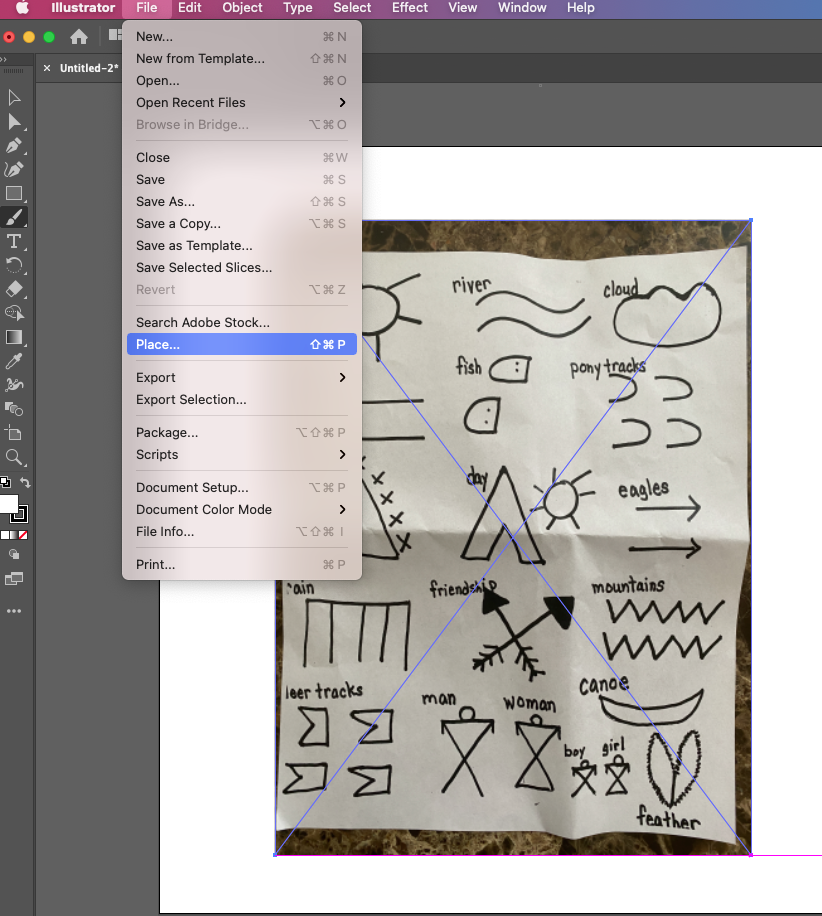
First, import this file into Illustrator. You have to use Ctrl + Shift + P and then put the image on the white canvas like below. (or you can go to upper menu like this : File--> Place) And then you can find the below screen. 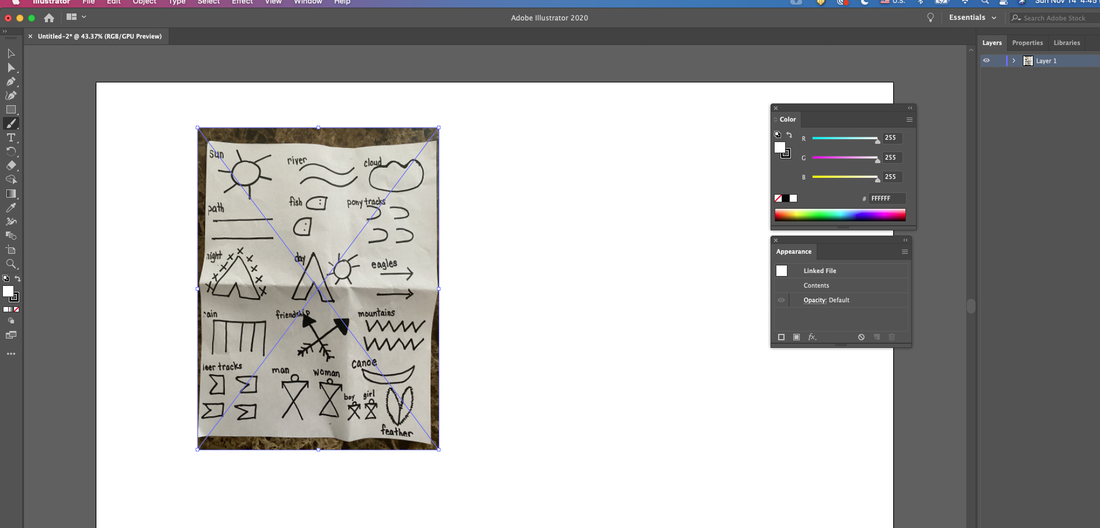
Second, you can go to the upper menu like this: Object---> tracing image--> make and expand.
After that, you can find the below result. 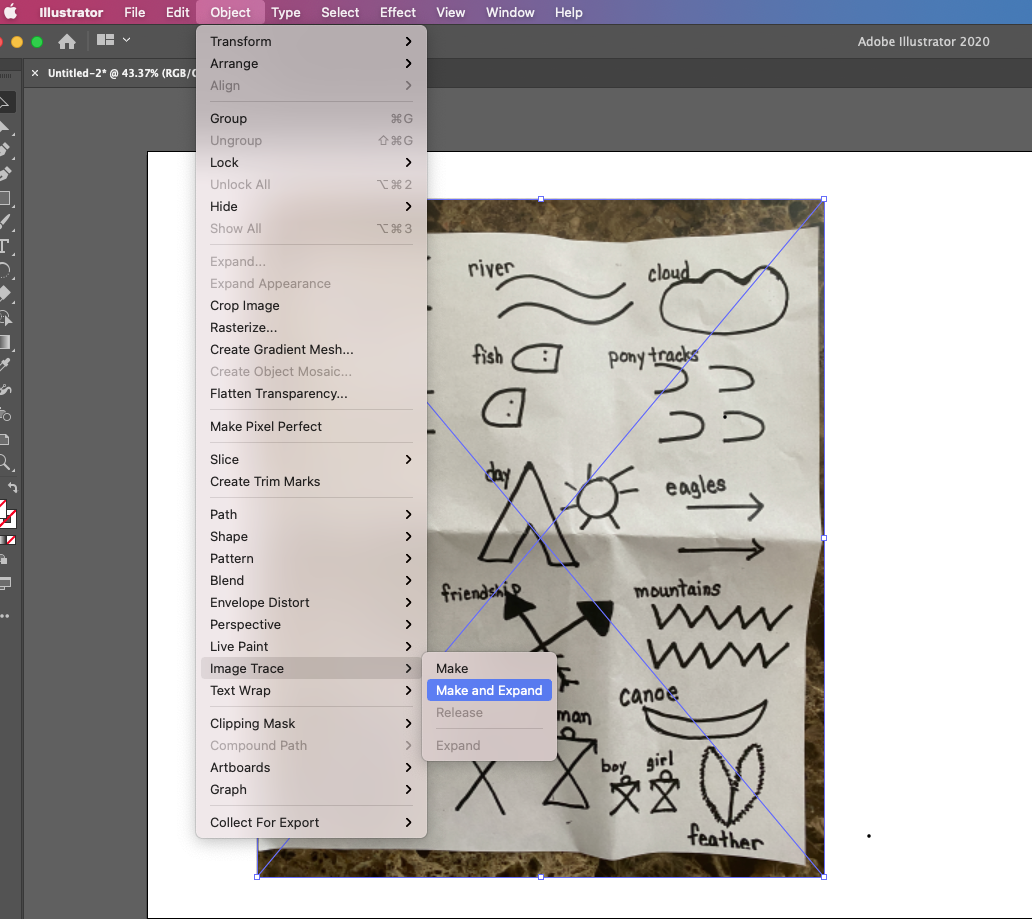
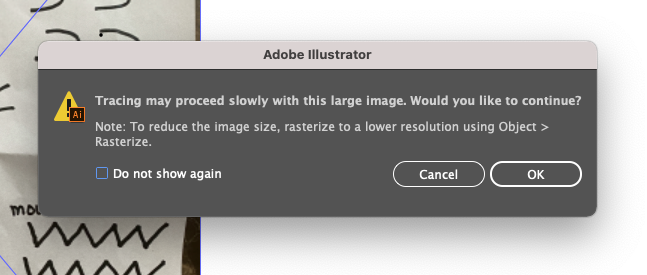
If you can find out below message, click O.K button.
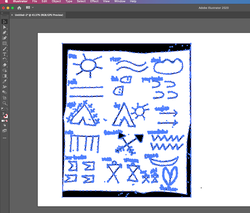
Here is the result after applying image tracing.
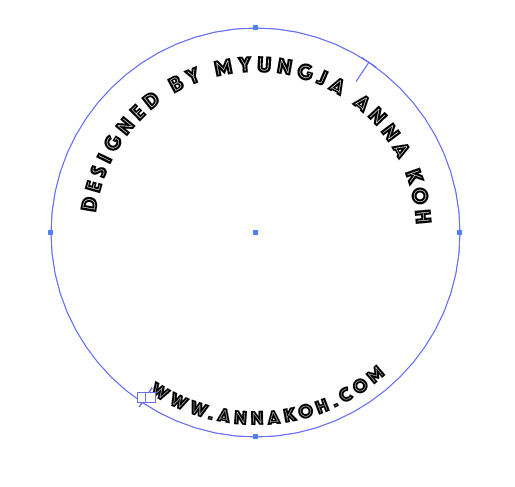
Emblem style logo making It's always fun to be able to create something yourself. Today, I would like to briefly show you the process of creating an emblem-style logo using Illustrator. A logo in the form of an emblem is a logo in which text and visual expression are combined within a certain mark, which is a combination of a logotype and a symbol. Emblem-style logos are suitable for use anywhere, such as web pages, social media, or products. You can put your own brand history in the round space. For example, it is effective because you can put a lot of text in a relatively small space, such as year of establishment, website address, copyright indication, etc. In particular, these emblems can become history itself.  Emblem logo example: Starbucks Let's make an emblem logo that can maximize the characteristics of text and symbols like this. First, open a new file in Illustrator. And draw a round circle as shown below. 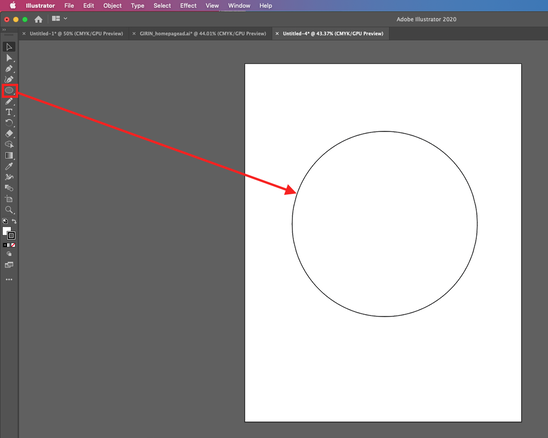 When drawing a circle, press the shift key at the same time to draw a symmetrical circle. Draw a small circle as shown below and put it inside.  Next, select the small circle inside and write the text by selecting the Type on A Path Tool among the Type tools from the toolbox on the left. 
As references, I wrote "Designed by Myungja Anna Koh" on the right screen above. When you turn the direction of the text after writing the text, hold the line in the red square below and rotate it. 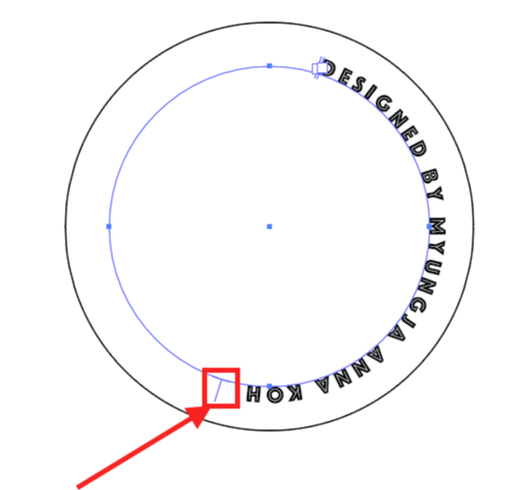 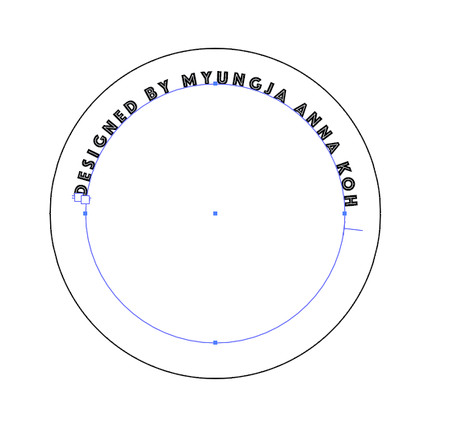 Also write text at the bottom of the emblem. After writing, adjust the contents of the properties menu on the right to change the size, shape, spacing, etc. 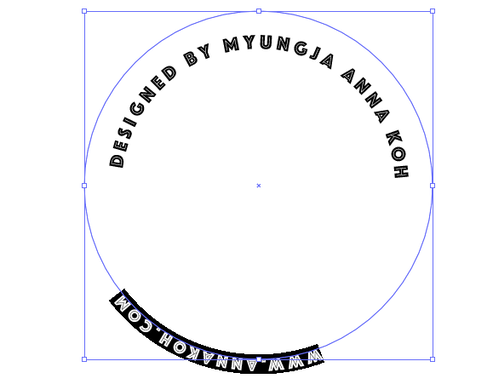 Another thing to note here is that you have to rotate the blue line under the red square at the bottom to put the text in the desired position. 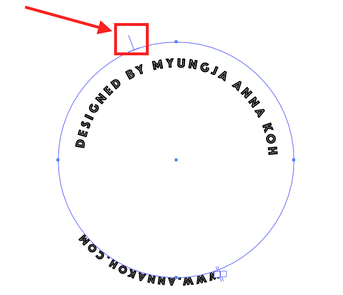 In my case, since the text is too close to the original, I changed the property that adjusts the spacing of the letters among the properties below and repositioned it.
When the text is complete, click the Direct Selection tool to change the color as desired. 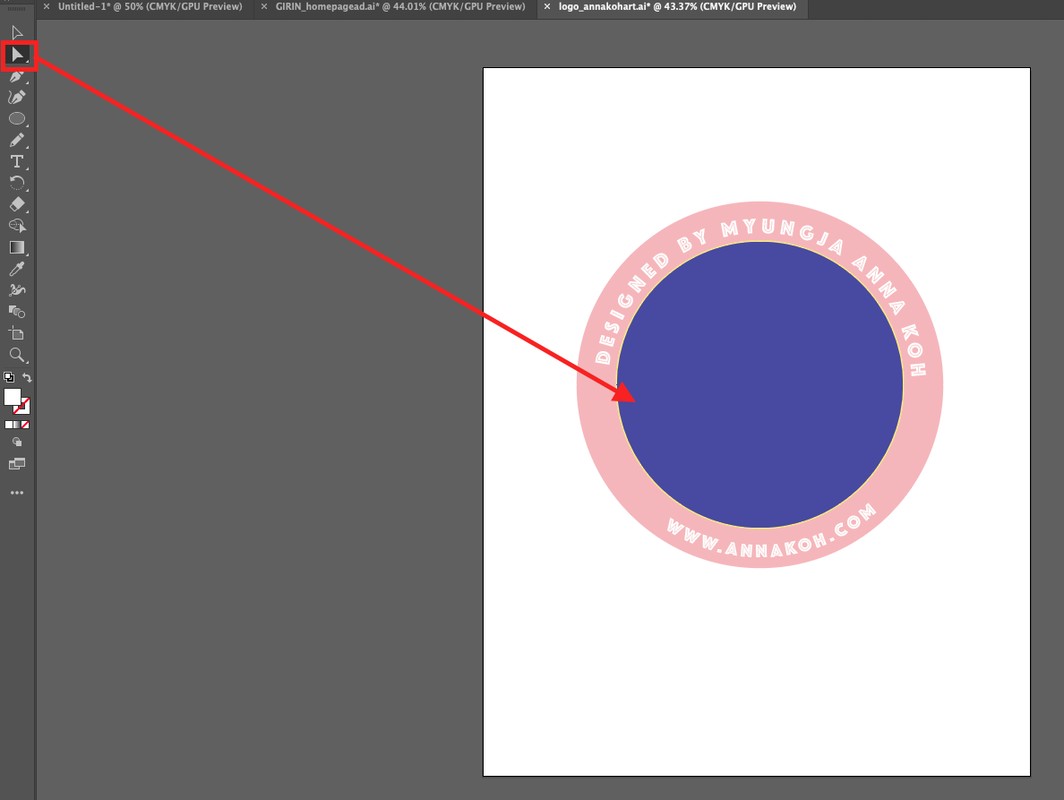 Then, load the picture that will be placed inside the emblem.  Designate Color Burn of the Opacity attribute so that this picture will naturally melt into the emblem. 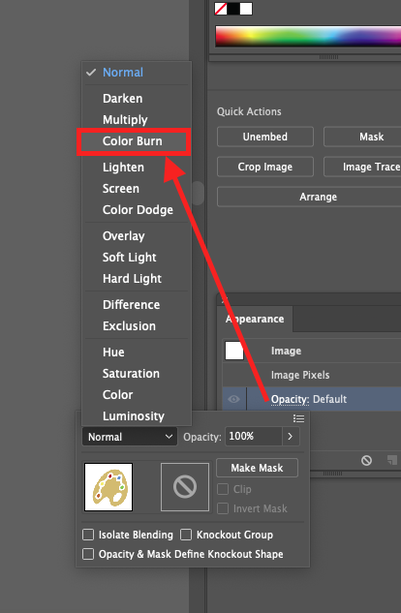 Below is the finished logo.  In fact, you will find that making your own is much more fulfilling and flexible than leaving it to a logo maker or someone else. Hope you all make your emblem logo great.
|
Myungja Anna KohArtist Categories
All
Archives
April 2024
|

|
Tutorial |


 RSS Feed