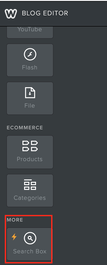
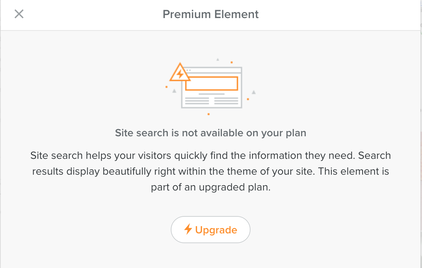
How to create your free site search engine on Weebly. It has now been almost two months since I have been posting regularly on my blog. After two months, the number of visitors suddenly increased because of the H1 tag. Anyway, getting to know each one seems to give a lot of joy. We keep talking as we post. Weebly is not a flexible enough site builder for bloggers to blog. It would be nice to have the usual features of other blog builders, but you can't even expect that. I remember being very surprised when I first found out that there was no such feature when I tried to search for these articles and turn them over to the page as blog posts were steadily piling up, and when I tried to view my posts as a list on one screen. I had to count my posts one by one manually. That's stupid. At this time, I was so disappointed that I wanted to switch to WordPress. But my son recommended to me Weebly he was 10 years old. I can't jump to another site because I remembered the scene he suggested with a lovely smile. Therefore I have to adapt somehow. Definitely!!! Today, I would like to show you one more feature to overcome the limitations of the Weebly site. It is a search engine that searches pages which I made in my site. The follow as below is the results screen. 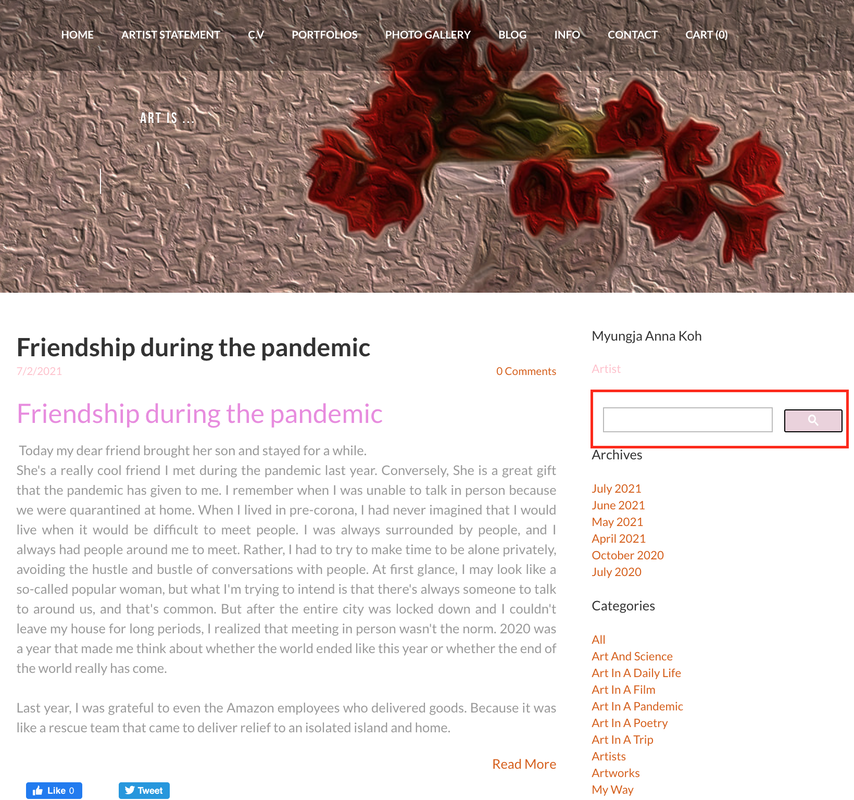 A search engine with a pink button is added to the right sidebar of Weebly. Contents in my blog are searchable. Of course, if you pay and upgrade to Weebly "Weebly Pro", you can get a search engine.
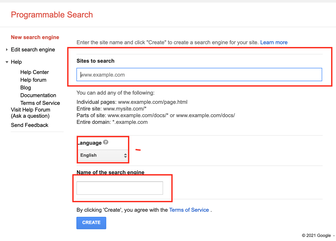
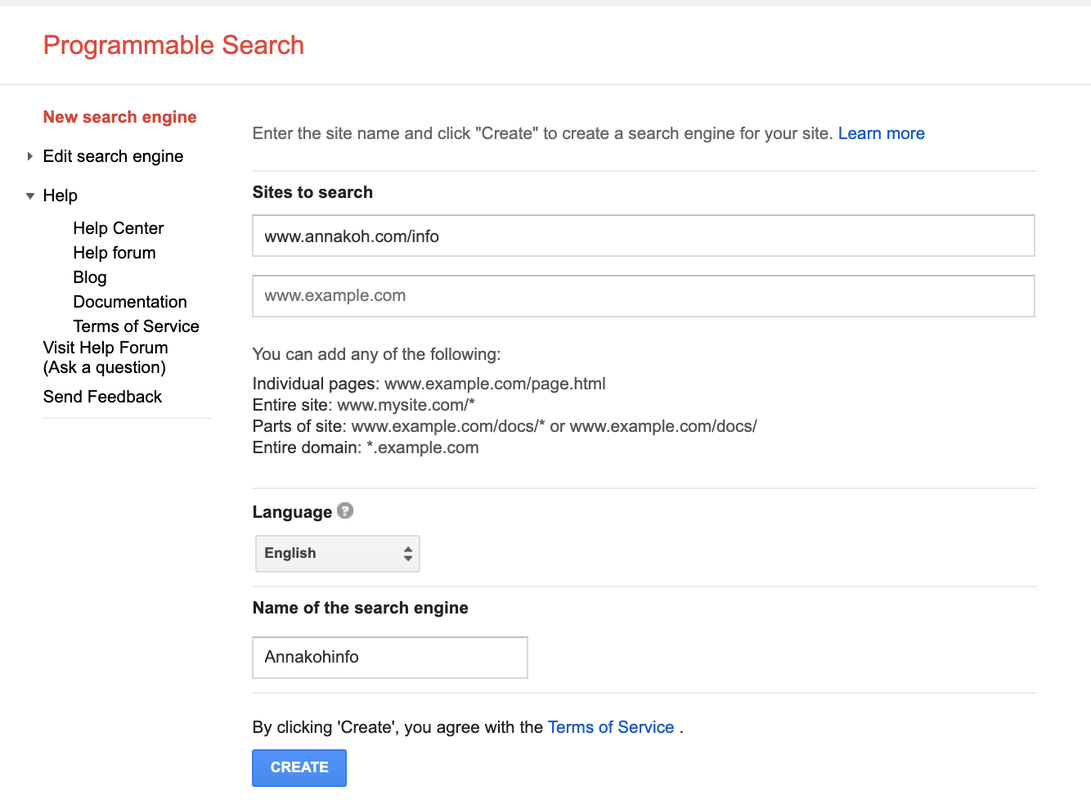
But I am going to show you how to create a search engine in my homepage for free using the custom search engine tool provided by Google. Of course, if you pay and upgrade, you'll get the best possible service, but in my case I don't have to. Go to the below site and then click the blue button called Get Started.  When you click the blue button, a form for specifying the site address, language, and engine name appears as shown below. I set it as below right. For reference, I wrote www.annakoh.com/info as below, because I want the content to be searched only in the Info menu of my site. You can also make it specific for each menu like this.
When you have entered all the information in the form above, click the Create button at the bottom. 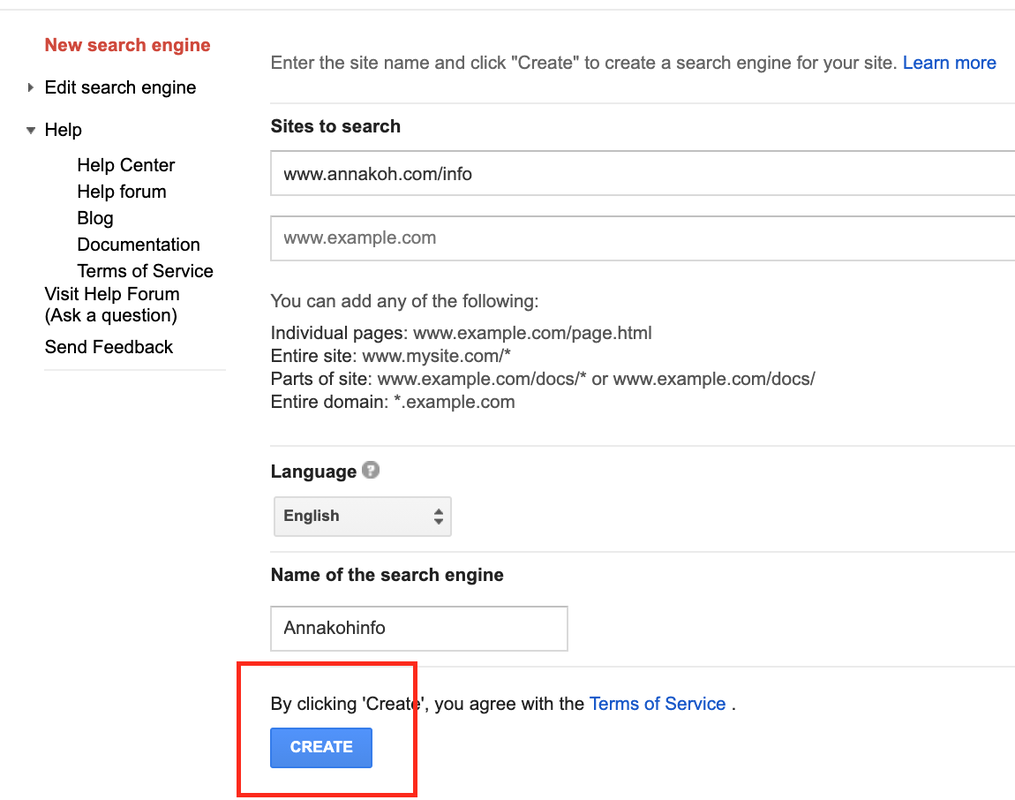 There is a way to get the code right away, but in my case, I want to change options such as the search engine button color, so I go to the Control Panel of modify your search engine at the bottom. 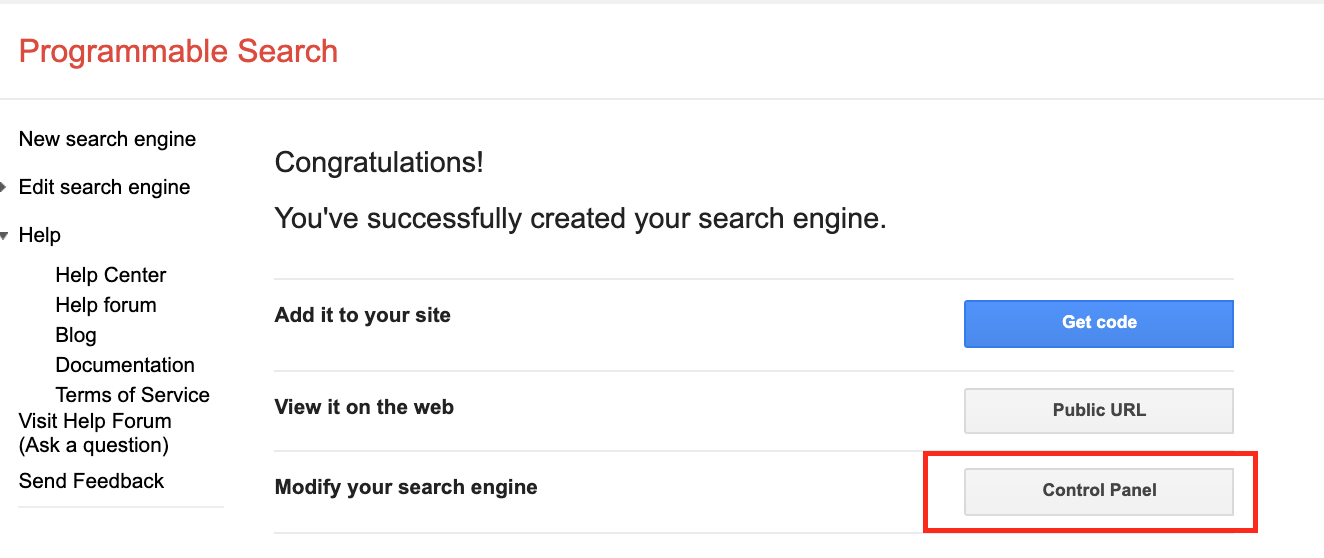 And then you can make sure the screen like below for setting. 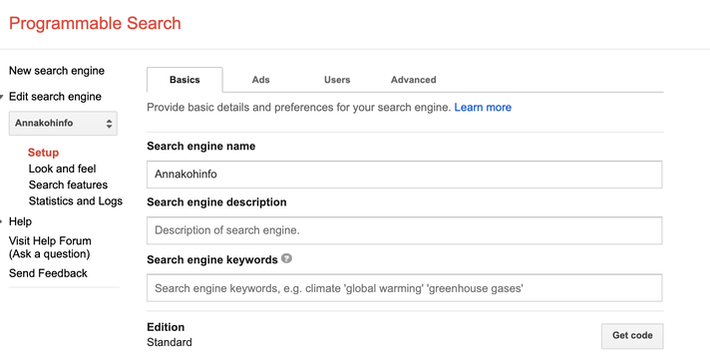 If you click on the public URL link on the above screen, the search engine window shown on the user's screen is displayed. In general, the default screen is shown below on the right. 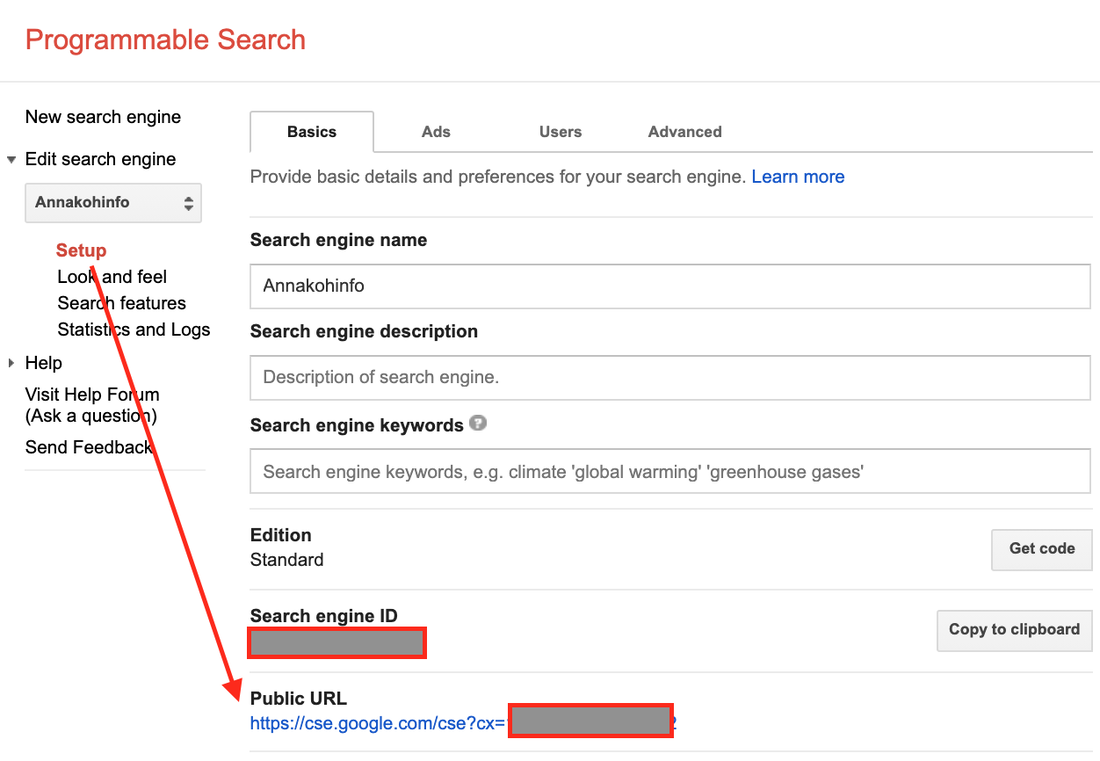  I don't like this default design and want to fix it. Before editing, first check the menu below in the setup window above. This means that I will only search within the site I have designated. 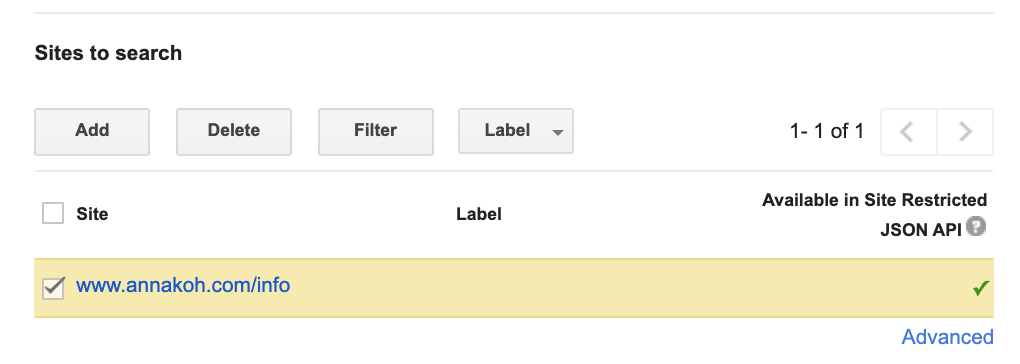 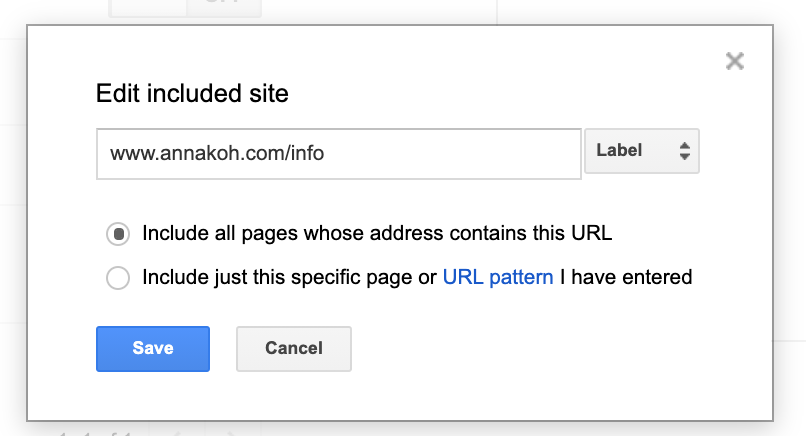 Then go to the menu under Setup, Look and Feel, and click Customize. In fact, I want to show all the menus here, but today, I will focus on the search engine and explain the menu in detail later. In my case, I chose the Full width menu at the bottom of the Look and feel because I want the search results to be displayed just below the right search engine. 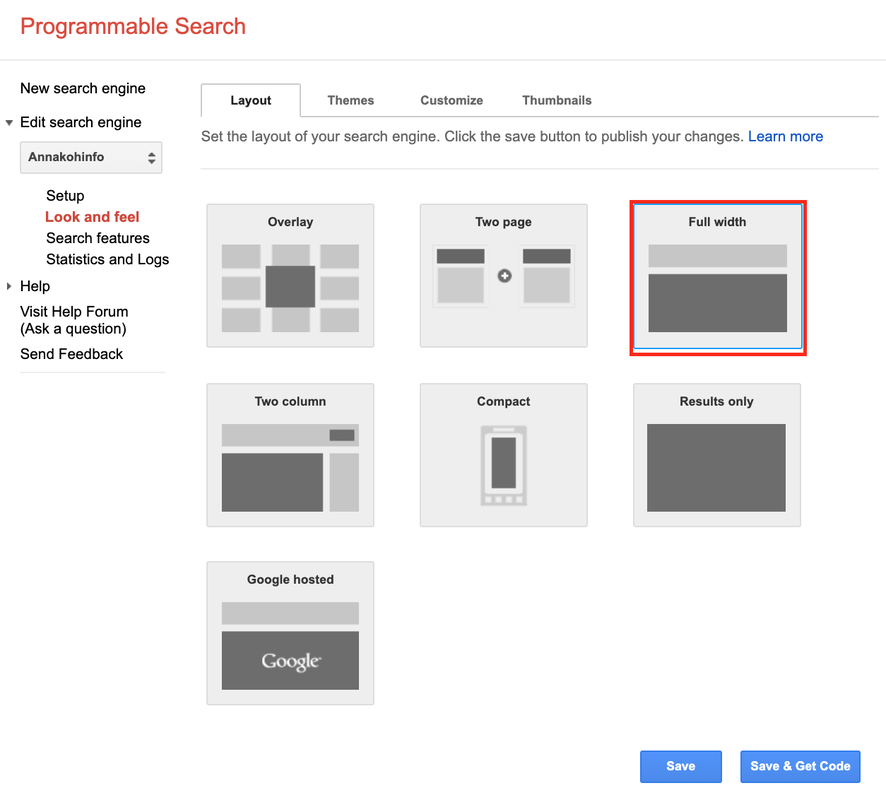 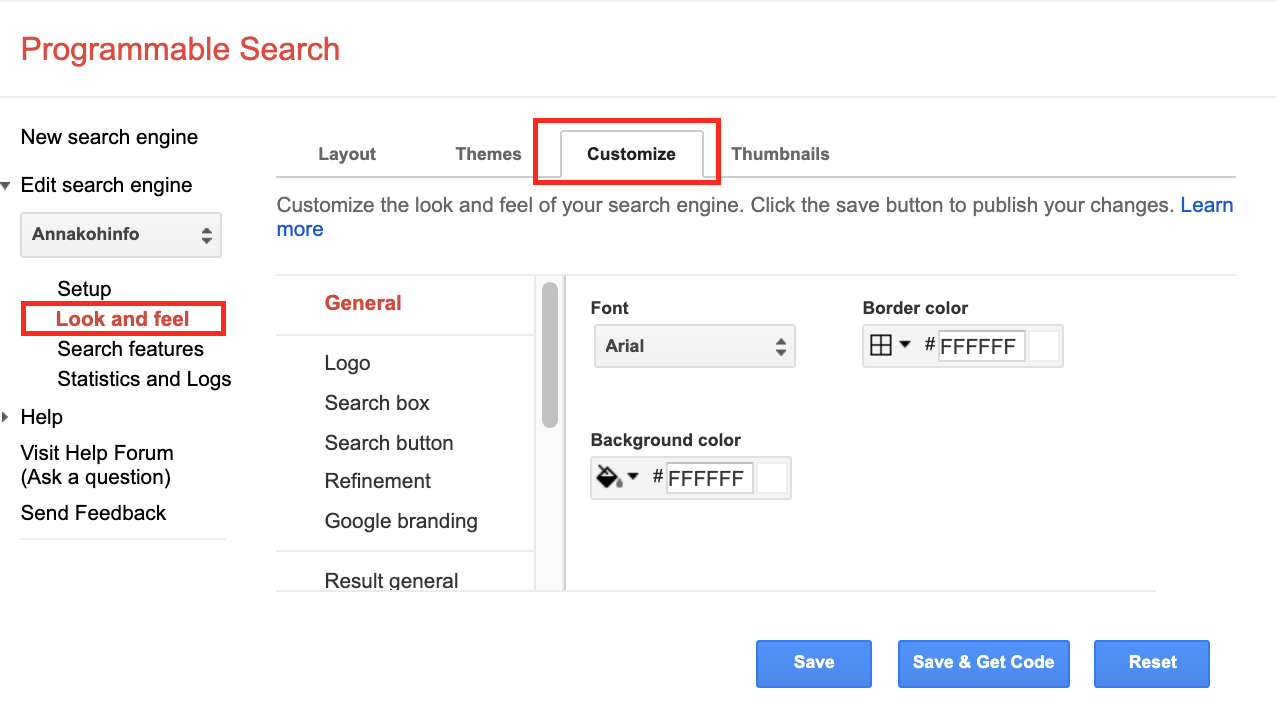 I like pink since I have a daughter. Change button color. If there is a Google advertisement in the search engine, I deleted the word Google (click the Disable Google Branding) because this engine would think that Google was searched rather than that my site would be searched. 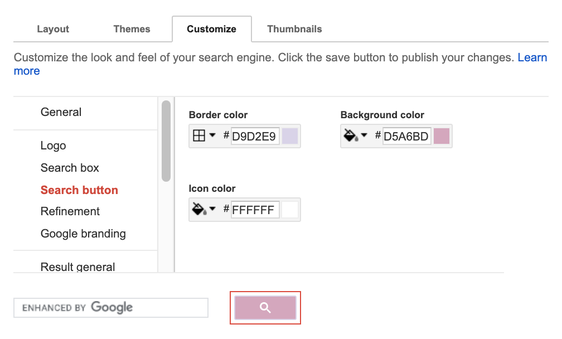 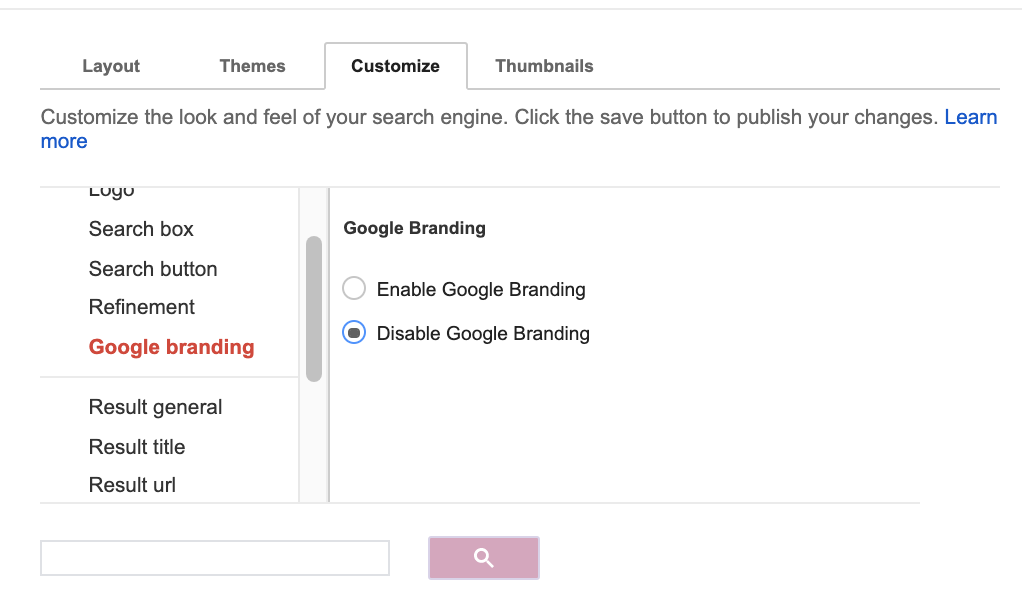 After setting, click the Save & Get Code button below. 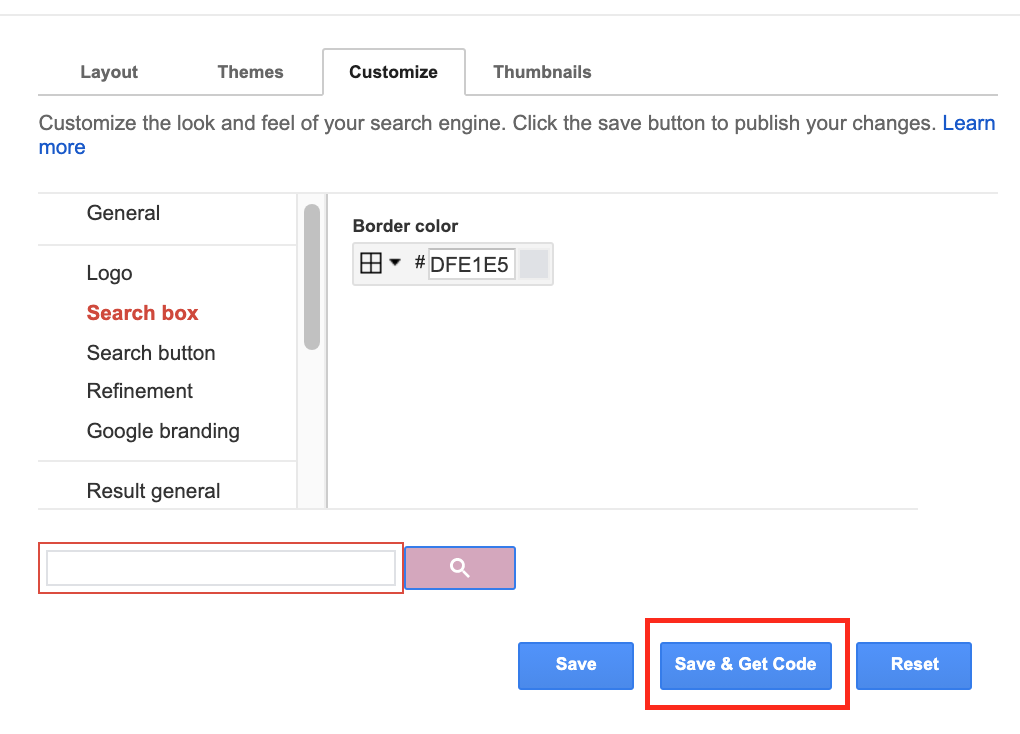 Finally, you can get the result's code, and then simply copy it! 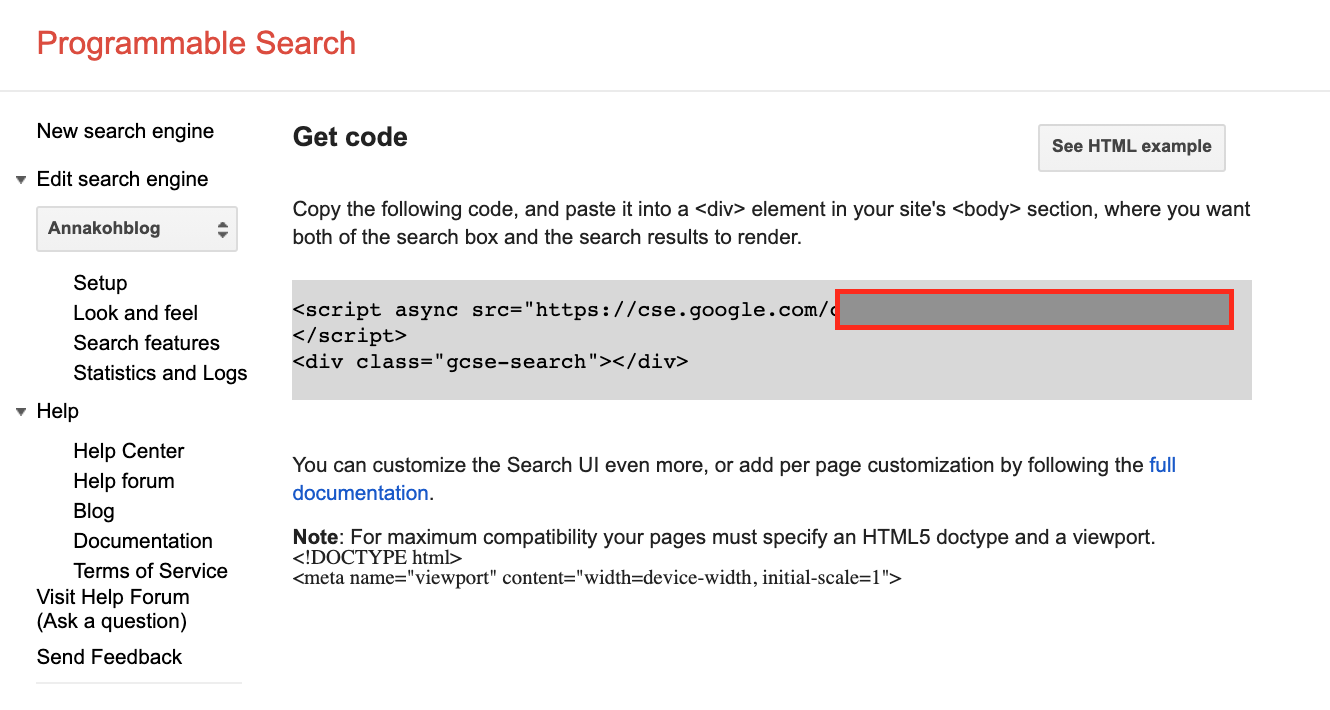 Now, as the last step, return to the Weebly editor and drag and drop the embed code to the location where the search engine will be placed. 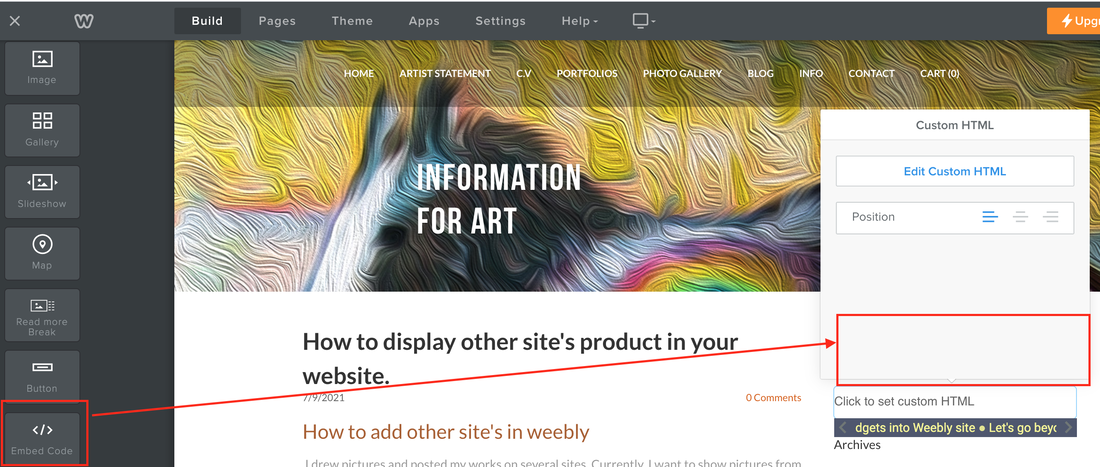 In my case, I put it above the right sidebar. I have the sidebar widened in advance just in case, if you want to know how to stretch the sidebar, go to the bottom of the related post. Go to related post ! <!DOCTYPE html> <html> <head> <title>Annakoh search bar</title> </head> <body> <script async src= "https://cse.google.com/cse.js?cx=Here should be changed to your id number"> </script> <div class="gcse-search"></div> </body> </html> Then, attach it to the HTML below. Refer to the code below and attach your own address. 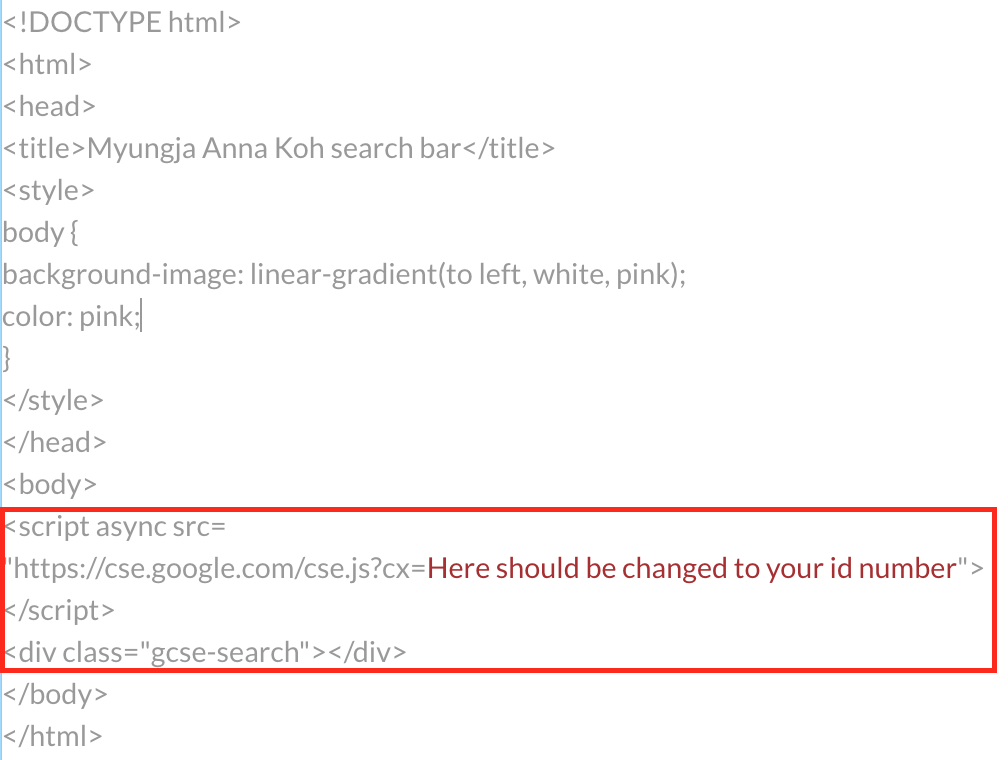 In the code, the code in the red box above is the area where your Google custom search code is pasted. If you know the html code well, you can change it more freely. If you go to the site below, you can see a detailed code explanation.  After pasting the above HTML code into the Embed Code HTML window of the Weebly editor, wait for a while and the result window will appear. Confirm and click the Publish button.
This is really the last step. Return to the home page and check the results. I hope you get even better results. 
13 Comments
Anna
2/11/2023 06:23:29 am
Thanks for talking about it in detail. Your wonderful comments are very helpful for me to run the blog.Thank you~~
Kesho Dass
6/20/2023 01:33:40 am
Thank you for addressing the practical aspects of the topic and providing actionable advice in your post. It's helpful and informative. <a href="https://Engine " target="_blank">click here</a> for additional insights.
Anna
6/20/2023 09:56:03 am
Thank you for your wonderful comment! 8/10/2023 07:36:36 am
Your website design blog provides practical insights that make a real difference. The article on optimizing website speed was a game-changer for me. Your tips on reducing file sizes and leveraging browser caching have improved my site's performance significantly. Your expertise is helping us create better online experiences!
Anna
8/10/2023 08:06:53 am
I am grateful that my review can be helpful. Also, through your writing, I could see how professional you are. Thanks for the encouragement and amazing comments. 8/22/2023 05:12:42 am
Elevate your brand with our dynamic web design services. We craft engaging, user-centric websites that make a lasting impact and drive online success. 10/25/2023 06:07:15 am
Informative article! Is it possible to integrate a search engine without affecting website speed? 11/26/2023 03:46:01 am
The Most Beautiful Beaches of the Mediterranean 1/19/2024 01:39:01 am
This blog mentions some really nice and helpful tips. Thanks for sharing. 2/1/2024 10:01:56 am
This blog is a gem for anyone seeking guidance on enhancing their website's functionality. The step-by-step instructions on adding a custom search engine are clear and practical. The detailed insights make it an invaluable resource for website owners looking to improve user experience and provide more tailored search options. Leave a Reply. |
Myungja Anna KohArtist Categories
All
Archives
July 2024
|

|
Tutorial |

 RSS Feed