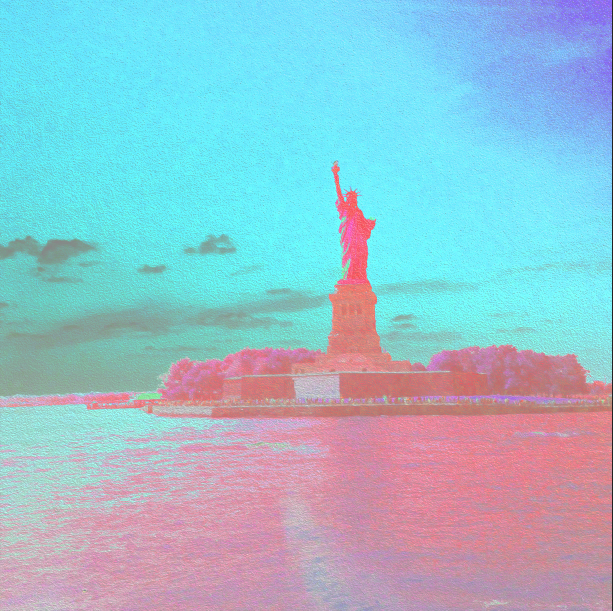
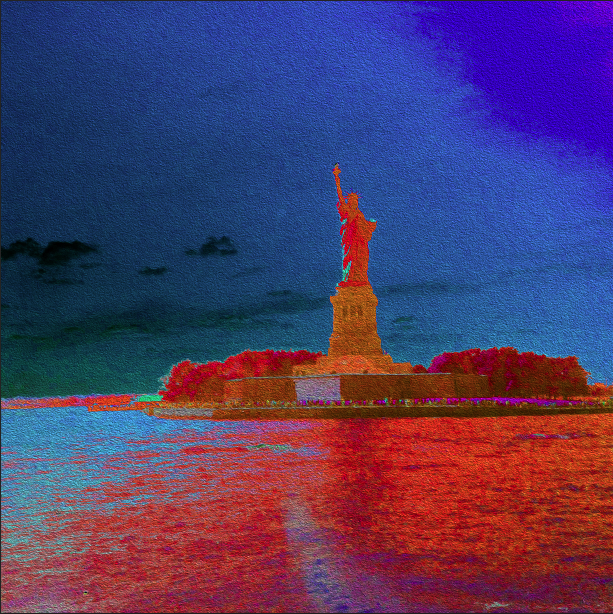
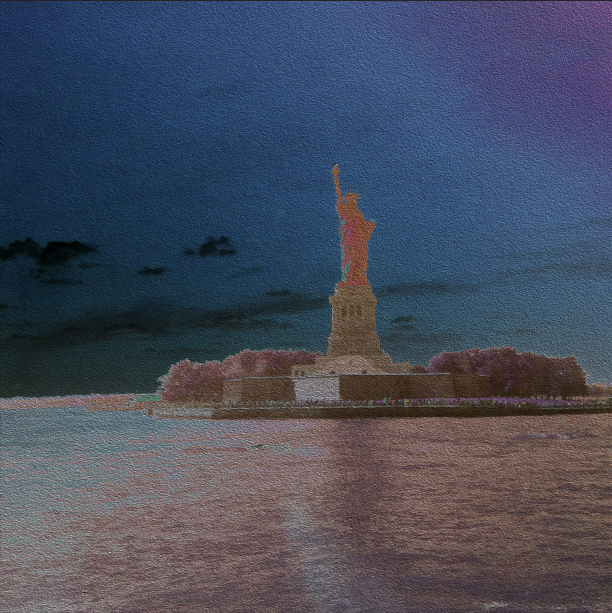
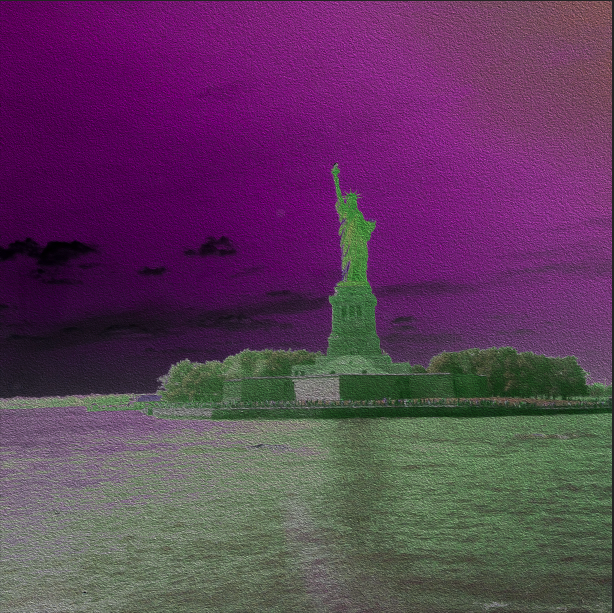
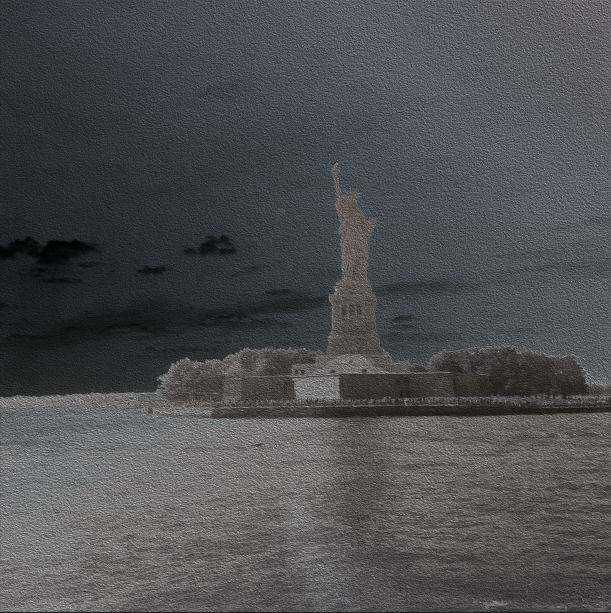
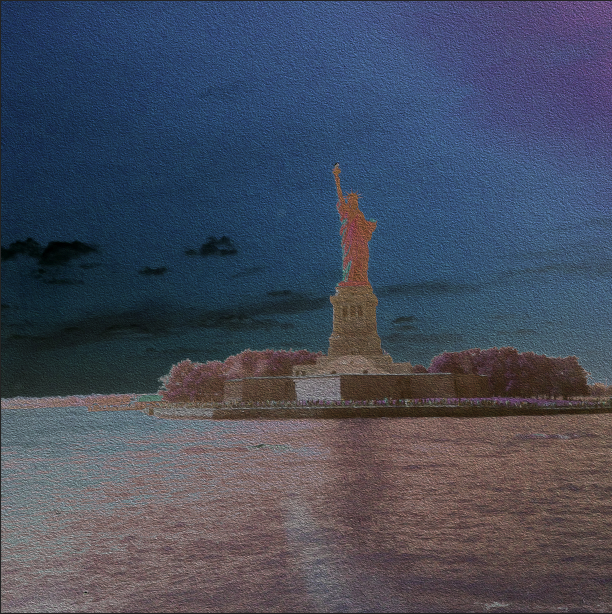
Turn shabby photos into great ones with Photoshop! Today I would like to show you how to convert a photo of the Statue of Liberty in New York into Photoshop. I digitally recreated some of the photos I took while visiting the Statue of Liberty that were shabby and I was afraid to erase them. You can digitally convert the simple, plain photo above into a variety of colors as follow as below. I converted it like this: The pink color of the Statue of Liberty is my daughter's point of view. She recommend the color strongly. 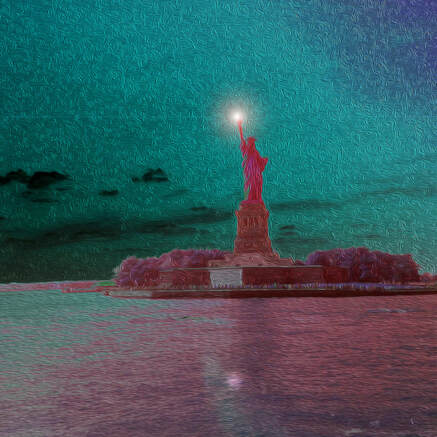 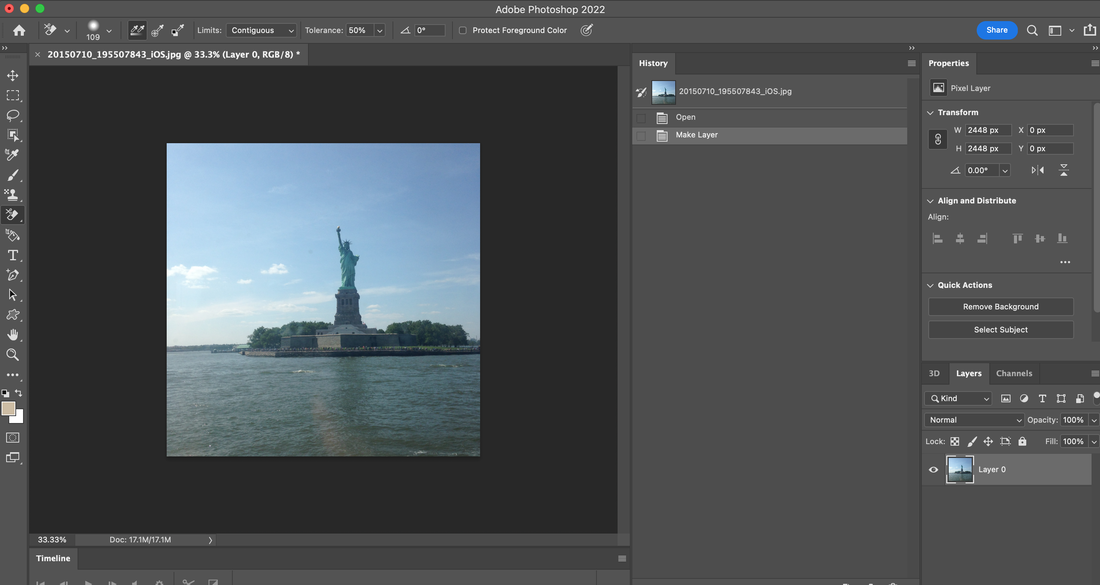 First, import the photo as above. And go to Filter---> Stylize---> Solarize. 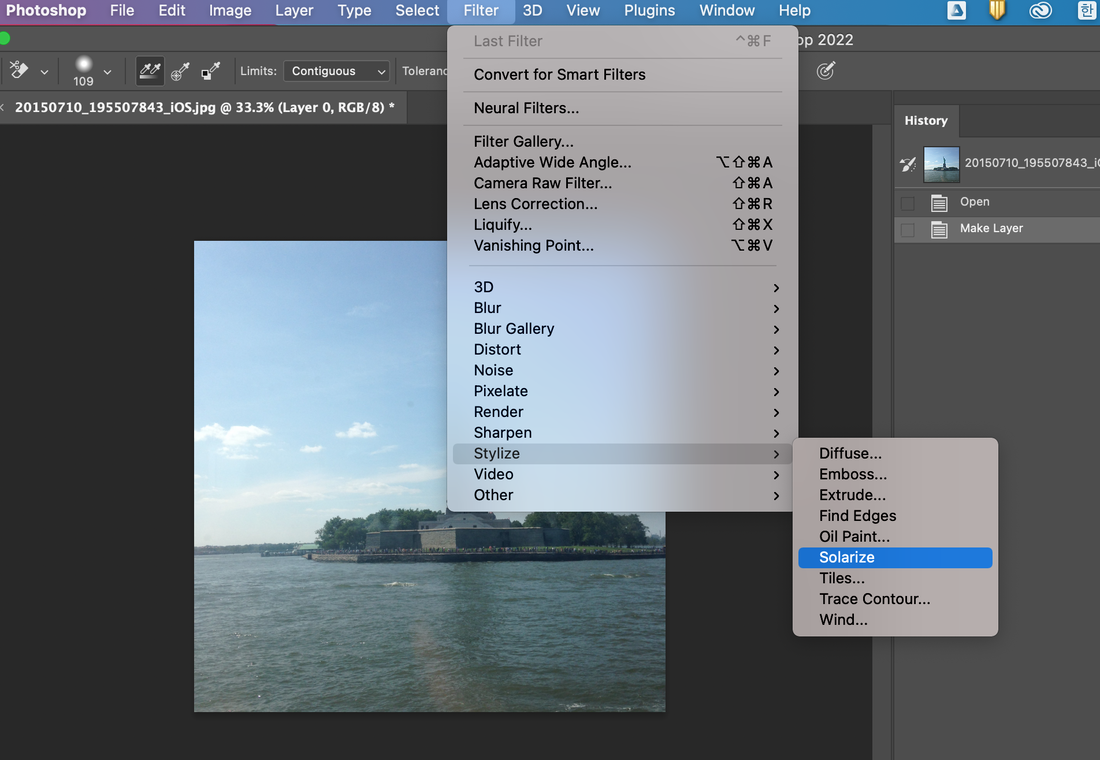 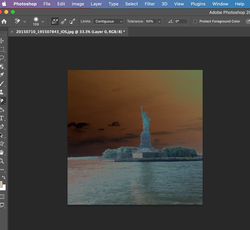 Above is a result after solarize effect. And next, you can go to Image---> Adjustments---> Hue/Saturation. 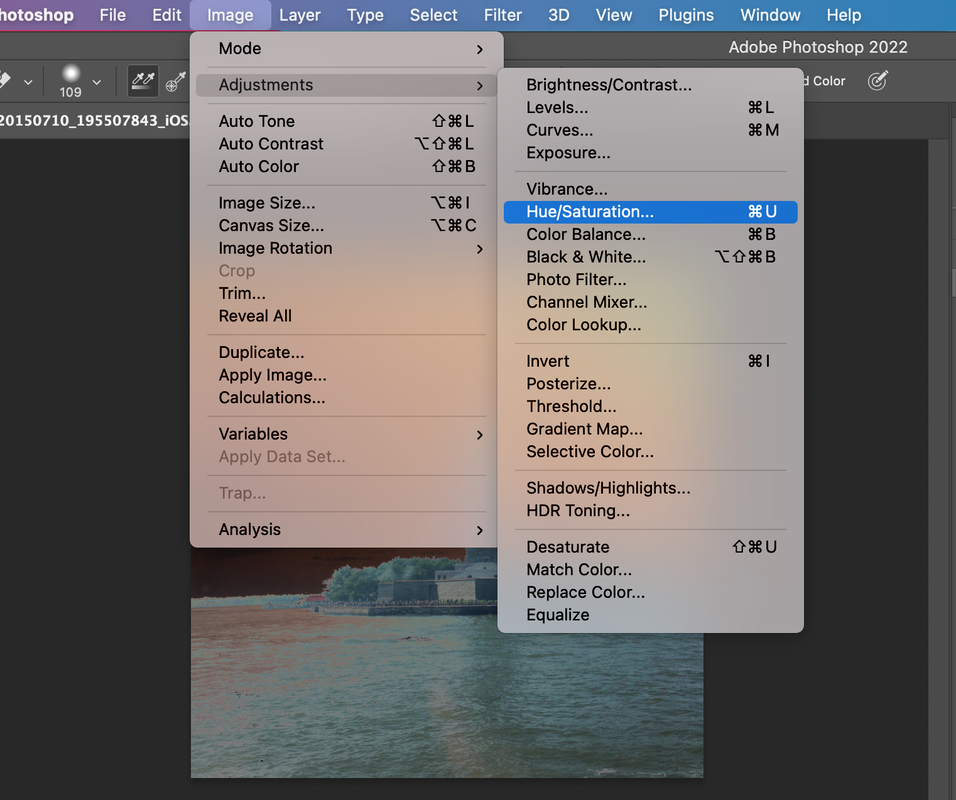 And then adjust the value of Hue/Saturation/Lightness like below. 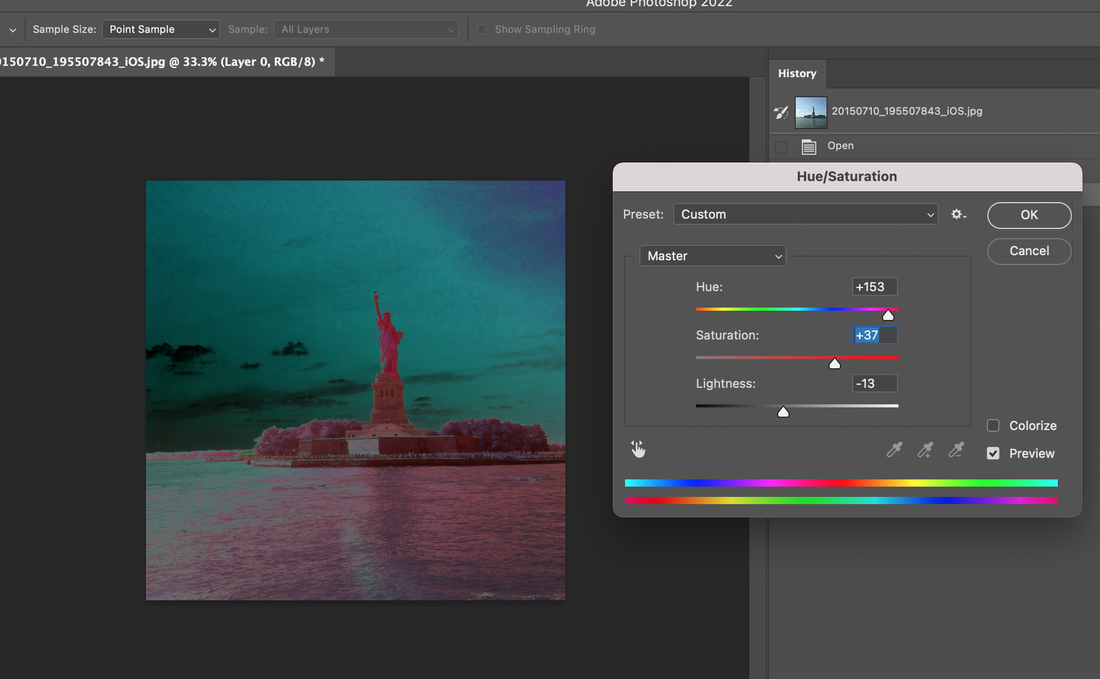 For more effect, go to Filter--->Stylize---> Oil paint. 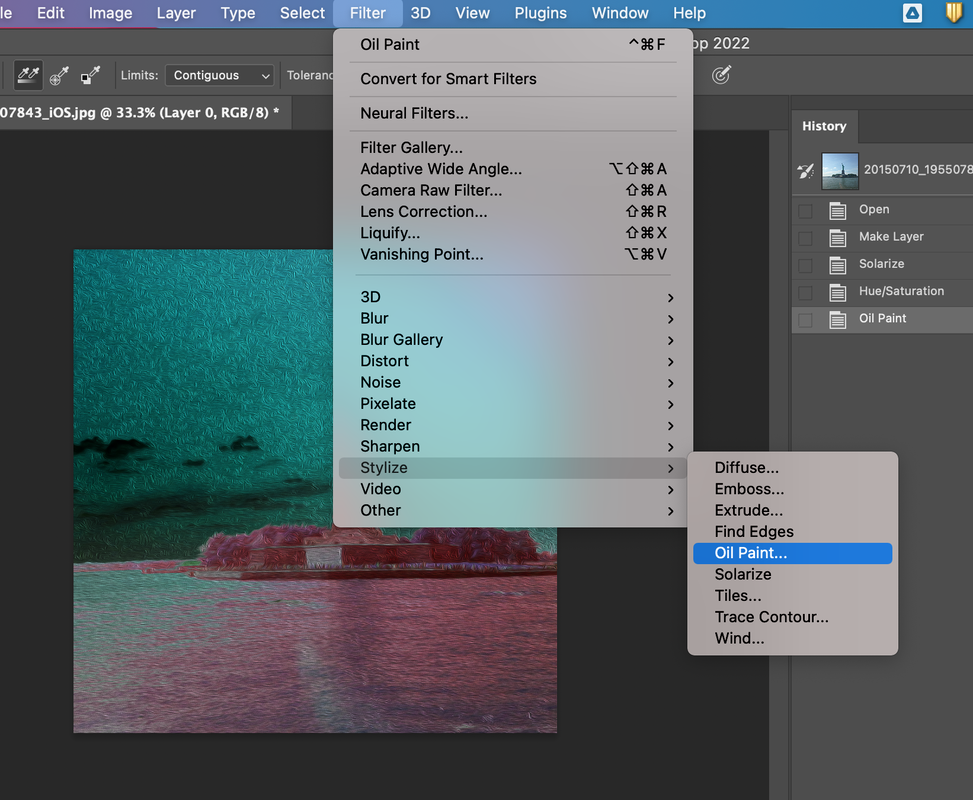 And then adjust the value of Stylization/ Cleanliness, Scale, Bristle Detail and Lighting. 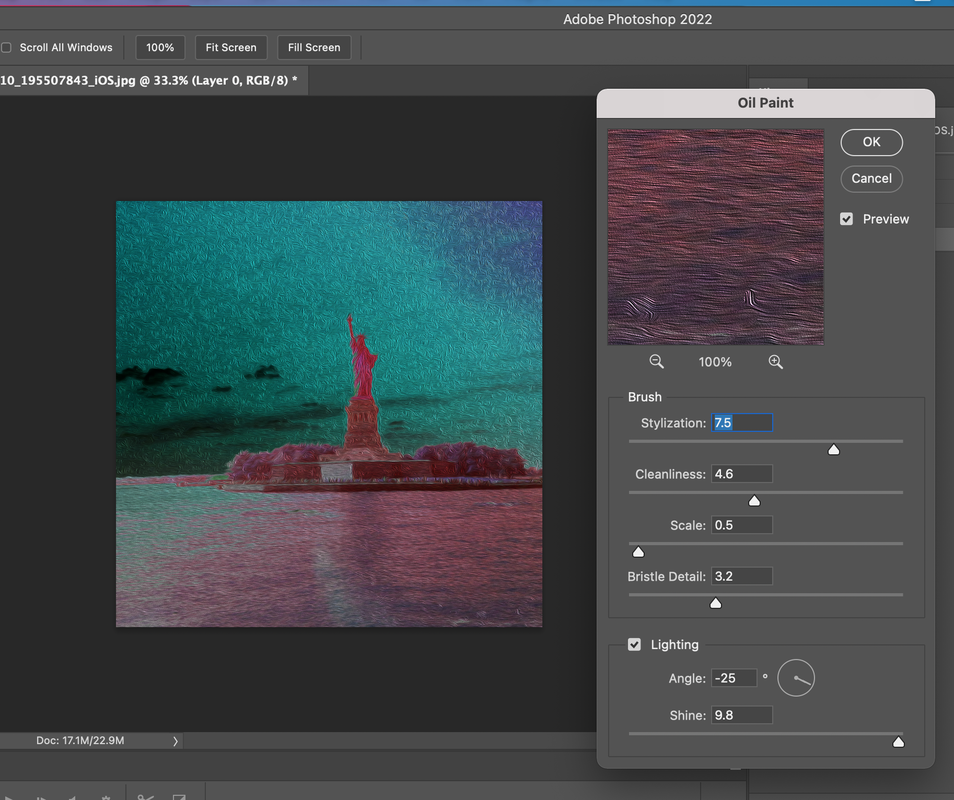 And go to Filter---> Render---> Lens Flare for express a lightning behind the torchlight. 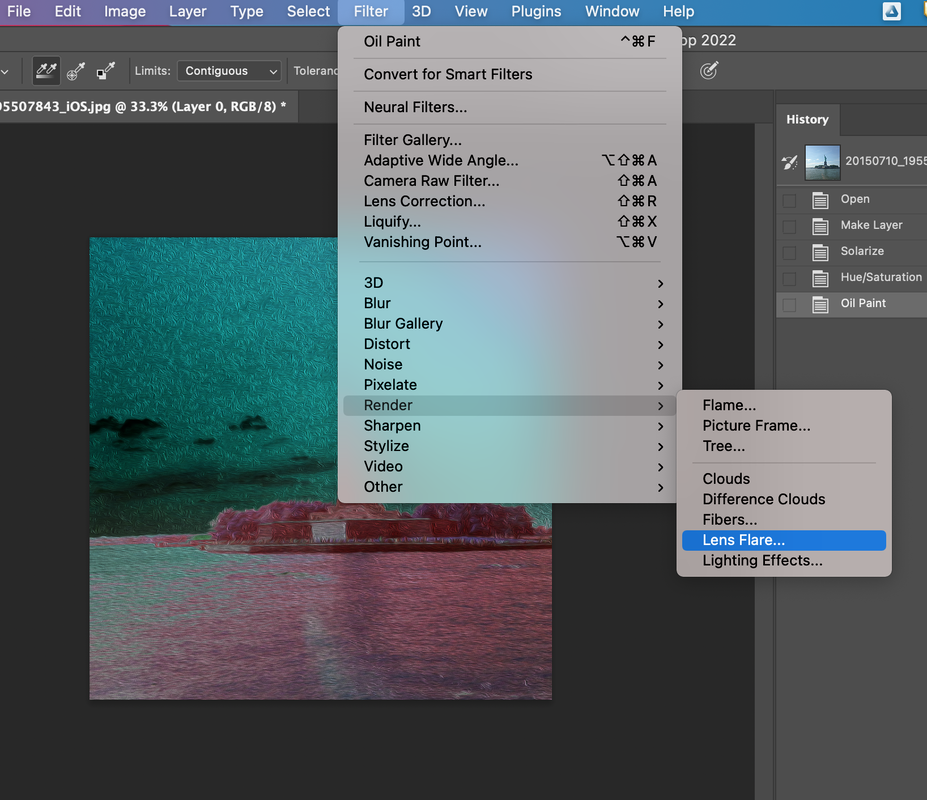 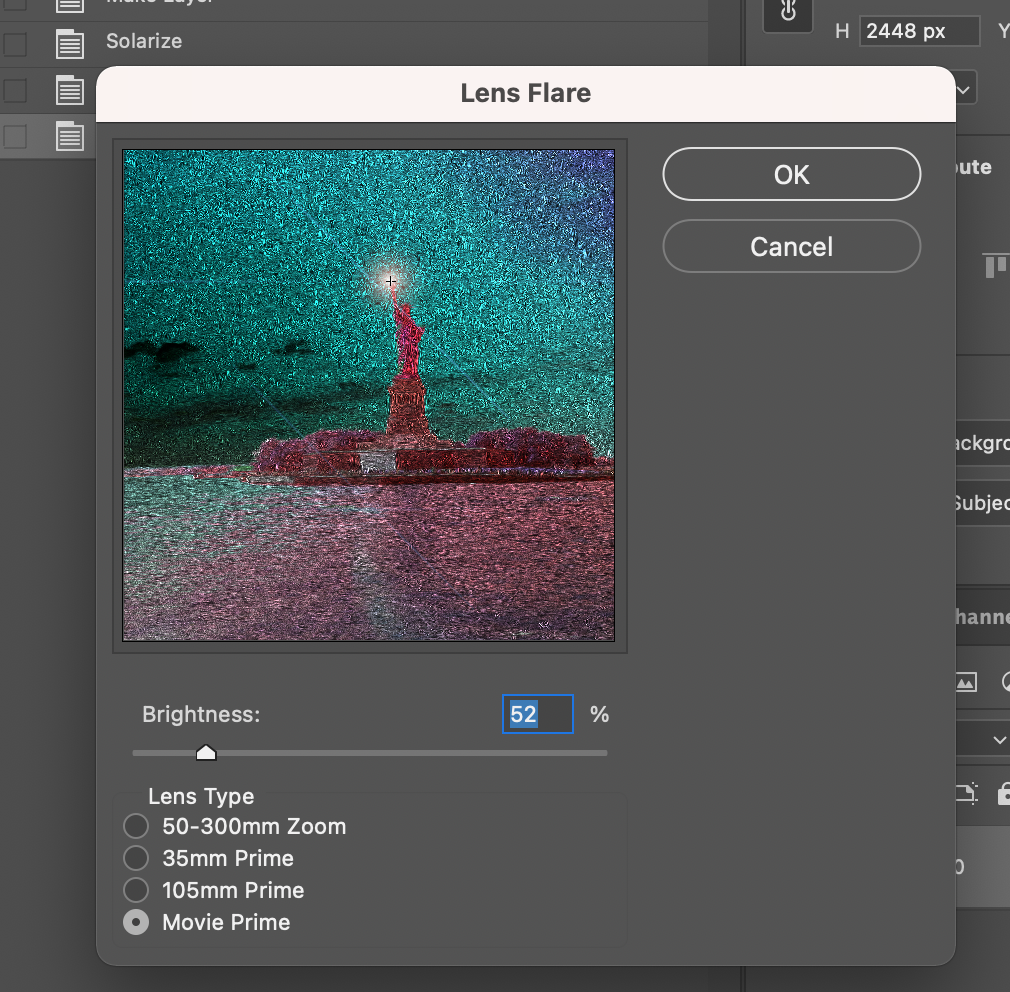 Last, you can add a touch for reflection from the lightning on the river. 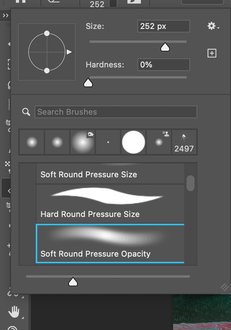 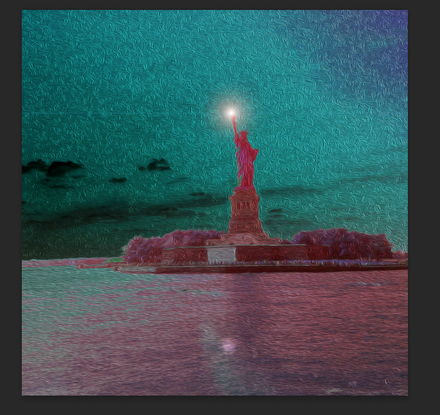 Below is the final result. 
0 Comments
Leave a Reply. |
Myungja Anna KohArtist Categories
All
Archives
July 2024
|

|
Tutorial |


 RSS Feed