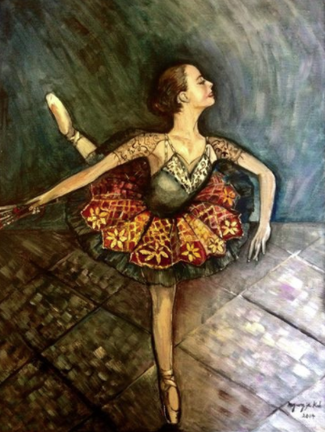
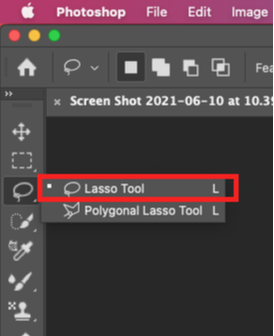
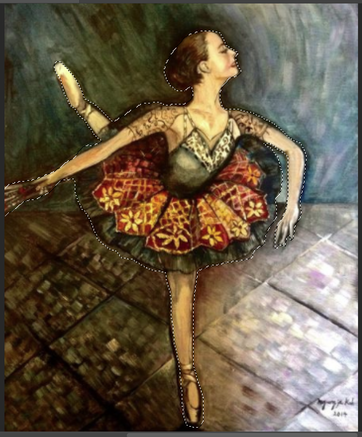
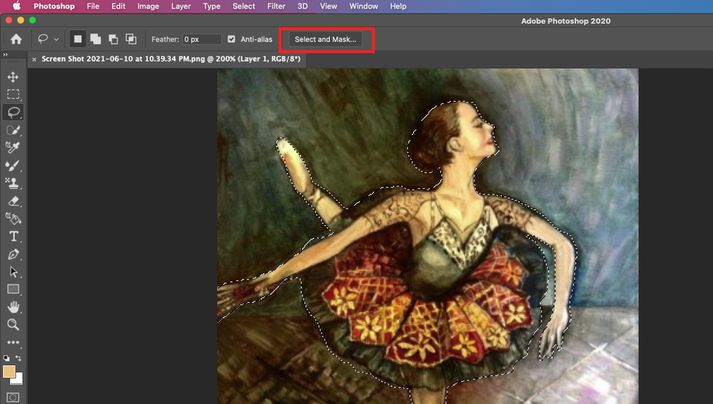
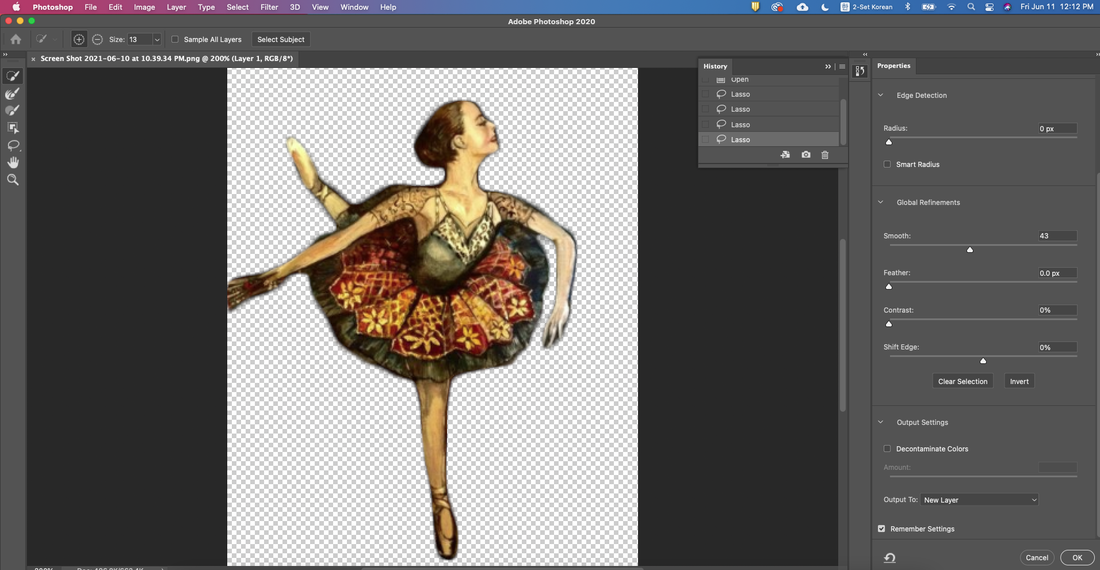
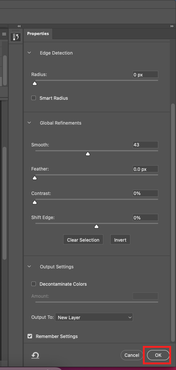
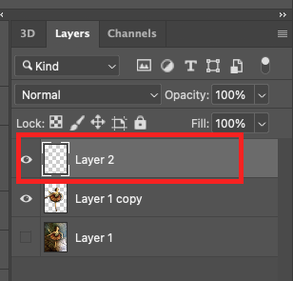
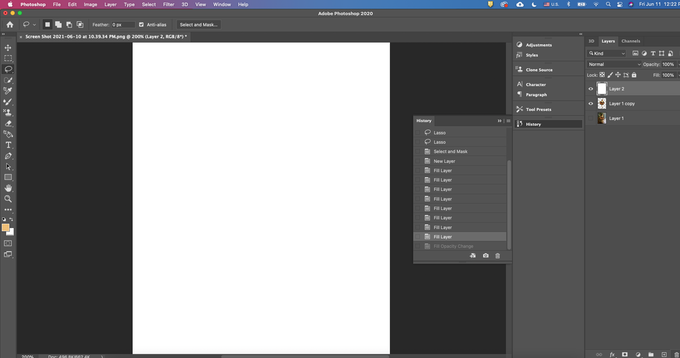
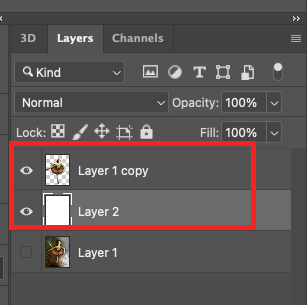
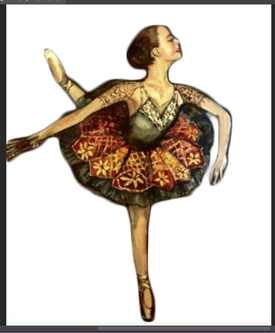
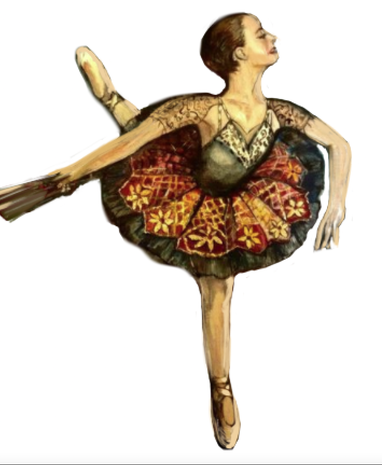
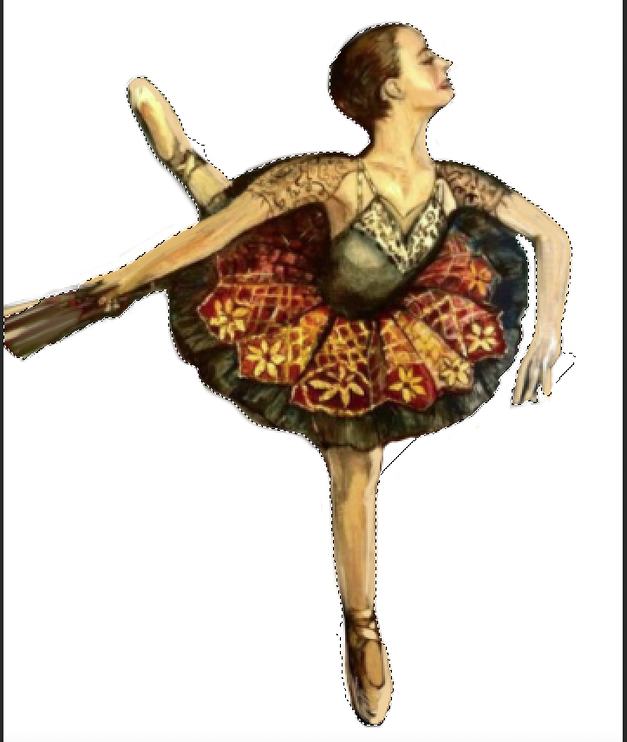
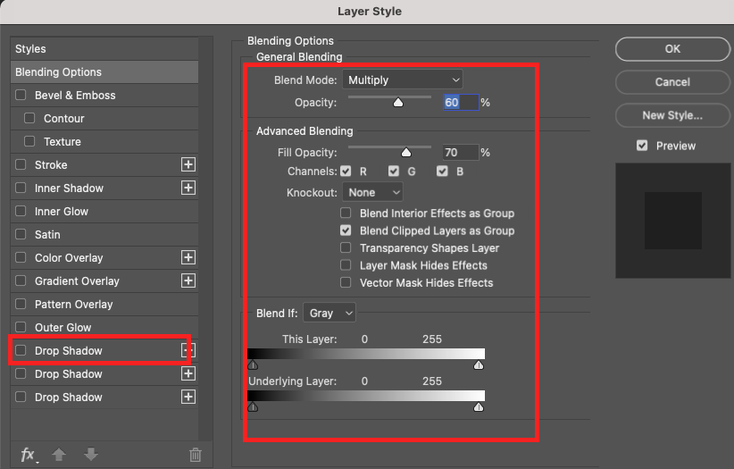
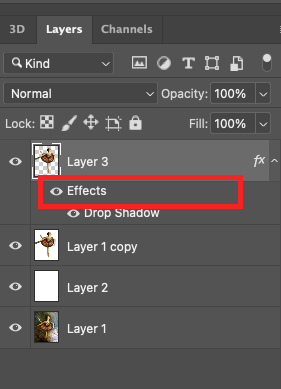
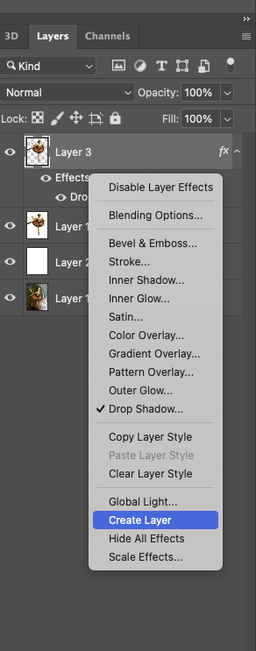
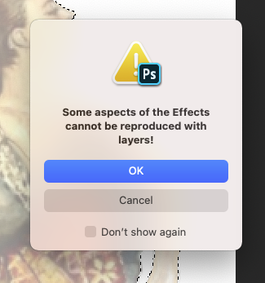
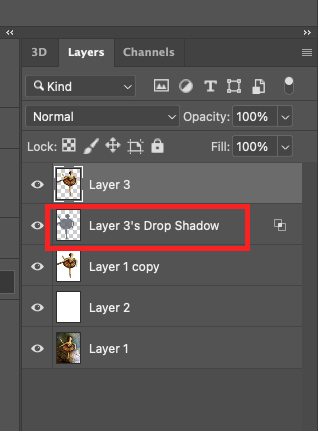
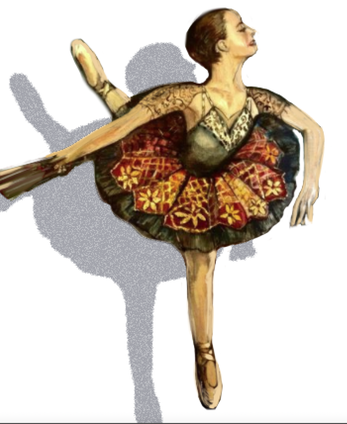
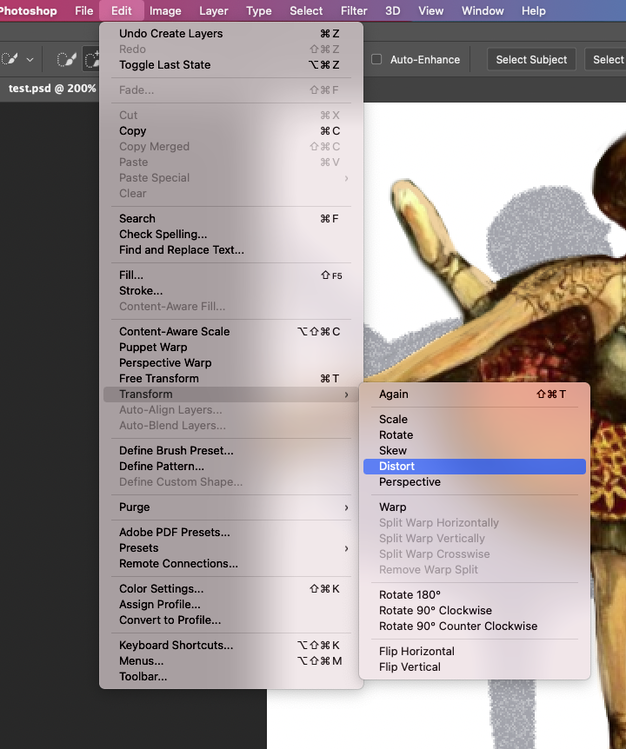
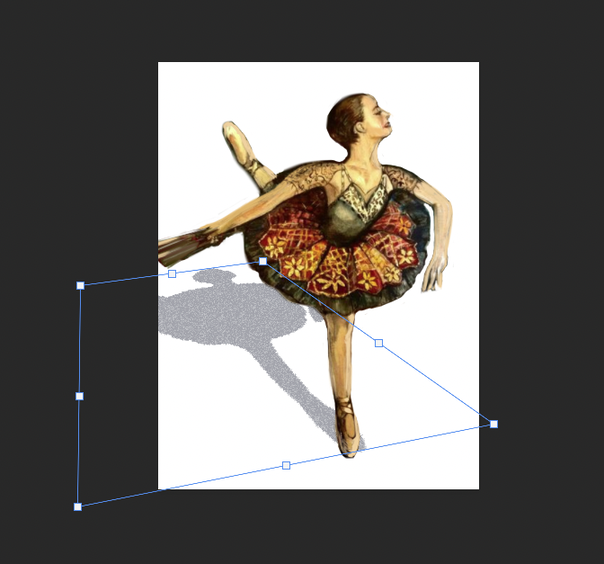
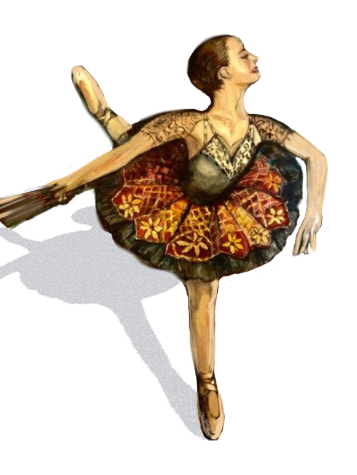
How to create shadows in Photoshop. As I draw, I feel that the colors and backgrounds become simpler. Our life also seems to become lighter and lighter as the years go by, like a painting. Today, I'm going to try to make a different artwork by removing the background from my old drawing and adding simple shadows. Digital makes these things possible and often I use them well. First of all, I opened a painting called Ballerina I drew before. This painting was painted in acrylic on a small canvas a year after I moved to the US in 2014. It was drawn for the granddaughter of an acquaintance who dances brilliantly against the background of sad and pathetic music. But sometimes I just want enough to get her out of the dark and dance in the light. Today I'm going to try to do some of that. First I choose the ballerina in this picture. Double-click the image to make it a layer state, then click the Lasso tool in the left menu panel. There are various ways to extract an image from the background in Photoshop, and the most used is the Quick Selection tool. However, since I have to extract the image from the work, I have to pick it up more precisely. The Lasso tool helps you naturally pick images like this. Try to select the image as close to the image as possible. Lasso tool can be difficult to handle the first time you use them because you have to complete them all at once. However, I have my own tip, which is not to focus on the senses on the hands, but to breathe slowly like yoga and concentrate on the breathing to draw much better. Below is the image after Lasso tool is applied. Then, in the top menu bar, click the Select and Mask menu in the red box on the screen below. Finally the ballerina is ready to go out into the bright world. Click OK at the bottom of the window that appears in the Layers panel on the right. Then click the Copy Layer tool at the bottom of the Layers panel to create a new layer. (or use Ctrl + J or Cmd + J) Now we will change the color of Layer2, the foreground color is Ctrl + Delete( Cmd + delete) , and the background color is changed using the Alt + Delete key. In my case, I changed it to white for minimalism as shown below. And to create an image like the one on the right below, change the order of the layers as shown on the left. In other words, the layer 1 copy must be on the layer2 For the next step, I moved the composition of the image slightly to the right to increase the artistic perfection and changed the image more naturally as shown below using the brush tool. Then select the image by selecting the Quick Selection tool from the leftmost menu bar. Since it will be used when creating shadows, roughly select it as follows. 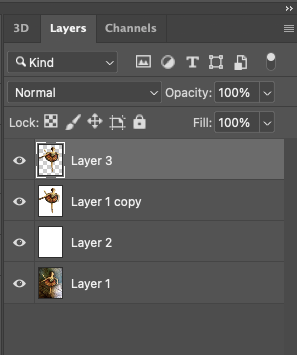 If the protruding selection area still bothers you, press the Alt key and tap the protruding area, a minus sign will appear and the clicked area will decrease. In this state, click Ctrl + J or Cmd + J to duplicate only the selected area on a new layer. If you've been doing well so far, you should have Layer 3 of the chessboard background, as shown in the screenshot on the left. Then, if you double-click the layer 1 copy with the quick selection tool selected, the window in the red area below appears. Set the drop shadow as shown below and click. Then, the layer panel window changes as shown in the left screen below, and the place where we will create shadows is the effects in the red area. If you place the mouse cursor over this Effects text and right-click, you can select the create layer menu as shown in the lower right screen. Then a small window like some kind of warning message will pop up to surprise you, but you can ignore it and hit OK. If you bravely hit OK you'll get a new layer with only shadows, like the bottom left screen, and you'll see a result like the one on the right. For some reason, it makes me feel better now that the ballerina is ready to take off in style. Next, with the layer 3's drop shadow layer and then select Edit --> Transform --> Distort from the top menu bar to adjust the shape and angle of the shadow. If you click select Edit --> Transform --> Skew, and then you can find more better shadow. Finally, the picture below is the finished image. I hope everyone can take out the ballerina in their heart and send them to a brighter world.
0 Comments
Leave a Reply. |
Myungja Anna KohArtist Categories
All
Archives
July 2024
|
Proudly powered by Weebly


 RSS Feed