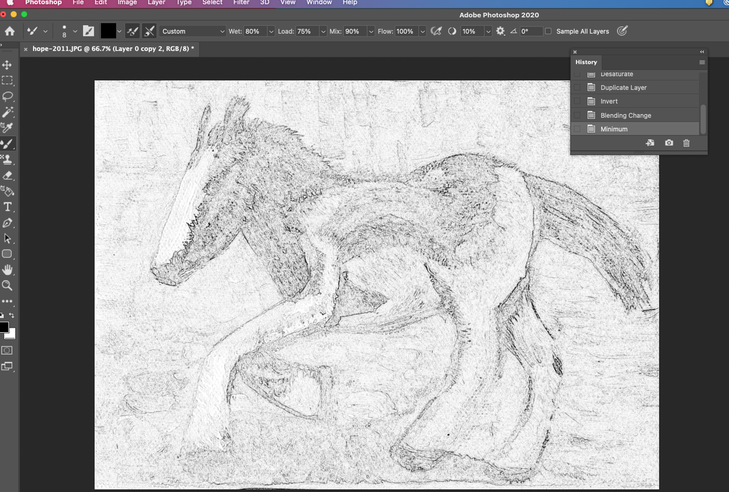
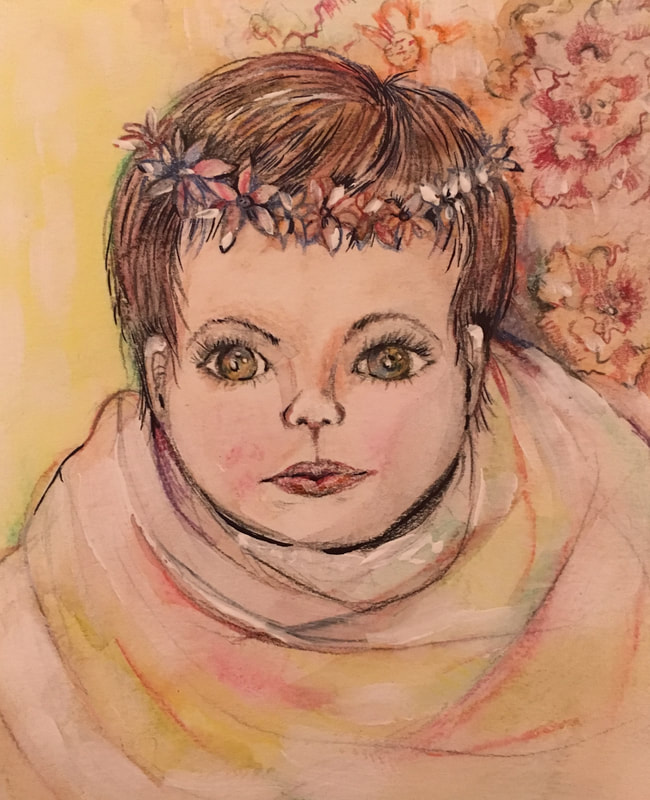
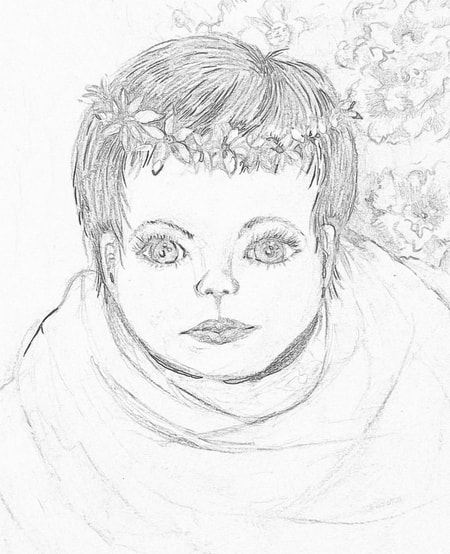
How to make coloring pages in Photoshop.Recently, my daughter asks me to make more coloring pages every day. Because I should draw and do housework, I have not enough time to draw on my tablet. How can I make a coloring page using a picture I drew or a photo I took before? So today, I'll show you the process how you can make own painting into a coloring book using Photoshop. If you don’t have a picture, you can use a photo. Are you ready ? I am using photoshop cc 2020 version. So I will explain based on this version. First, open Photoshop and load the image you want to make into a coloring page. The shortcut key is ctrl+O. I brought up the image I drew in 2011 called "Hope". It's a picture that was sold in the first exhibition, but someone bought it to give her a daughter. Like the words in this picture, I hope that the girl is running strong with a beautiful dream. 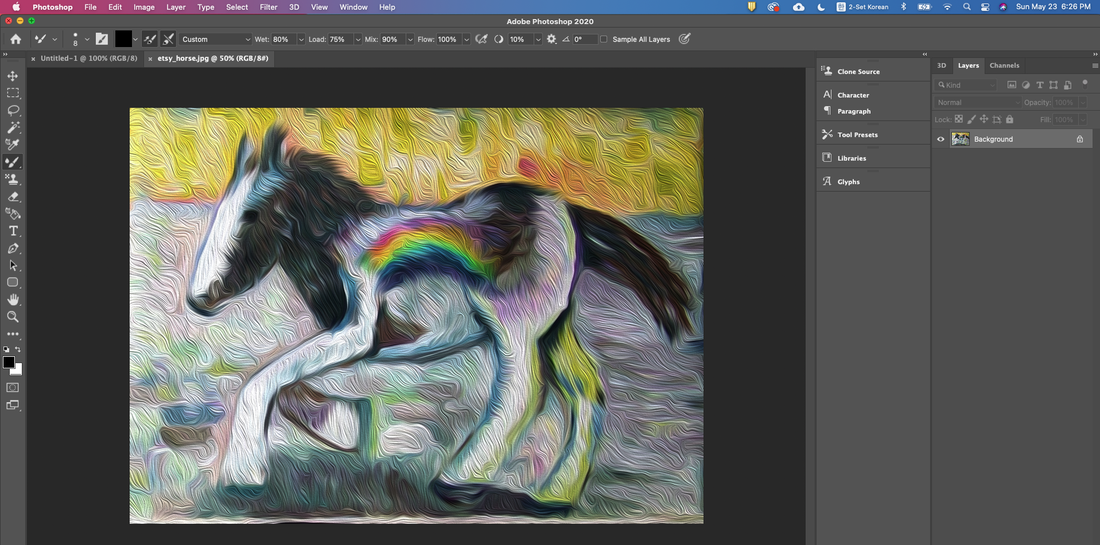 And place the mouse cursor over the picture on the layer, right click . You should create duplicate layer like this. 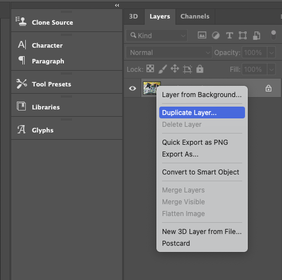 And then you can see the below message. please just click OK !! 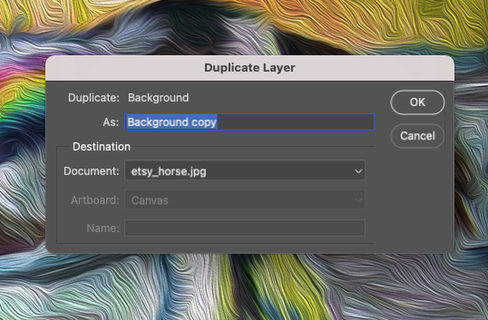 And then you can see the below layers window with creating the duplicated layer. 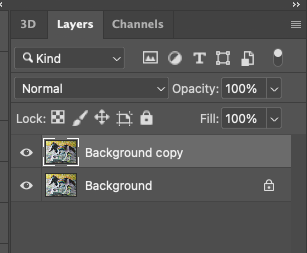 Then move the mouse over the copied layer and go to the upper menu bar like this orders: Image - Adjustments - Desaturate 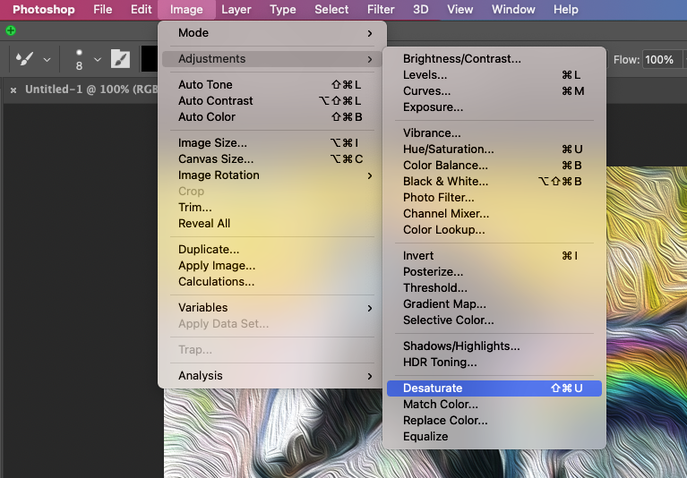 If you have succeeded so far, you should see the image turned to black and white. 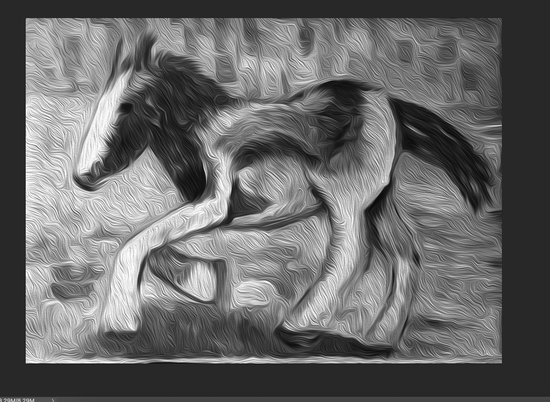 Then put the mouse over the copied layer that has turned black and white and right-click to duplicate the layer again. 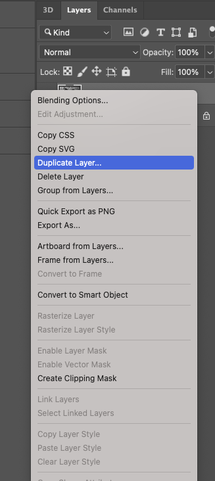 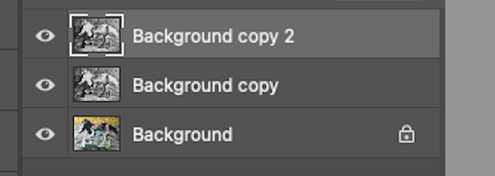 And then go to upper menu like this: Image - Adjustments - Invert 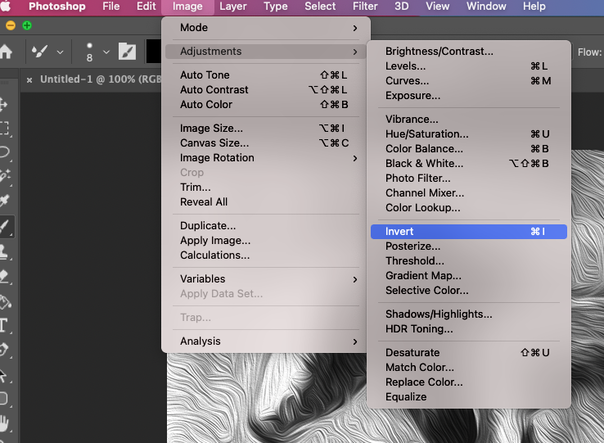 You should see an inverted image like the below. 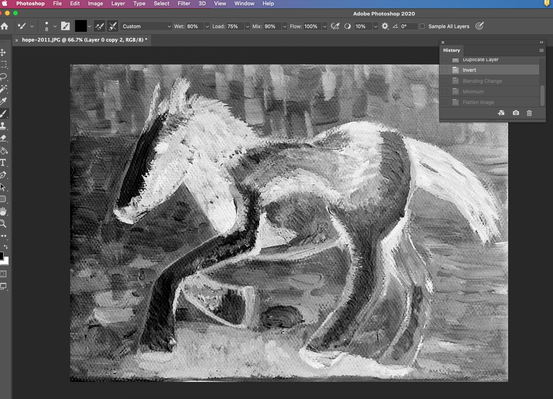 Cheer up! You are almost there ! You can click the red rectangle area(as the below screen) for selecting the option of the layer. 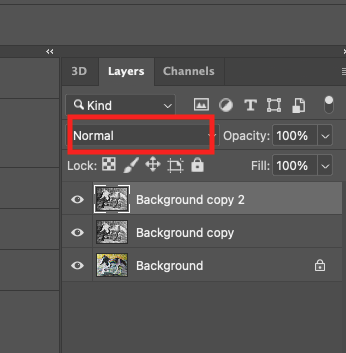 Next, select the option, Color Dodge like the below. 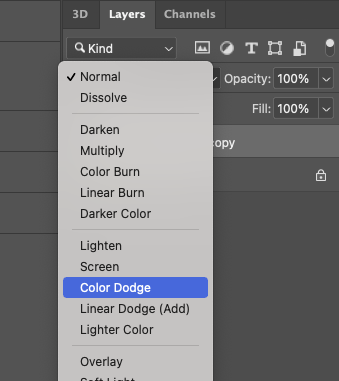 OOOOPS ! But Don't panic. Depending on the picture, you may see blanks or blurry images. It is normal. 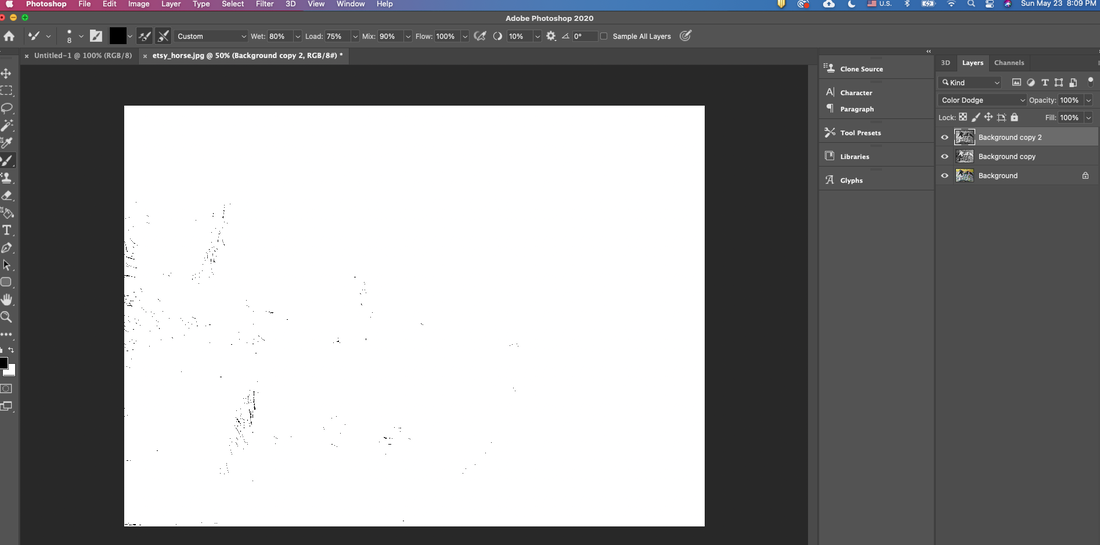 For the next step, you flow the process like this : Filter - Other - Minimum 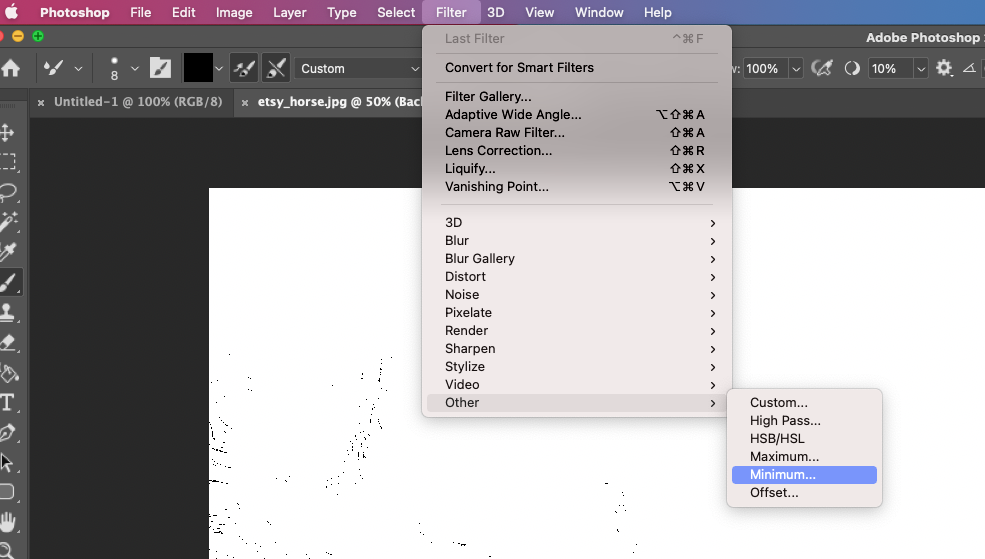 And then you can see the below screen. 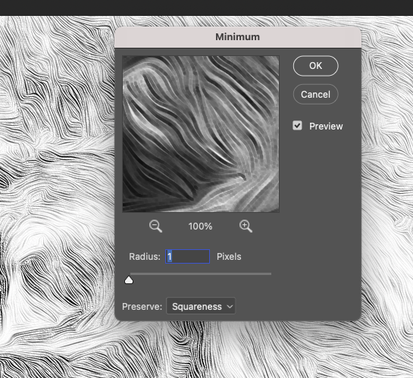 You let the Radius 1 pixels or may put 2 or 3 if you want. Anyway I'll select Radius 1.
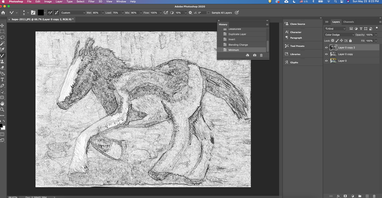
Now it's time to create an image for printing. Please go to the upper menu like this : layer - flatten Image 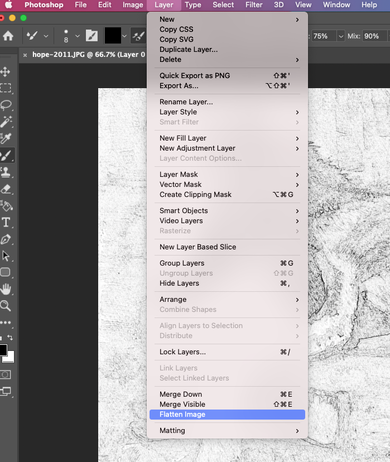 You can see that the 3 layers have been changed to a single file and the name has been changed to Background. 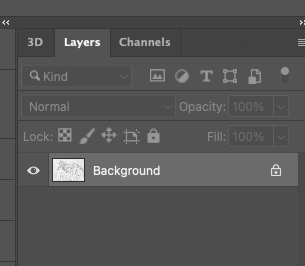 Now is a final step. Click the upper menu, File and go to Export like the below. 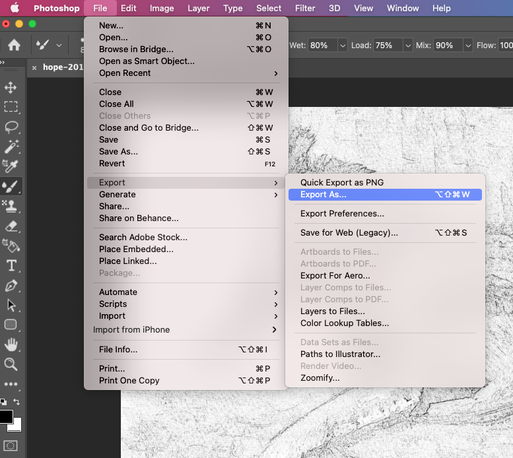 I first saved it as a jpg file for printing. And I'll have to do some coloring with my child for a while.Have a good time.
0 Comments
Leave a Reply. |
Myungja Anna KohArtist Categories
All
Archives
July 2024
|

|
Tutorial |
 RSS Feed