How to create your special Word Cloud. annakoh.com Anyone can easily create a word cloud on the site below without registering. Click the green button ‘Create’ at the top. 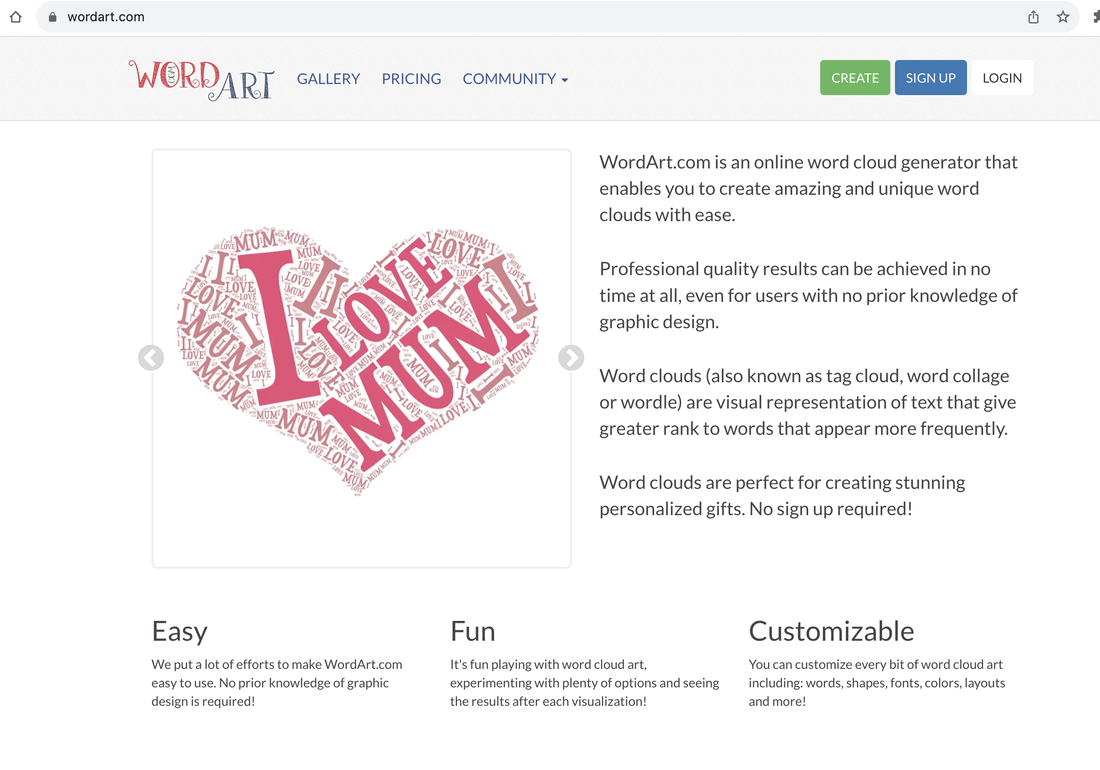 https://wordart.com/ 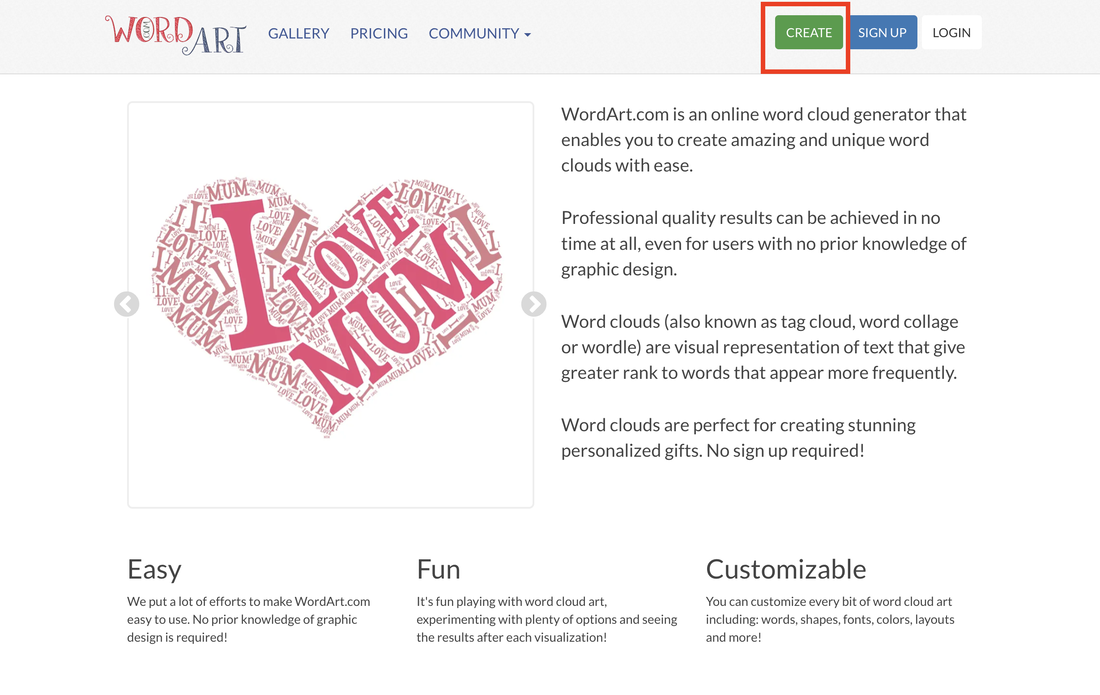 Below is the window where you can edit. Simply change it to the corresponding word in Word and change the color, font style, size, etc. 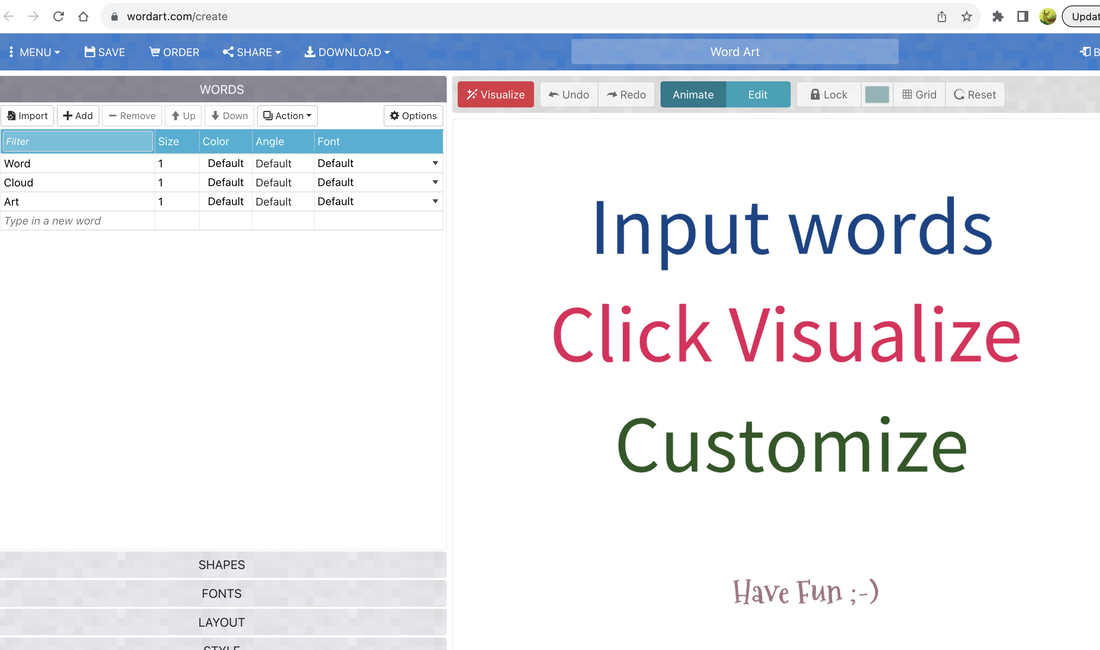 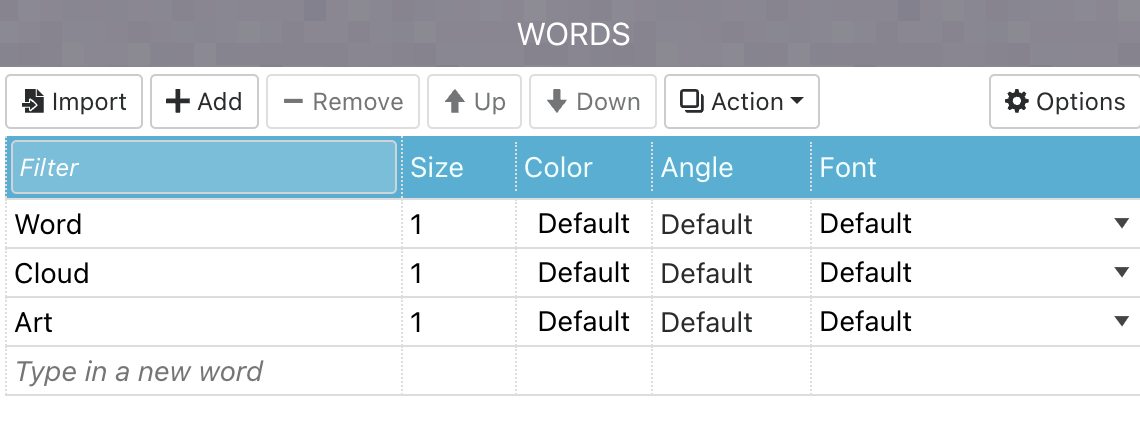 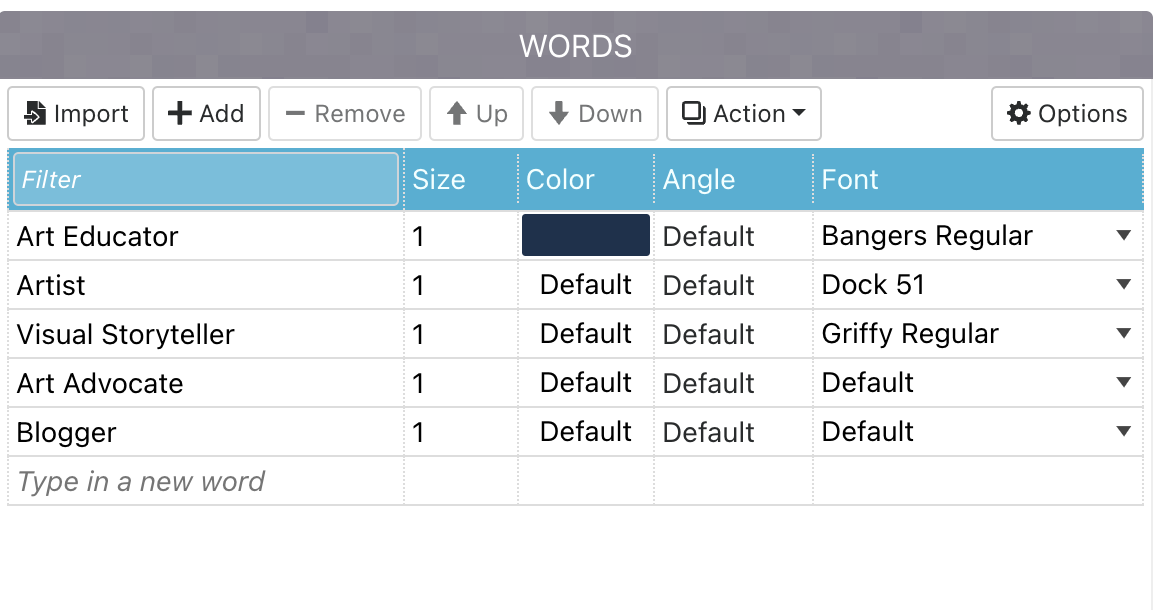 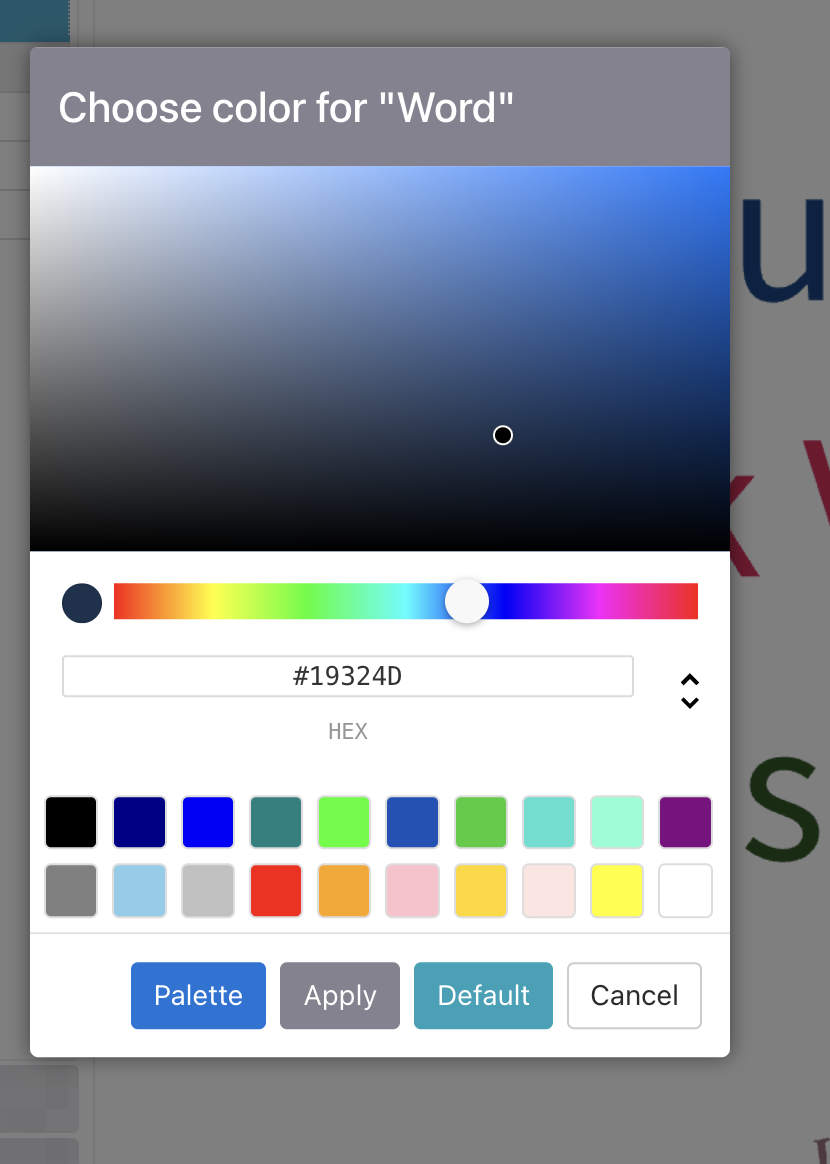 I chose a shape that looked like paint was dripping to suit the artist's characteristics. The words are listed here. Changing the direction of the words also makes it more dynamic. 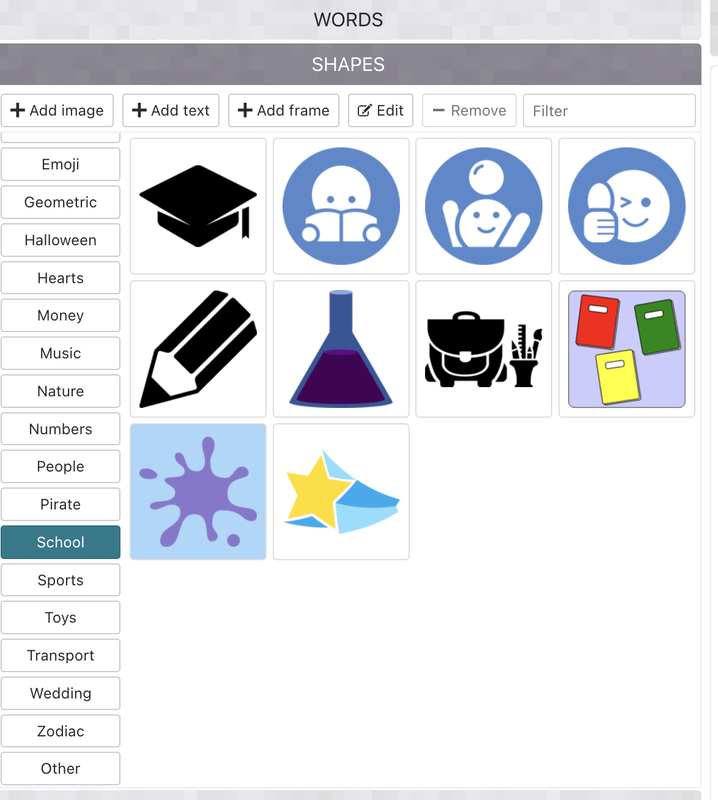 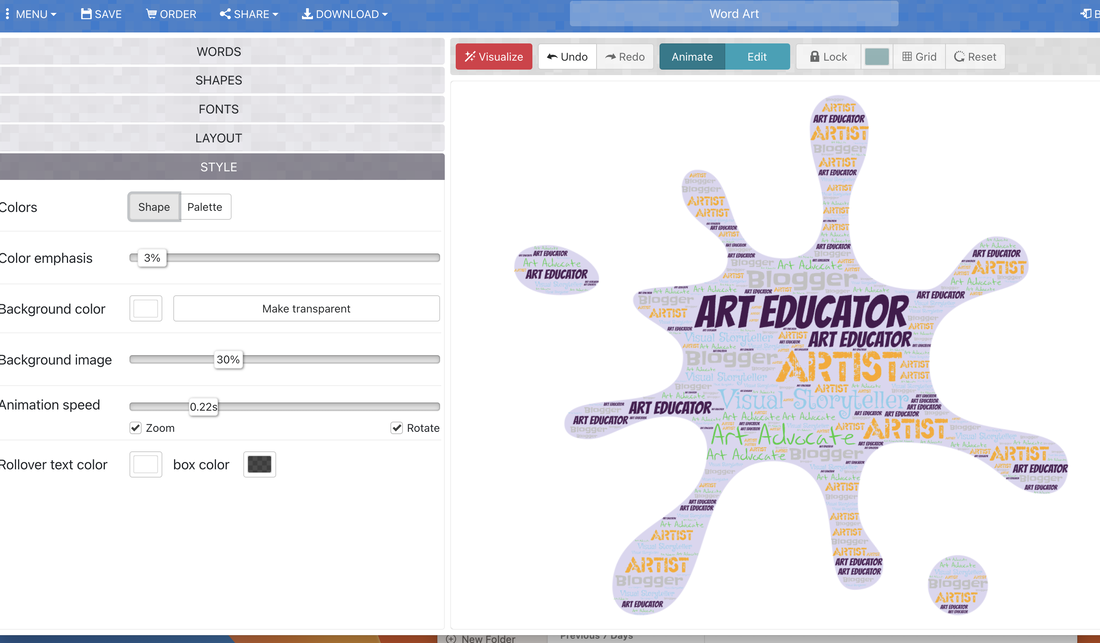
0 Comments
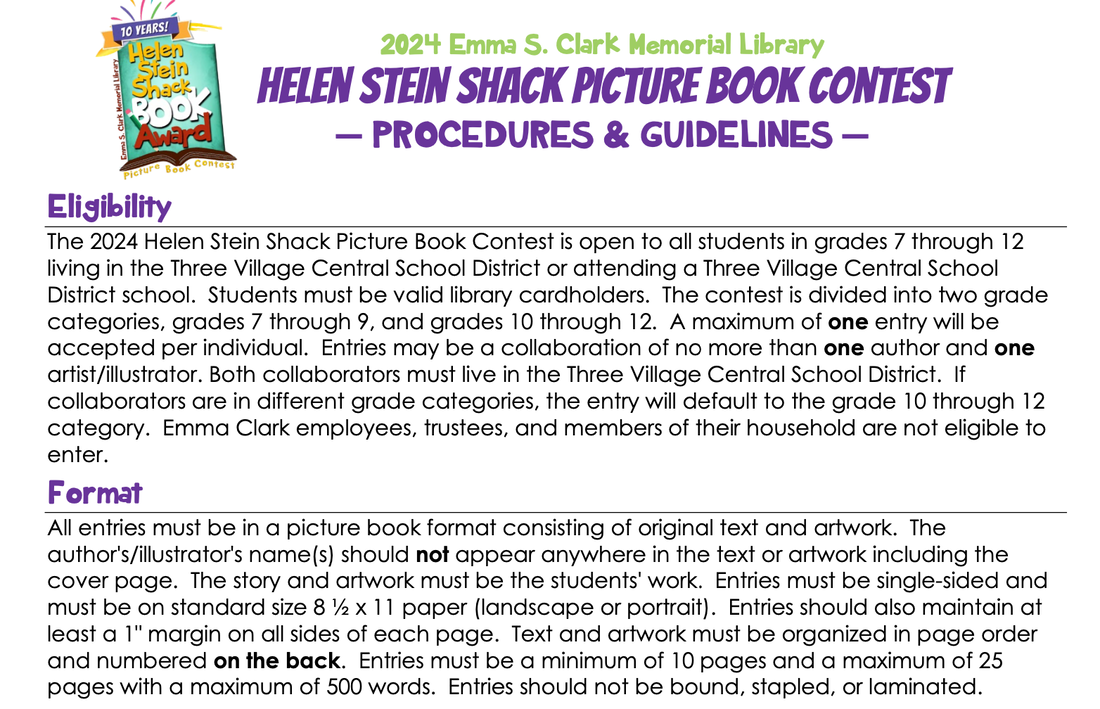
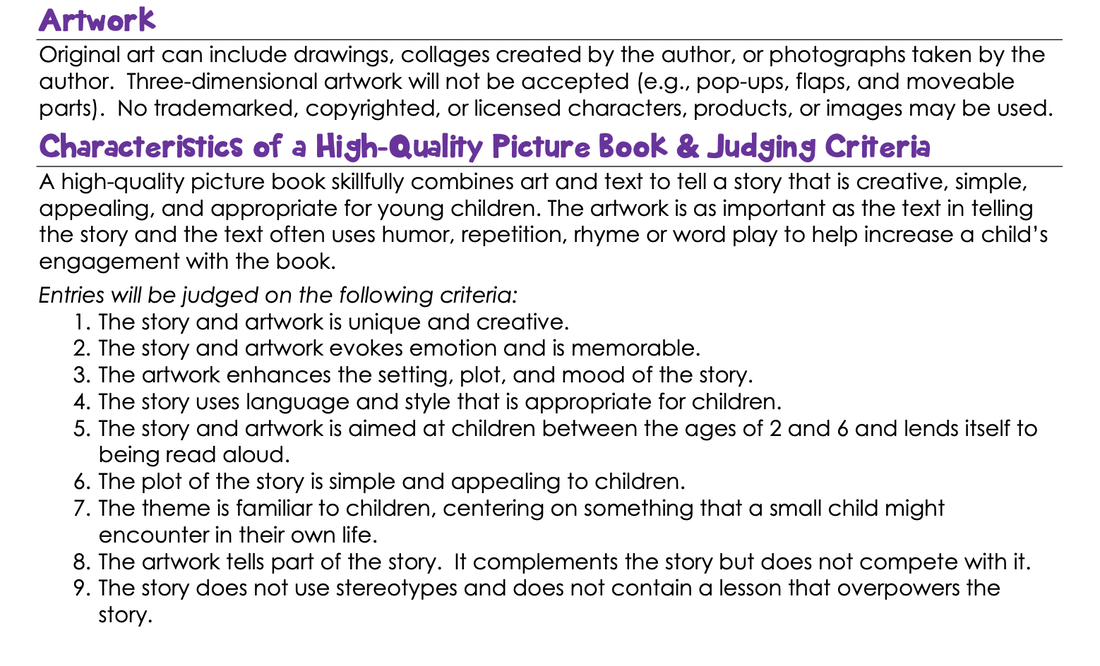
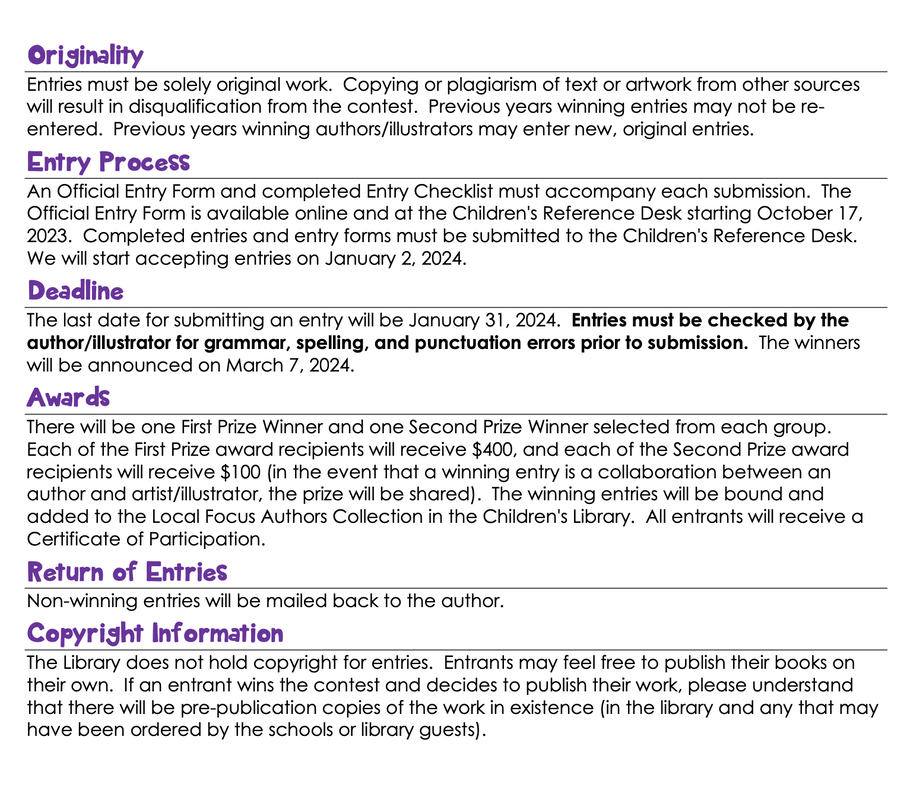
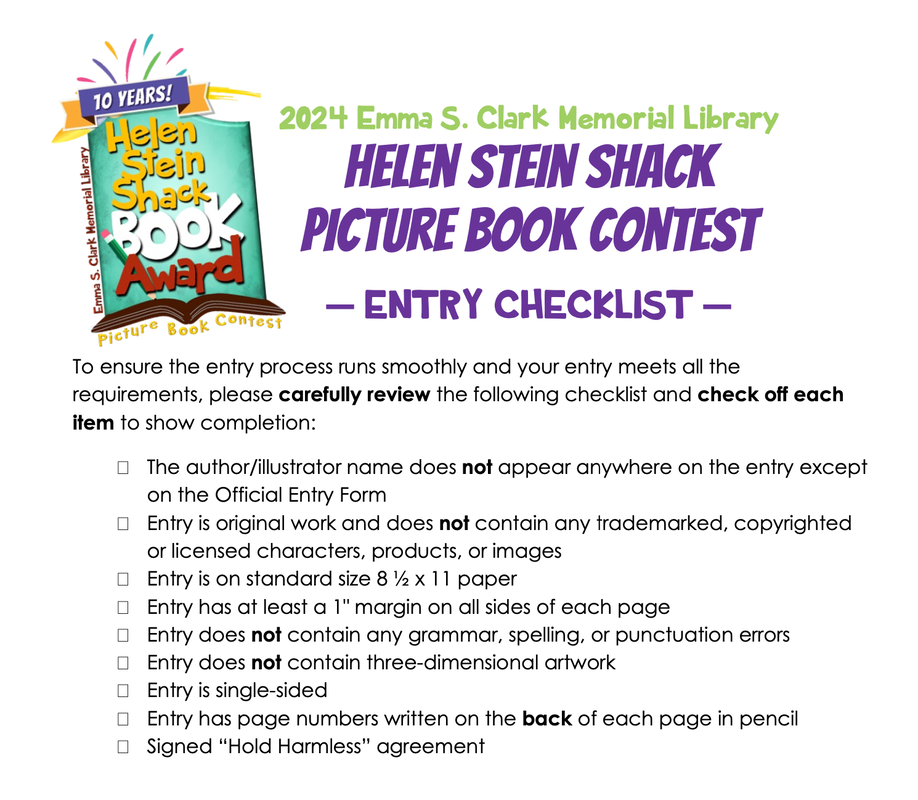
THE 13TH annual Ocean Awareness Contest.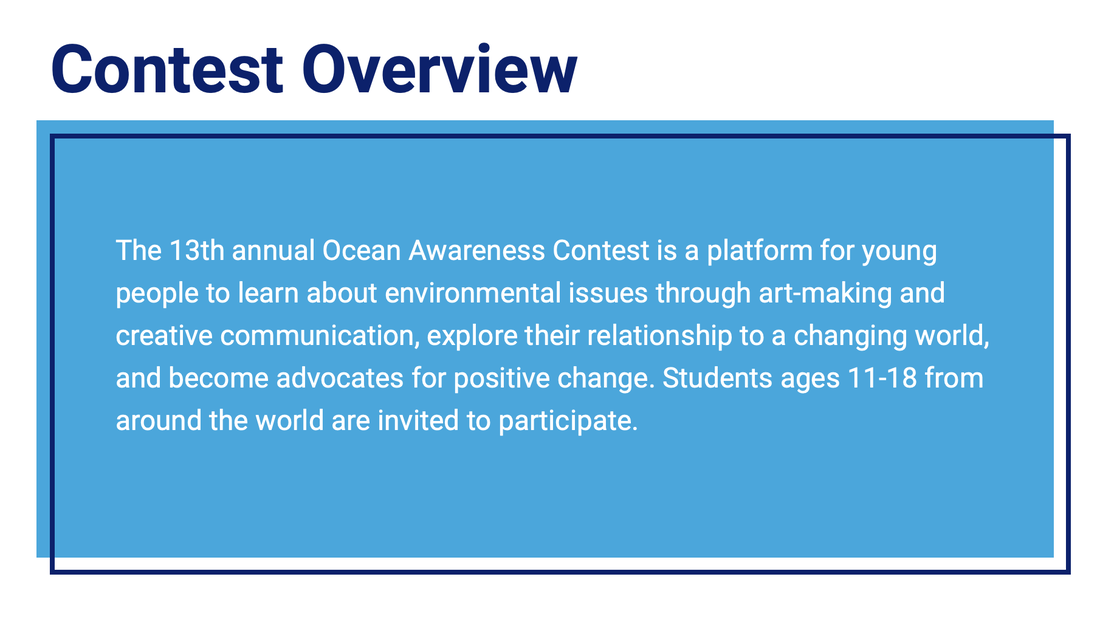 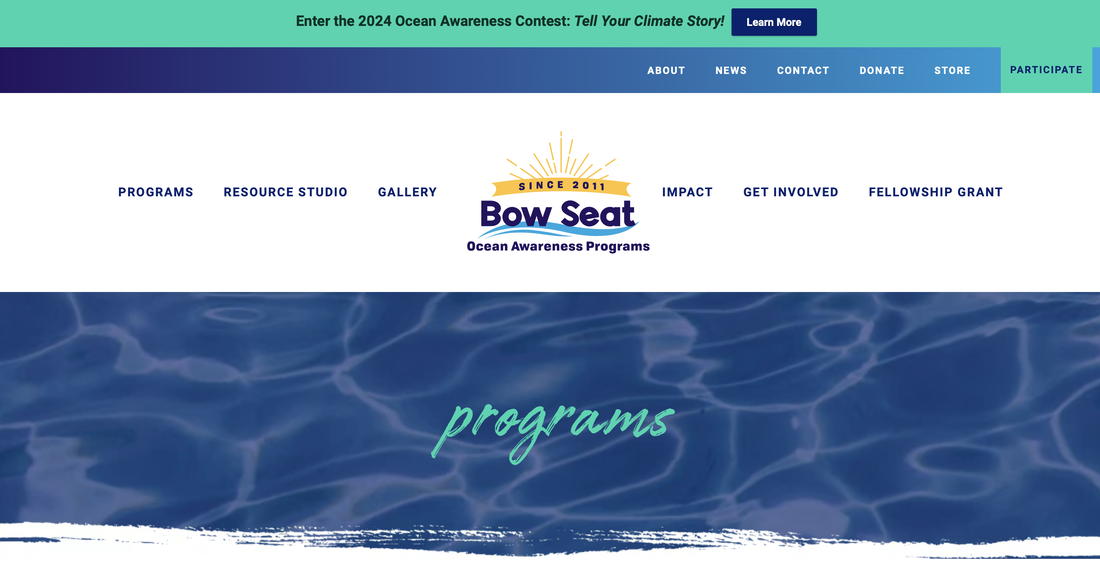 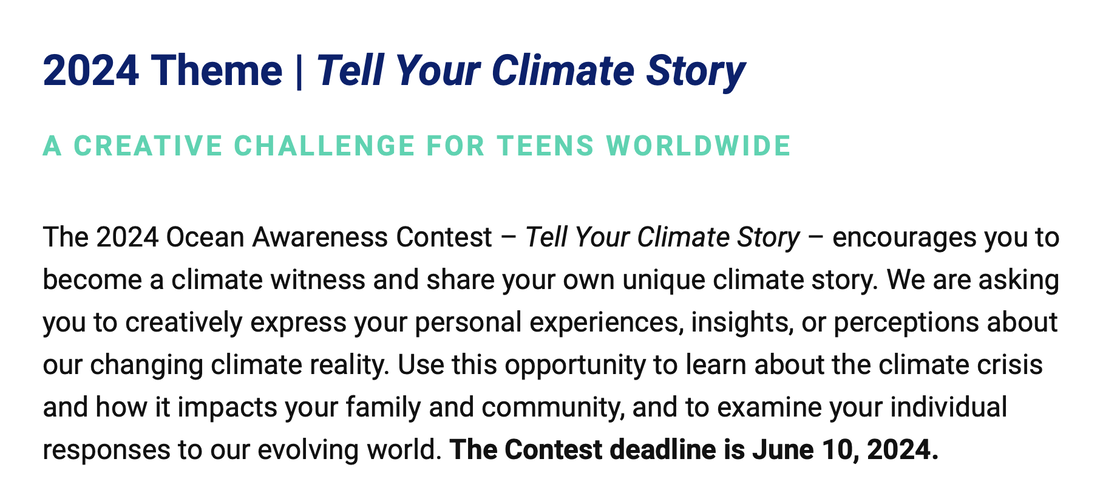 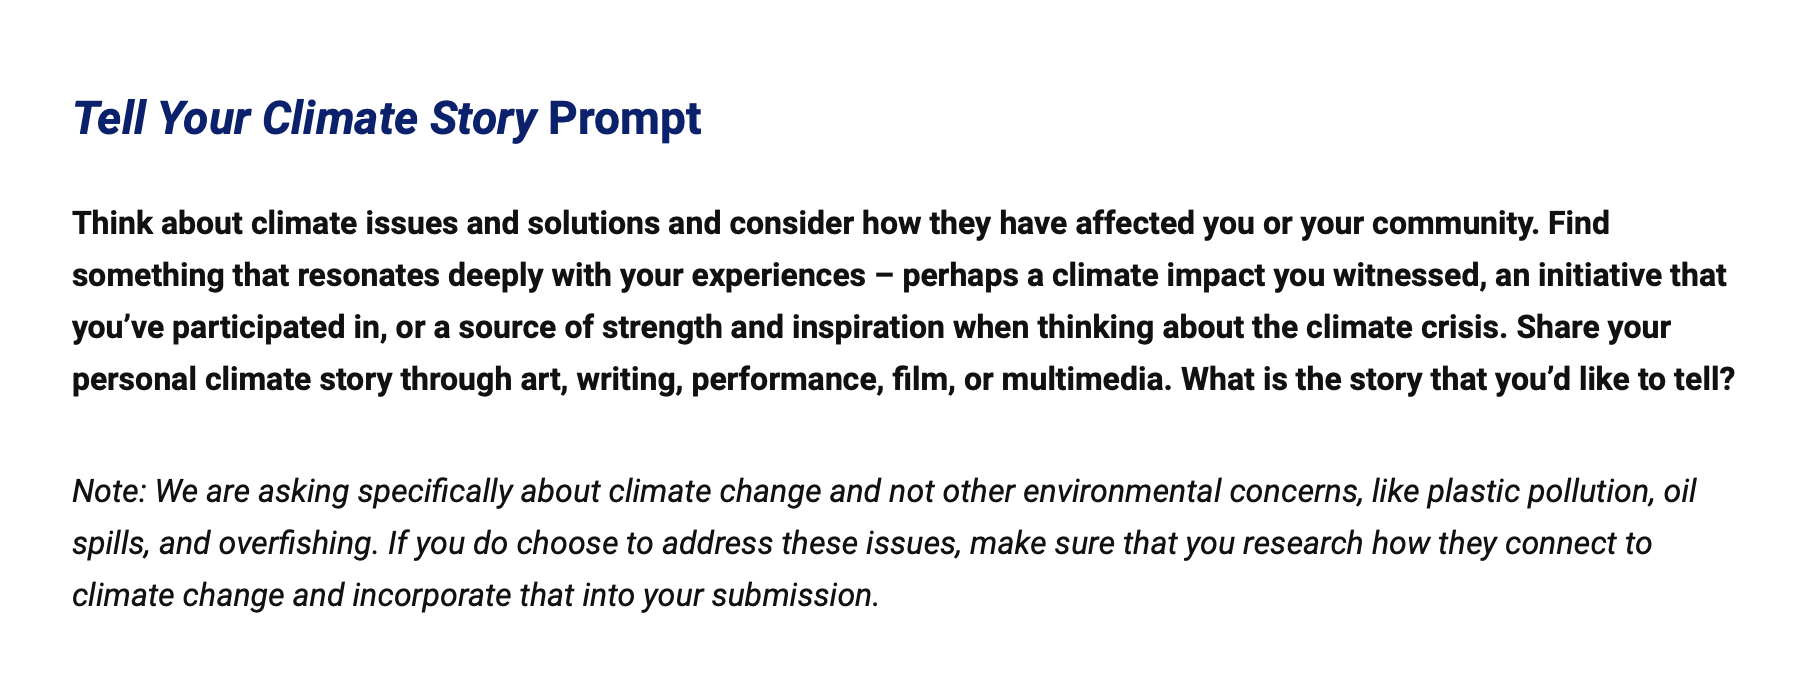  How can use the template to make Your Children's Book to Amazon KDP.Today I'm going to explain how to use Amazon templates before showing you how you can publish your own children's book on Amazon Kindle. Amazon Kindle Service provides templates that anyone can download and use for free in a simple way for authors who want to publish books using this service. This feature is very convenient. Please visit the site below first. 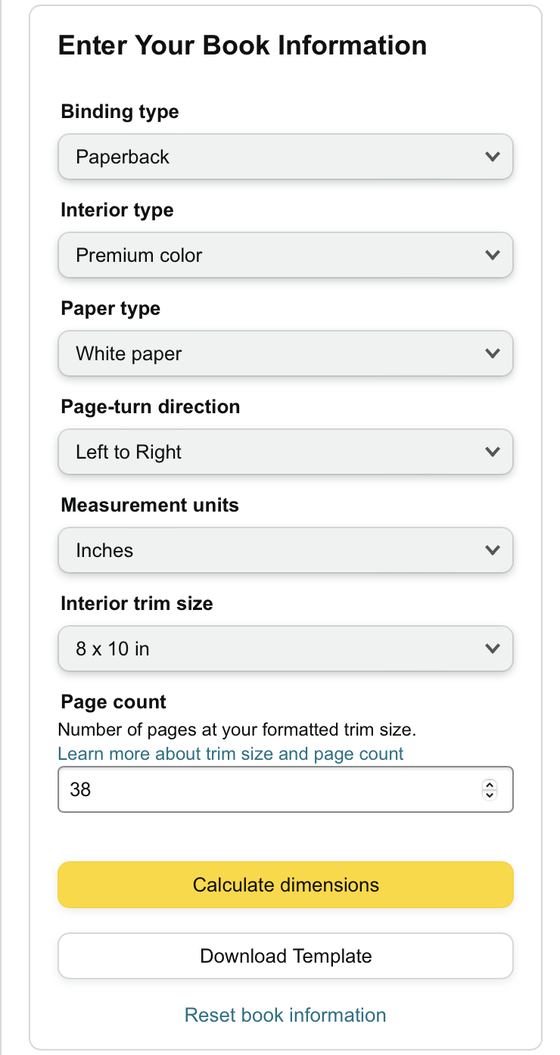 In the US and Europe, we read left-to-right. Right to left is used in Japan and in Hebrew The size of your children's book is your personal preference, but standard children's book sizes are 8 x 10 or 10 x 8 (landscape). The standard picture book page count is 32 pages. Almost all picture books put out by children's book publishers are 32 pages, but there are exceptions. Picture books also come at 24 pages, 40 pages, and 48 pages. Considering the above case, I chose the most common template and downloaded it. To publish a book, you must have a good understanding of the concepts below. In the context of book publishing and printing, "bleed" refers to an important design and printing term. A "bleed" is the area of an image or design that extends beyond the trim edge of a printed page. It's essentially an extra margin of the image or artwork that ensures there are no unprinted edges after the page is trimmed to its final size. Here's why bleeds are important: Professional Printing: When books are printed, they are typically produced on larger sheets of paper and then trimmed down to their final size. Without a bleed, there's a risk that small shifts or variations during the printing and trimming process could result in unprinted white edges, which would look unprofessional. Full-Page Graphics: If your book includes images or graphics that cover the entire page (full-page bleed images), having a bleed ensures that the image goes all the way to the edge of the page without any white space. Aesthetic Purposes: Bleeds are also used for design aesthetics. They allow for a visually pleasing, continuous look when an image or color background extends to the edge of a page. The standard bleed size can vary, but it's typically around 1/8 inch (0.125 inches or 3.175 mm) to 1/4 inch (0.25 inches or 6.35 mm) on each side of the page that requires a bleed. It's essential to work with your printer or publishing service to understand their specific bleed requirements, as they may have slight variations depending on their equipment and processes. When creating artwork for a book with bleed, your design should extend the image or background color beyond the page's trim size by the specified bleed amount. For example, if you're working with a 1/8-inch bleed, your image should extend 1/8 inch beyond the edge of the page on all sides. In a nutshell, a bleed is a necessary element in book design and printing that ensures your images and designs look professional and extend to the page's edges without any unprinted white space after trimming. 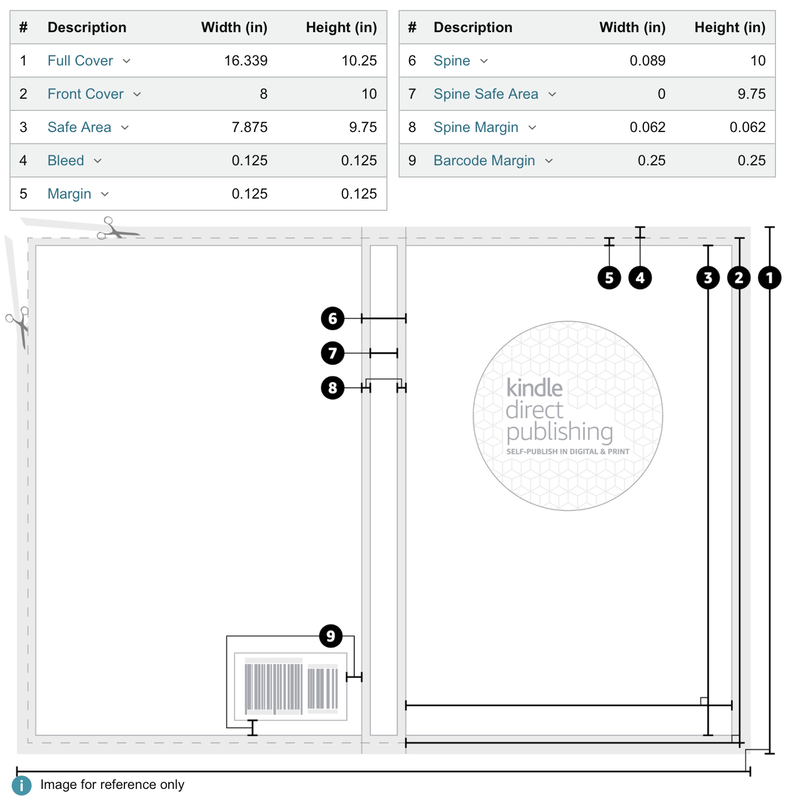 In book design and publishing, "margins" refer to the space or blank areas around the content on each page. Margins serve both practical and aesthetic purposes in a printed book, and they are an essential part of the book layout. The margins include several different types:
Once you download the template, you will see a folder like the one below. 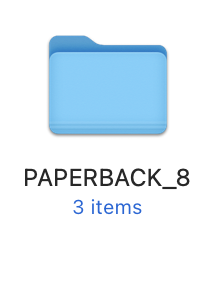 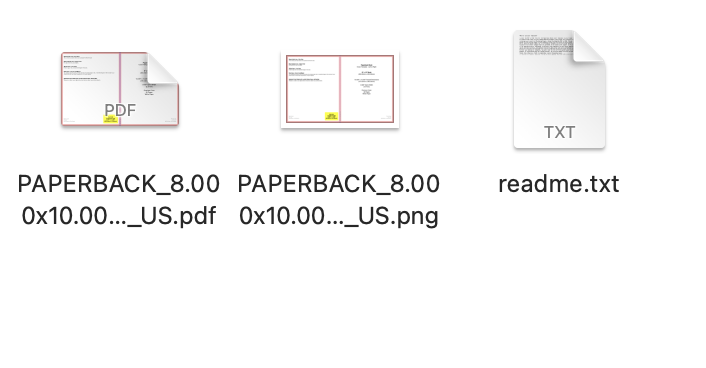 *How to use your template* 1. Open the PDF or PNG file for the Paperback Book Cover Template in your image editing software. 2. Create a new layer in your image editing software. This layer will serve as the design layer. 3. Design your cover in the design layer, using the template PDF or PNG file as the guide layer. The artwork should extend to the outside edge of the template's pink zone to ensure a white border will not exist within the printed work. Do not move the guide layer, as it is properly aligned for our printing specifications. 4. Ensure text and/or images that are intended to be read do not appear in the pink zones of the template. 5. The barcode area is indicated in yellow on the template. Do not place important images or text intended to be read in the barcode location. We suggest filling in this area with your background color or design. KDP will automatically generate a barcode representing your title’s ISBN when printing copies of your book. 6. Once your design is complete, you will need to turn off the guide layer so that it is not printed on your final product or rejected during the review process. If you are unable to turn off the guide layer, then you will need to format the artwork so that it completely covers the guide layer. 7. Flatten all layers, save the file as a press quality PDF with CMYK color profile, and upload the file via KDP. Below is my final selection:  I opened the .png file, which is the image file for this template, using Photoshop. 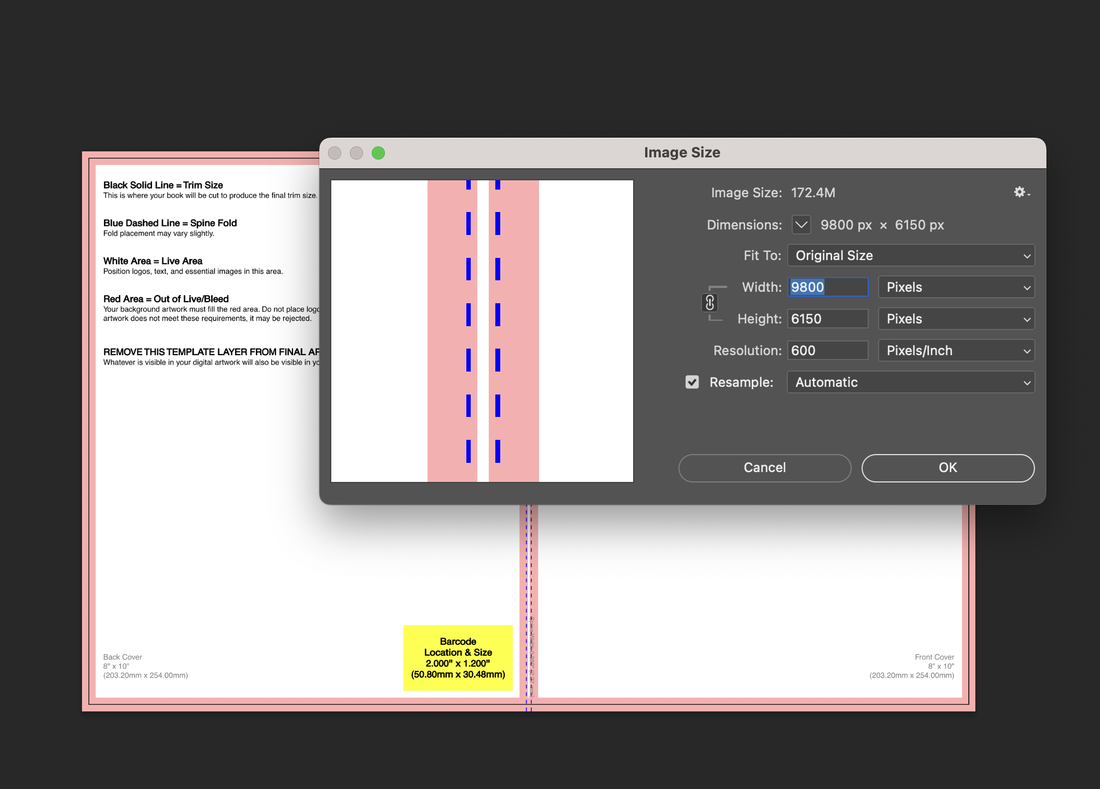 As you can see, important text or images should not be included in the pink area below. And your image should extend beyond this pink color. At this time, the area to be expanded is an area without important images or text.  This will load your image onto the template. 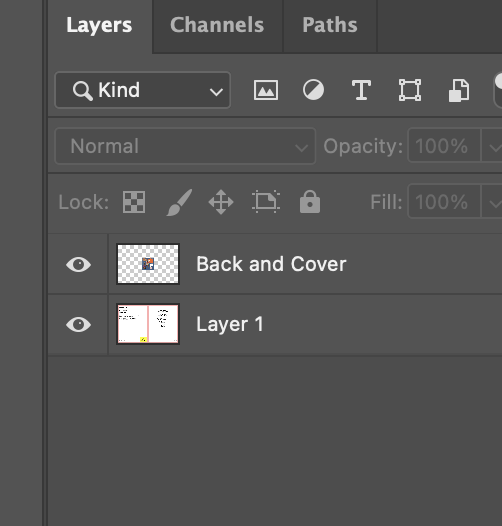 Then spread it out taking the size into account. At this time, important images or text should not be placed in the pink area. In my case, I am using it by lowering the transparency (40-60%)of the template. This way, you can check whether the image fits into the area. 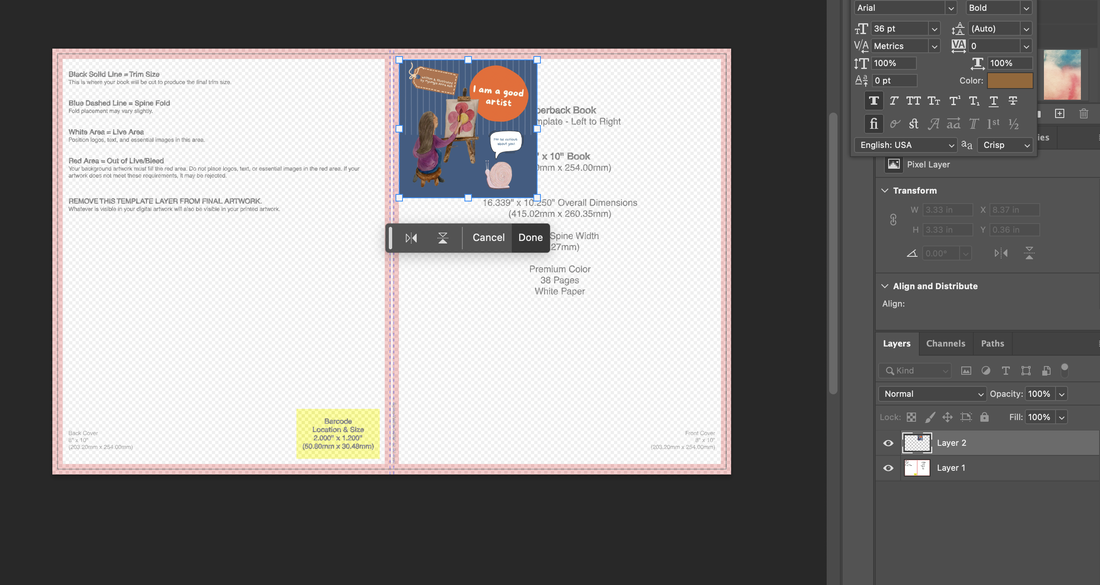 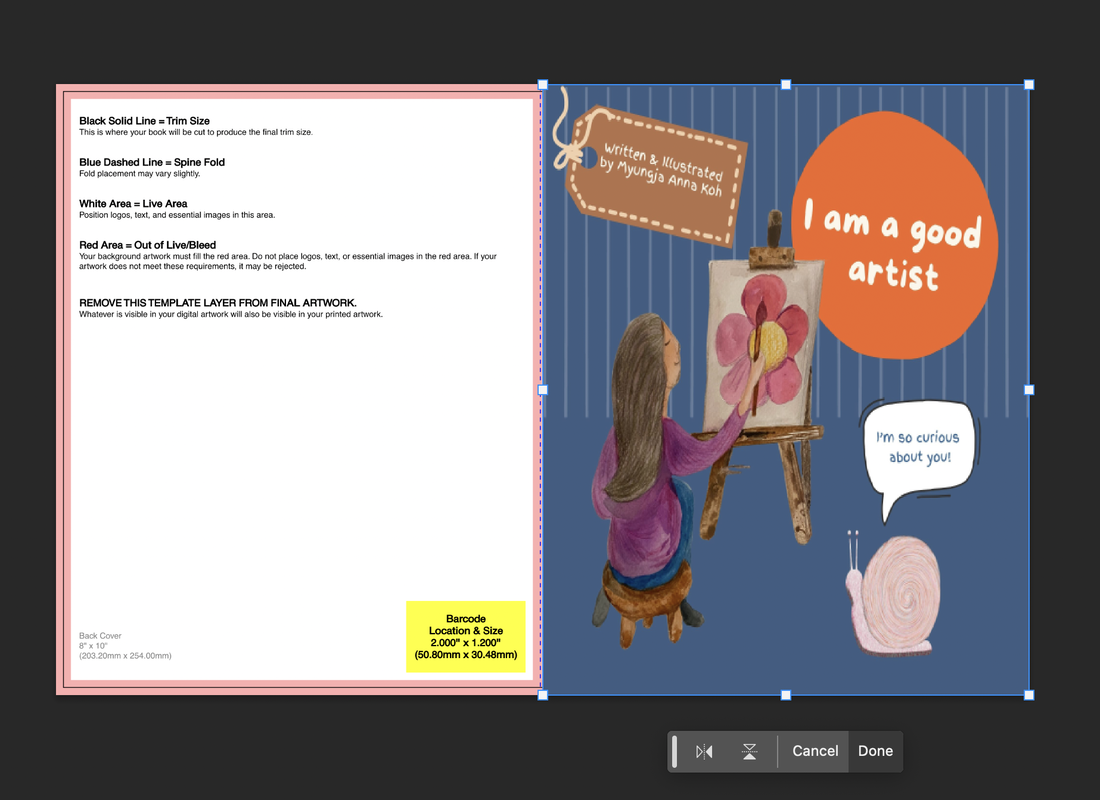 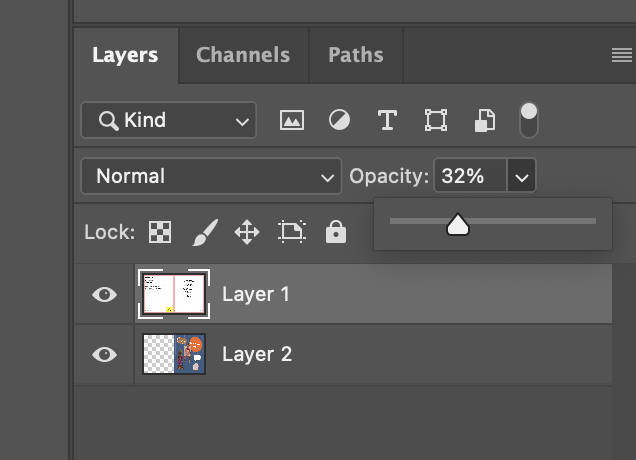 Here is a two spreading style's images. 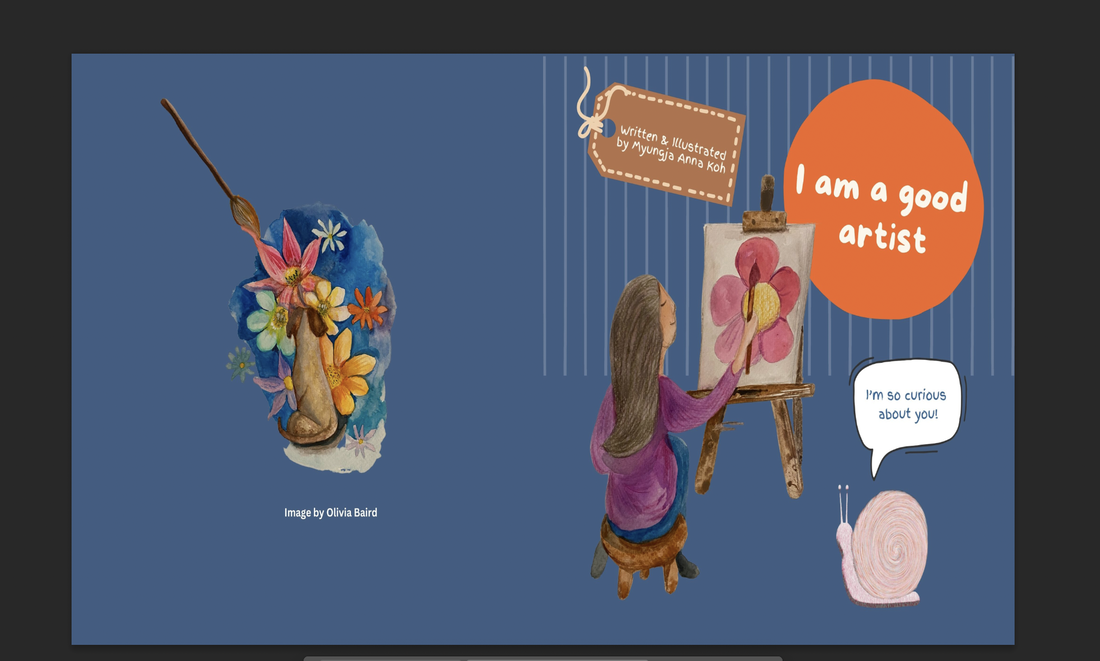 And, considering printing, be sure to save it in CMYK mode. 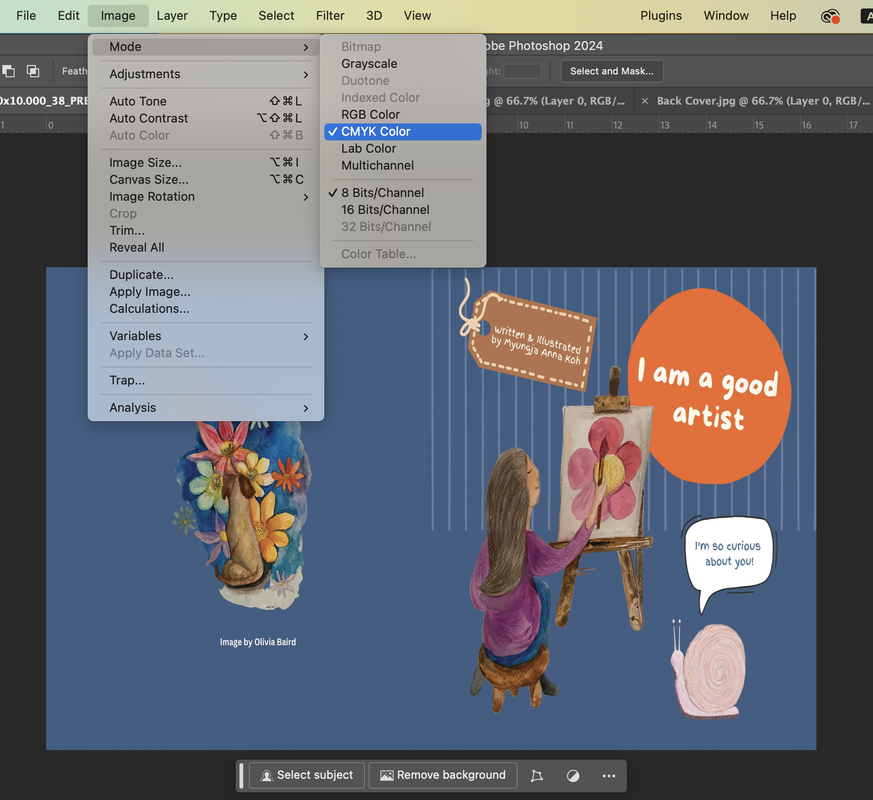 Below is the image you see when you first open the book. The left side is empty and we start from the right. 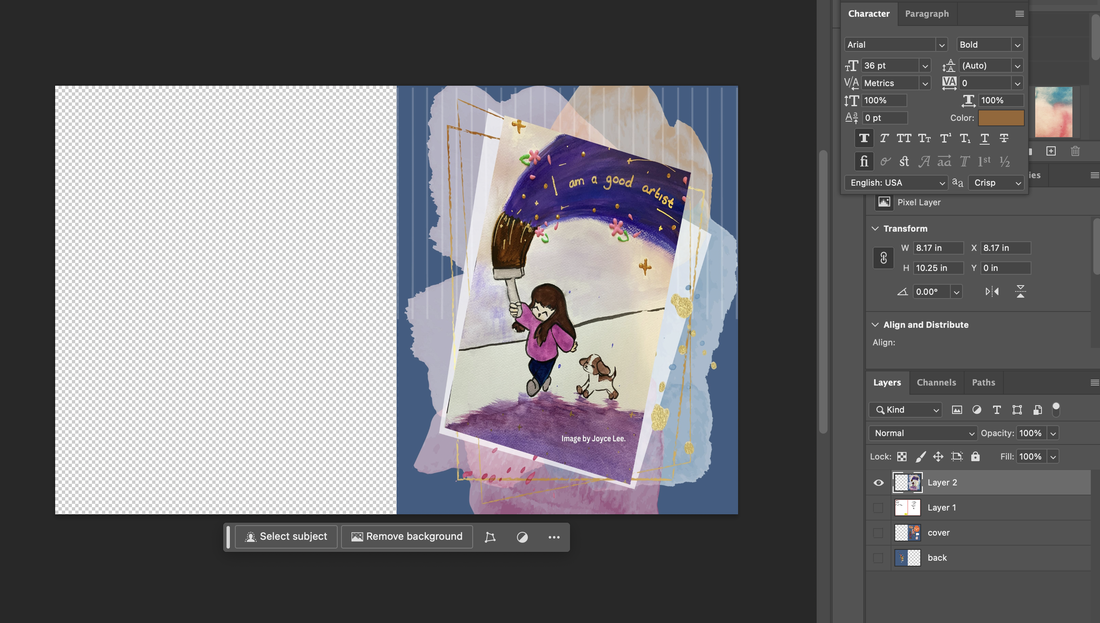 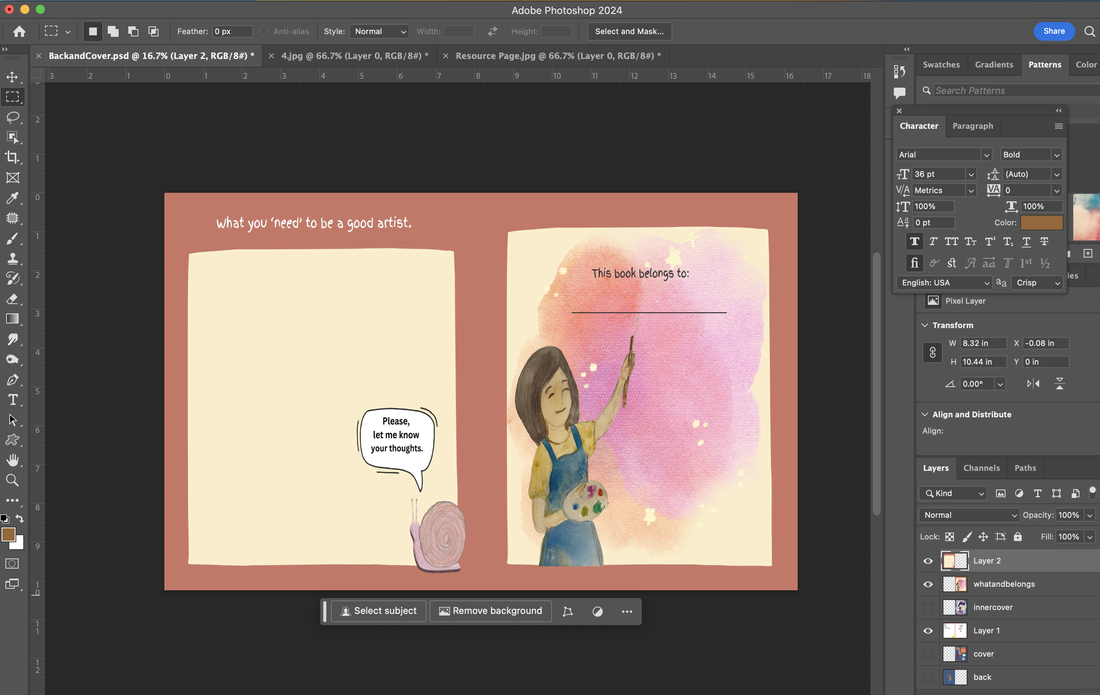 https://www.annakoh.com/blog/the-story-of-fancy-snail-anna-was-published-on-amazon-store 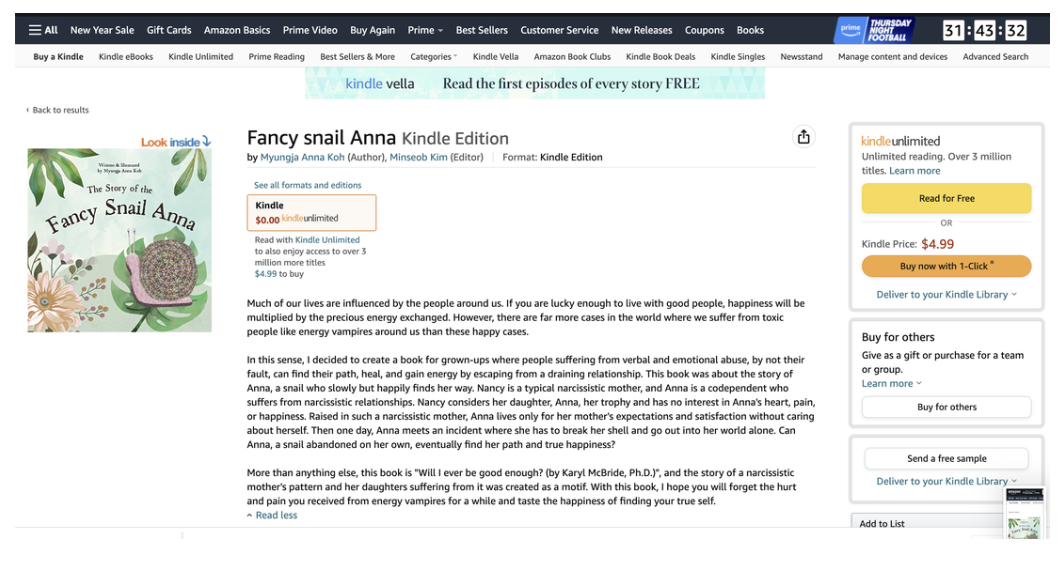 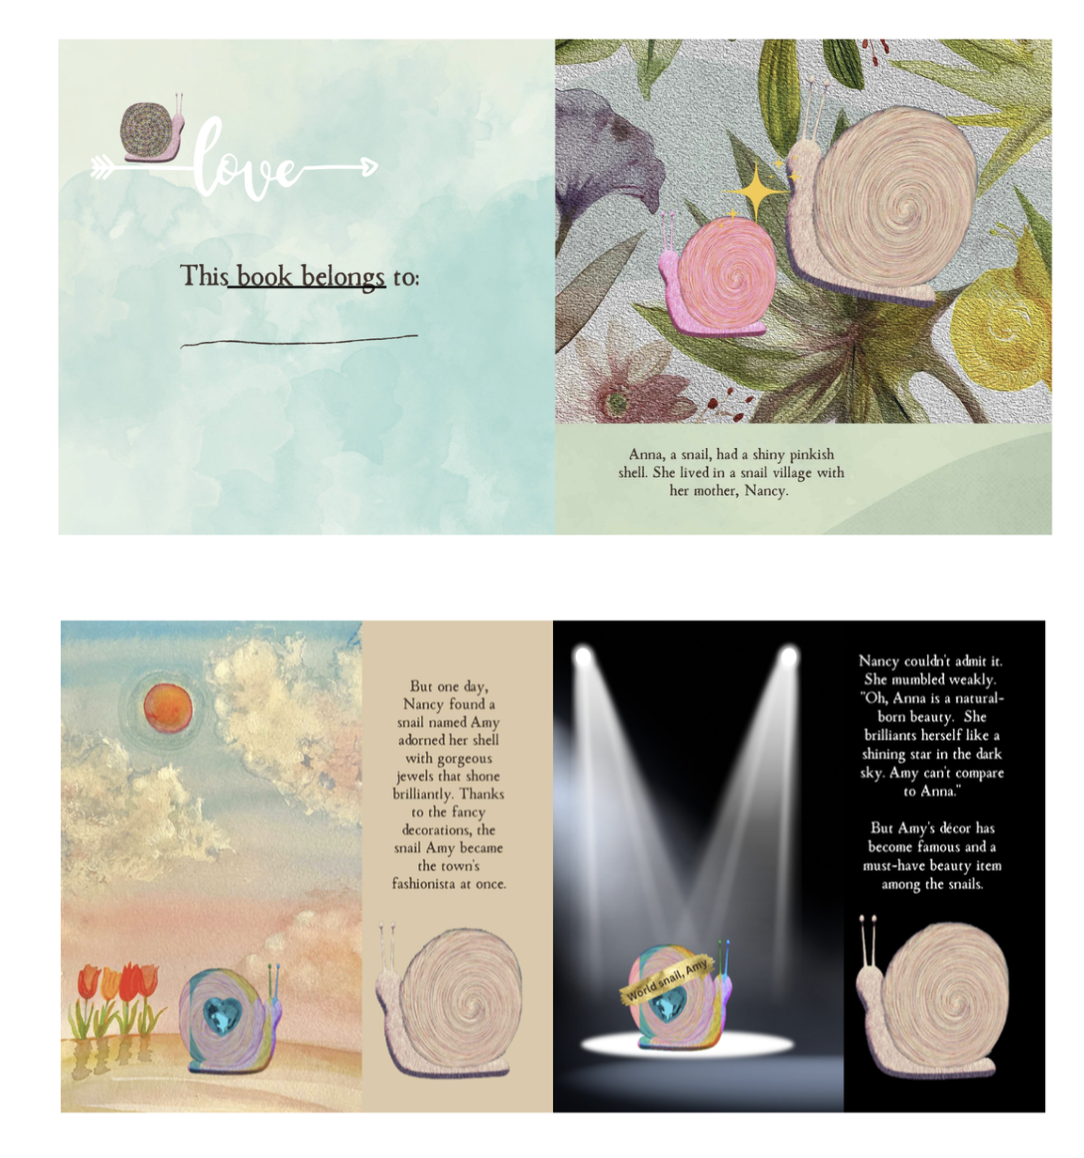 How to edit your movie with iMovie.Turn your self-shot videos into attractive videos. Video editing software targeting general users that Apple has been developing since 1999.  First go to 'Projects' menu. 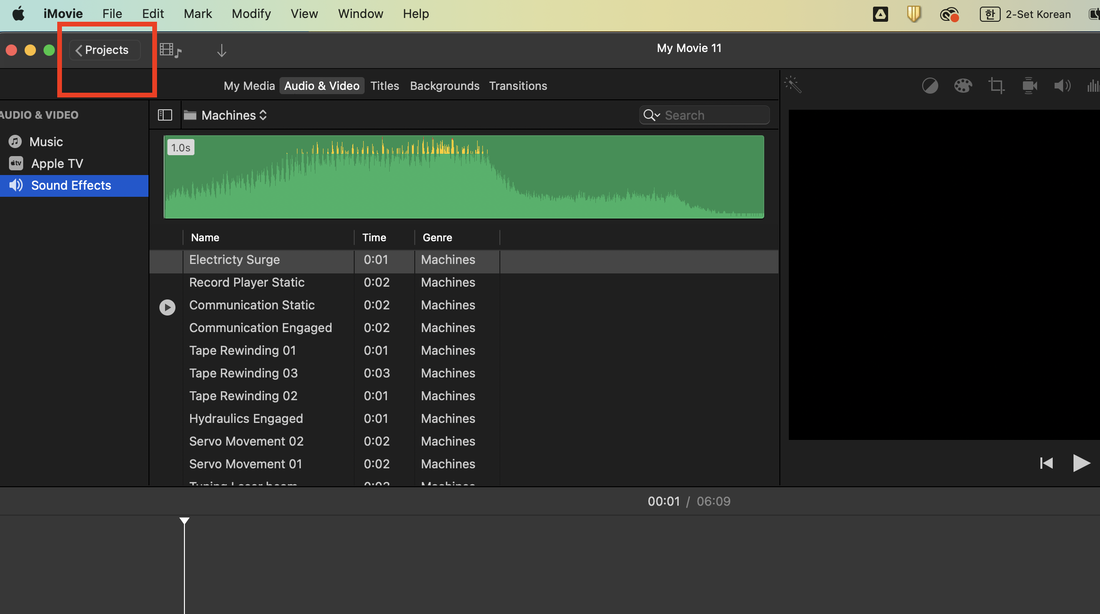 And then create a new movie with click the plus button. 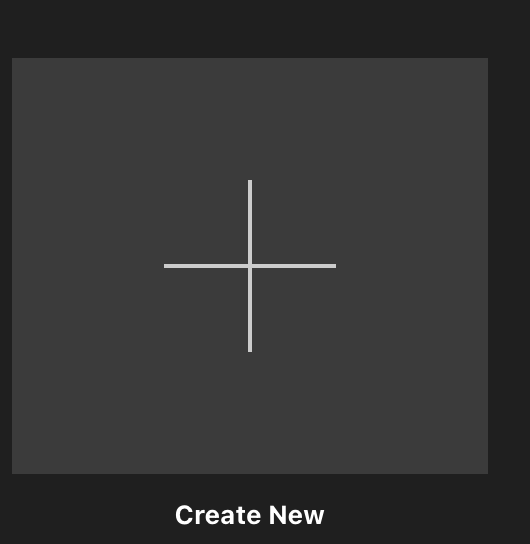 Then, select the 'movie' for edit your new movie clip. 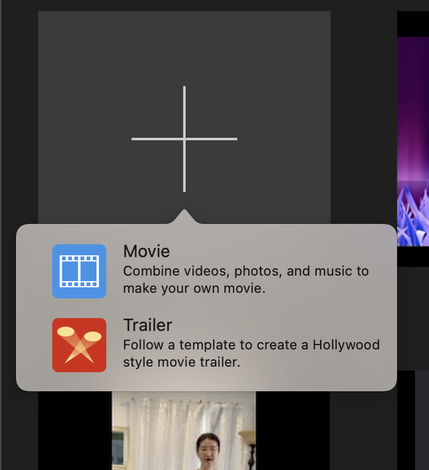 And click the Import Media! 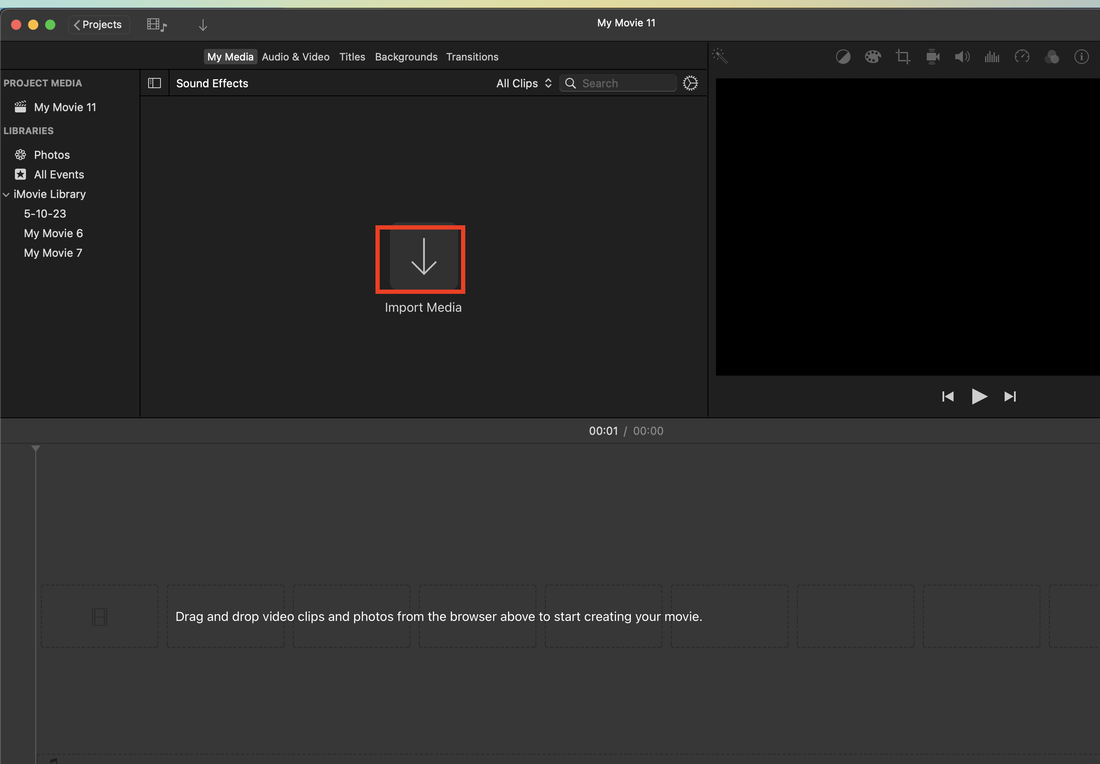 After importing your file, you have to drag from top to down like the below. 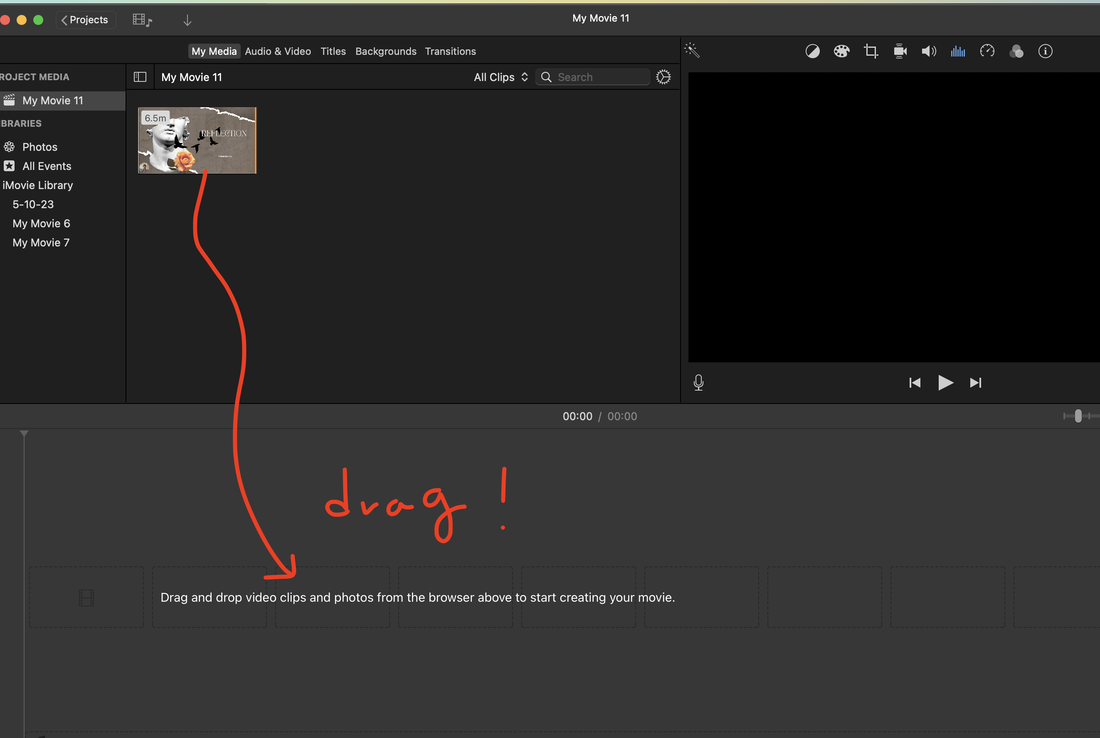 And you can see the movie file. 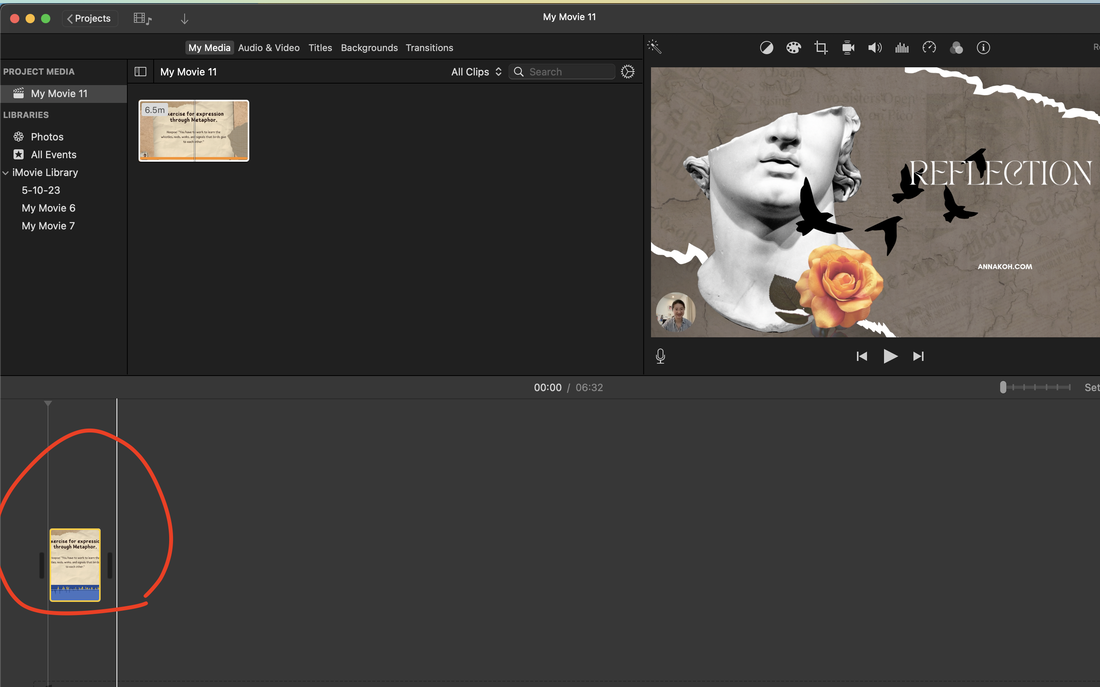 For editing, you have to scratch the bar like the below, and then you can see the movie line with sound. 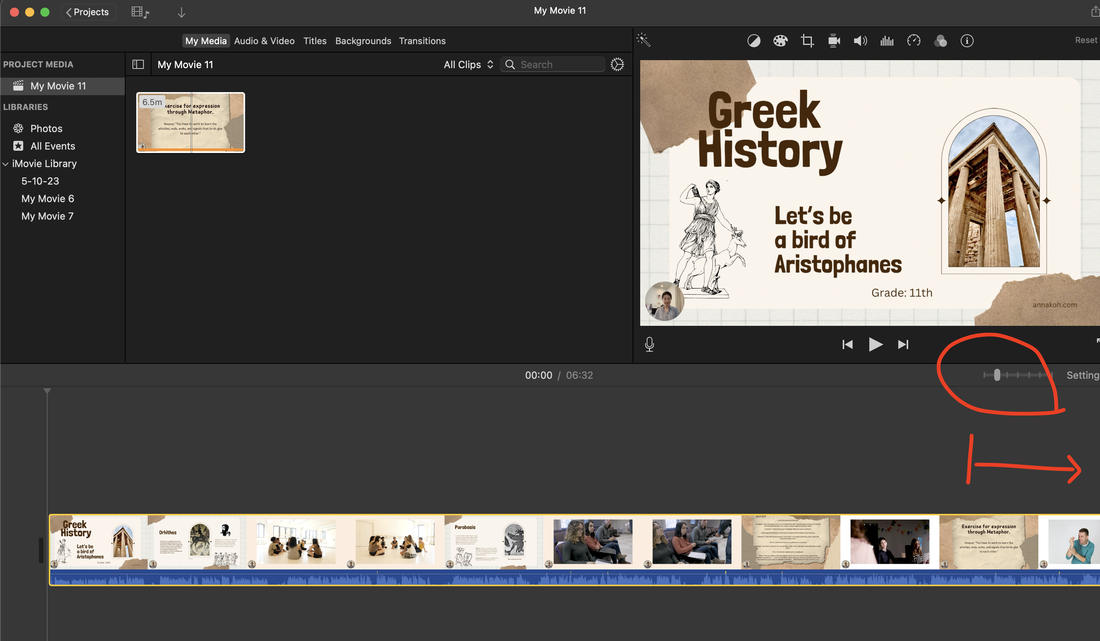 And in my case, I would like to show you how to make an intro screen. I used the 'Backgrounds' like below. 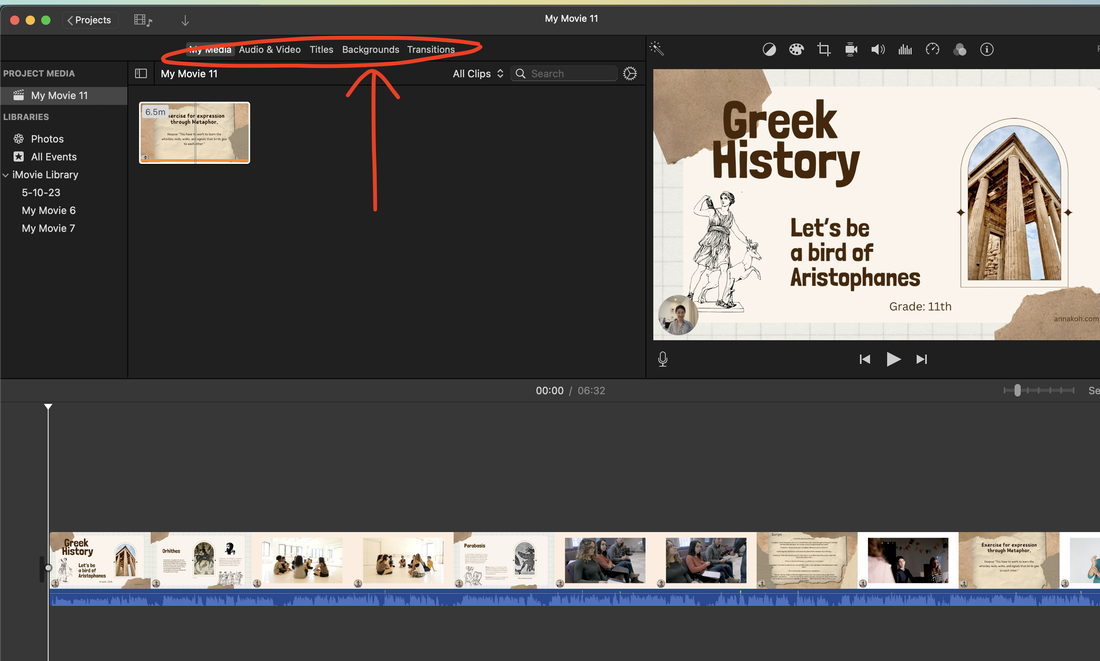 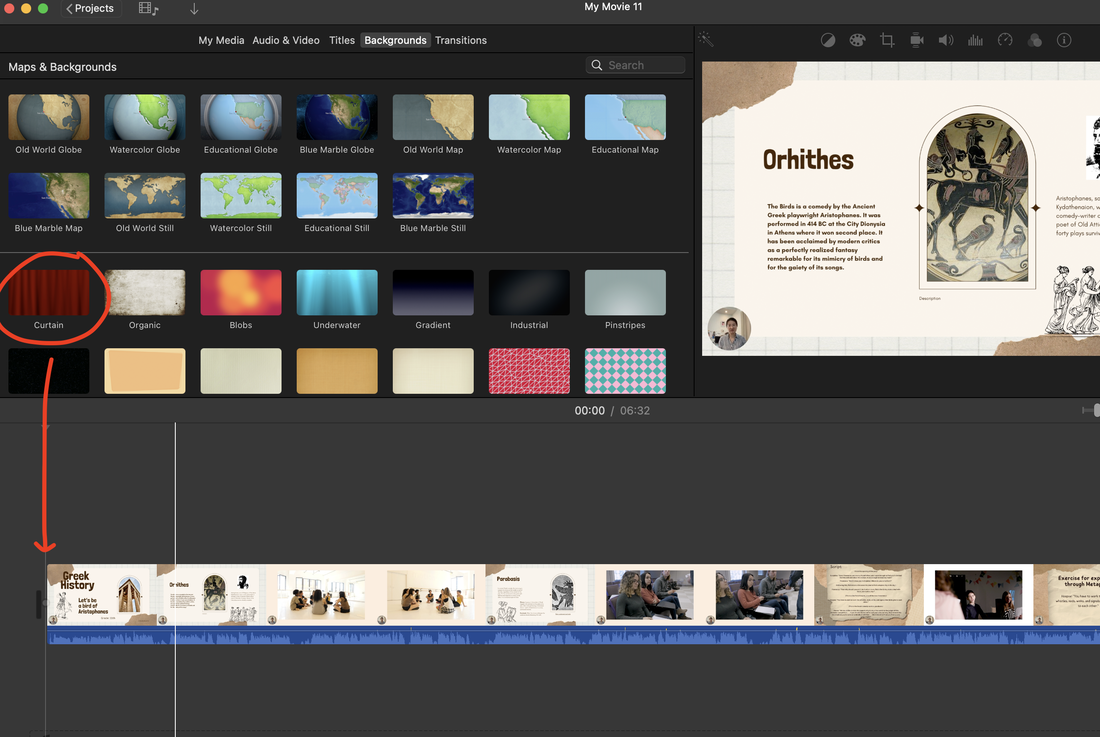 If you drag the Curtain, and you can see the part of timeline with your background. 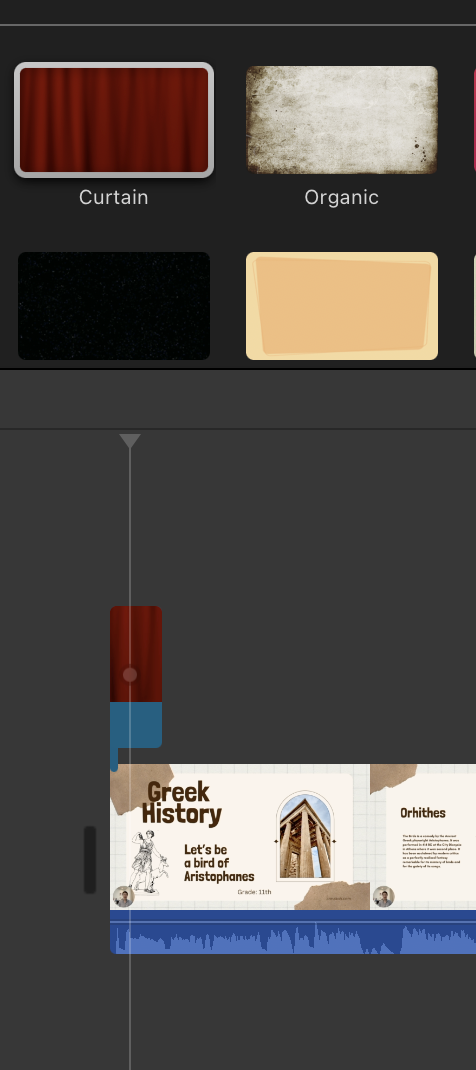 And then for making a title, go to Title menu.  Additionally, you can make title,too. 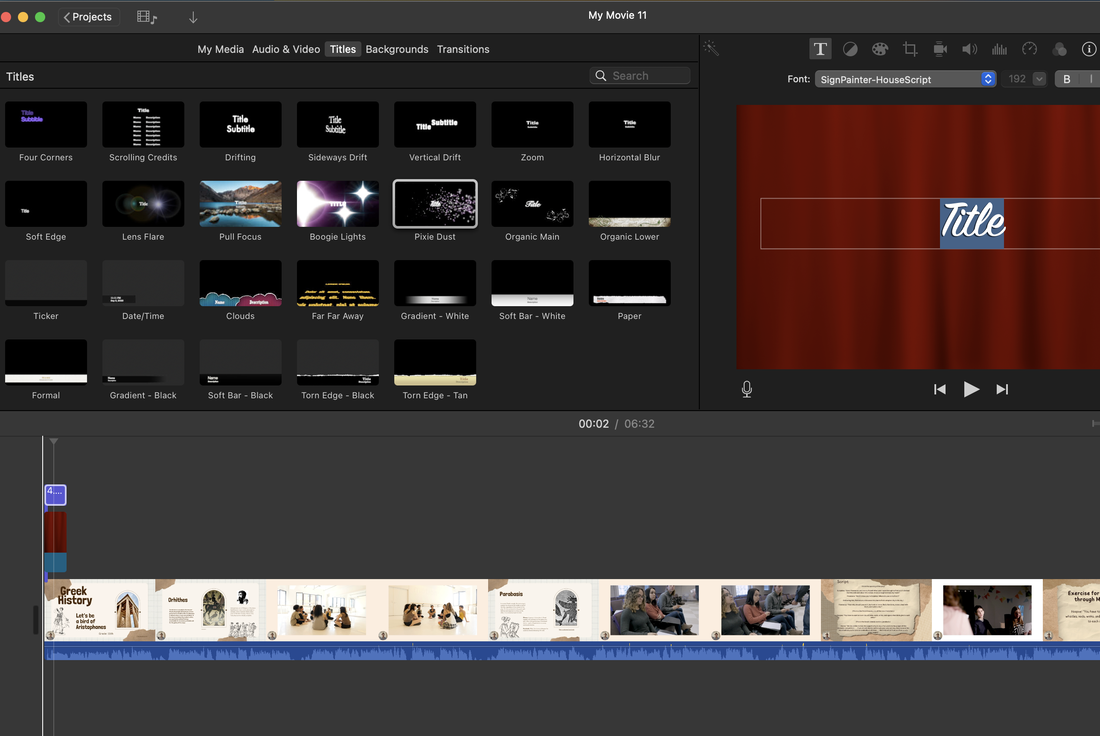 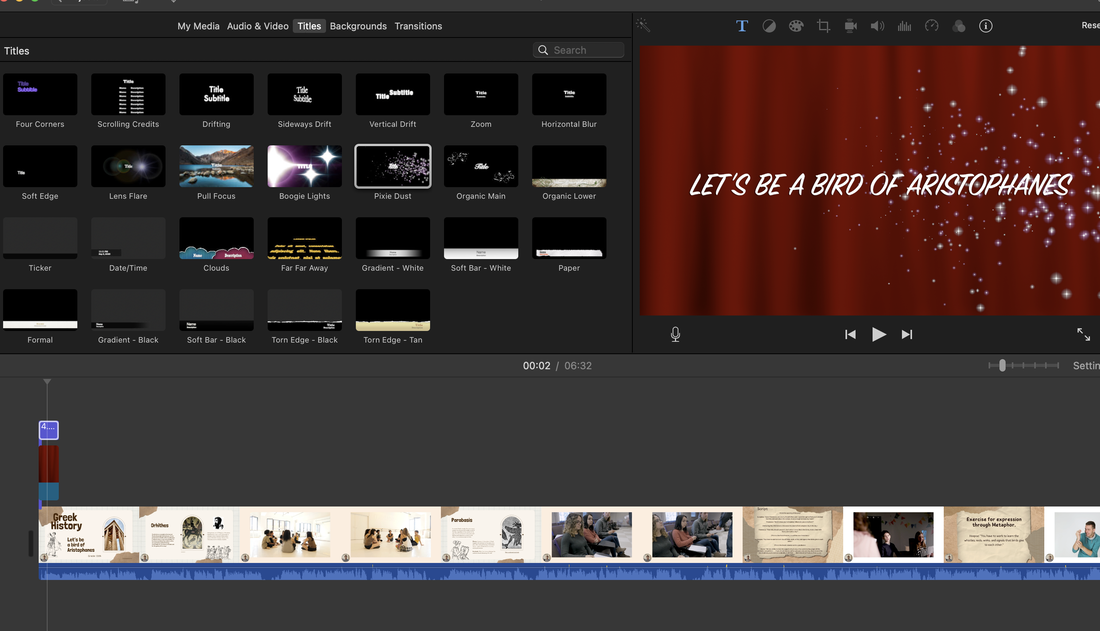 Next, you can go to 'Audio&Video' session to make a background music for your video clip. Just drag it on the window. 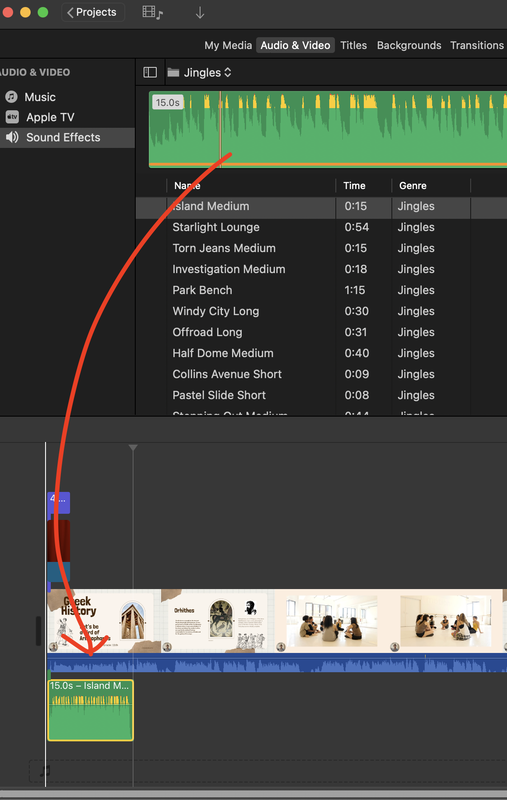 If you think the sound is so loud, you can adjust by using scroll bar or mouse's button like below. 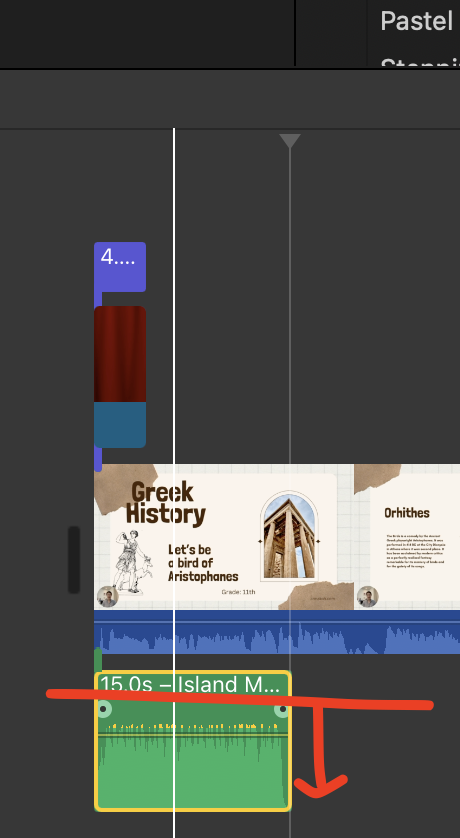 If there's a part you don't like, you can cut it out by using 'Split Cip'. 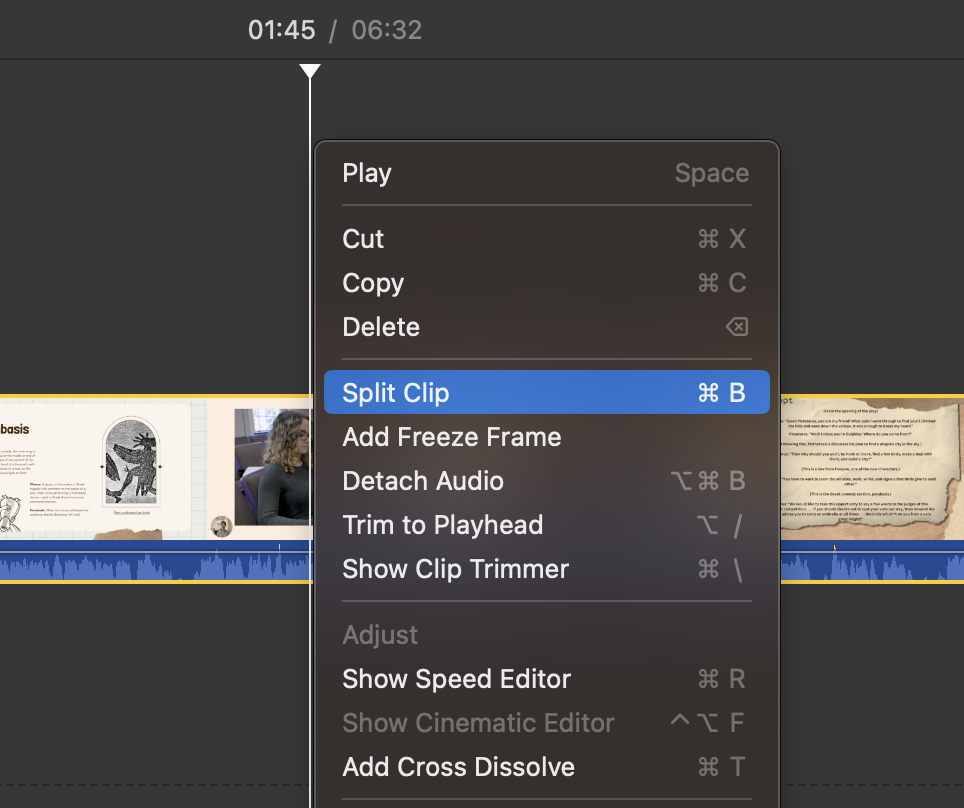 For saving the movie, you have to move File---> Share---> File and download it with new name. 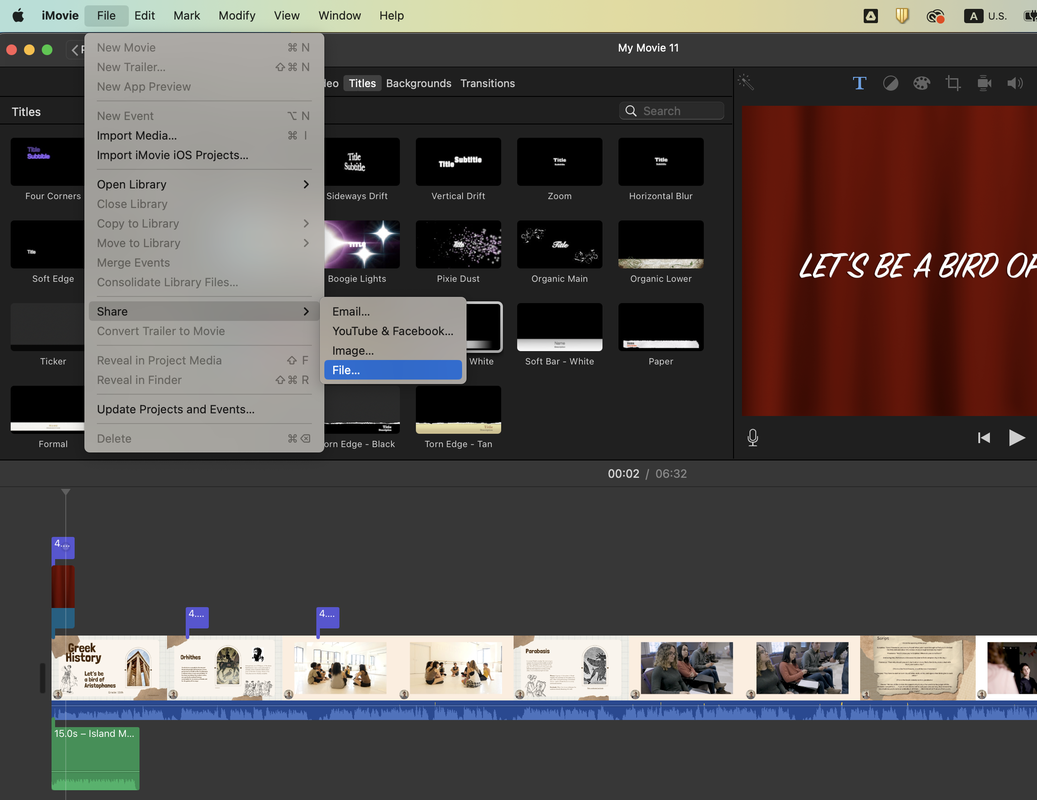 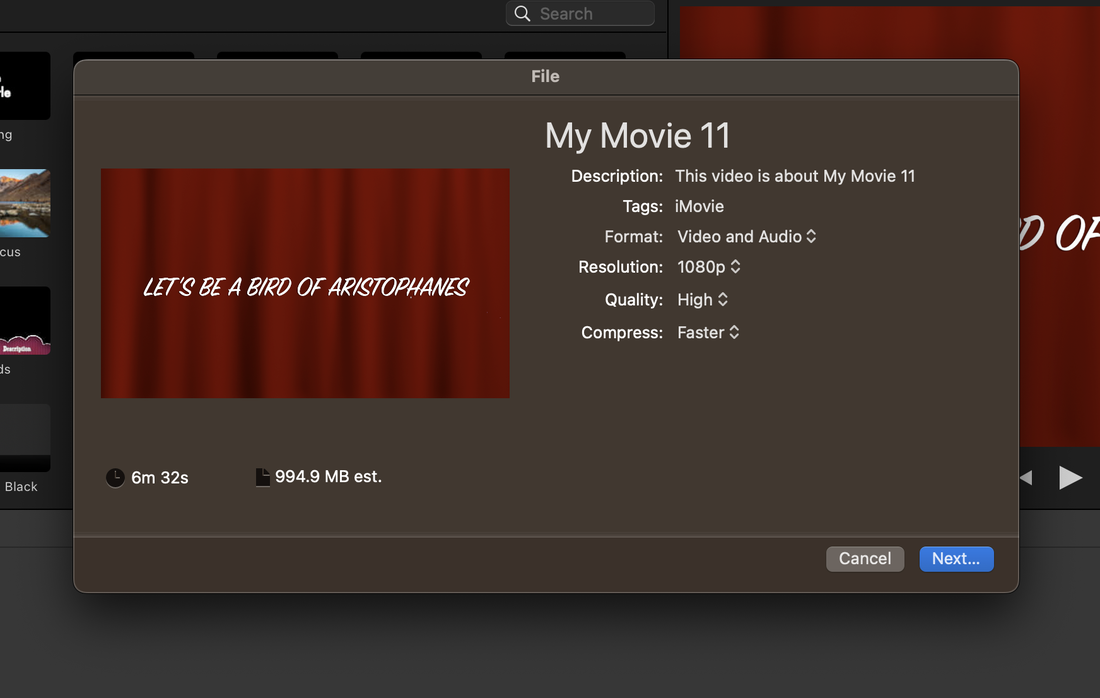 |
Myungja Anna KohArtist Categories
All
Archives
April 2024
|

|
Tutorial |
 RSS Feed