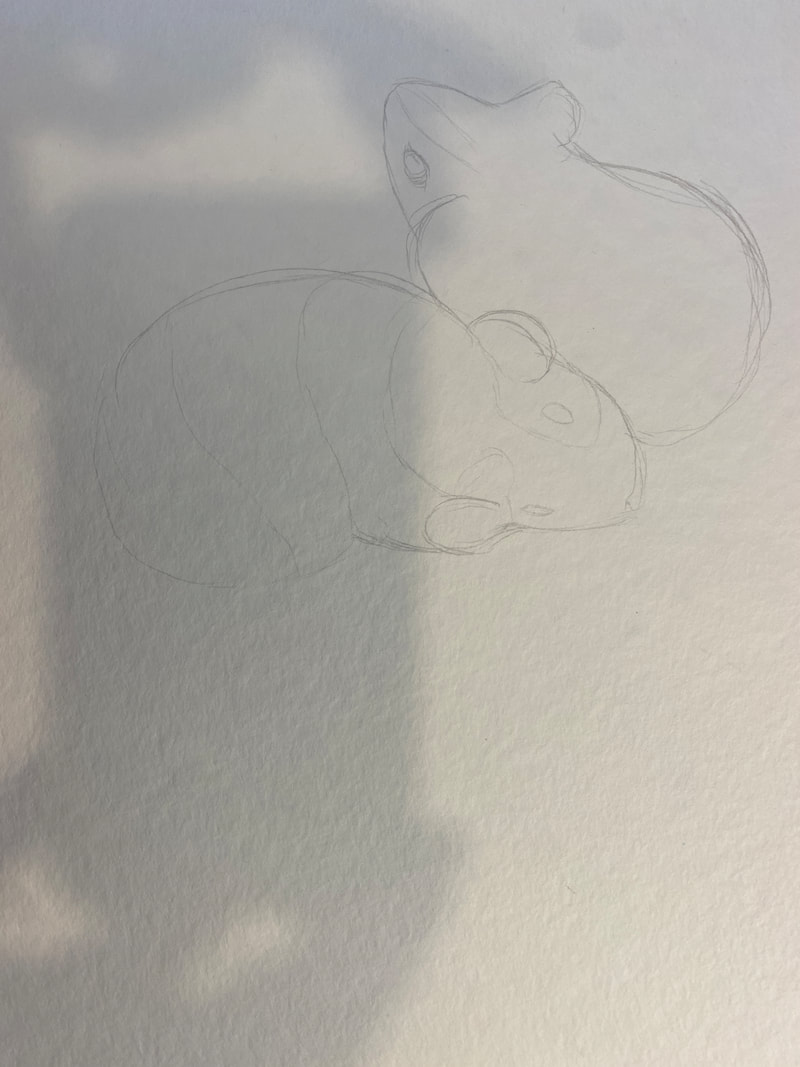
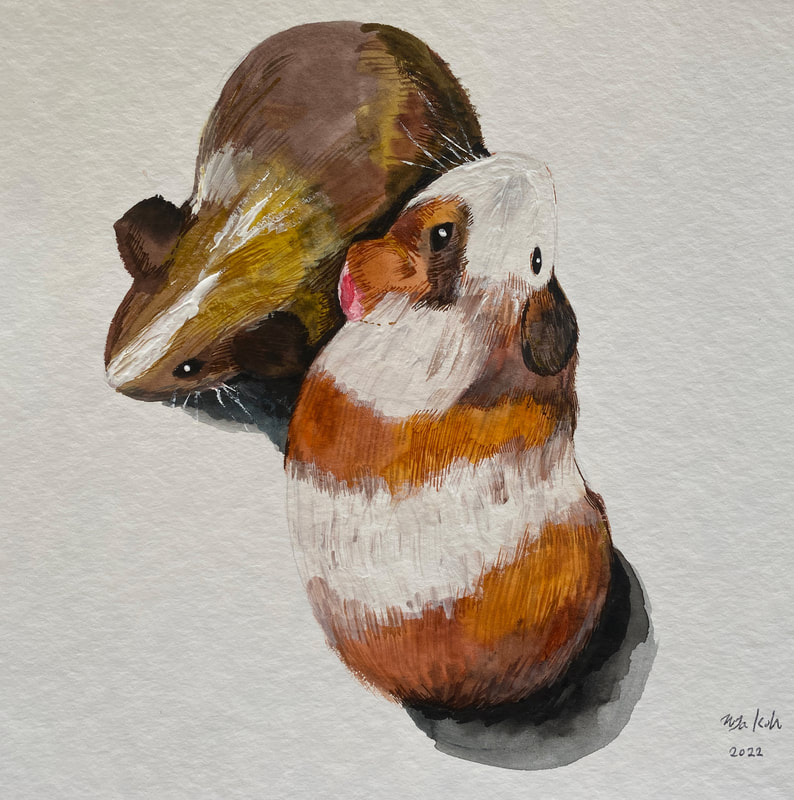
Drawing animals for kids! Children draw something every day when they have free time. If you observe them, you realize that painting is a kind of play, not very stressful. When you become an adult and try to draw, just looking at a white piece of paper makes you feel terrified. As a person who draws pictures every day, I predict that anyone will become a painter if this fun as a child continues into an adult. My eldest son, who went to college, painted his first meaningful pictures when he was two years old. Before that, it was just scribbling.  At that time, my son explained that he painted the sea and mountains. The description is better than the picture, so I took a picture. When my daughter was two years old, I made the first meaningful picture below.  Anyone can tell that it is a fish. As you can see from the two pictures, you can see that the expressive power of children is very different depending on their tendencies and personalities. Personally, I think that my son's drawings are close to abstract paintings and my daughter is good at minimalistic drawings. For these kids, my husband used to show me how to draw animals by drawing characters from the then famous TV character Sara and Duck. I can imagine that if you are a family with children, you will be drawing hard every day in this way. 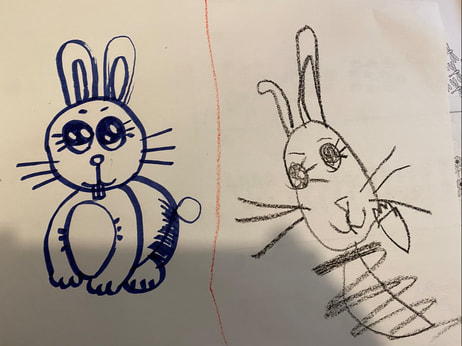 I often showed my child a book called Kim Chung-won's Painting Class, a book that was quite popular a long time ago in Korea to teach how to draw animals. This book is suitable for children's level, especially when teaching children between the ages of 2 and 5 to draw for the first time.  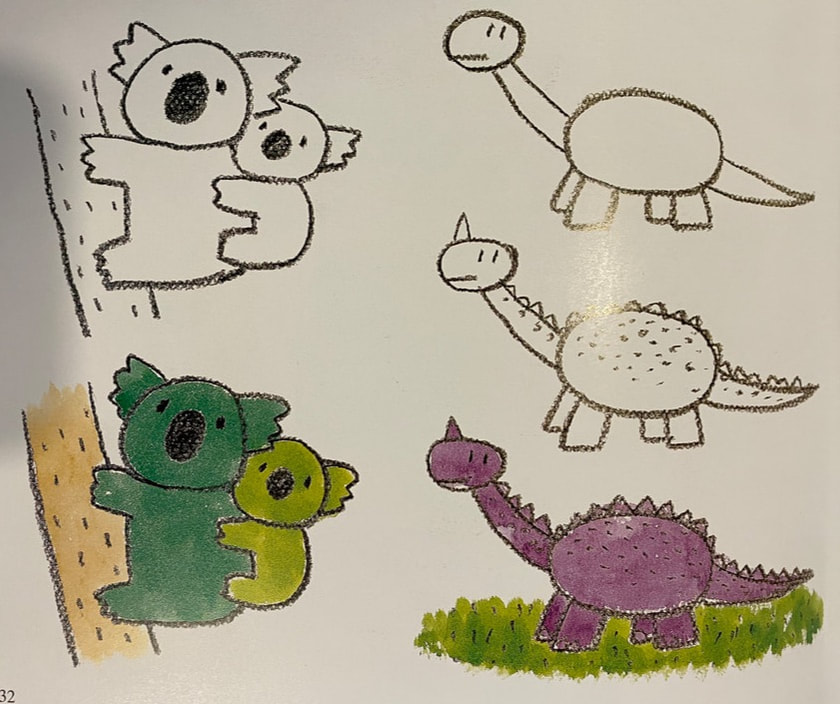  I recently drew a guinea pig with my child. As you know, if you want to draw with a child, you need to simplify things as much as possible so that they are easy to trace.  And I tried to simplify the guinea pigs to make it easier for children to follow. 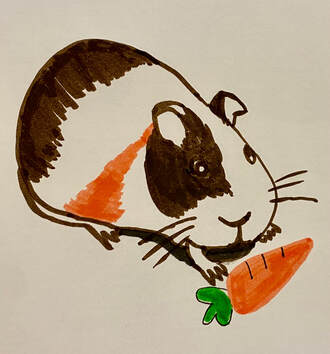 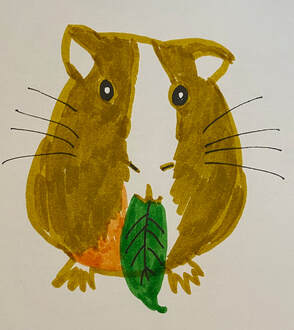  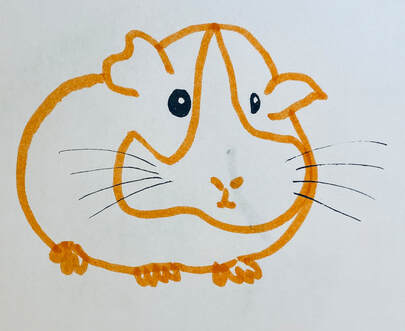
0 Comments
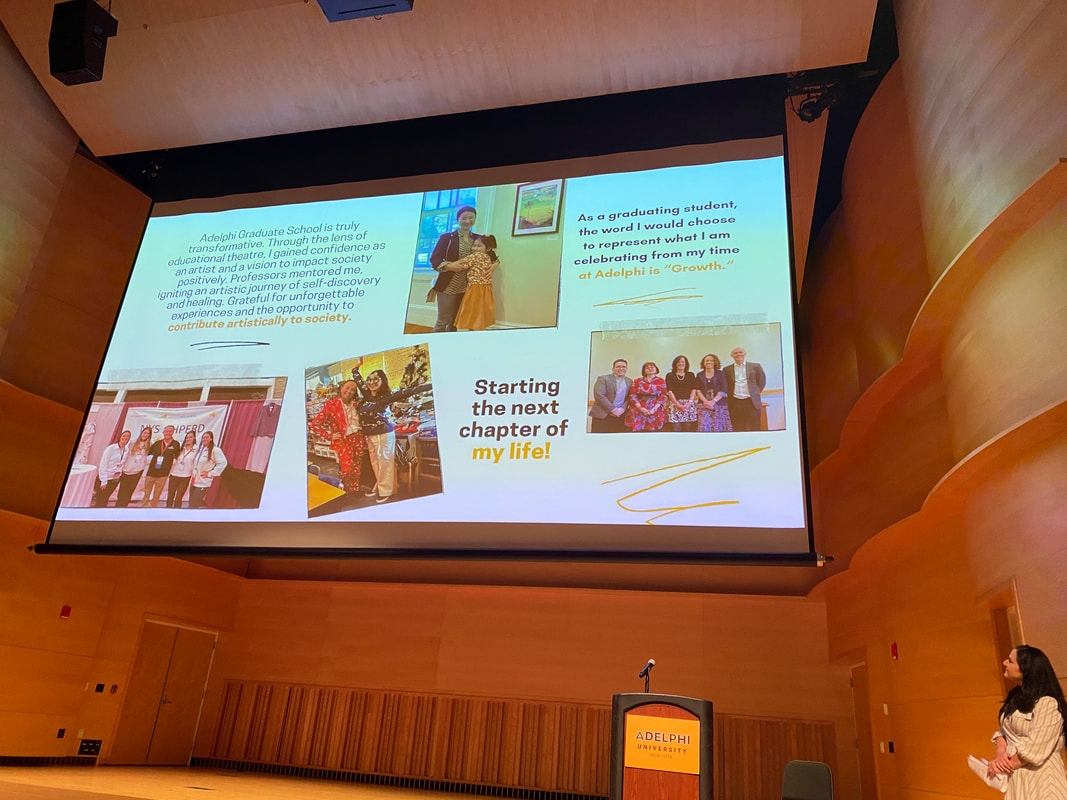
Animal Painting
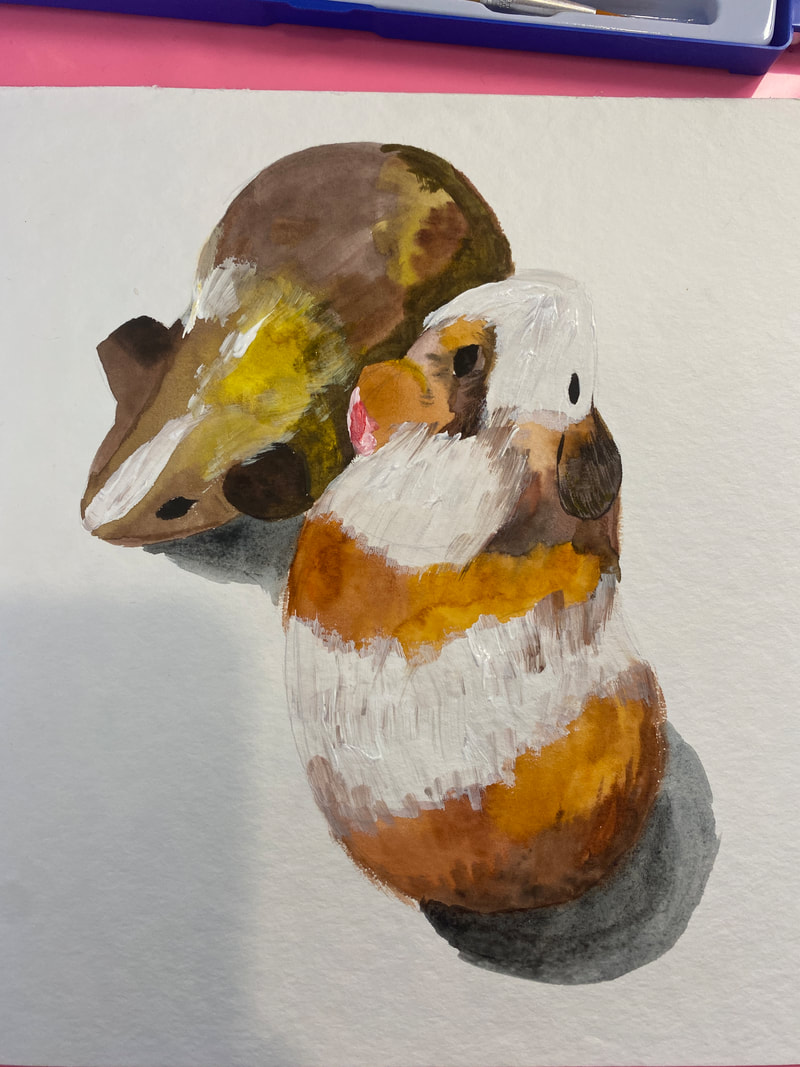
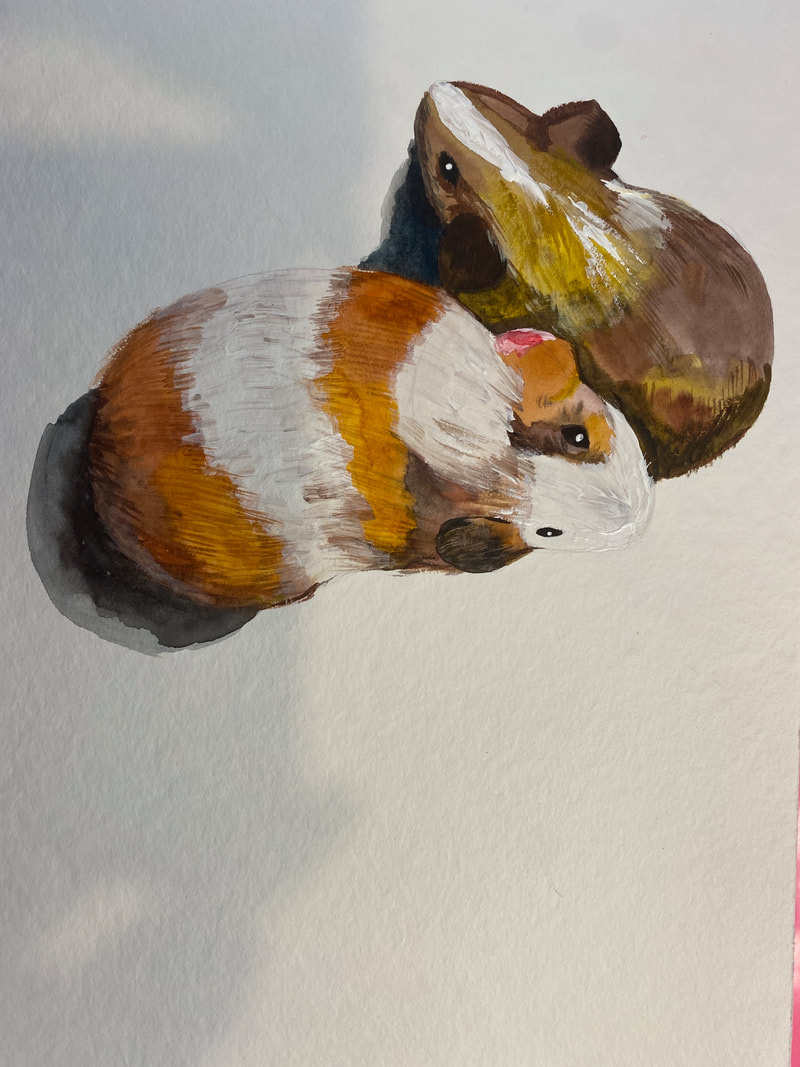
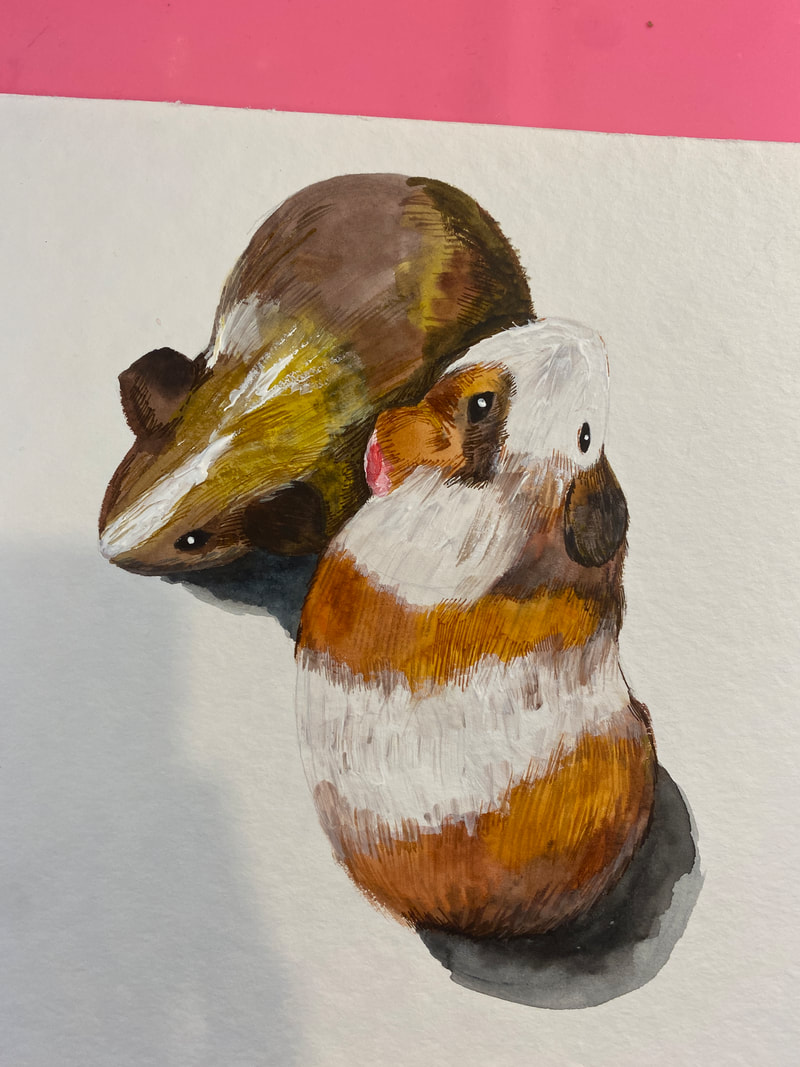
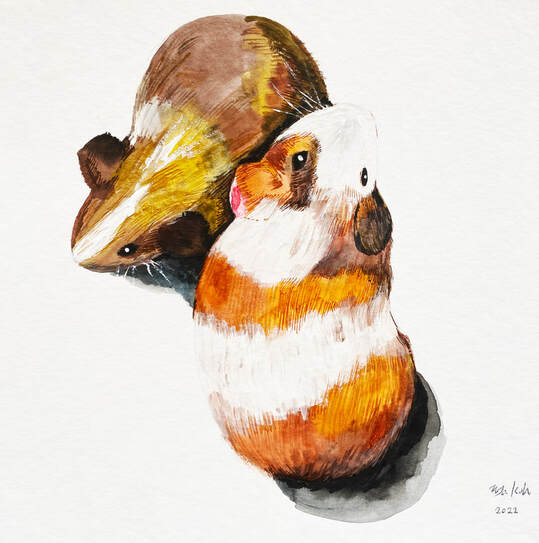
Here I am sharing how to draw two guinea pigs with watercolor paints for $1.
Go to related Post ! 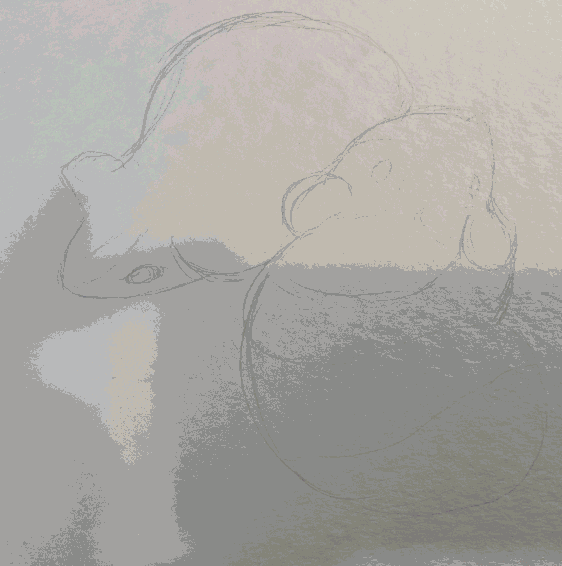
Since I had to paint within the limited time given to me, that is, 30 minutes, I found a way to minimally paint with relatively inexpensive materials in a short time. So, I came up with a way to do this: one-dollar watercolors, children's paints. The color of the paint was also simple with eight colors: purple, red, orange, yellow, green, blue, brown, and black. It is very affordable and compact, so it is easy to carry. Just because there is no white, we need to add acrylic paint white here. Use HB or 2 H for sketching pencils. The brush is included in the paint. Since we use acrylic paint, we need to add another brush. You will need two pieces of kitchen towel to dry your brushes. All you need is this. Very minimalistic. 
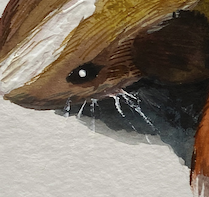
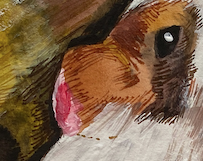
I have been raising cute guinea pigs Pinky and Squash since last month. There are several differences between raising two piggies. I will introduce only 5 of them.
1. The whole family got to eat fruits and vegetables well. Watching the piggies eating carrots is so adorable. Naturally, if I go to the supermarket to give my piggies, I end up buying more carrots and vegetables than I used to. Commonly, families are also exposed to vegetables and fruits. Even my picky child is now good at eating carrots and broccoli.
2. Common conversations between families have increased. The topic of animals and their care is a general and interesting topic. Anyone can easily open their minds to this topic. Rather, I find that conversations with other people, including family members, flow very naturally when it comes to piggy.
3. Through caring for animals, children can learn to be responsible, considerate and love and respect life. This may sound like a textbook cliché, but it's the truth. I often bought my child toys. But children cannot interact with toys. Since the piggies have become part of our family, we've had fewer kids begging for toys. Most of all, the amount of time my child spends watching YouTube or the Internet has significantly decreased.
4. I have become more diligent. In other words, I get up earlier in the morning and go to bed later. I clean their cages twice a day. It can be done by waking up 15 minutes earlier in the morning. Before going to bed, check their condition and clean the surroundings of their bed. It was cumbersome and difficult at first, but the dirty areas are clean and happy to see the piggy popping up there.
I personally feel emotional stability and learn to take responsibility for nature and life. The day is tighter and busier than before, but when I see piggies in a busy time, I feel a certain sense of security. Maybe it's the energy they give. I think that people, animals, and nature were one in the first place. I think we should love nature and animals more and take good care of them.
I drew this picture with the sense of stability and peace that these little animals provide. You can visit the post below for detailed process.
Go to relate Post !
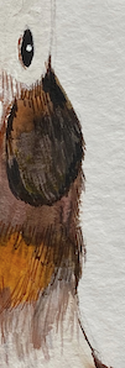
For example, Piggy's whisker is expressed in more detail with white acrylic.
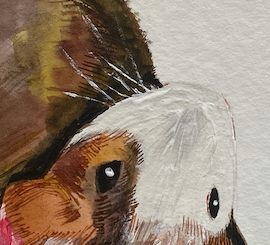
My piggy, Pinky, was named after my daughter, meaning pink ears. Pinky's ears are pink. It would be nice if you didn't miss out on these details.
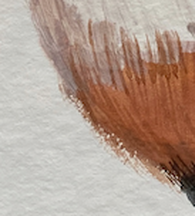
And it is good to express even the fine details of the hair by adjusting the strength of the hand holding the brush well.
Take 30 minutes of your time to paint a minimalistic picture of your pet using $1 watercolor paints.
Below is an image composed of products.
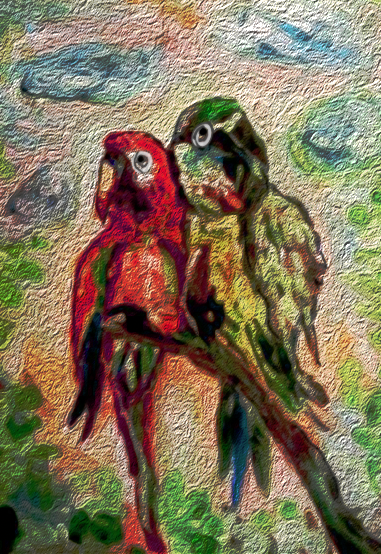
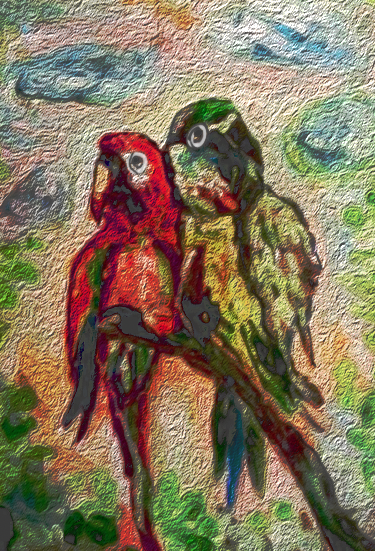
The Process of making the Blue roses. Today I want to show you how to sketch and draw a blue rose in a very simple way. * Note: Some errors may be found in the images in the document below. I am currently working on fixing this. thank you 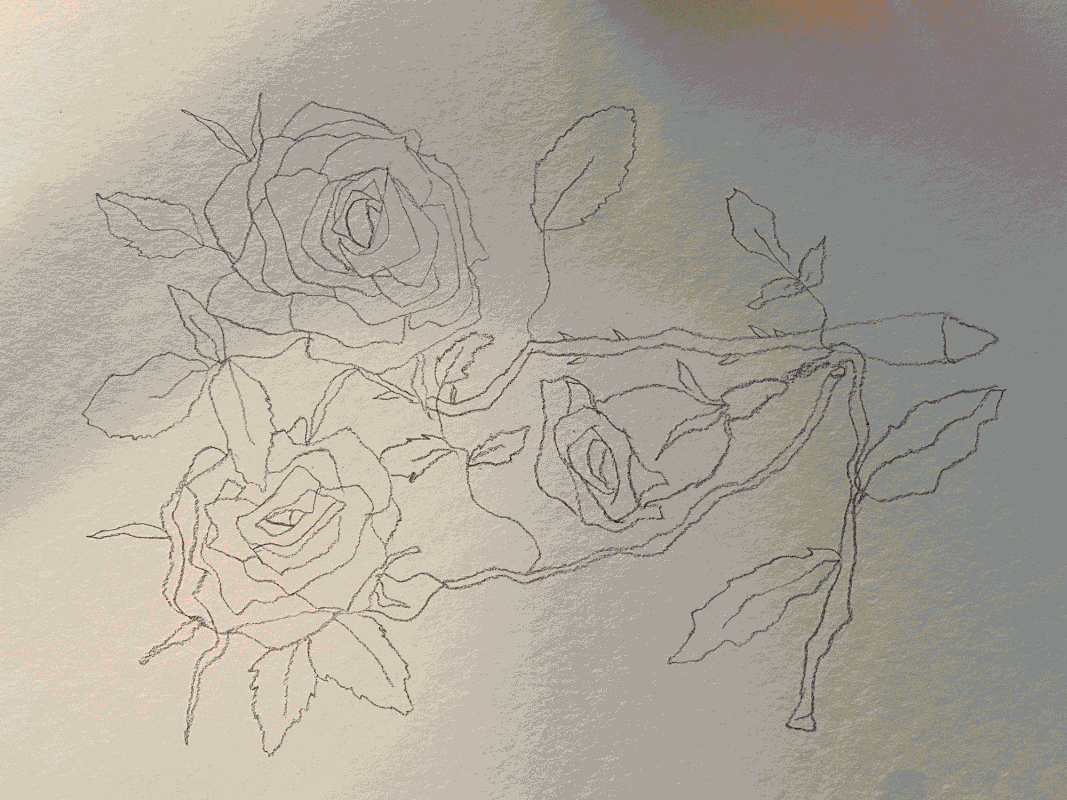 There are many different ways to draw a rose, and it will be introduced in various routes and methods on various YouTube and Internet sites. The method I will introduce here is to show you for a moment how I finished the blue roses I drew today. I would be very grateful if you could watch it with interest. First, make a simple sketch as shown below.  I made a sketch for practice in Photoshop. 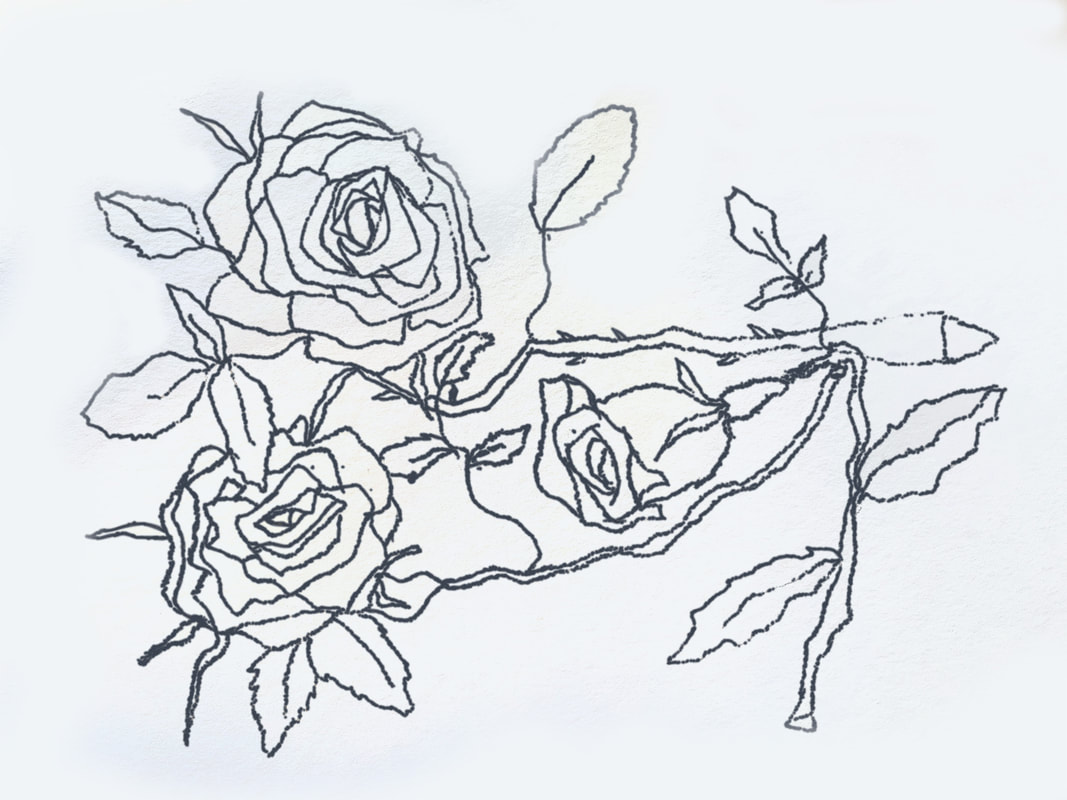 Paint every corner with the main blue color. In my case, I use the watercolored pencils.  Paint every corner with the purple or orange color for middle shade.  Wet a brush with water and paint.  In my case, I set the part that receives the strongest light with white acrylic.  Then, the dark contrast is expressed  Below is the finished look.  If you photograph a sketch drawn in pencil, you get an image like the one below. The boundaries are vague and not clear. In this case, you can use it as a coloring page if you process it with Photoshop. Here are some simple tips. 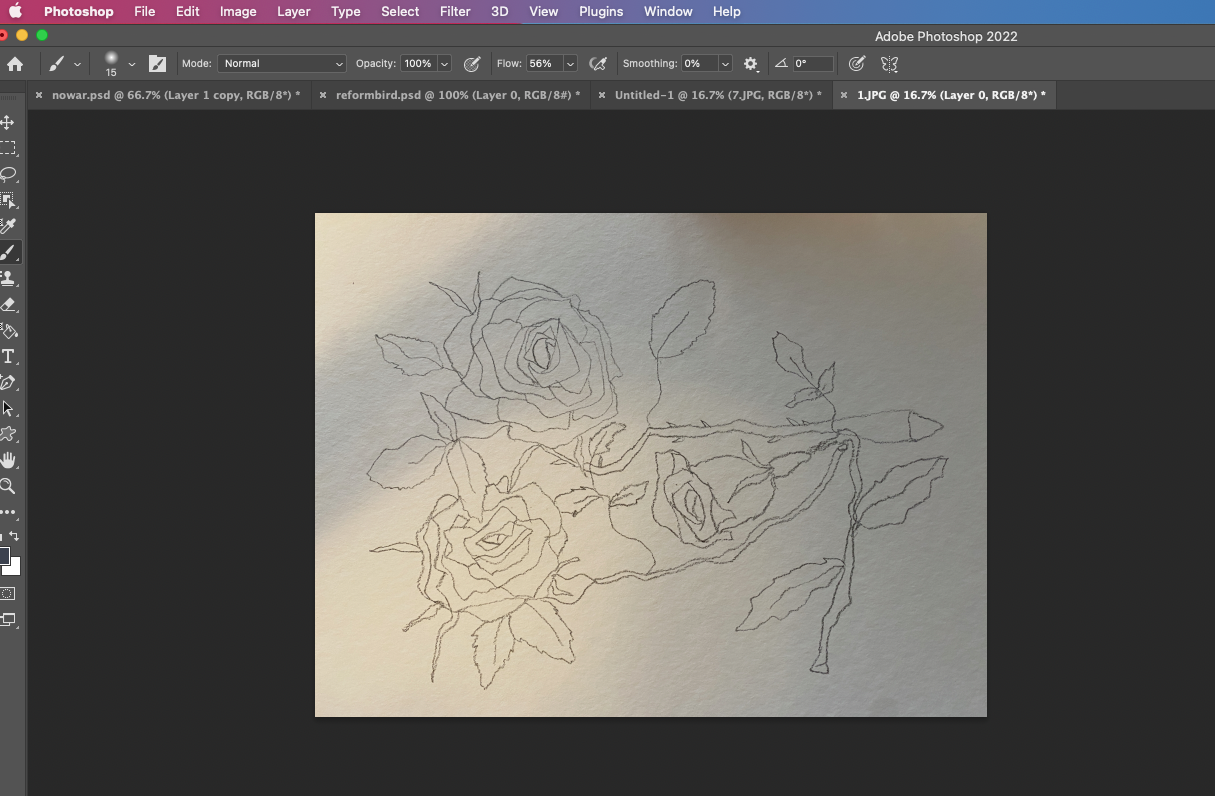 If you want to get more clear sketch, and then you can go Image--> Adjustments---> Levels. 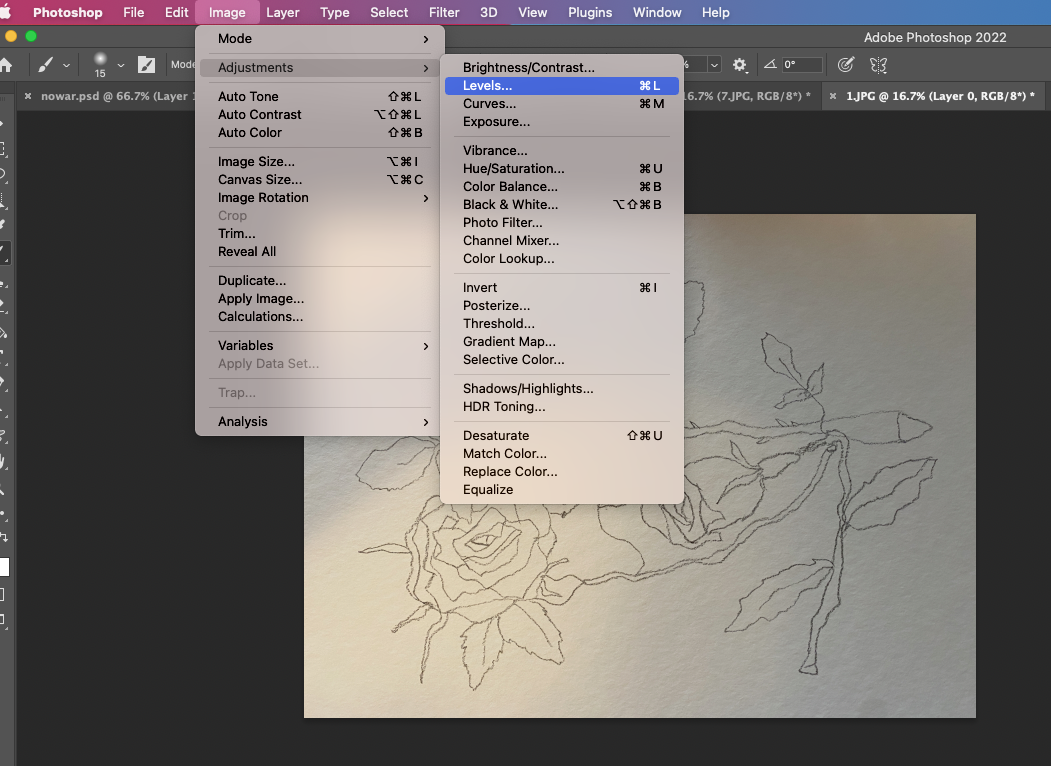 You have to adjust the value of Levels until you get more clear image. 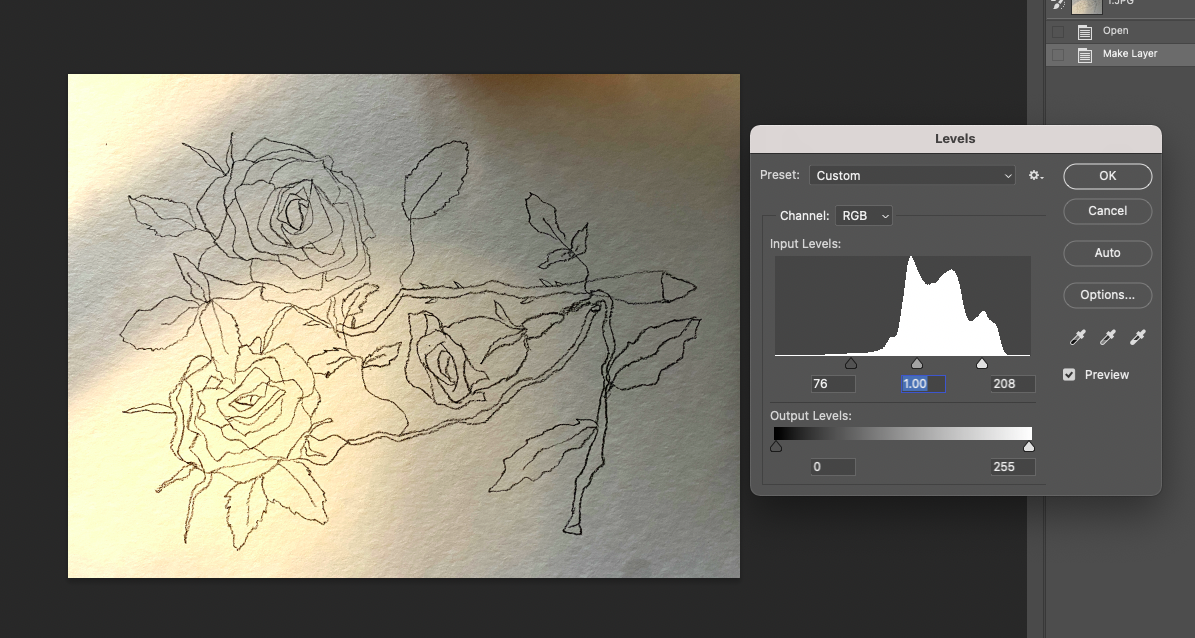 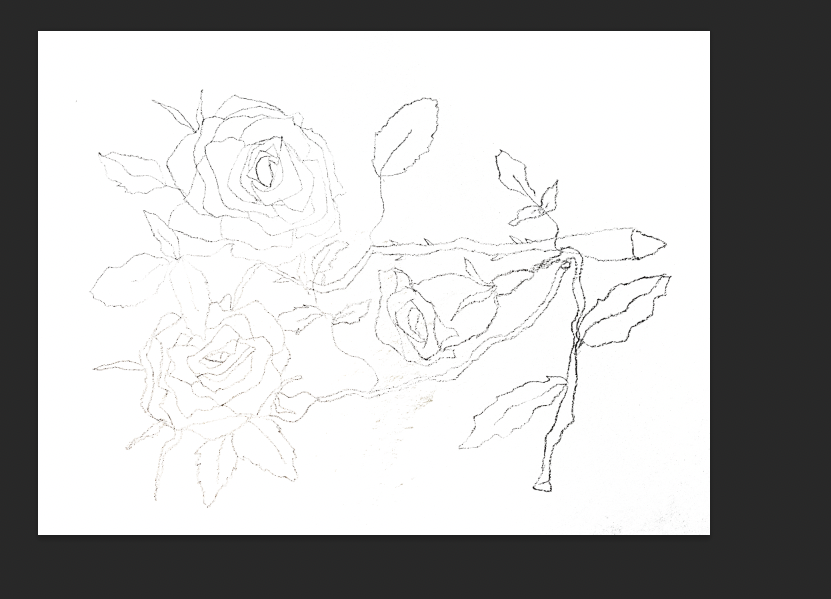 And then select only the line of roses. (Select the layer with Shift + Cmd). 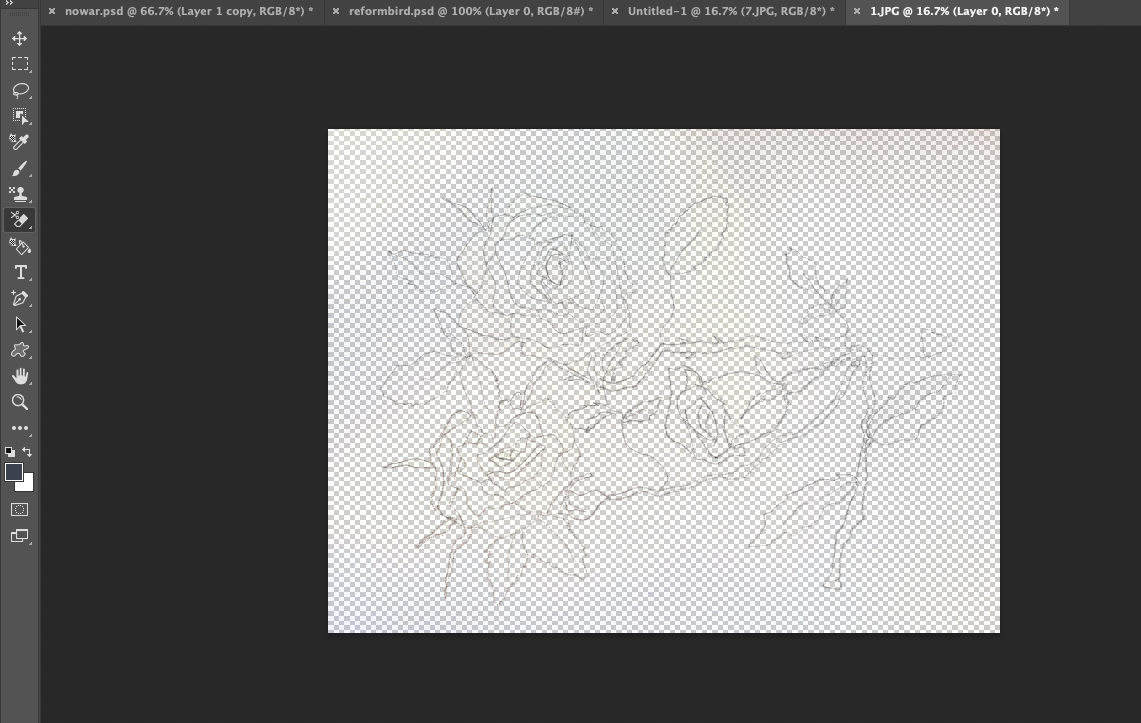 Next, click with Right-click on your mouse, and then go to Stroke Path like below. 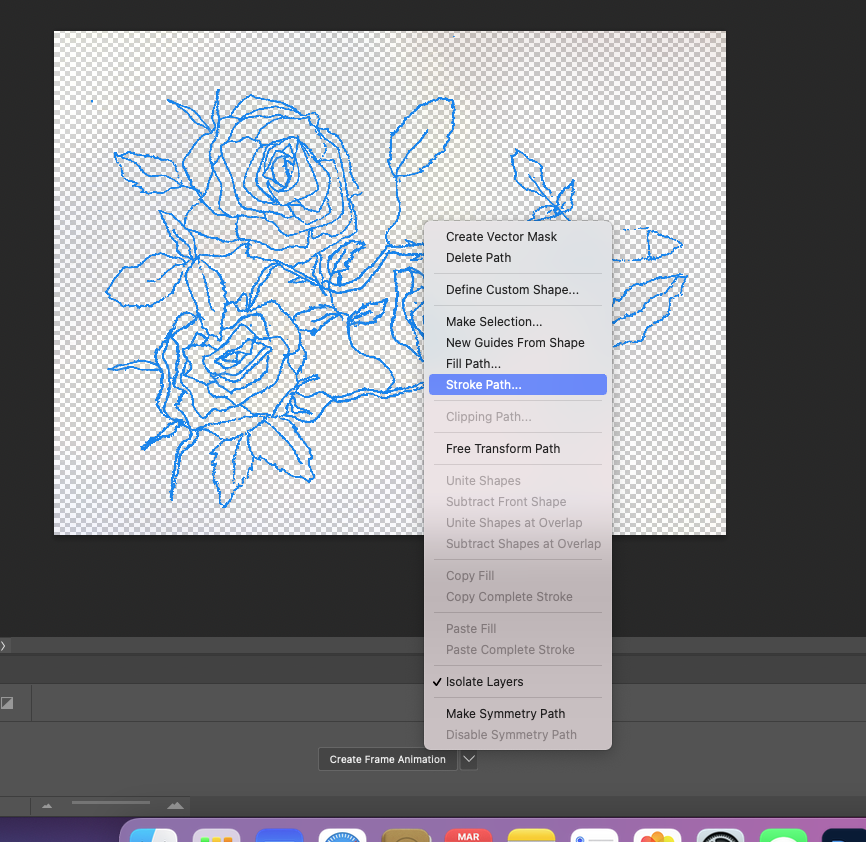 Select the Brush tool and click to OK ! 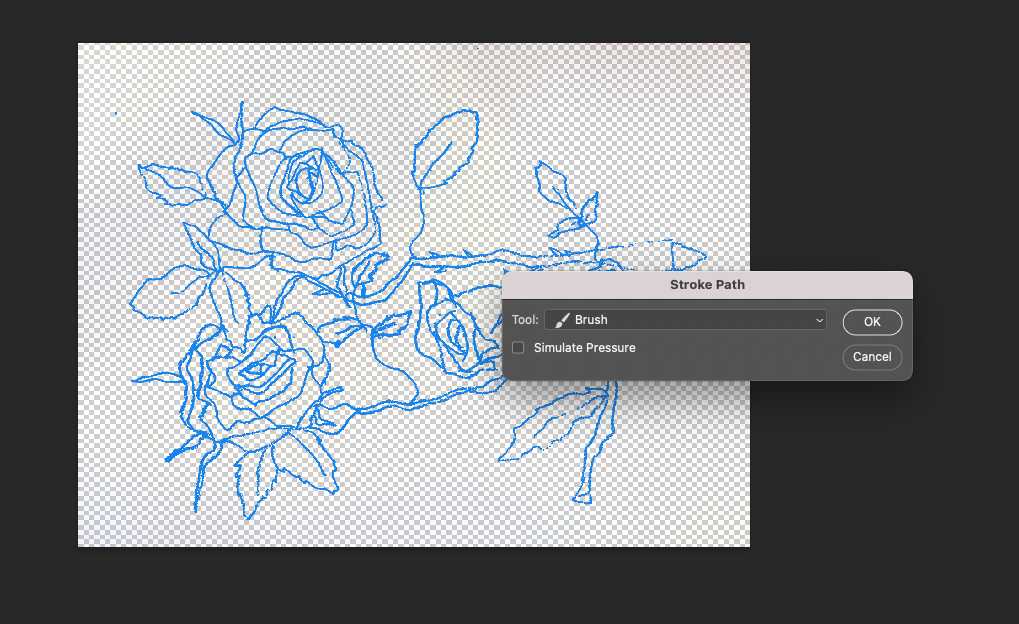 To check your result, delete Path with right-click on the mouse. 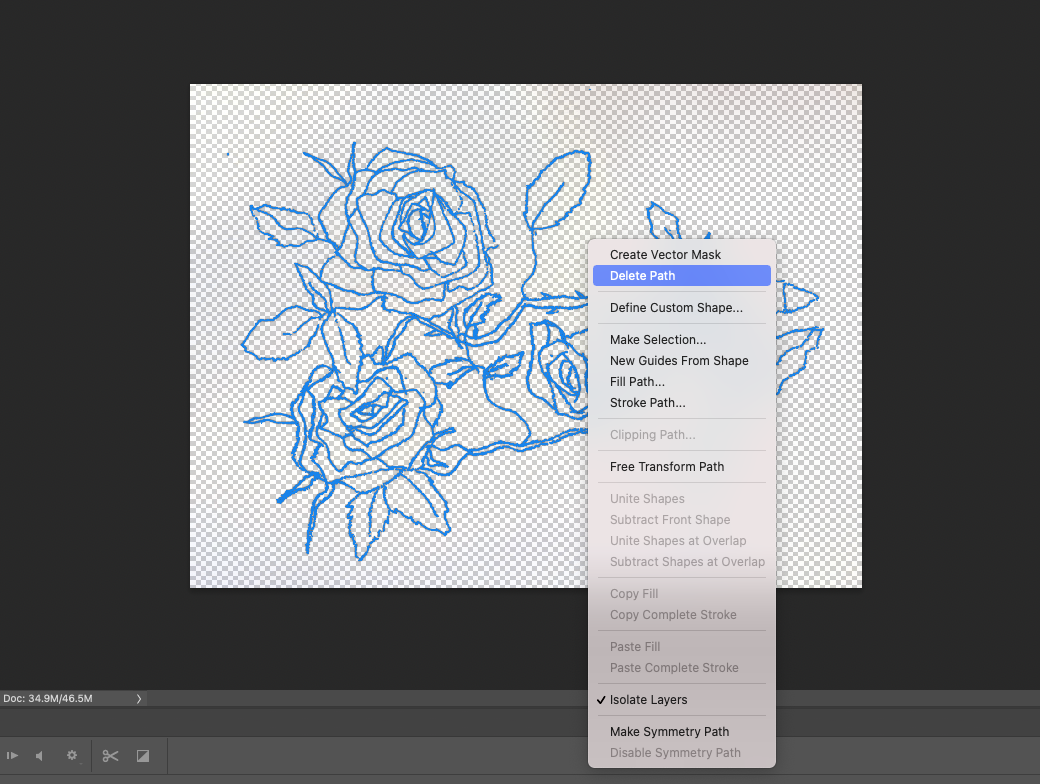 Here is the result. 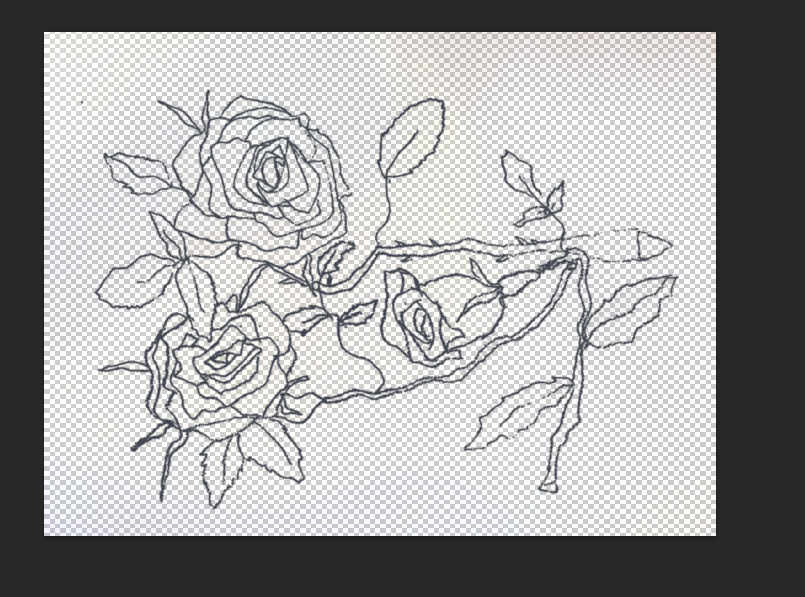 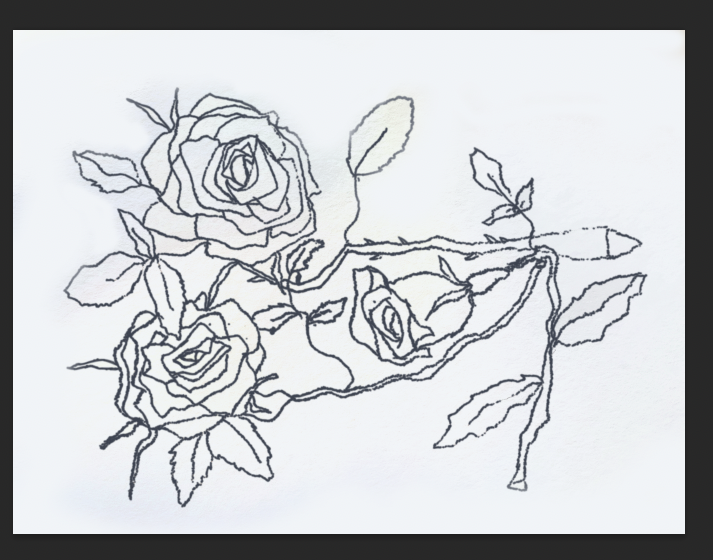 How to Change the color of a specific part in Photoshop Today is International Women's Day. The color of the symbol for International Women's Day is purple. Today I want to show you how to change a specific color in Photoshop to purple. I will only change the red part of the picture below to purple. 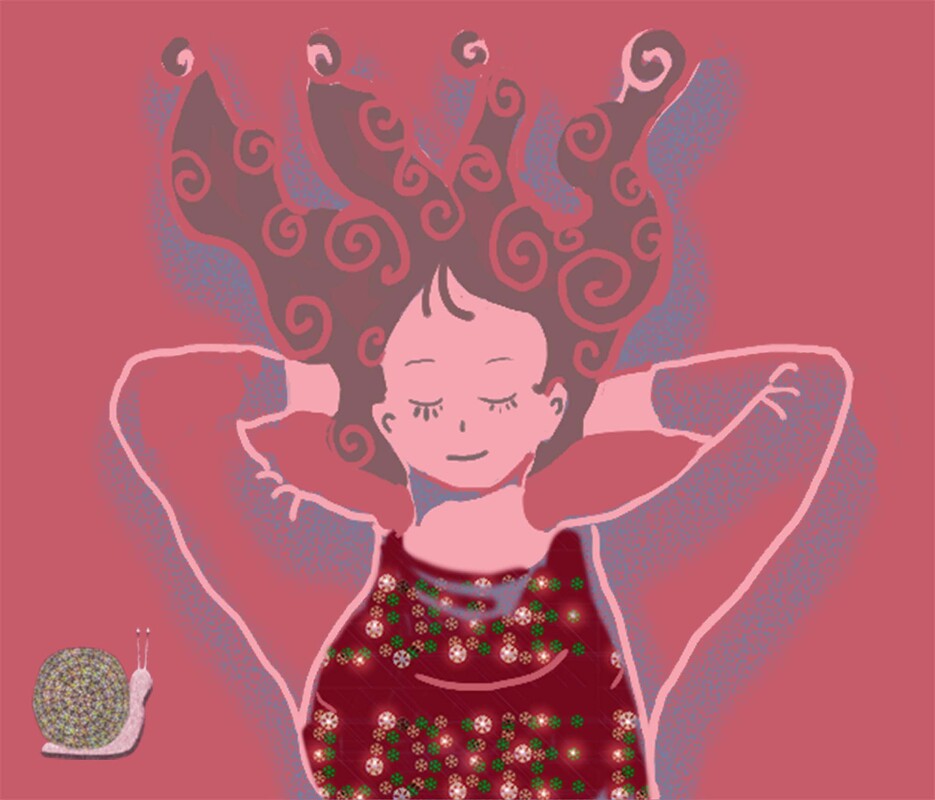 First, go to Image---> Adjustments--> Hue/Saturation, and then Usually, if you want to change the color, you click and adjust the each bar until you find your favorite colors but in this case, you have to click under the icon (with red-red-rectangled area before adjustment. After that, you can find out Spode shape cursor and then pick the area, which you want to change it. And then adjust with Hue/Saturation. 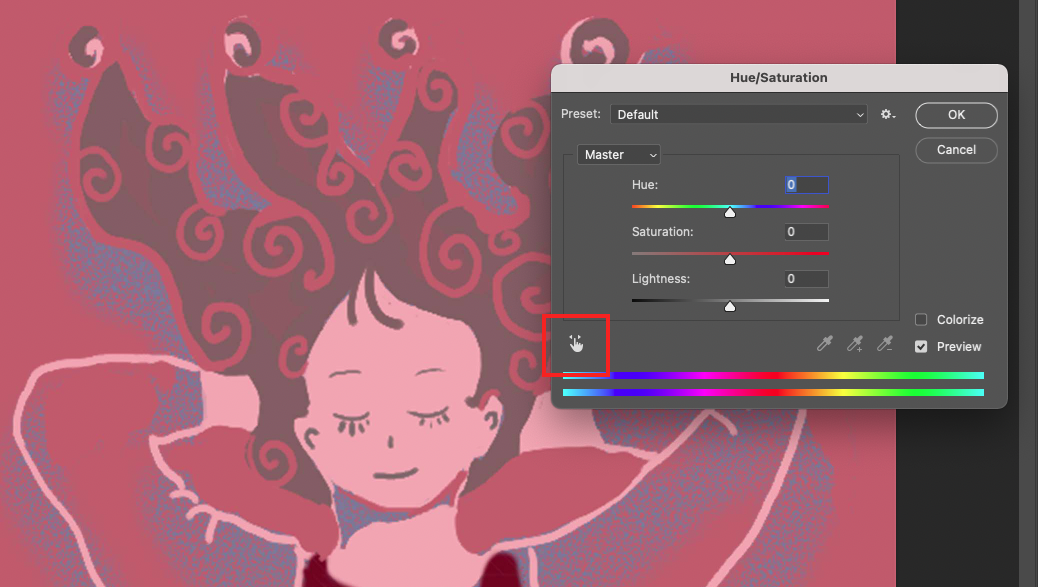 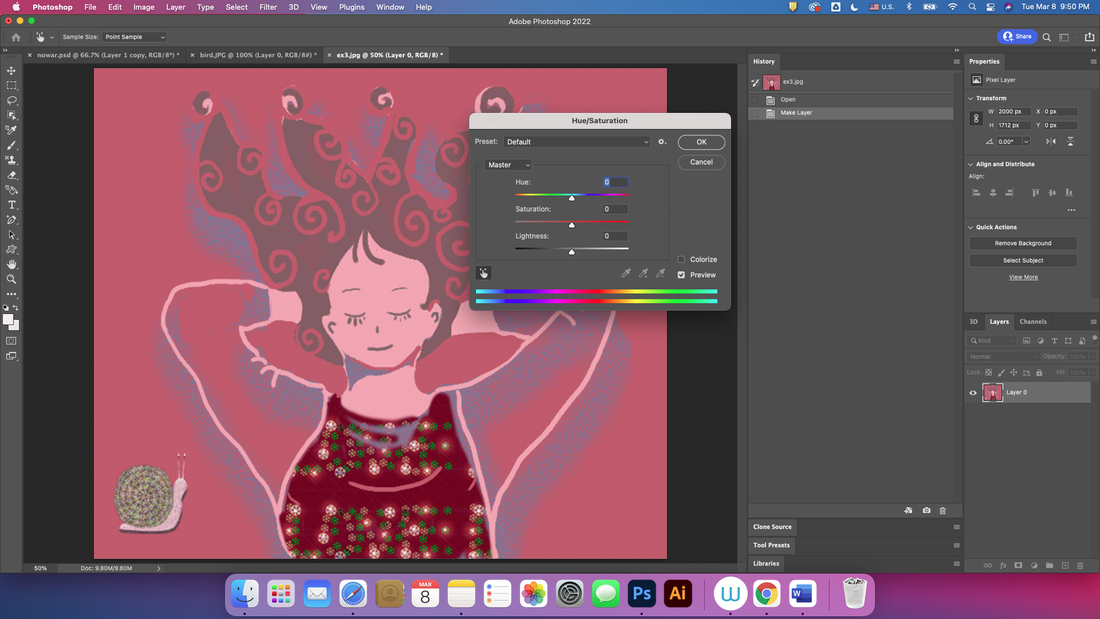 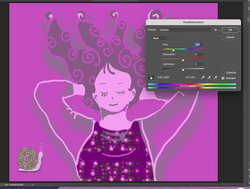 Here is the result, you can find the specific color was changed. 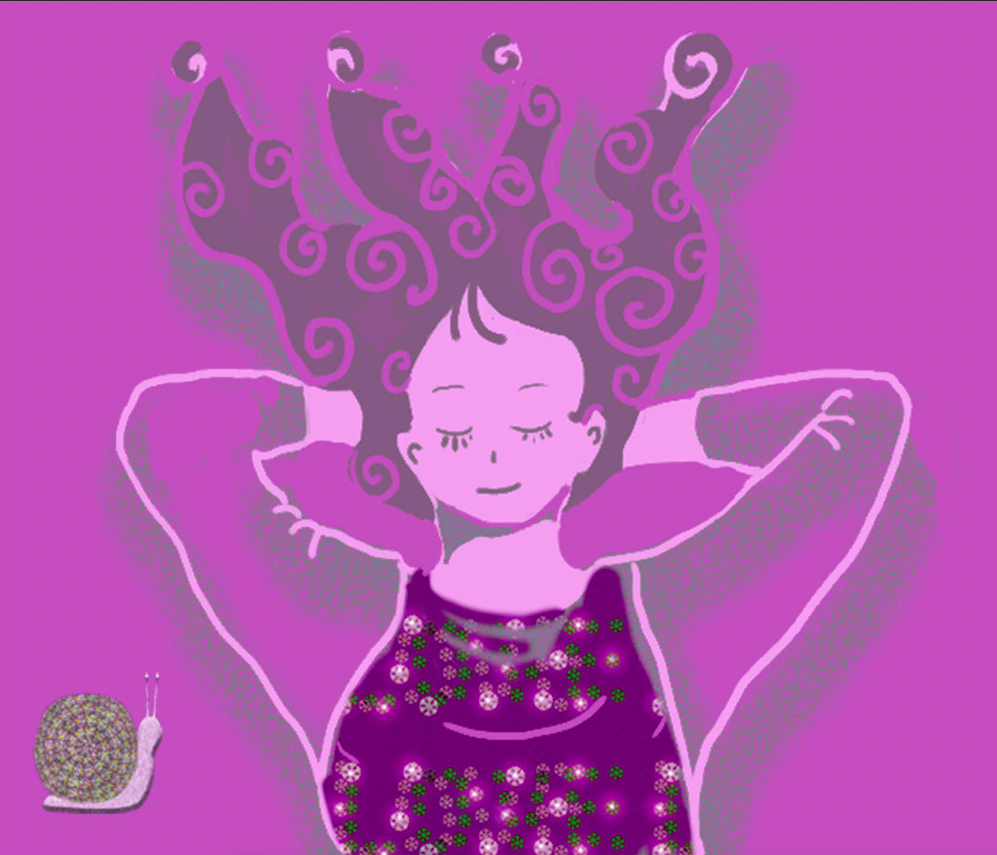 Here's another way. For changing specific area, you have to go Image---> Adjustments--> Replace Color. 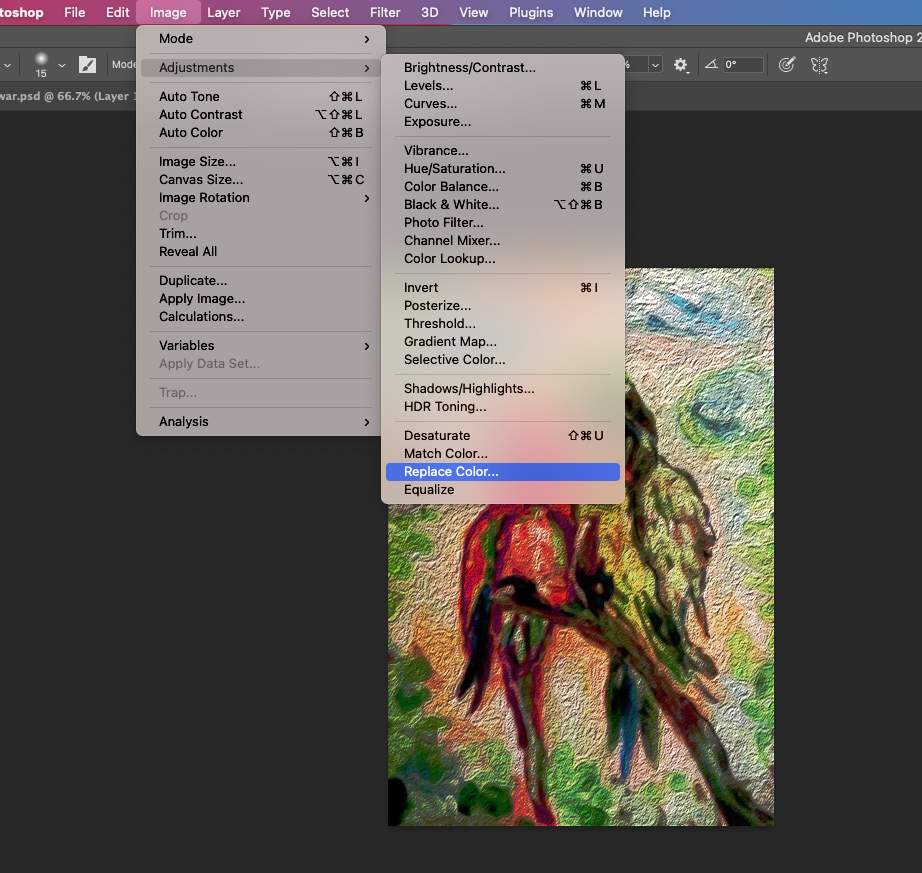 In my case, I click the under belly area, where drew a black to lighten it. I did use a Spode cursor and adjust it. 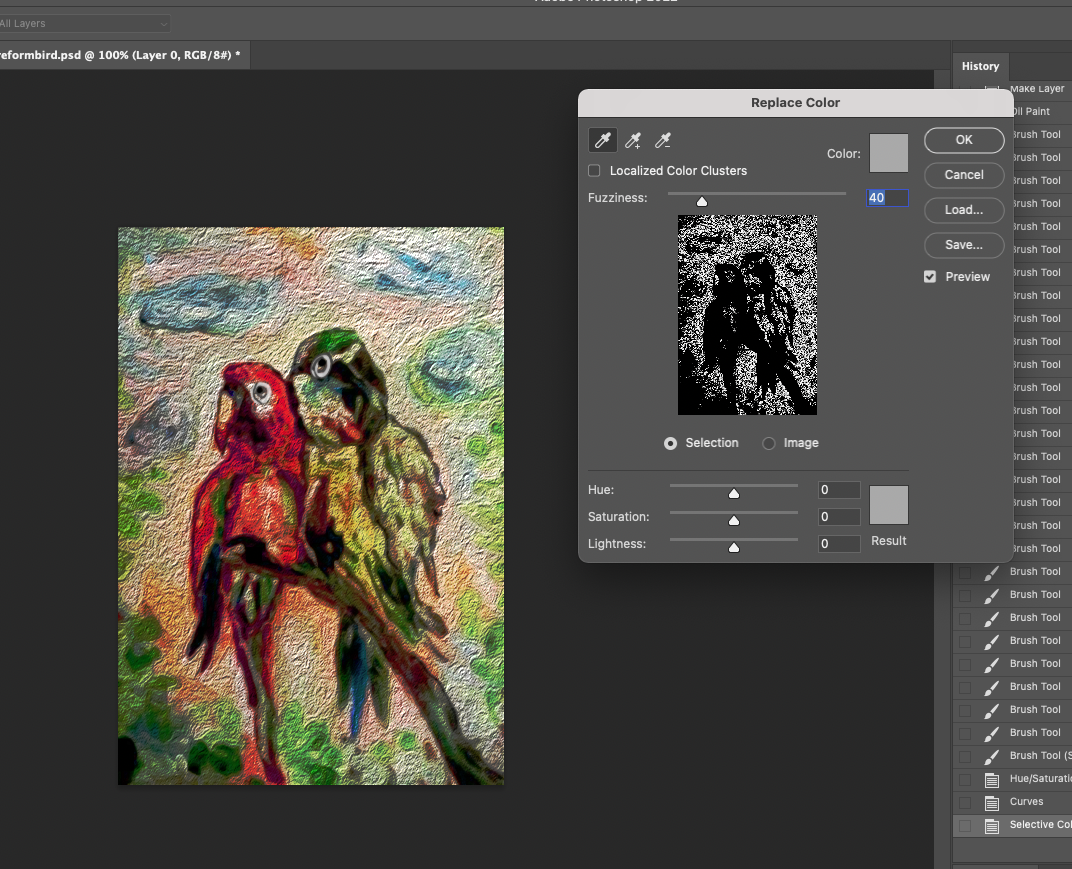  During the process, you can check which area will be changed. 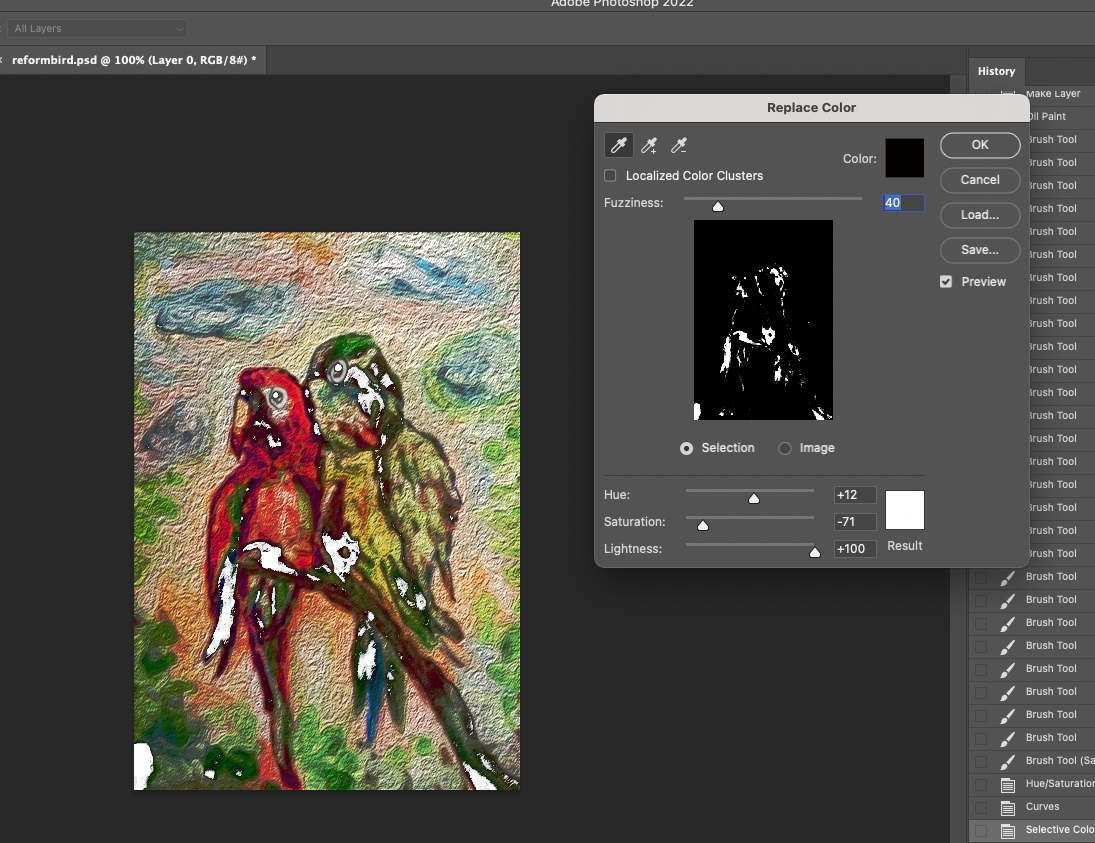 Also, you can apply another new color. 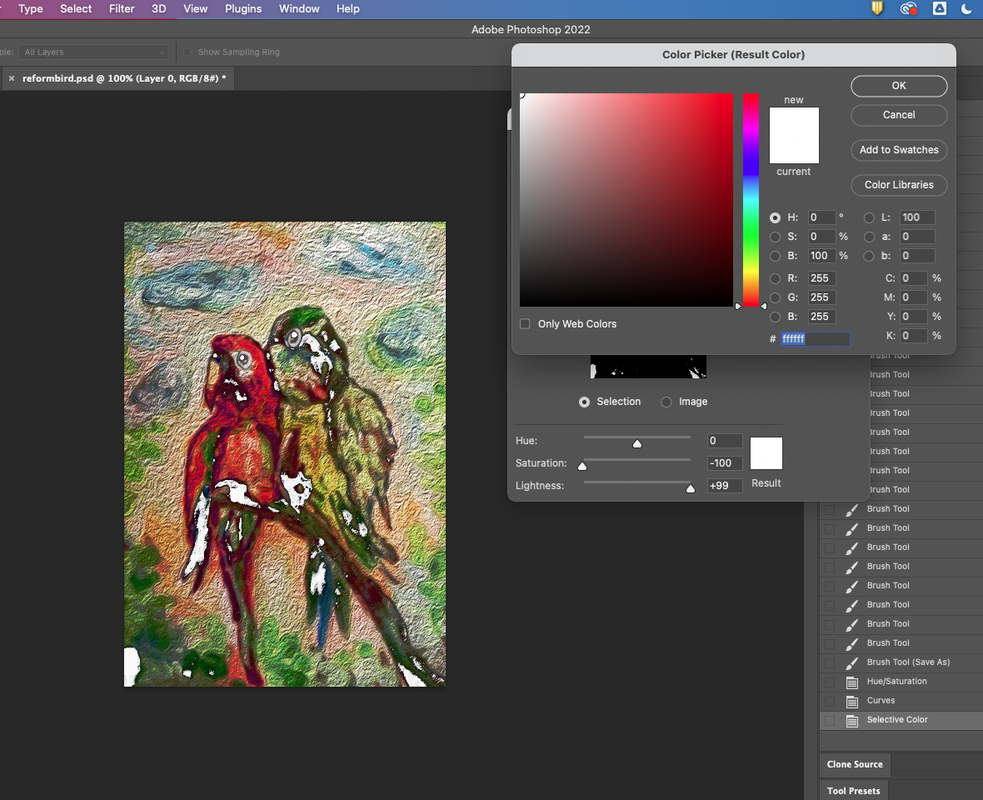 Next, I checked the Localized Color Clusters and adjust Hue, Saturation and Lightness. 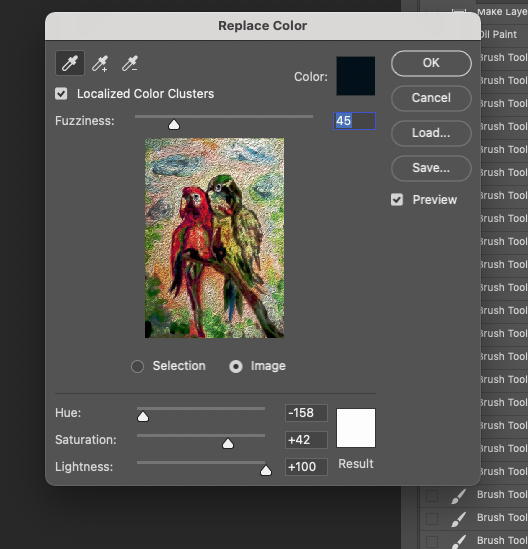 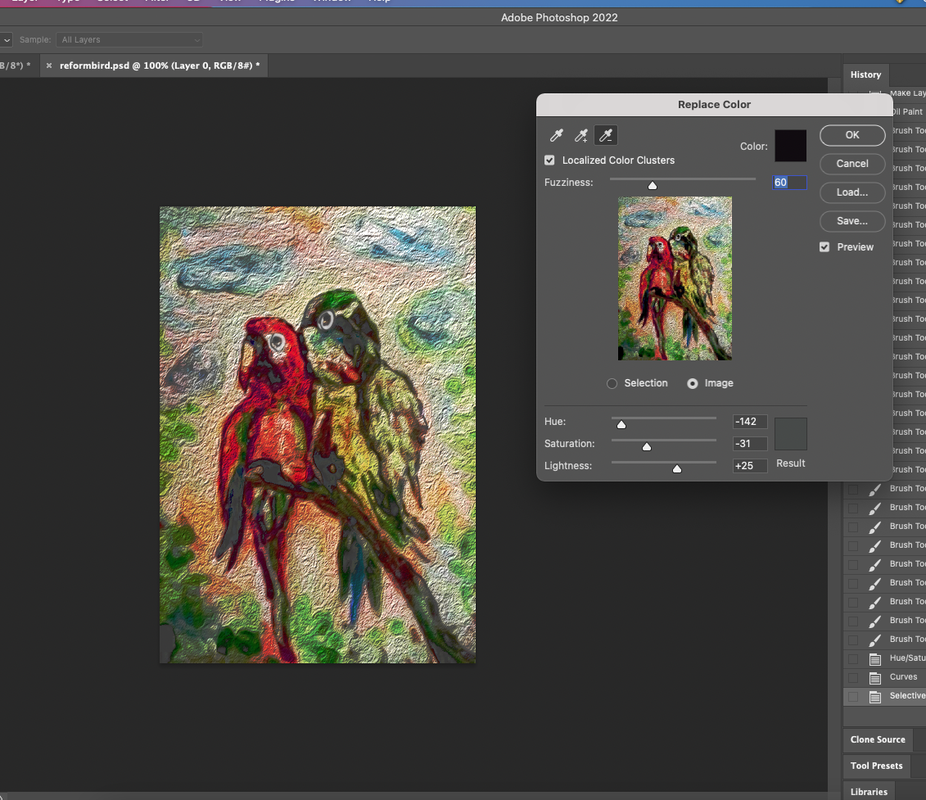
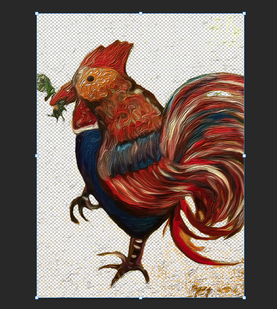
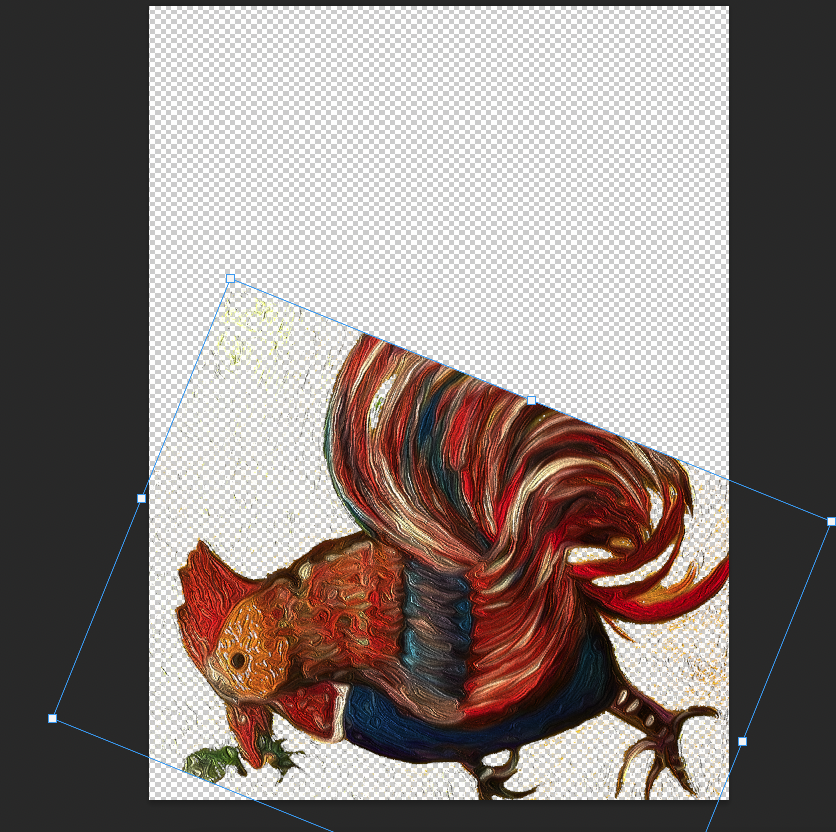
Converting analog pictures to digital work! Today, I would like to briefly show you the process of reforming a picture I drew on a canvas back into a digital image. The image of the painting to be reformed is a painting I drew with acrylic in 2013. The resolution is low and has lots of refection because it was taken with a digital camera in a hurry at the time. 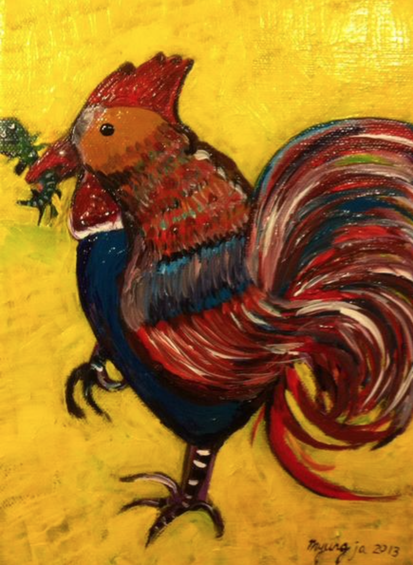 After importing the picture into Photoshop, use the small square-shaped selection tool to create a yellow background. 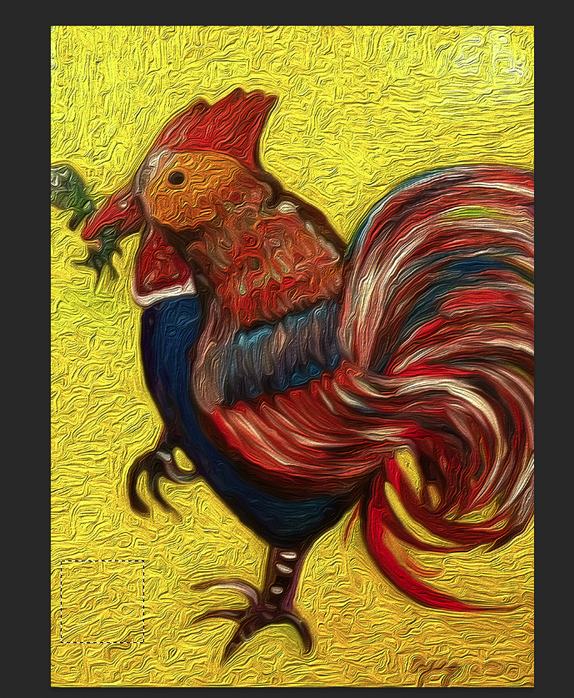 Next, go to Edit--> Define Pattern and then make one of pattern as follow as below. 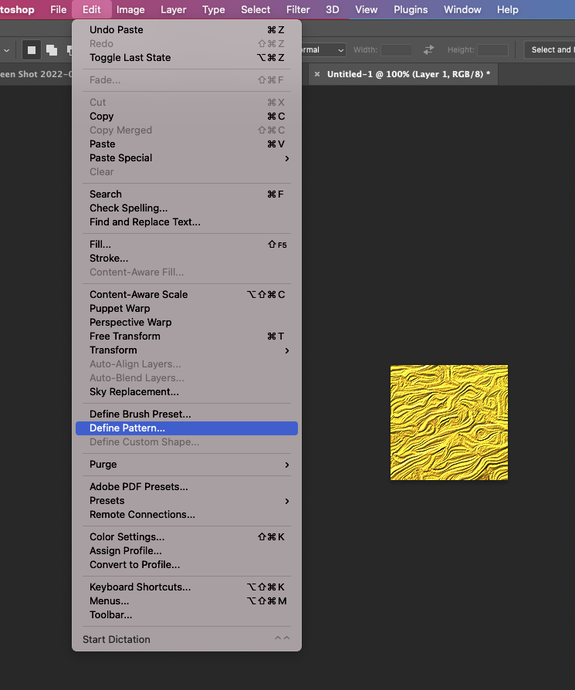 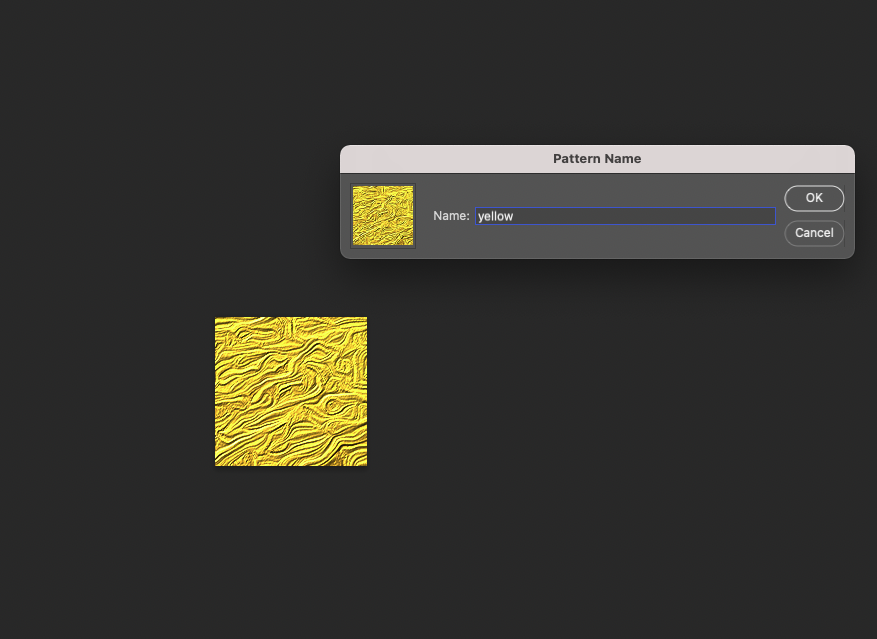 Make new layer and Go to Edit ---> Fill to create new yellow background. 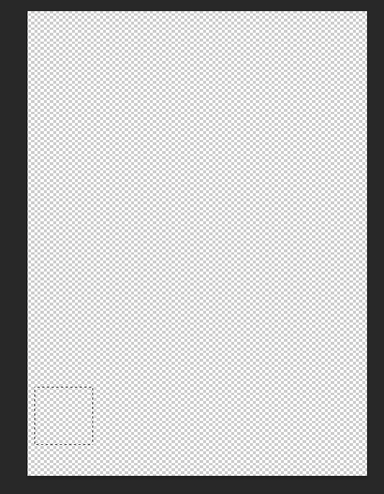 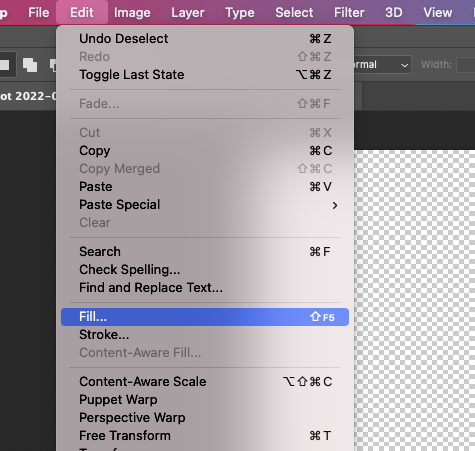 For regular pattern, you can select the Option of Script as Brick Fill like below. 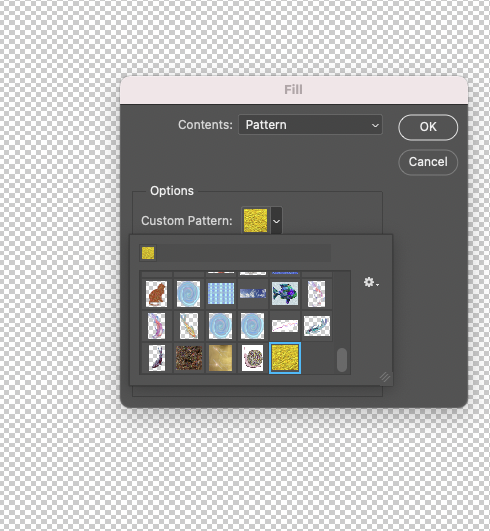  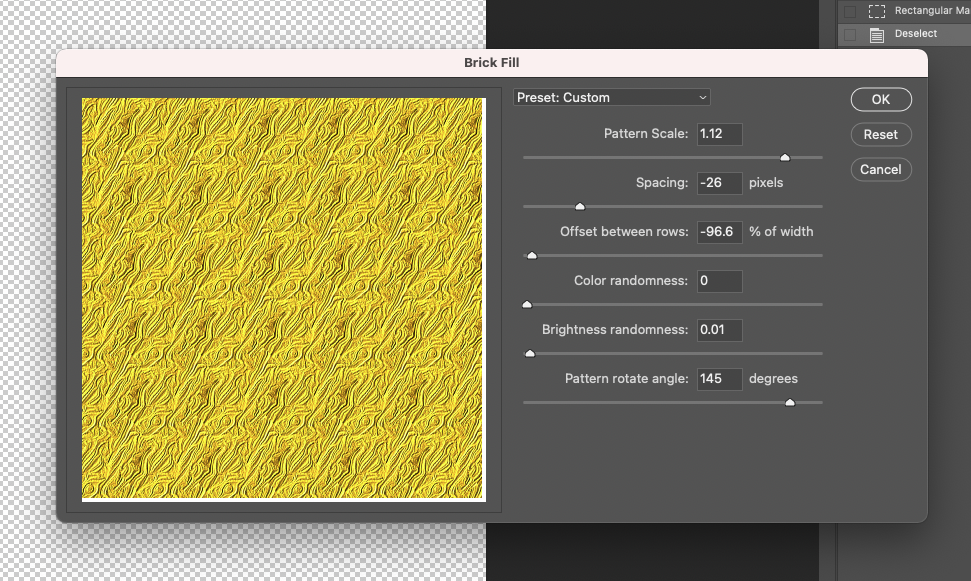 And then duplicate one more same image like below to make a shadow. 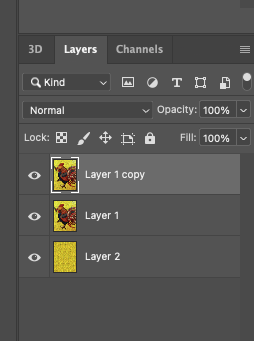 Select copied layer and erase background by using a Magic Eraser Tool. ( You don't need erase perfectly) 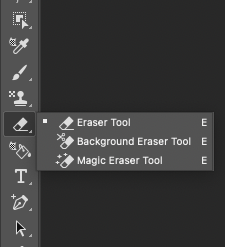 Next, with Ctrl + T to adjust the size, you can resize the image. 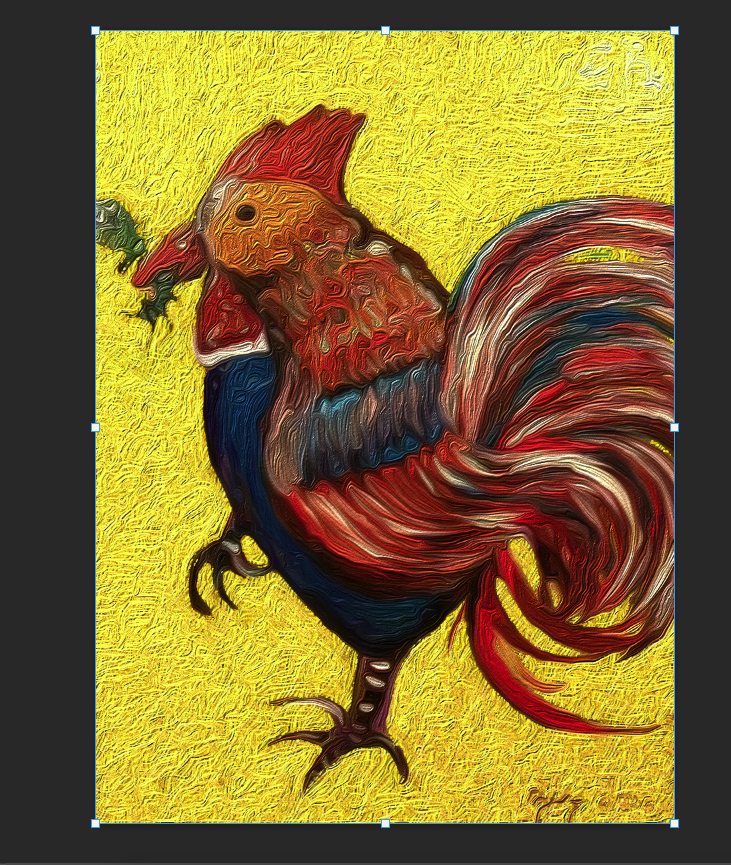 After resizing, you can select the Smudge tool for smoothing the edge. 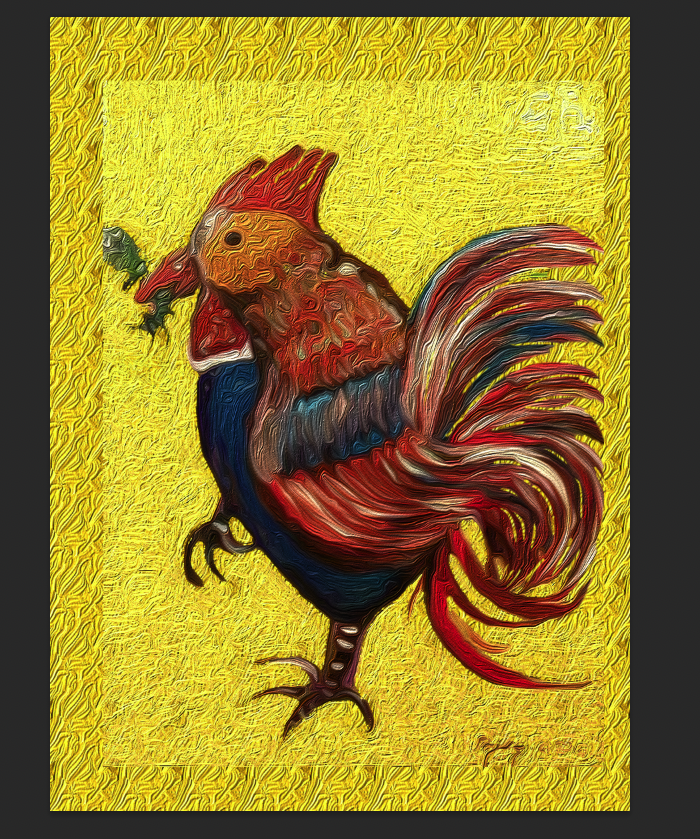 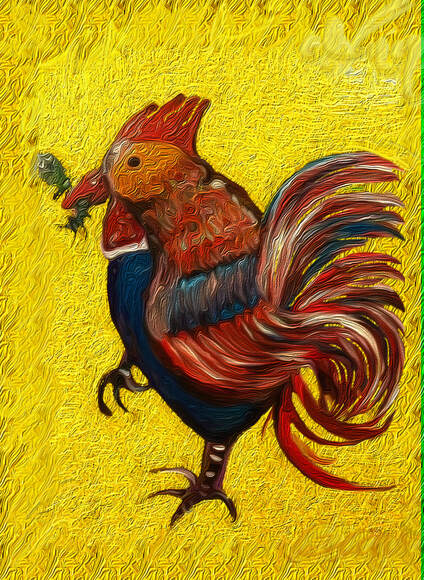 Select the original image to make a shadow. In my case, I will express the shadow as if it is kind of mirroring. 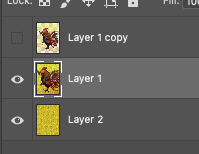 Above the process, you can select a Magic eraser tool, and then delete the background like below. 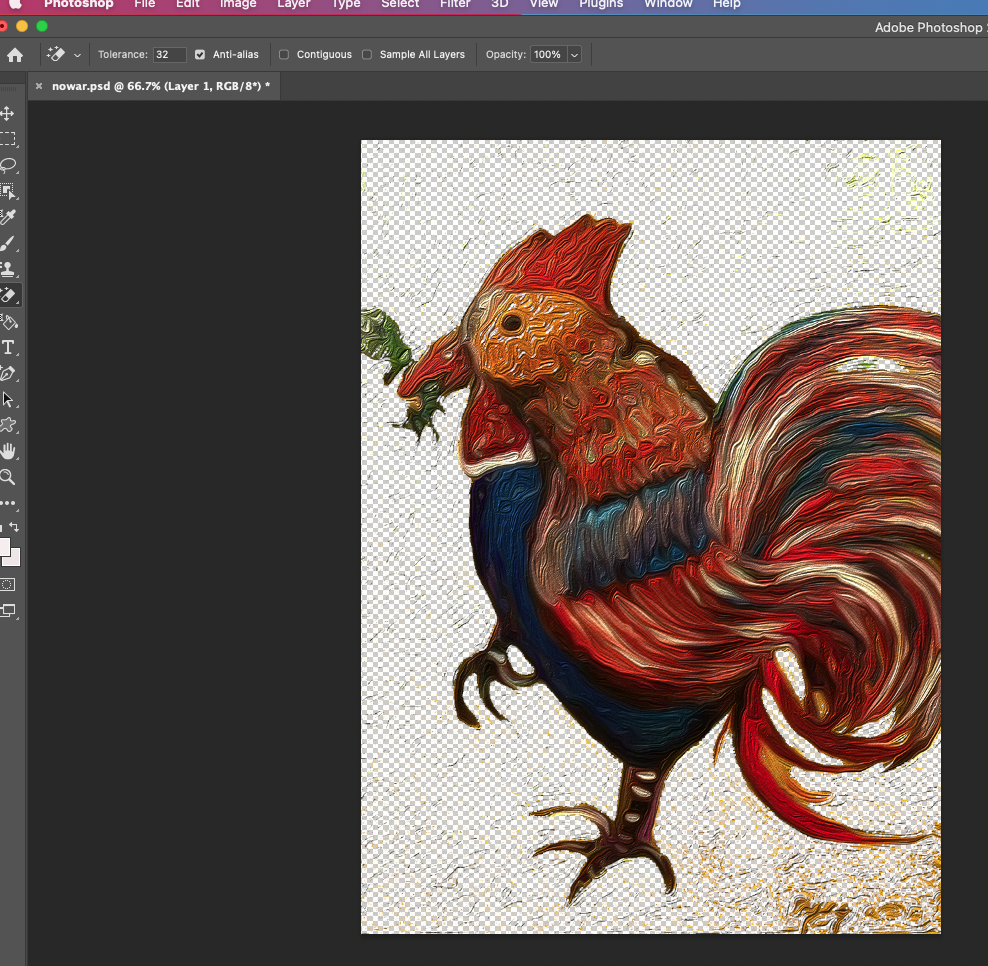 With Ctrl+ T, you can move the image like this.
Here is the result after that. 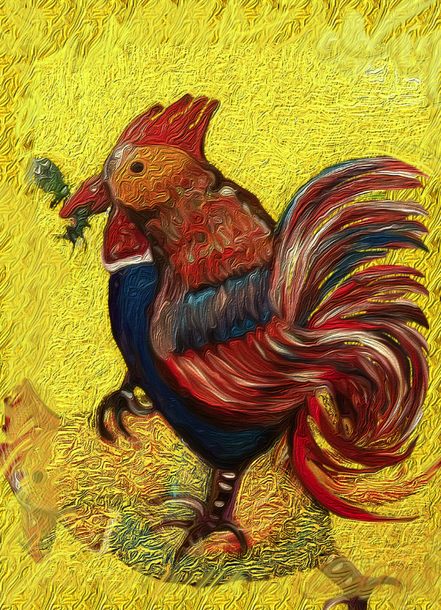 Last, I'd like to change the specific area such as the belly of rooster, and then I want to show you how to do it. Go to Image---> Hue/ Saturation. 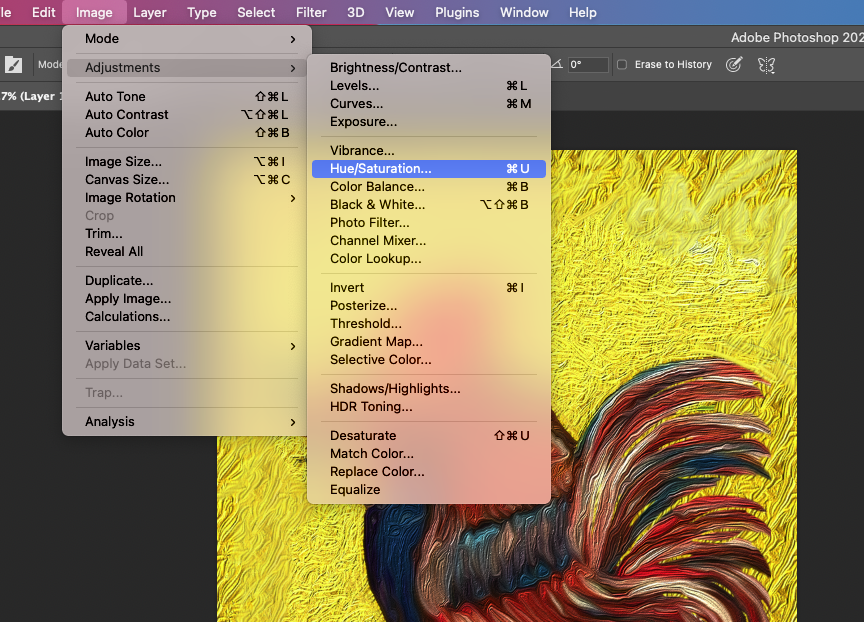 Usually, you use it for changing whole area. But if you click the red-rectangle area, you can adjust the color only you select and use with Spode it. 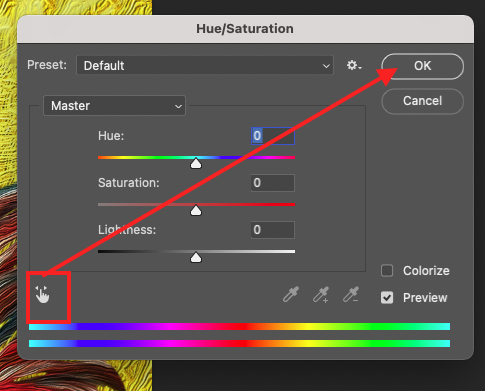 You can make sure the area like below. 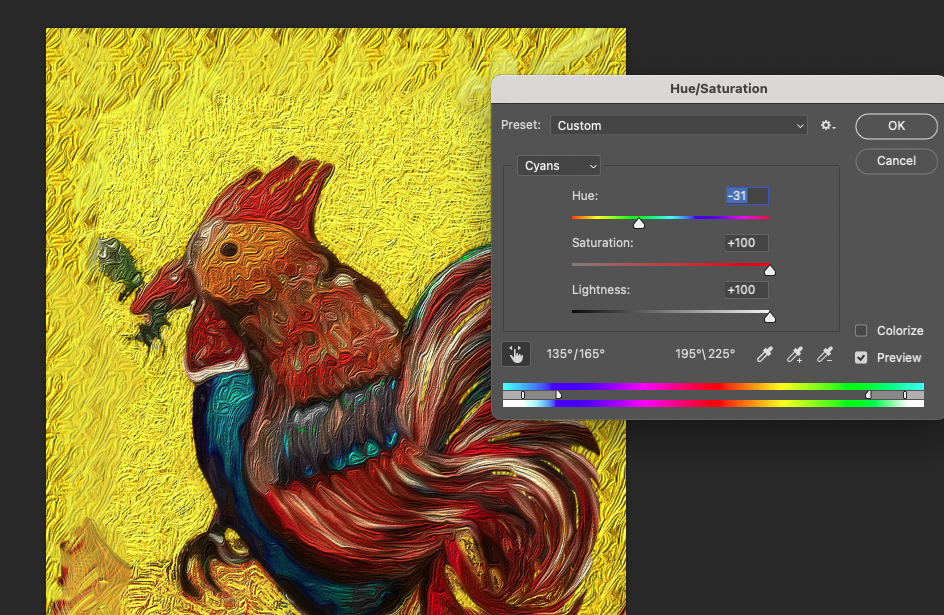 Here is the result ! 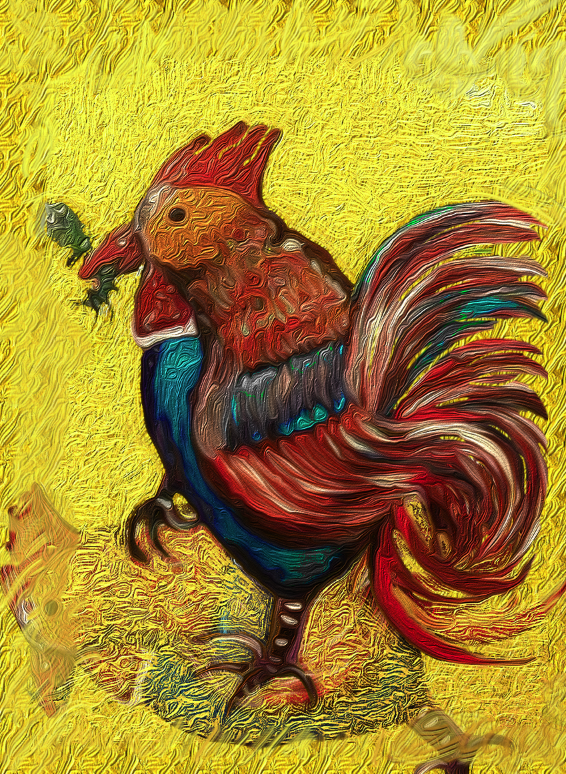 |
Myungja Anna KohArtist Categories
All
Archives
March 2024
|

|
Tutorial |


 RSS Feed